

Introduction
This guide will walk you through the steps of disabling a payment gateway.
How to Disable the Payment Gateway
Step 1: Disable the payment gateway from the financial settings
The settings below will disable the option from the end users’ accounts, the Financial menu, and online payments. For this, navigate to Financial Settings > General Settings > E-payments > Basic Settings > setting: Payment Gateway.
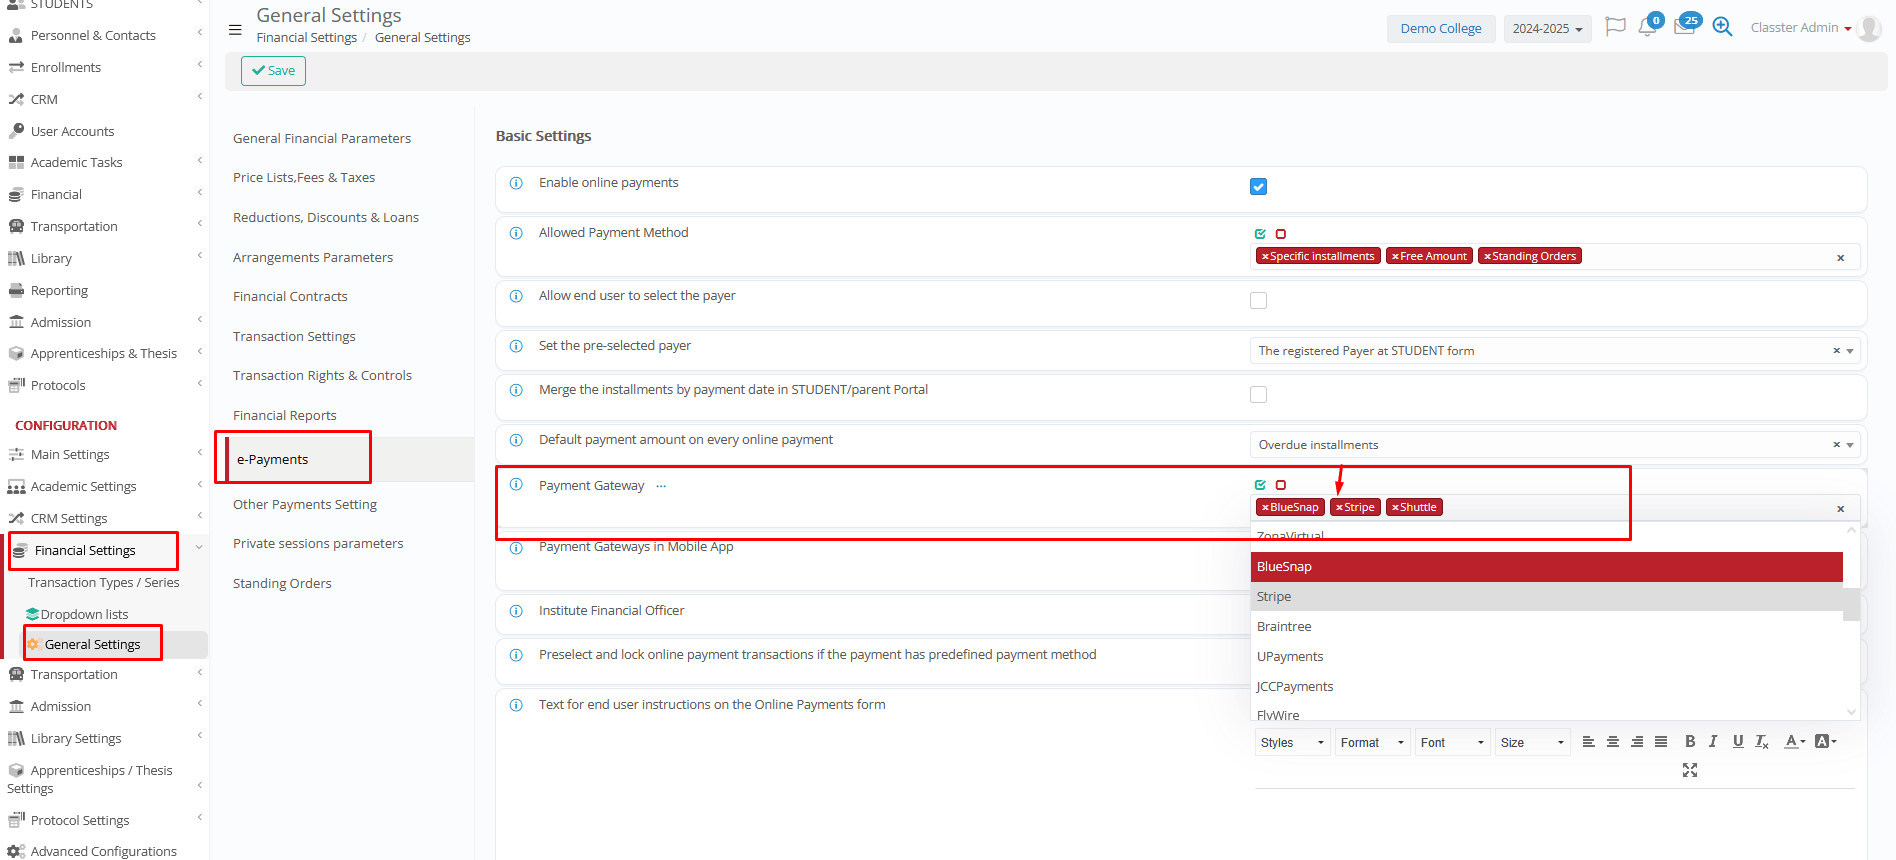
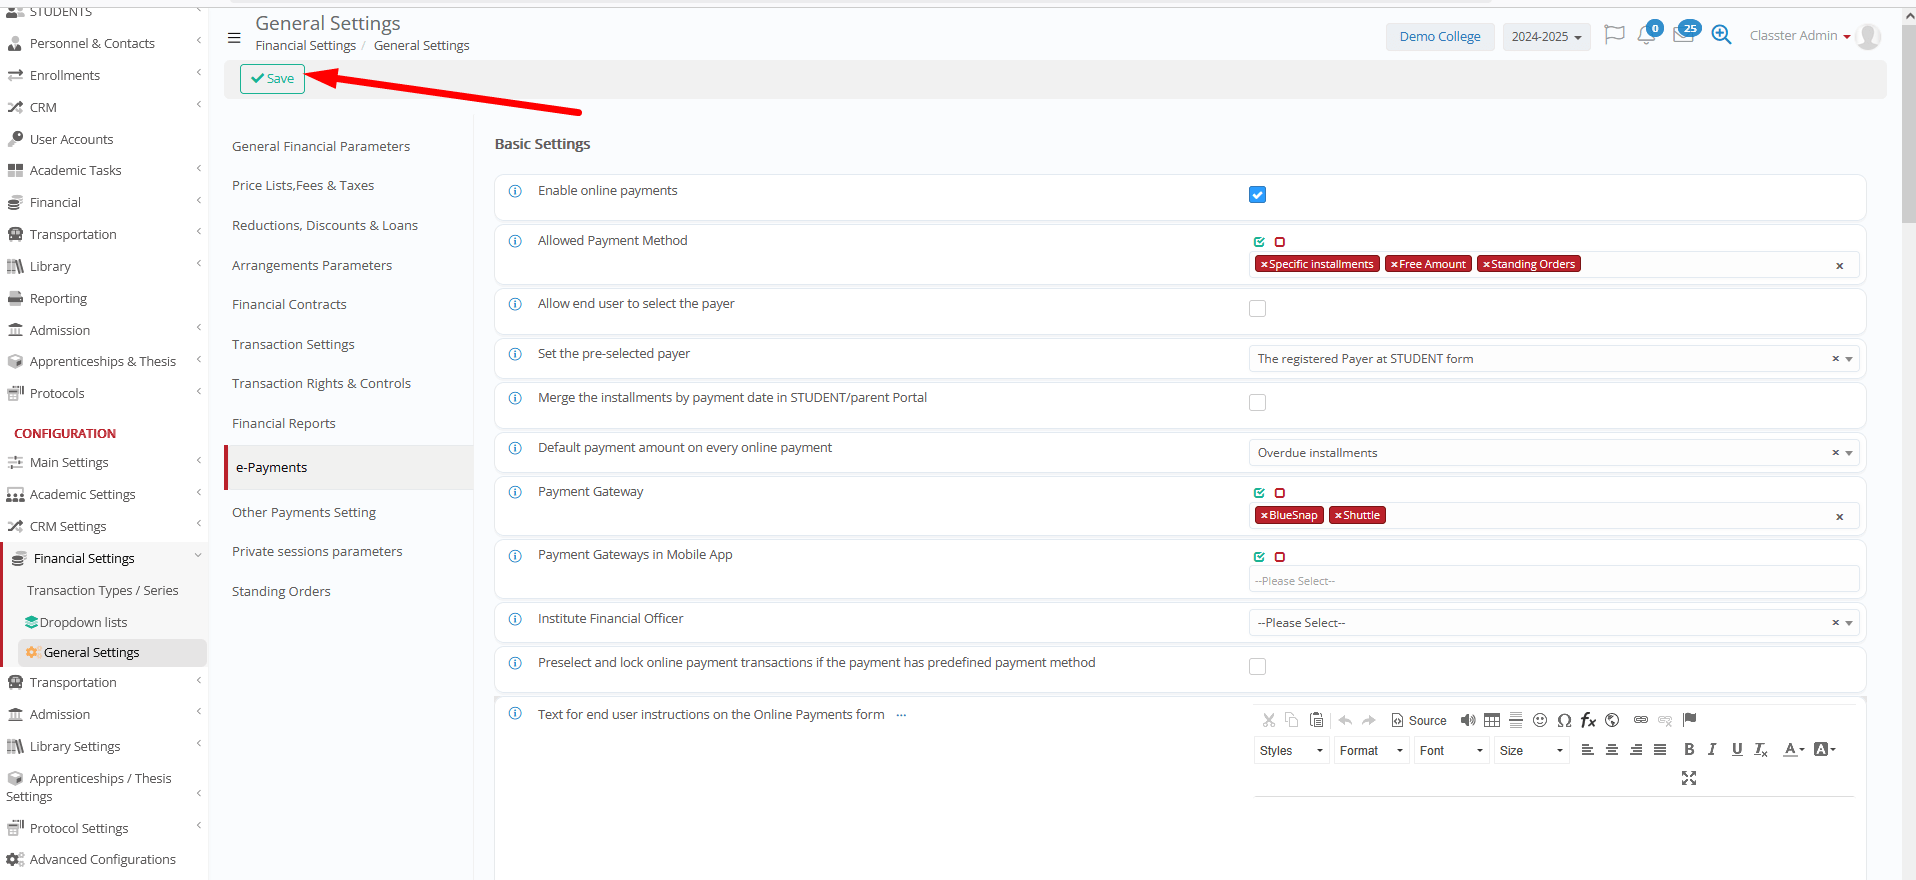
Disable the payment gateway you wish and then click Save.
Step 2: Disable the payment gateway integration from the Advanced Settings
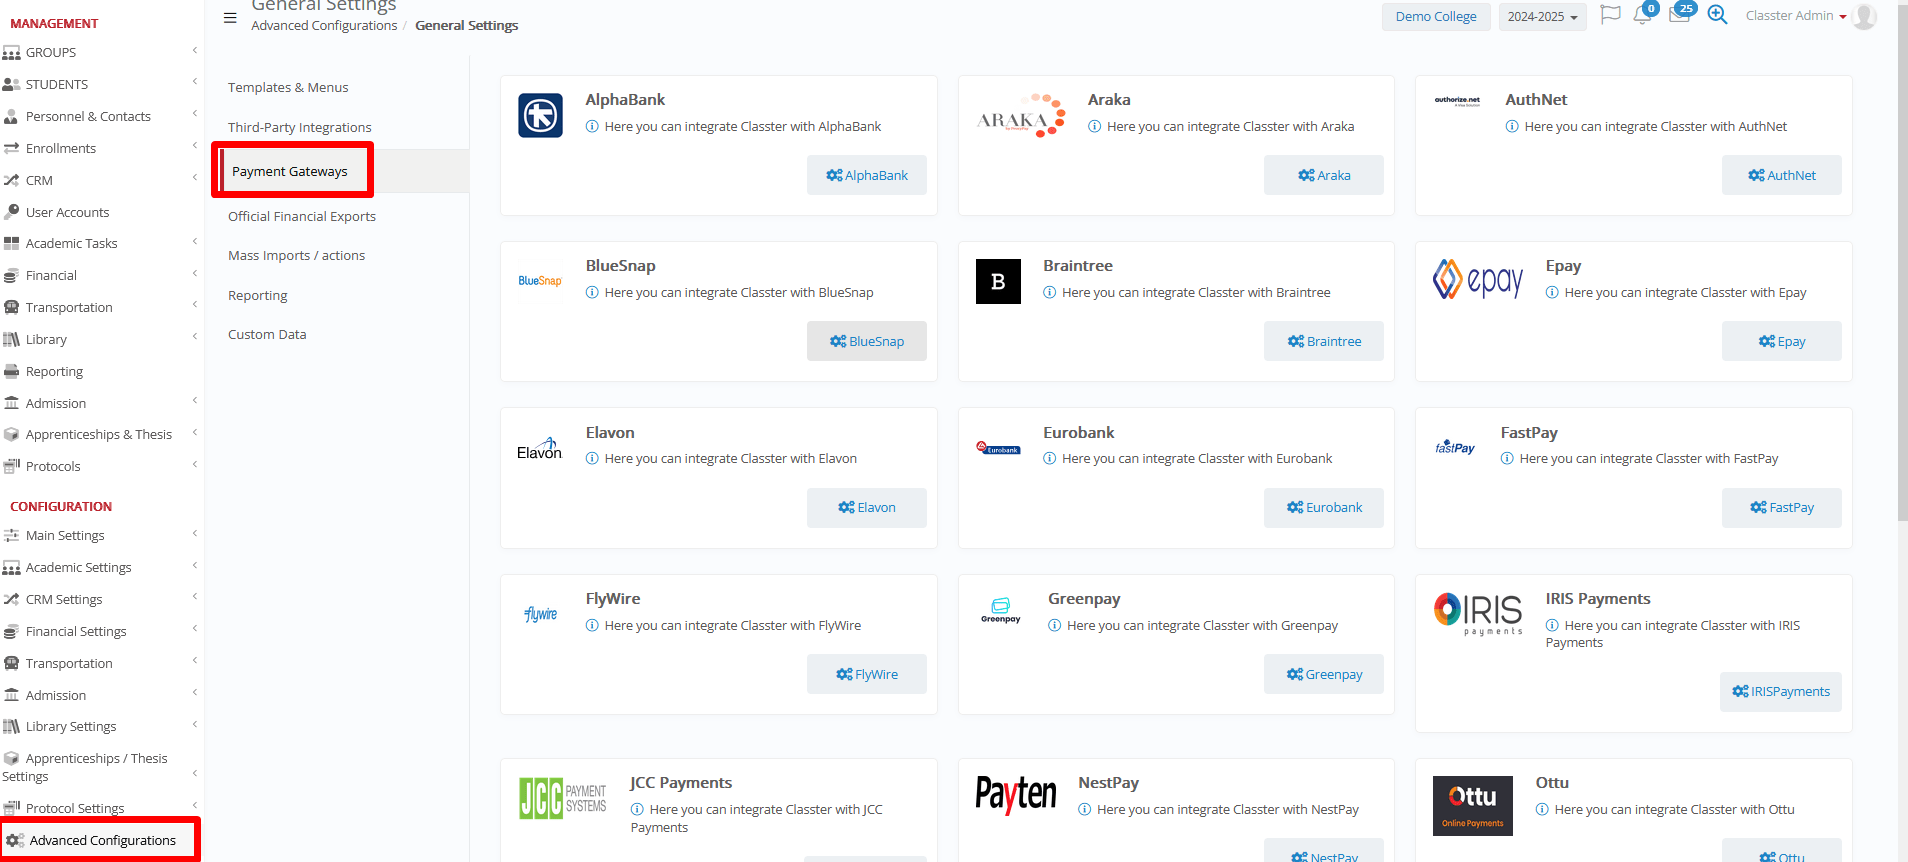
Navigate to Advanced Configurations > Payment Gateways > find and open the payment gateway you wish to disable.
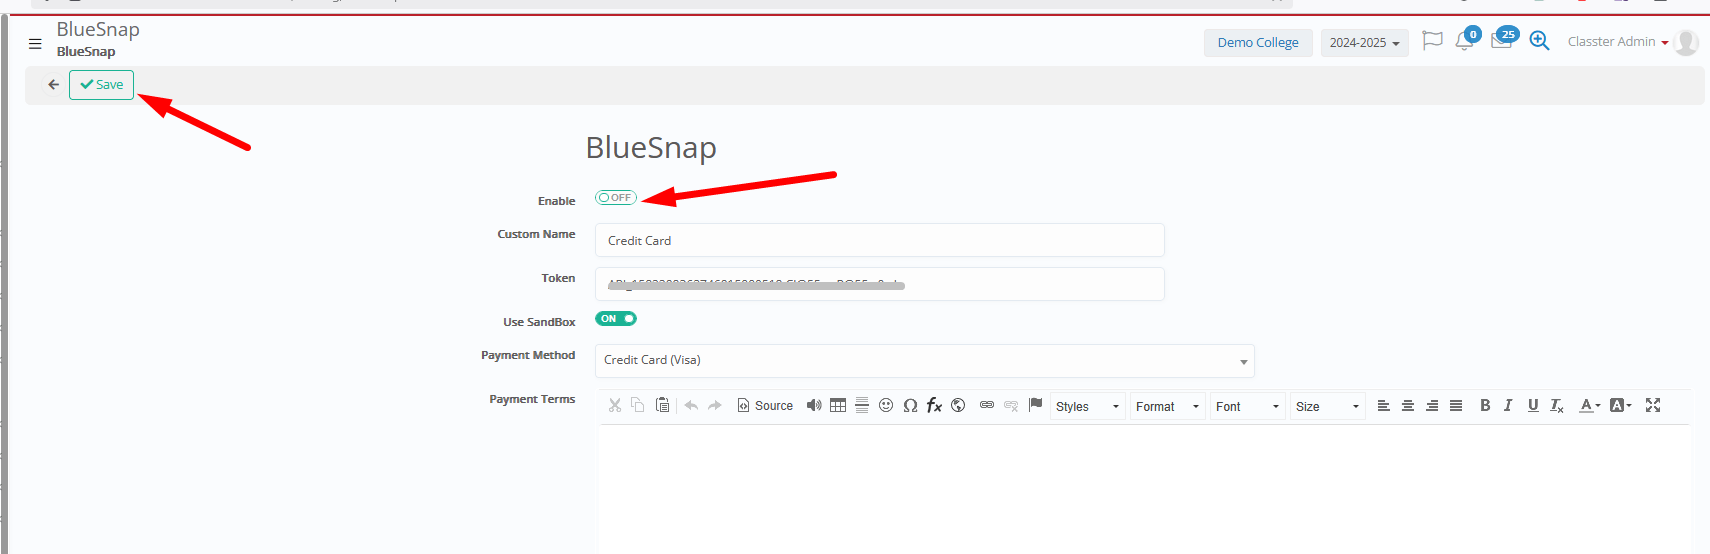
Open the payment gateway integration, switch off the ‘Enable’ option, and click Save.
Run a test
We recommend logging in with an end user account (e.g., to a Student Portal), in order to make sure that all settings have been saved successfully and the option is disabled.