Watch the How-to Video

Manage Events
In this menu you can add and manage your events and announcements.
An Event is a meeting or an event where you can invite students, parents, teachers or employees. All events are presented to participants in their calendar.
An Announcement is a general article or news presented on the announcements page.
Follow the path: Calendar & Timetable>Manage Events (Figure 21b).

 Figure 21b
View, Edit or Delete Εvents/Announcements
- Select a range of dates for which you would like to see the events/announcements (Figure 22).
- Define if you want to see events/announcements that are shown in the Calendar or not (Figure 22).
- Click on the “Search” button to see results (Figure 22).
- Click on “Actions” button to “Edit” or “Delete” the event/announcement (Figure 22).
Note: The “Edit” button is only available on events/announcements created by the teacher logged.
 Figure 22
Create New Event
- To create a new event, click on the “+ Create New Event” or “+ Create New Announcement” button (Figure 21b).
At the “+Create New Event” page (Figure 21b):
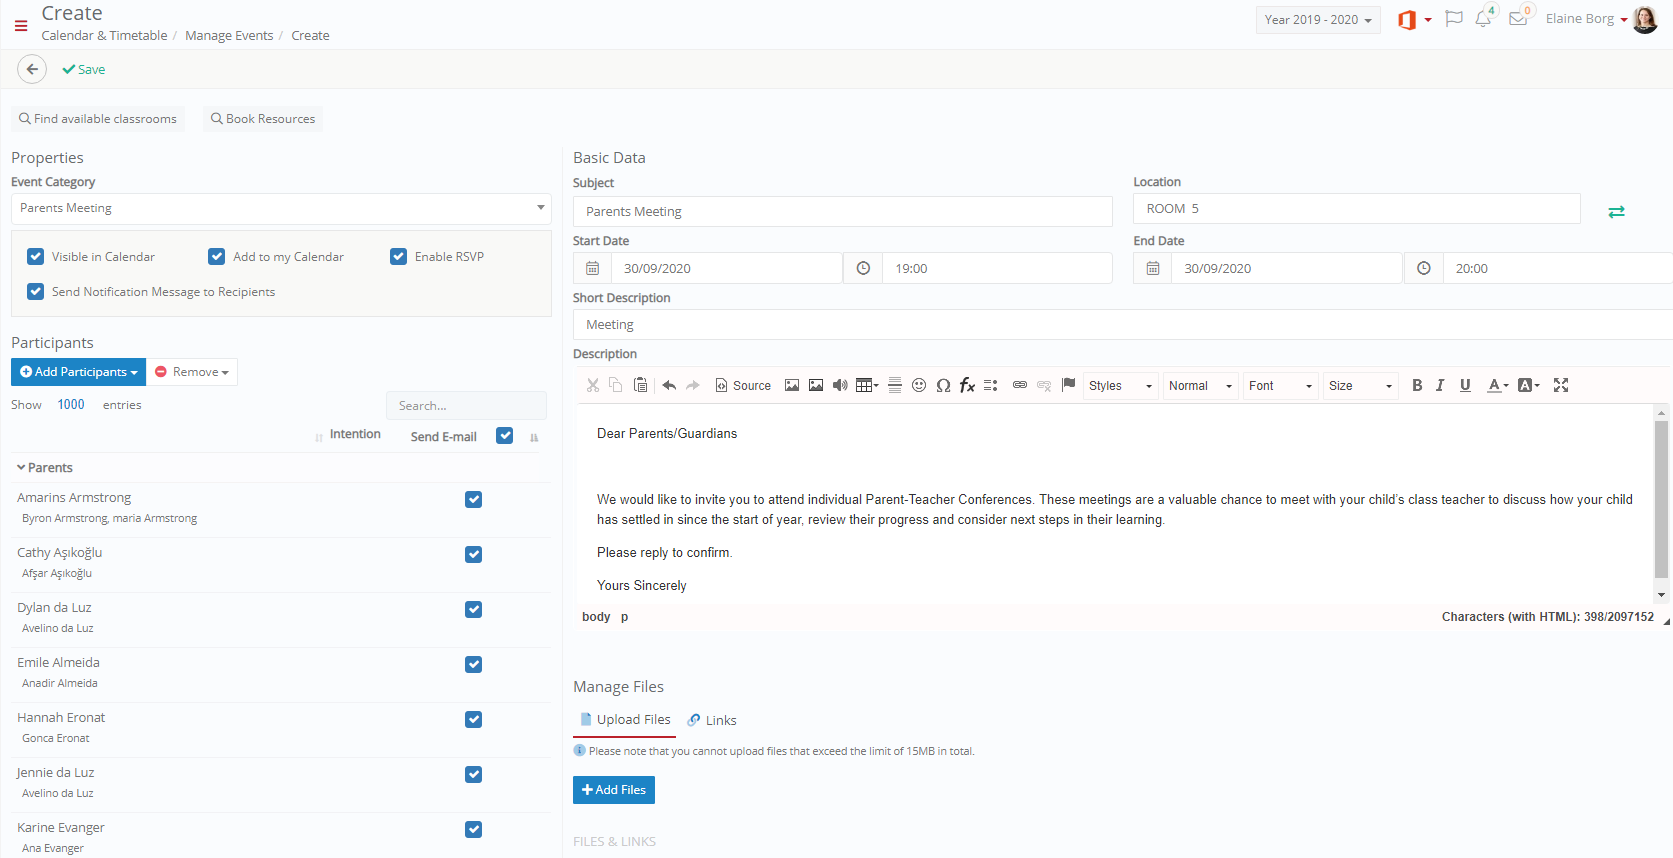 Figure 23
On Figure 23 you can see the following:
- Choose a category of event e.g Parents Meeting.
- Decide if you want this event to be visible on users Calendar, visible on your own calendar, if you wish to ad a RSVP field to this event and if you want a notification sent out for this event to recipients.
- Select Participants by clicking on the +Add participants button (Students, Parents, Staff).
- Fill in the essential fields regarding this event. These fields include Subject, Location/Classroom (changes if you click on the arrows button next to the field), Start and End date as well as a short description.
- If you want to enter more details, fill in the free text box called description.
- You can also attach files or add links to this event by clicking on the upload files or links button under the Manage Files section.
- Once you click on ‘Save’ the event will be created and notifications sent if you have chosen this option.
- Check classroom availability and book a classroom (Figure 24).
- Click on “Find available classrooms” (located on the top left of Figure 23)
- Select location, date, time and number of students
- Click on the “Search” button
- Click on the ”Book Classroom” button of the classroom you want to book.
Note: Once added, click on the “Convert to Classroom” button if you want to select another classroom ![]() (Figure 23).
(Figure 23).
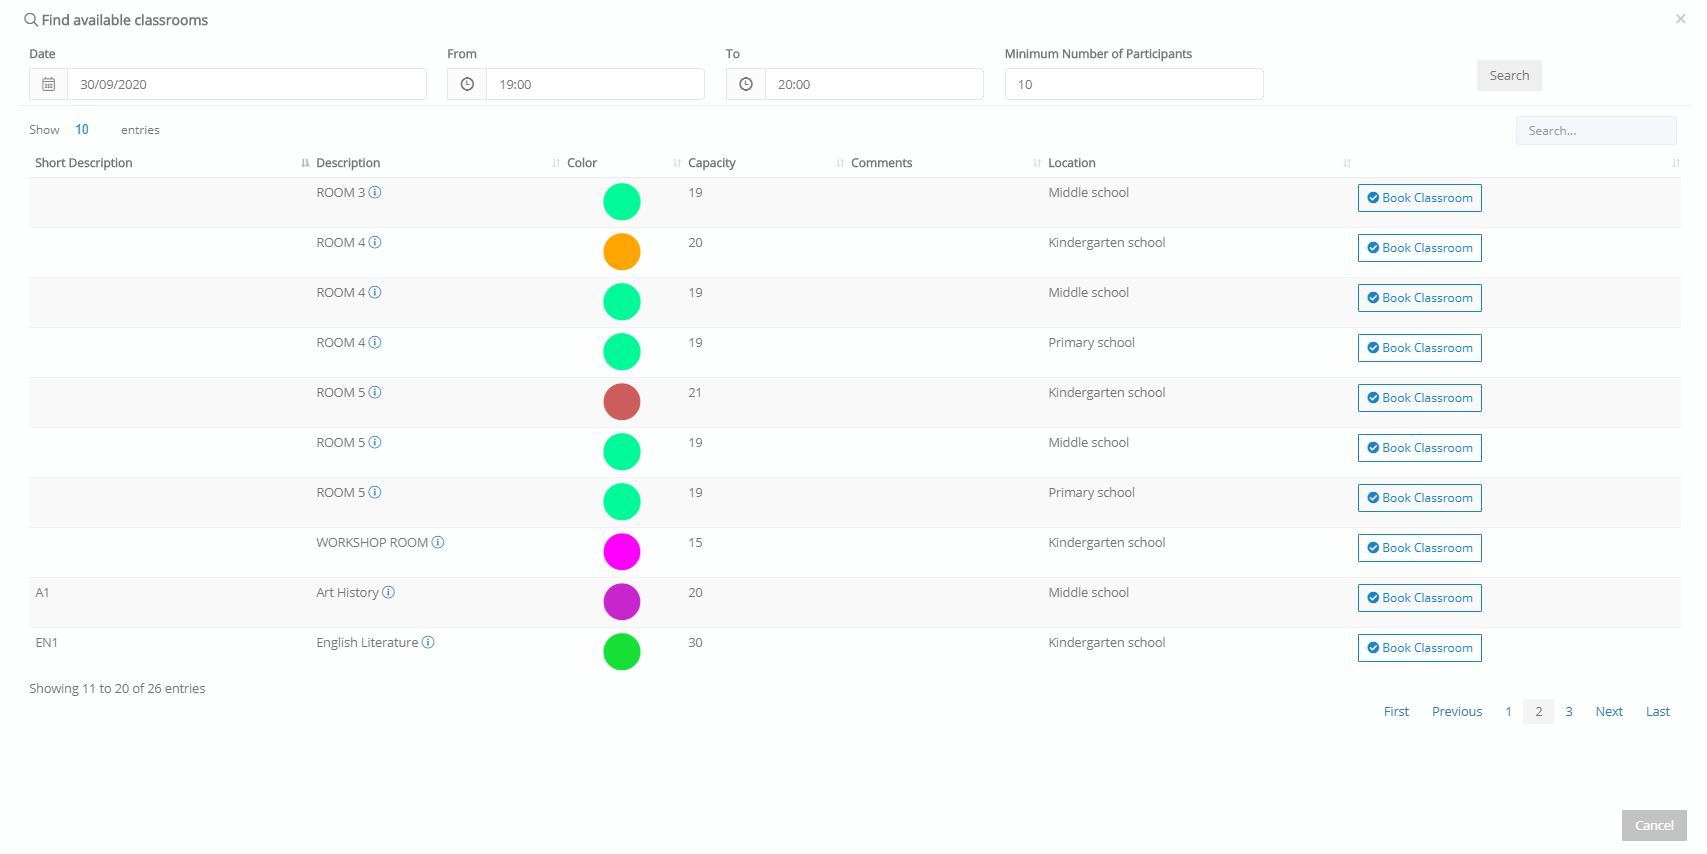 Figure 24
- Book Resources[1] such as projectors, speakers or tablets (Figure 25).
- Select a resource “Category”
- Click on the “Search” button
- Click on the result to select it
Note: Use the ‘Remove’ button on the Resources area of the page to remove selected resources (Figure 23).
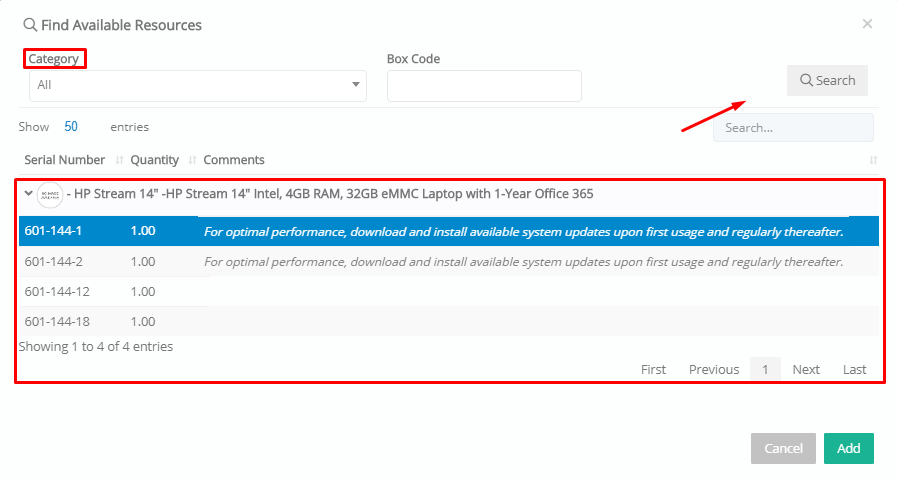
Figure 25
- Select an event Category e.g. Parents meeting.
- Define if you want it to be shown on your calendar or the participants’ calendar.
- Add “Participants”. You can select multiple participants (Figure 26):
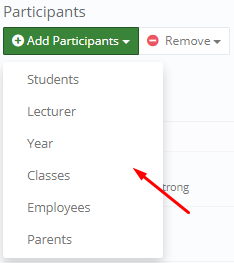 Figure 26
- parents and students – filtered by: Grade, Group
- A list of school Employees or Teachers
If you select Grade or Group, then you can invite Students/Parents of the whole Grade or a Group you teach. Click on ‘Select All’ to select all students or choose one by one any Grade. Click on ‘Add’ to add the selected Grade (or Year) or Group to the event list (Figure 27). You can click on the ‘Event for Applicants’ button to indicate this event is for applicants (admission users).
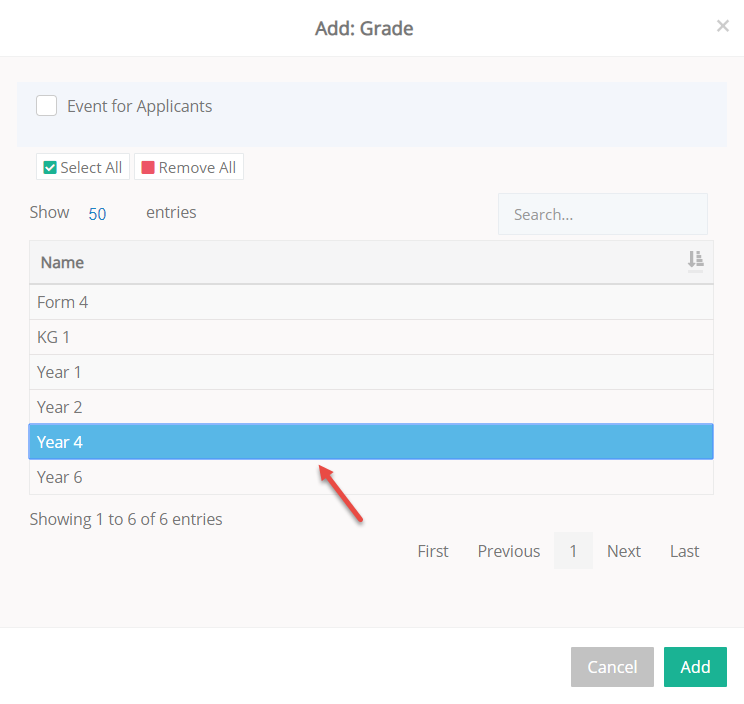 Figure 27
Note:
1. If you have more than 1000 people invited, Classter will create a list with multiple pages. You need to press next page to view all participants.
2. Once added, use the ‘Remove’ button to remove selected or all recipients.
- Add event Subject, Location, Start/End time, Short description and Description.
- Add Files or Links.
- Click on Save.
Create New Announcement
- To create a new announcement, click on the ‘+Create New Announcement’ button (Figure 23).
At the ‘Add Announcement’ page (Figure 28):
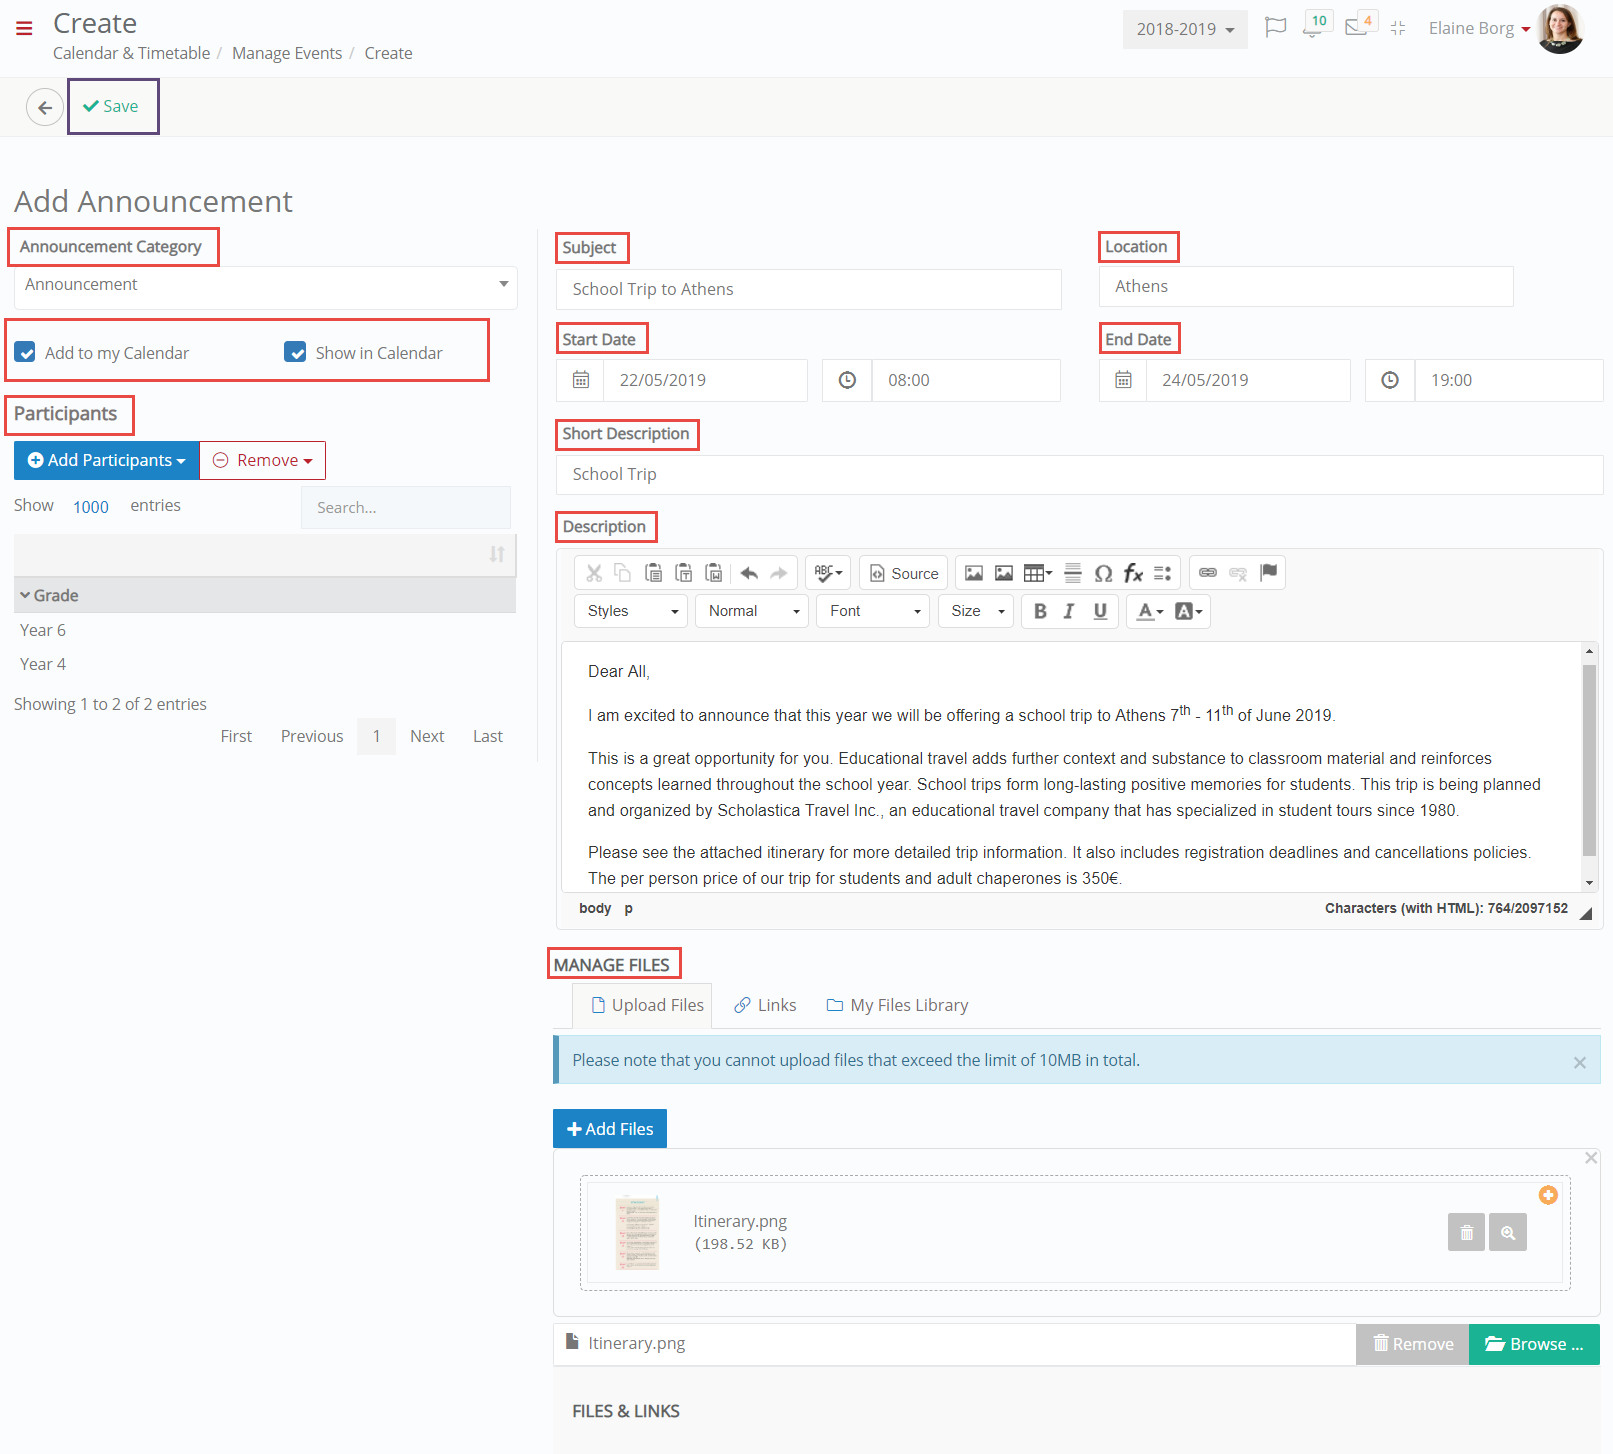 Figure 28
- Select an Announcement Category.
Note: Central Announcement will be shown on the top of the participants’ dashboard page. - Define if you want it to be shown on your calendar and on the participants’ calendar.
- Add/Remove participants (as described at ‘Add Event’)
- Write event’s Subject.
- Select announcement’s Start/End date and hour.
- Insert a Short description and/or Description.
- Add Files or Links
- Click on Save.
Note: The End Date is the date after which the announcement will be hidden from end users.


