

Management
In this section you can manage and monitor the student’s transportation. You can configure student’s routes, check daily routes, set exceptions and monitor buses positioning live. (Figure 27)
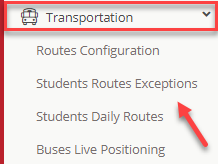
Figure 27
Students
Initially, declare that the student will use the transportation service. (Figure 28)
- Students > Student List > Actions (Grid View) > Preview & Edit > Student Profile tab.
- Activate the ‘Student Use Transportation’ switch button.
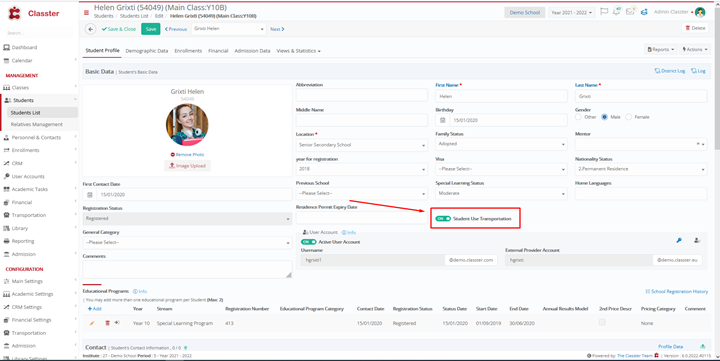
Figure 28
Then, add student routes and/or student route intentions and exceptions.
- Students > Student List > Actions (Grid View) > Preview & Edit > Views & Statistics tab > Transportation.
- Use the corresponding tabs:
Student Routes
You can add student routes and manage the created ones. (Figure 29)
- Use the ‘Edit’, ‘Delete’ or ‘Copy’ buttons at the route entry to manage the route.
- Use the ‘Collapse/Expand ßà’ button to view all route entries at each day. If collapsed, click on the day arrow to see route entries for the specific day.
- Use the navigation bar buttons to print or export student routes.
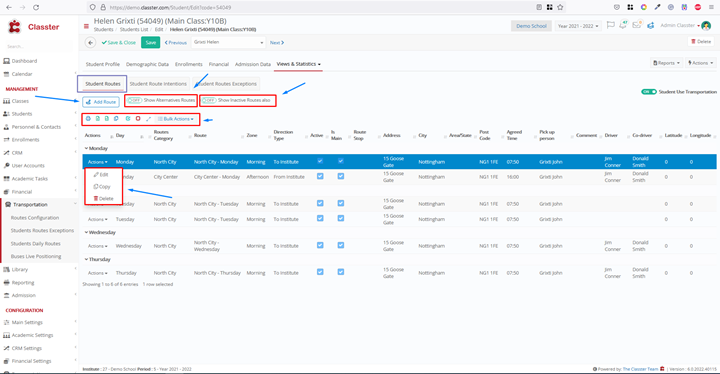
Figure 29
- Activate the ‘Show Alternative Routes’ to view alternative routes.
Note: The alternative routes are the student routes created as not main (Figure 30). You can use them when you create a route exception, for example in the case that parents ask the school to pick up or drop off their kid at a different address than usual e.g. grandparents’ address.
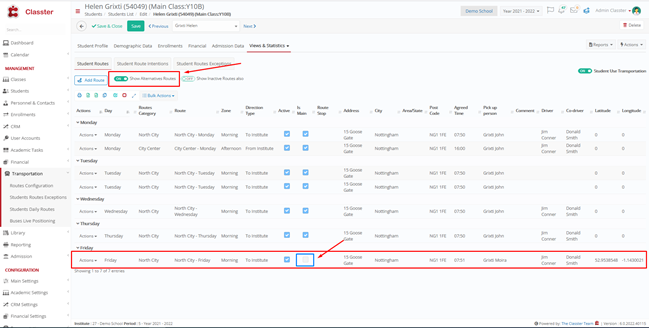
Figure 30
Activate the ‘Show Inactive Routes also’ to view inactive routes.(Figure 31)
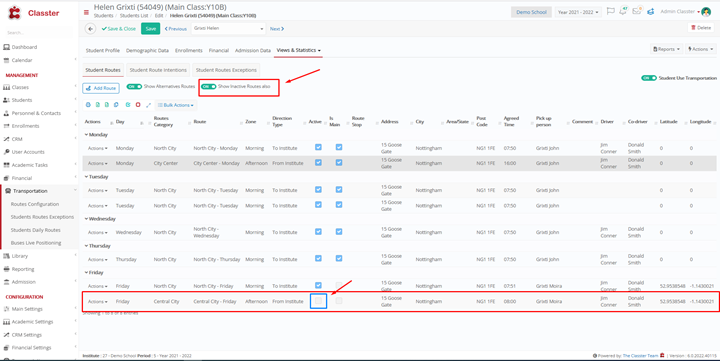
Figure 31
Add Route
Click on the ‘Add Route’ button to add a route. (Figure 32)
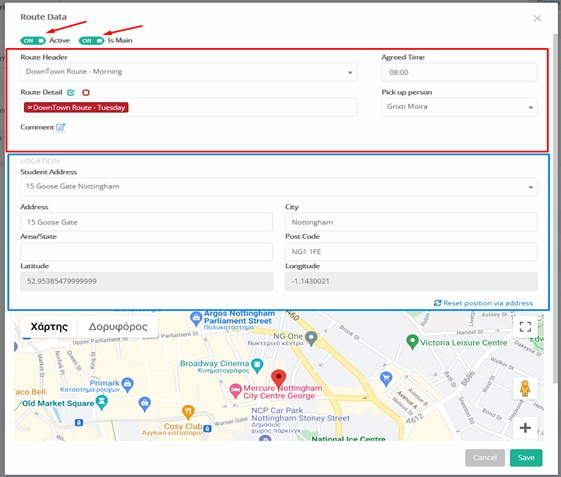
Figure 32
- Turn the ‘Active’ switch button to ON, if you want to activate the route
- Turn the ‘Is Main’ switch button to ON, if you want to declare that the route is the main one
- Select Route Header e.g. DownTown Route – Morning
- Select Route Day e.g. DownTown Route – Tuesday
- Insert the agreed time
- Select the Pick up person e.g. Grixti Moira
- Click on the ‘Comment’ text box to add a comment
- Select the Route stop where the student will be picked up from
- Select the student’s address from the drop-down list (available only if registered on the student profile tab) or enter it or select it on the map
- Click on ‘Save’