

Teachers can be created manually on the Classter platform. The fastest way to get started, though, is to upload your teacher lists into Classter.
This can be done by uploading an Excel file. To initiate this process, you will need to follow the path: Dashboard > Configuration > Advanced Configurations > Mass Imports/Actions (Figure 52).
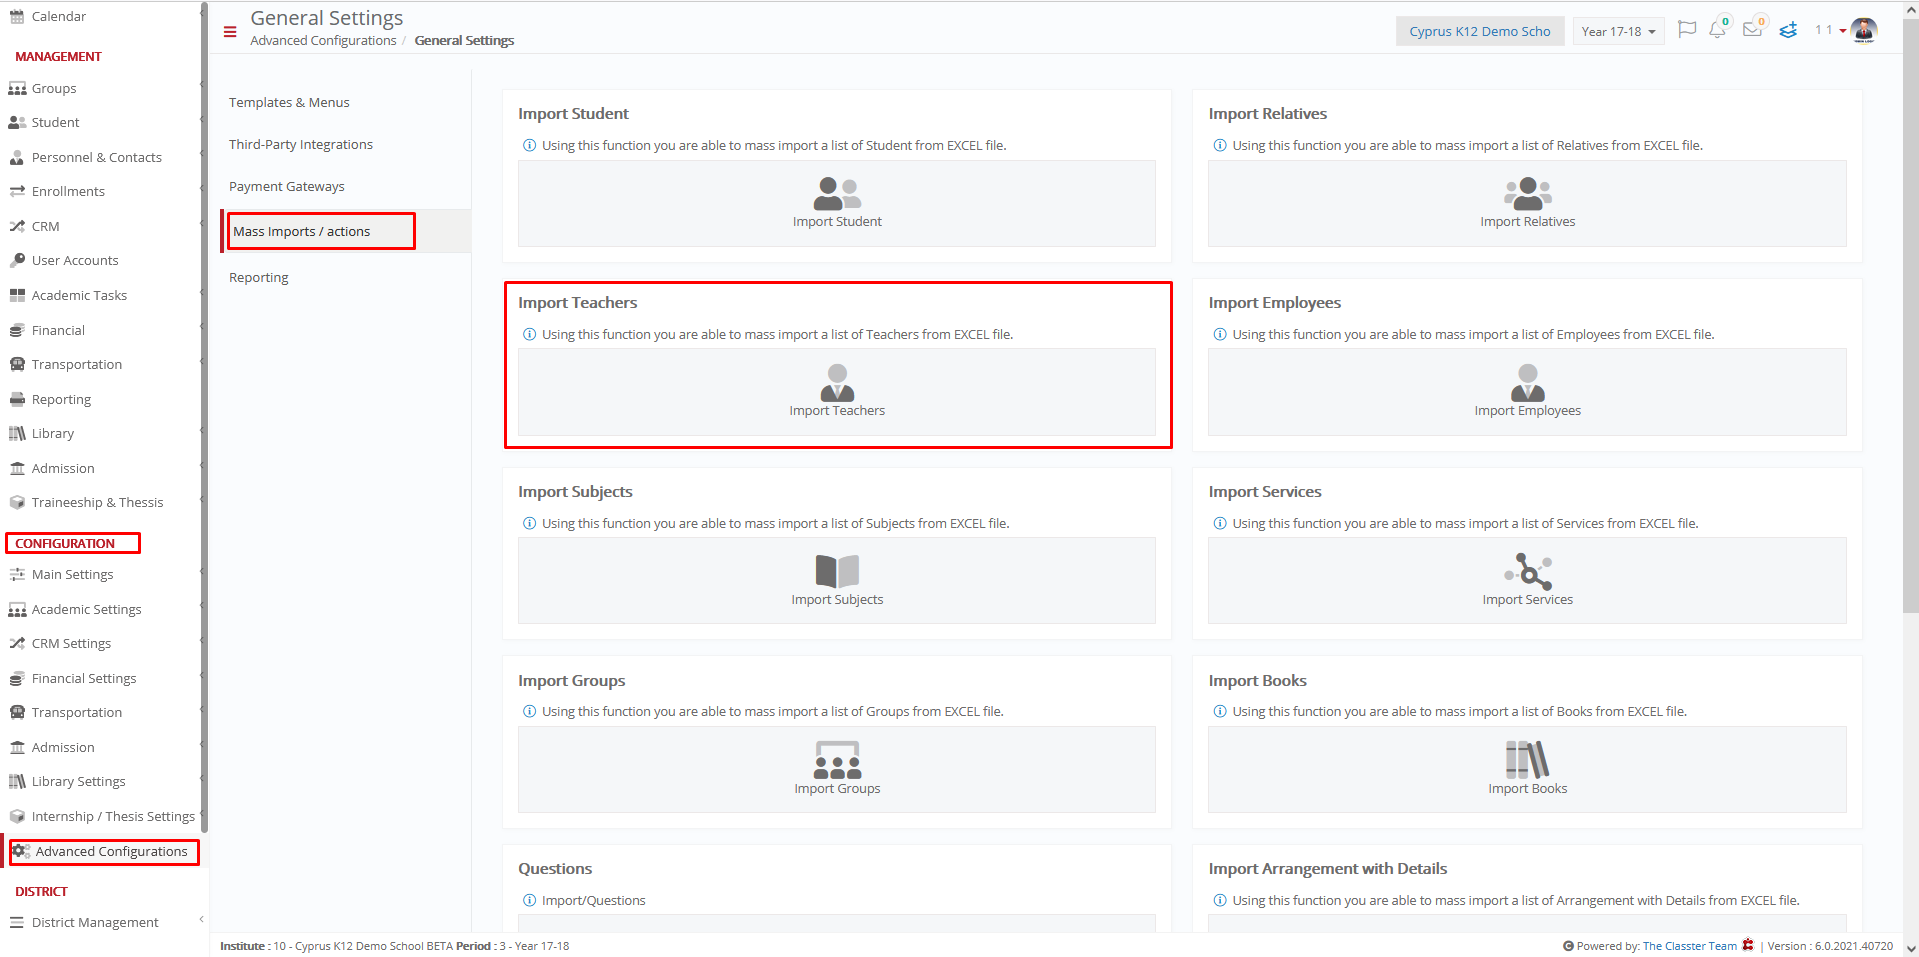
Figure 52
On this page, you will see the following (Figure 52):
- On this page, you can make mass actions, upload Students, Teachers, Timetables or Financial Arrangements.
- In this case, we will be looking at massively uploading teachers.
- Click on the Import Teachers button.
- Once you do, you will see the following pop-up window (Figure 53).

Figure 53
On this page, you will see the following (Figure 53):
- First, edit the order of fields to match your Excel file (if it’s necessary).
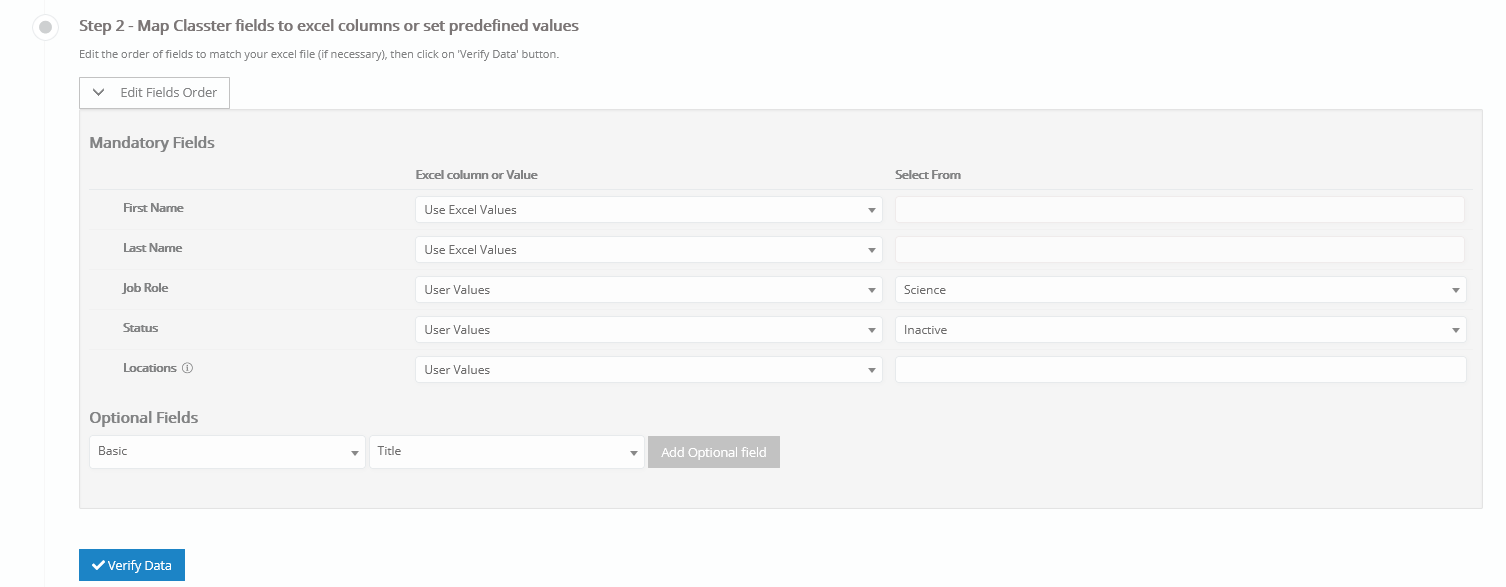
Figure 54
On this page, you will see the following (Figure 54):
- Here you can find the fields regarding teachers that are needed by the Classter platform.
- You can choose the fields that correspond to the information you have on your Excel spreadsheet. The Mandatory Fields are required fields, and you are required to have that information in the Excel sheet.
- You can add Optional Fields if you have extra information you need to add
- Organize your Excel sheet like you see in Figure 55.
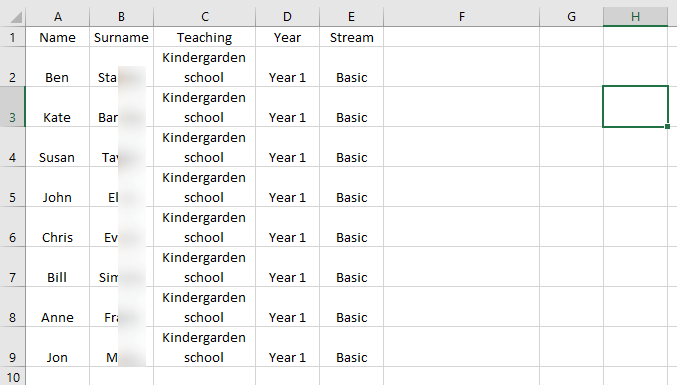
Figure 55
- Organize your Excel sheet in this way (Figure 55) and then click on the Verify Data button (Figure 54).
- If your data are in the correct form, you will be able to see the following preview (Figure 56).
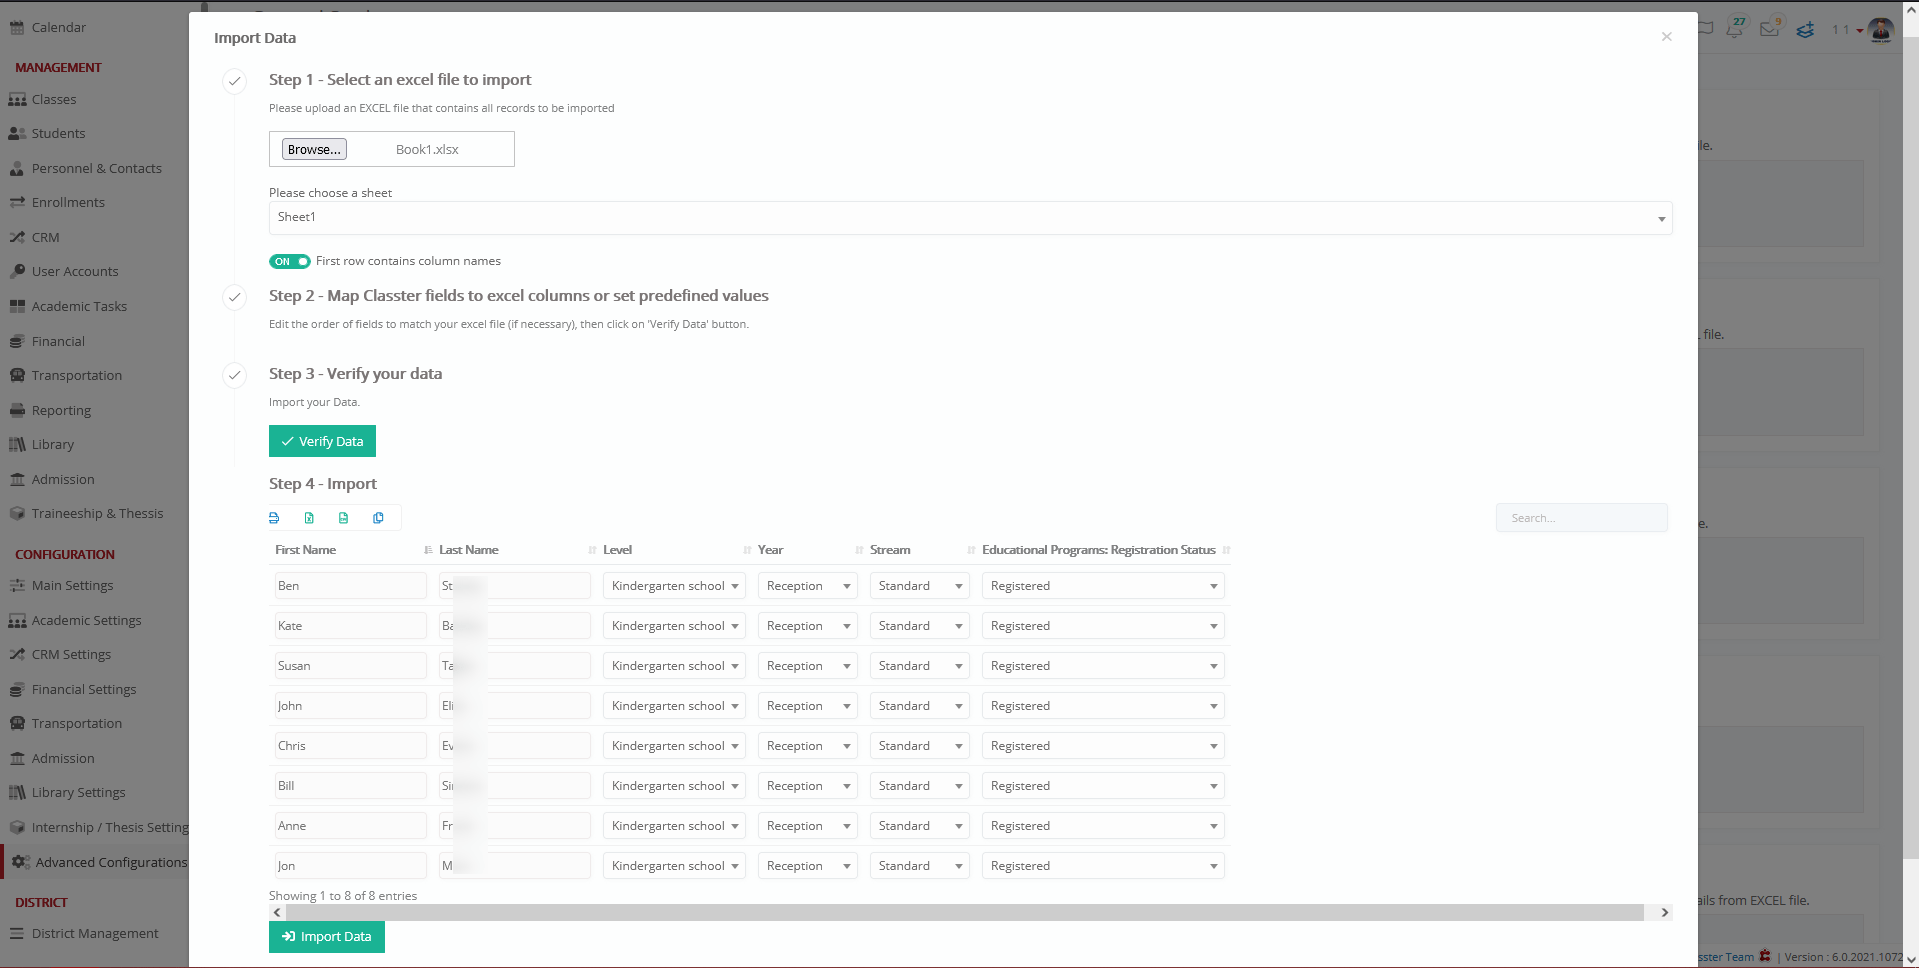
Figure 56
- If there is a problem in the alignment with the Excel sheet, you will see a preview with red frames (Figure 57).
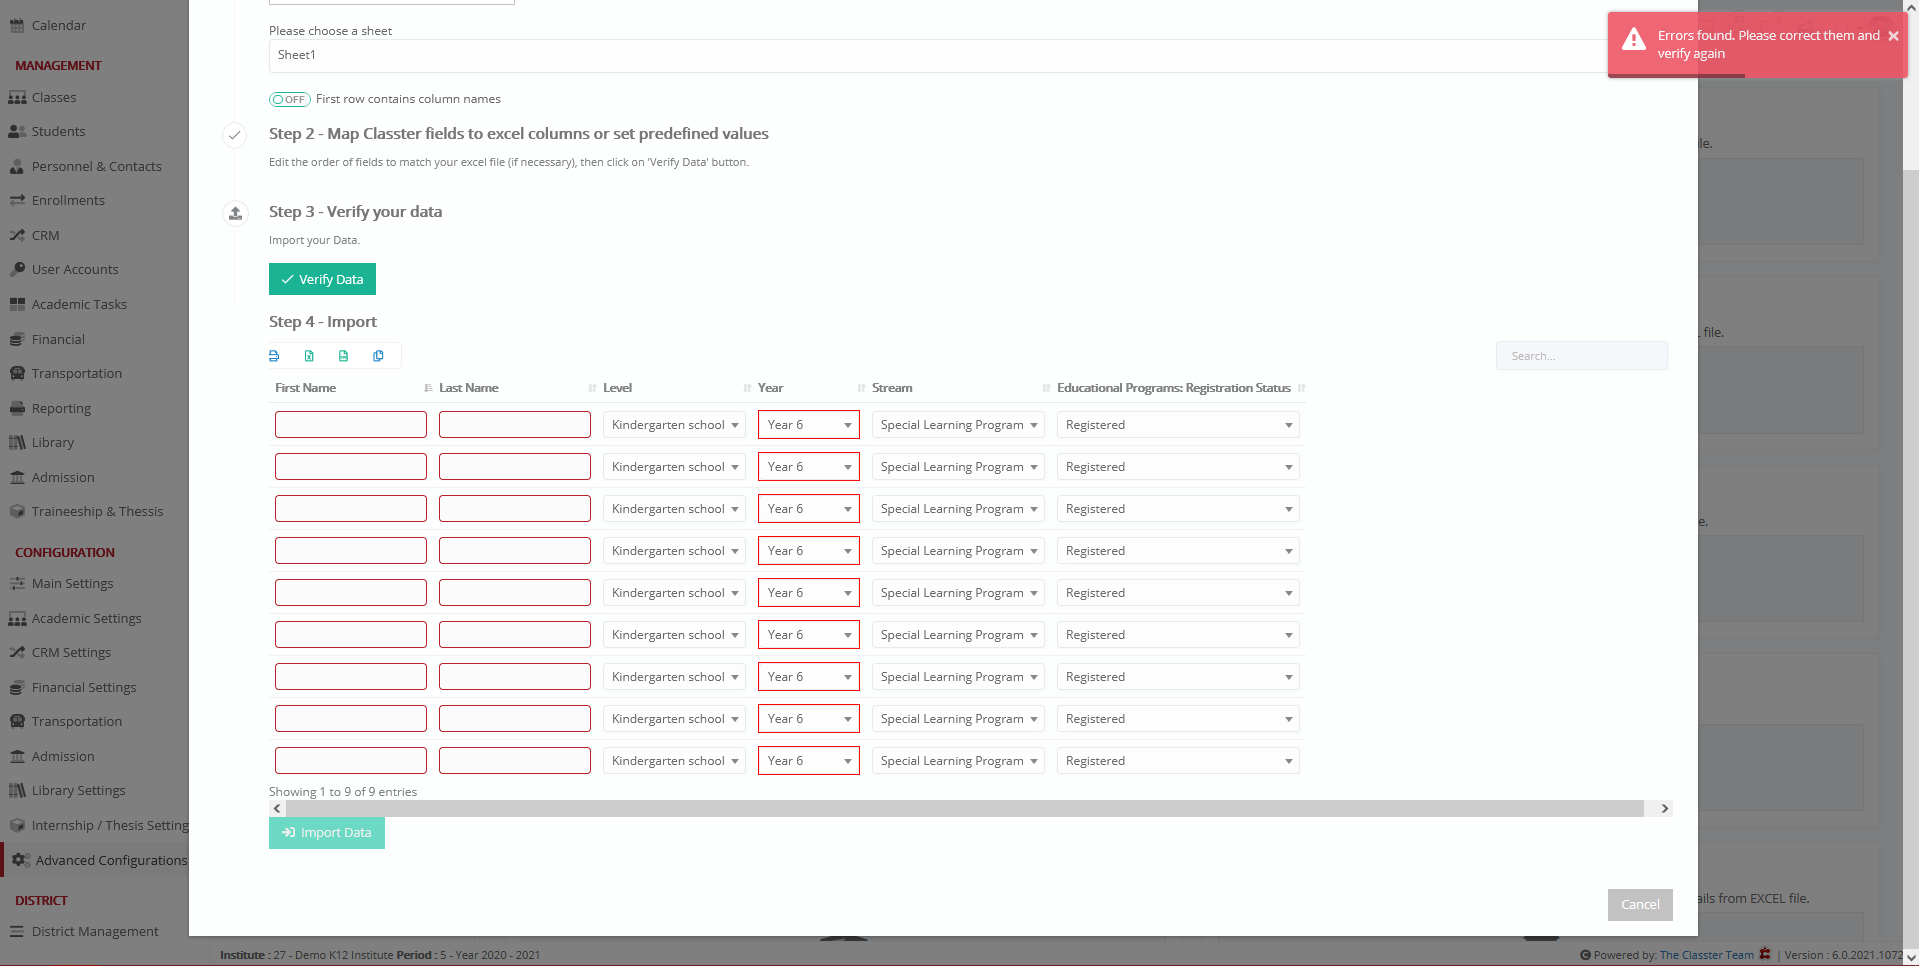
Figure 57
Once you have aligned the data between Classter and your Excel sheet, you can proceed to upload the Excel file to Classter.
Click on the ‘Choose File’ button (Figure 58) and you will see a pop-up window (Figure 59).
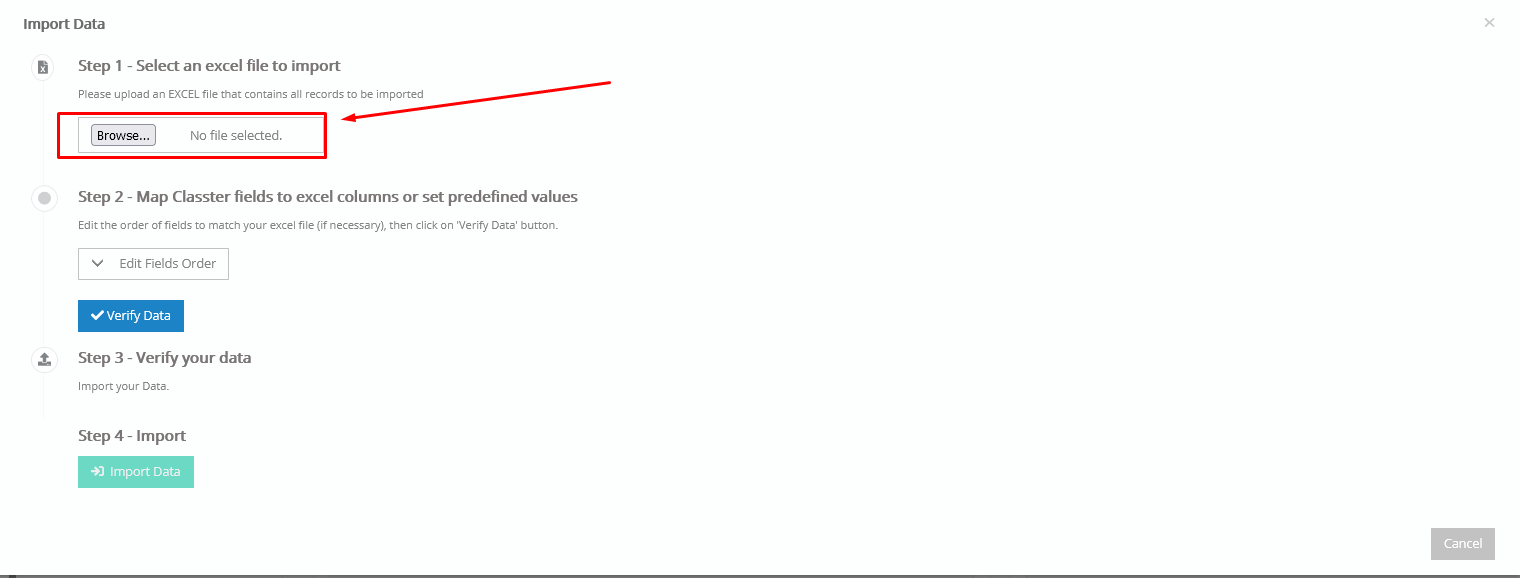
Figure 58
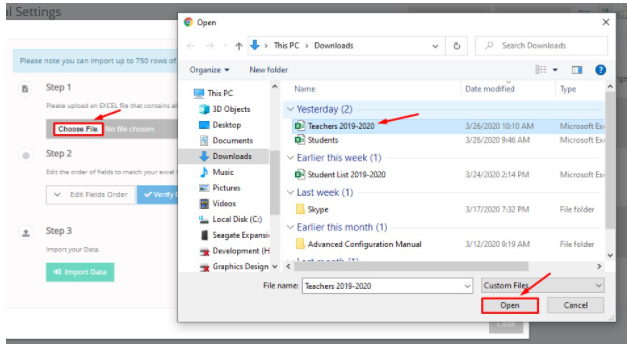
Figure 59
On this page, you will see the following (Figure 59):
- When you are ready, you can upload your Excel file
- Choose your Excel file.
- Click on open to select the file
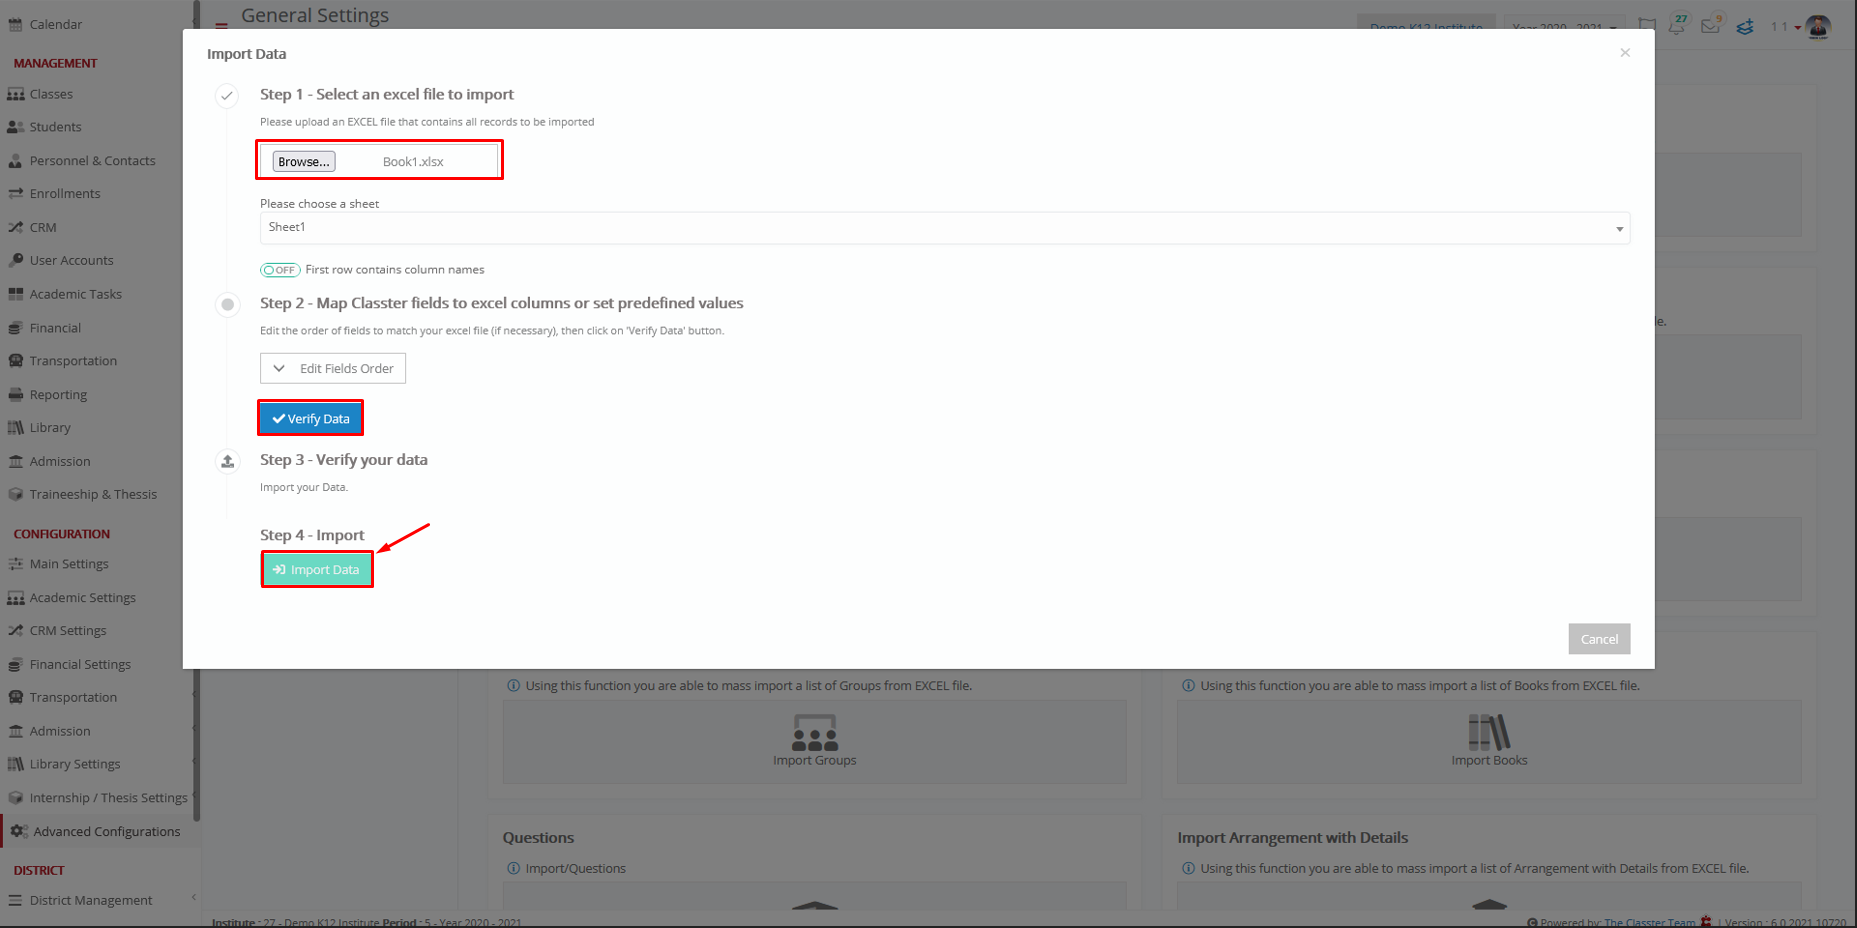
Figure 60
- The Excel file has been verified, selected, and now you can click on the Import Data button to complete the process (Figure 60).
- Import of Teachers is Complete
Invite Teachers to Log in
You have uploaded your teachers, and it is time to notify them and provide them with sign-in credentials! This process is done through the user accounts page.
Follow the path: Dashboard > Management > User Accounts (Figure 61).
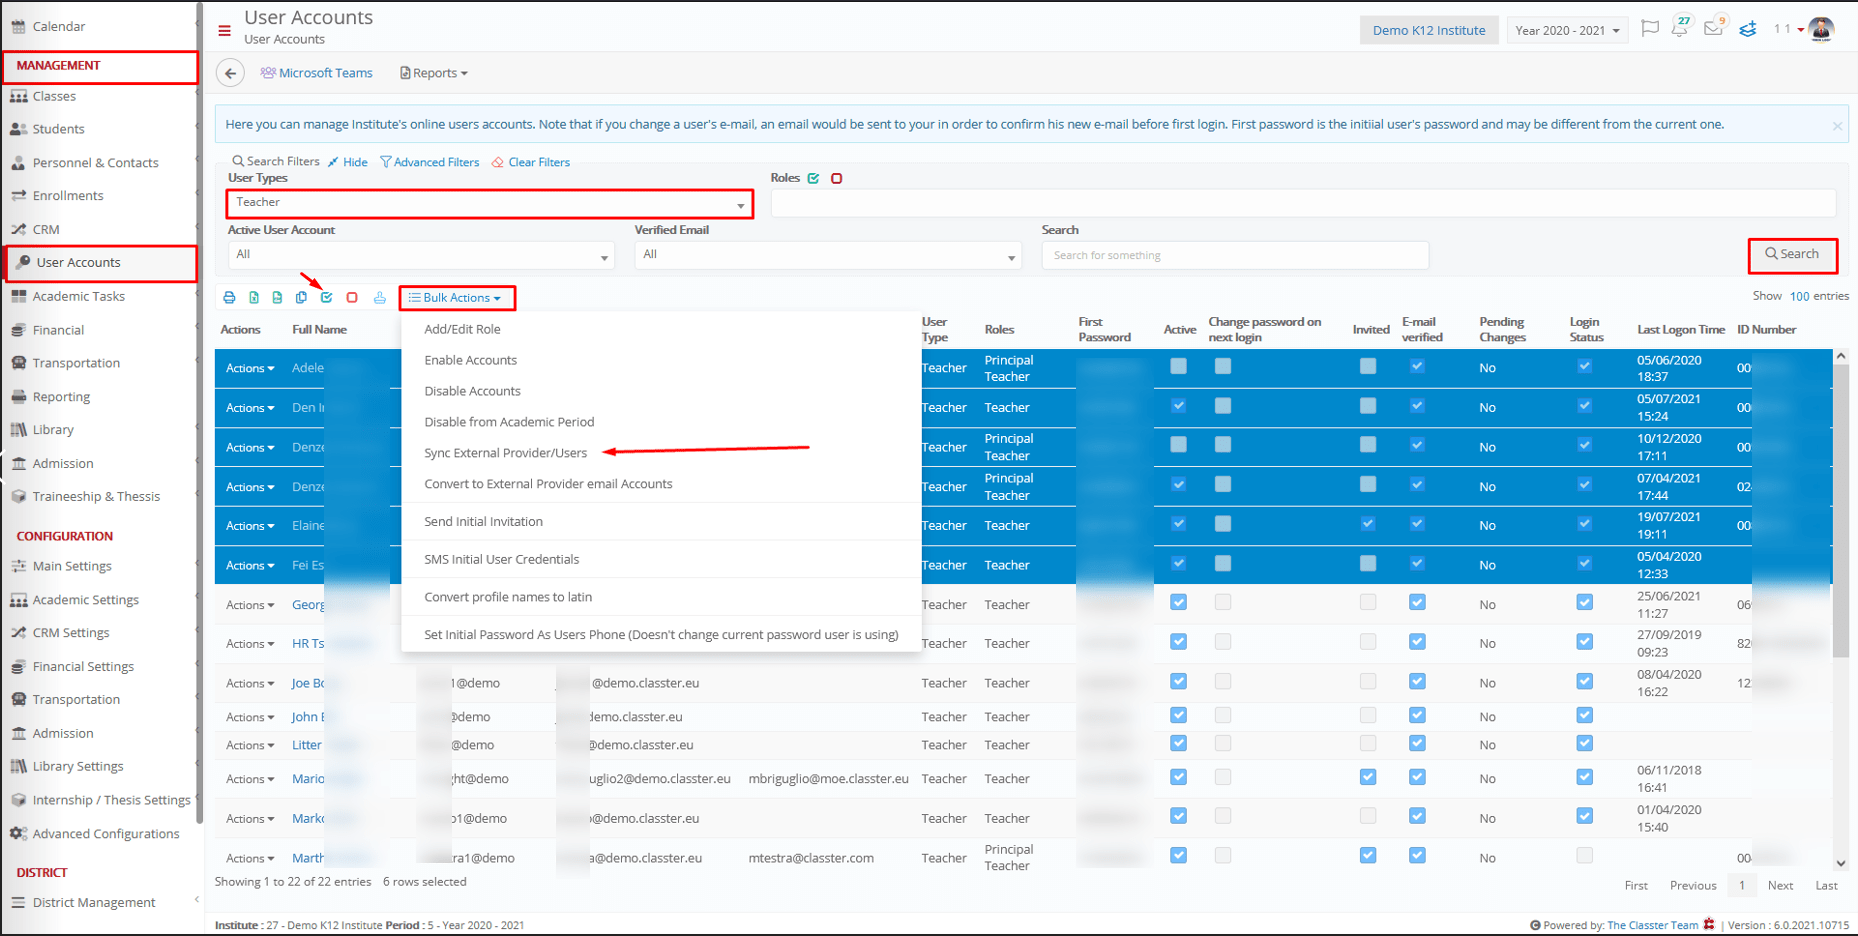
Figure 61
On this page, you will see the following (Figure 61):
- From the Search Filters, select the User Type ‘Teachers’.
- Select users who have not received verification email, as you just added them.
- Click on the ‘Search’ button to load the results in the list.
- Now you can view all the institutions teachers who have not received a verification email.
- Select all the Teachers you have previously imported, by clicking on the select all button (Figure 62).
- Once you have selected all the teachers, click on the bulk actions button and from the dropdown list click on the ‘Send Initial Invitation’ button (Figure 62).
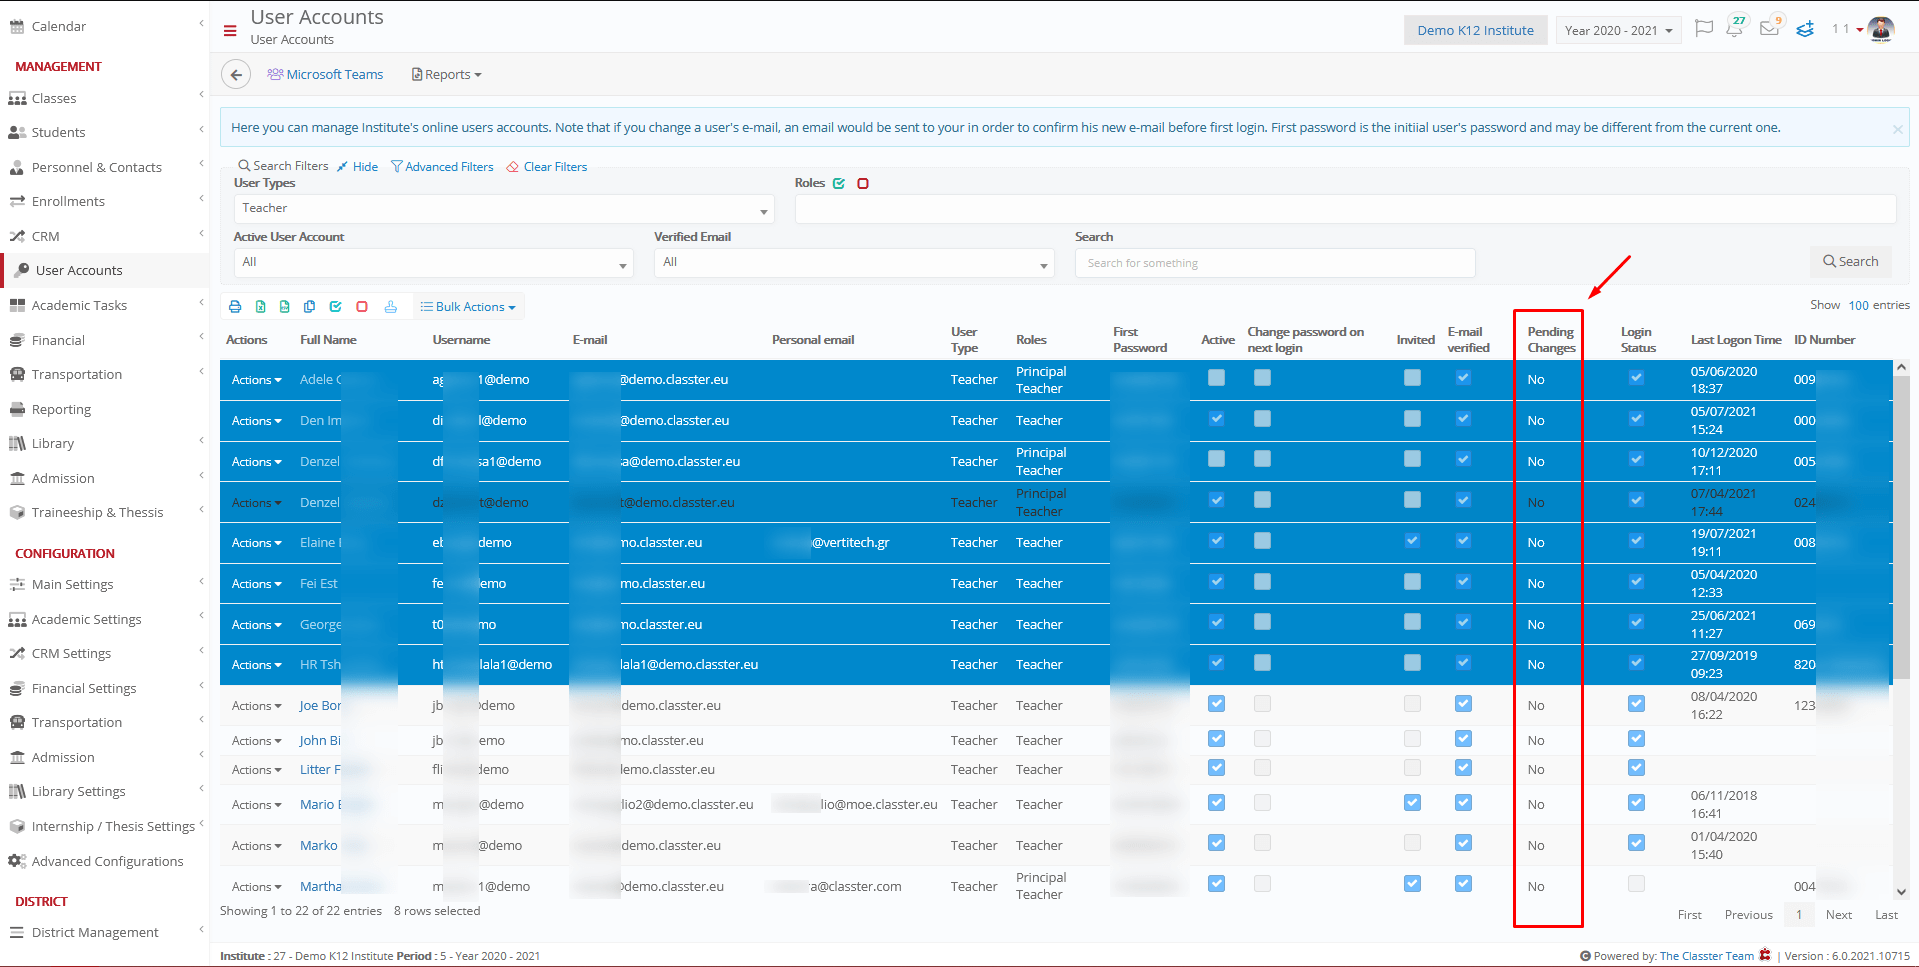
Figure 62
The email that is sent to teachers contains a welcome message and the teacher’s credentials (username and password) so they may enter the Classter Portal (Figure 63).
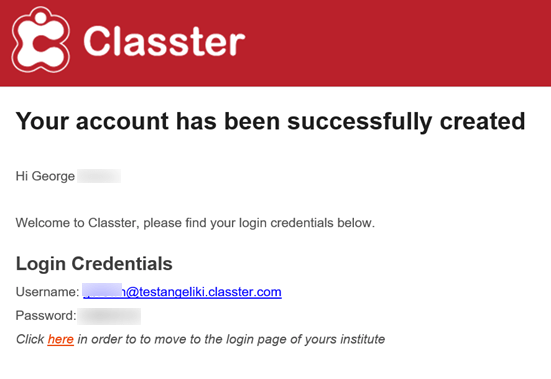
Figure 63 – Sample Invitation Email