

This part of the Classter Portal is very important to the overall function of the system. The advanced configurations available allow users to create templates for emails and reports, create custom menus, configure notifications, setup integrations with Office 365, G Suite, SMS services and much more. This section is also used for the mass import of students, teachers, timetables and financial arrangements. To reach the advanced configuration page you need to follow the path: DashboardConfigurationsAdvanced Configurations (Figure 1).
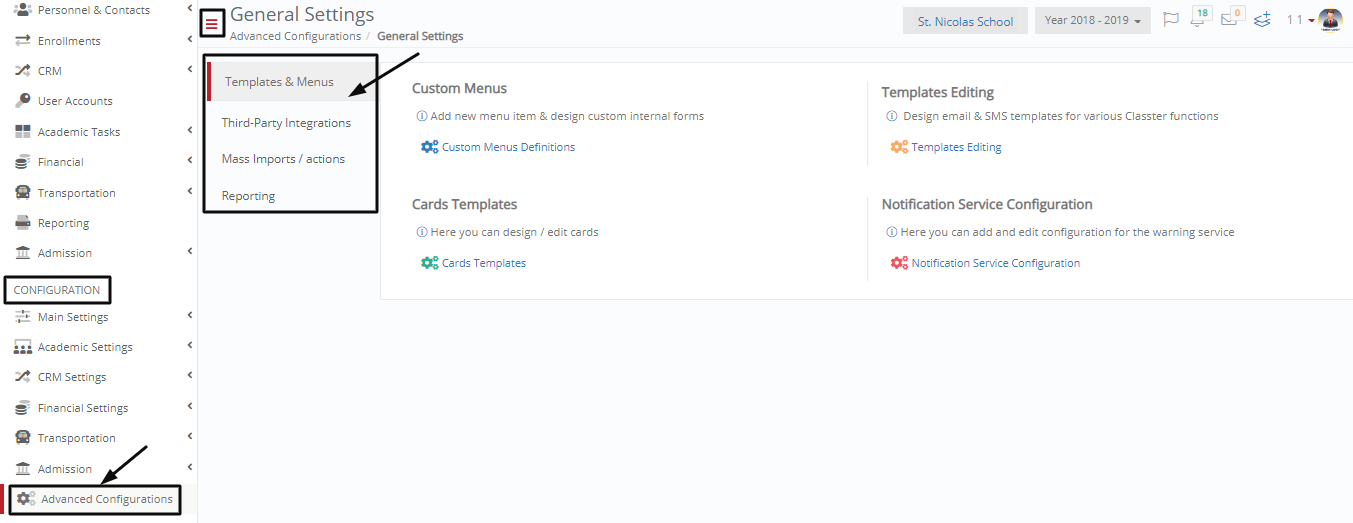 Figure 1
This is the first tab in the advanced configurations page and deals with the creation of custom menus, templates editing, card templates and the configuration of notification services. The path to this page is the following DashboardConfigurationAdvanced ConfigurationsTemplates & Menus (Figure 2).
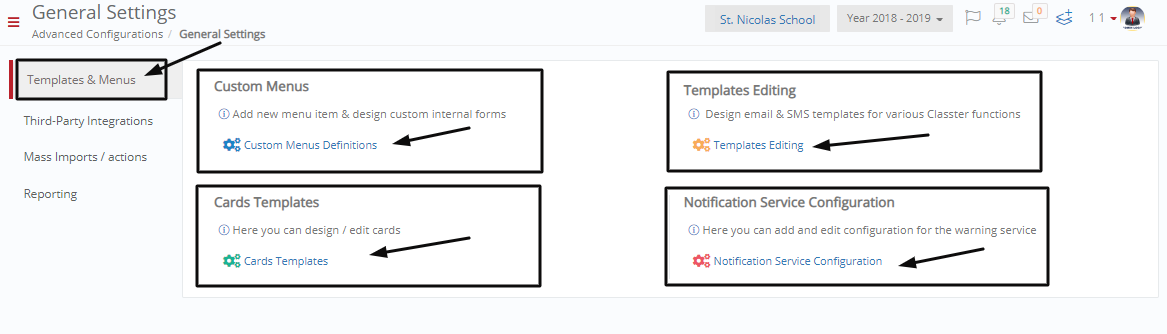 Figure 2
Custom Menus
On this page we can create quick action buttons on the dashboard or add custom menus to the dashboard main menu. To reach this page follow the path: DashboardConfigurationAdvanced ConfigurationTemplates & MenusCustom Menu (Figure 3).
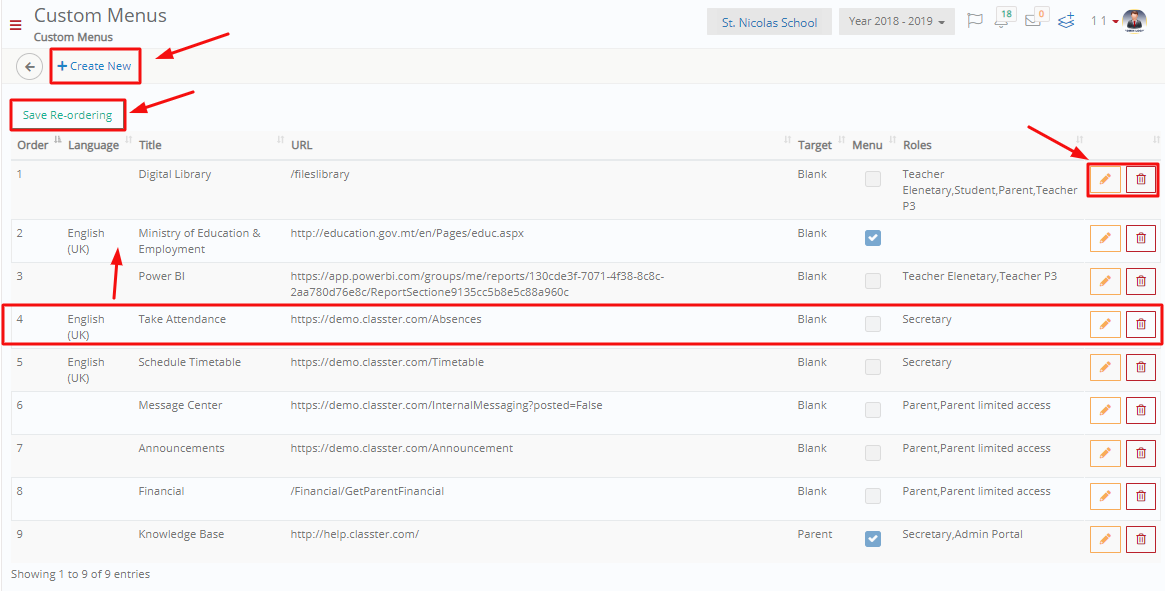 Figure 3
On this page we can see (Figure 3):
- You can view all the custom menu buttons; their connections and which user roles have access to them.
- You can re-order them on the list by dragging and dropping them up or down on the list.
- If you re-order the list, you will be able to see a click on the ‘Save Re-ordering’ button to save your changes.
- You can edit or delete a specific custom menu by clicking on the edit or delete buttons respectively.
- If you wish to create a new custom menu the you can click on the ‘+Create New’ button.