

First you must enter the Classter Portal as a Teacher:
On the main menu, click on Attendance>Subject Absences.
Here, you can manage absences for a selected subject of a class/group, on the selected date. Select the Date and Group that you want to manage absences for and click at the ‘Show’ button to see students’ absences according to the filters given. (Figure 1)

Figure 1
At each student entry you can activate ‘Absence’ or ‘Late’, select Absence Category, see Absence Type, add comments, check the absences’ total number and check if the absence is verified or not. (Figure 2)
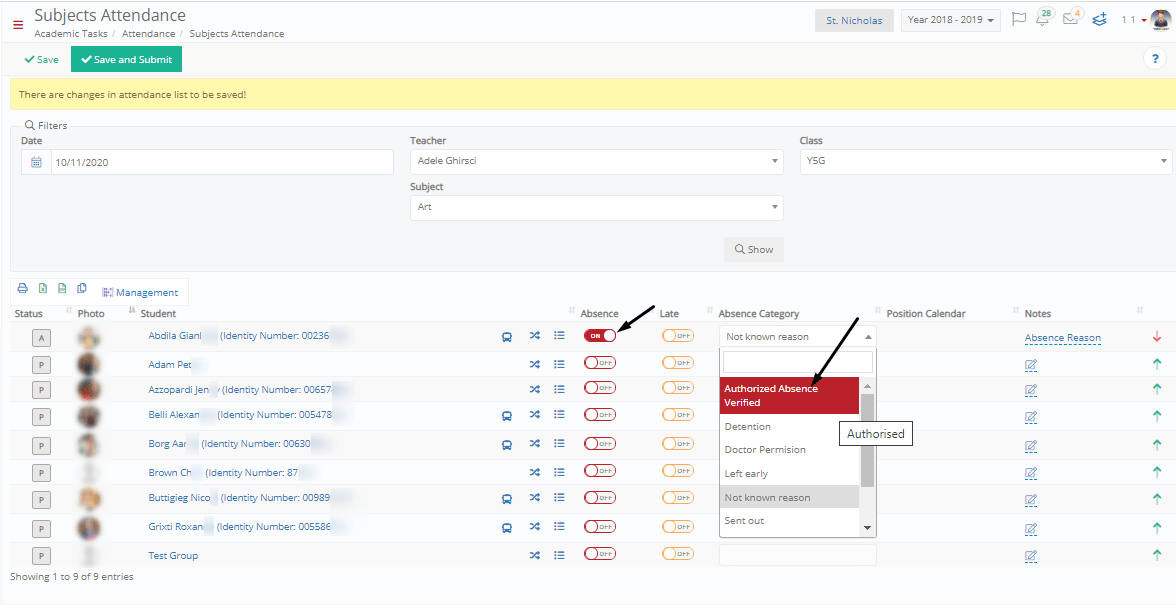
Figure 2
On the top of this window you can see two buttons: ‘Save’ and ‘Save and Submit’. (Figure 3)

Figure 3
The ‘Save’ button saves all absences either as verified or not verified based on the Absence Category. Some absence categories may be verified, and others not verified.
The ‘Save and Submit’ button saves all absences as verified, as it overwrites the Absence Category which may be ‘un-verified’.
Tip: A typical configuration is to let all absence categories with the setting ‘verified’ as false and then allow teachers to ‘Save and Submit’ to verify absences. Absence categories can be configured by the admin (configuration>academic settings>Attendance settings>Dropdown lists>Attendance Categories).
Note: Absences are counted in summaries and are visible to students and parents only if they are verified.