

- Click on ‘Create New’ to create a new teacher (Figure 213).
Figure 213
Note: Fields with a red asterisk are mandatory
- Insert teacher’s basic data. You can also add the teacher’s job role, status i.e., if he/she is active, the title, ID, birthday, nationality, religion, level he/she is teaching at, the date of first contact, the employment date, and the date he/she stopped working (if applicable) (Figure 214).
Note: The drop-down lists options are set by the admin (follow the path: Main Settings > Dropdown Lists > Type: Teachers > Dropdown Lists > Edit list.)
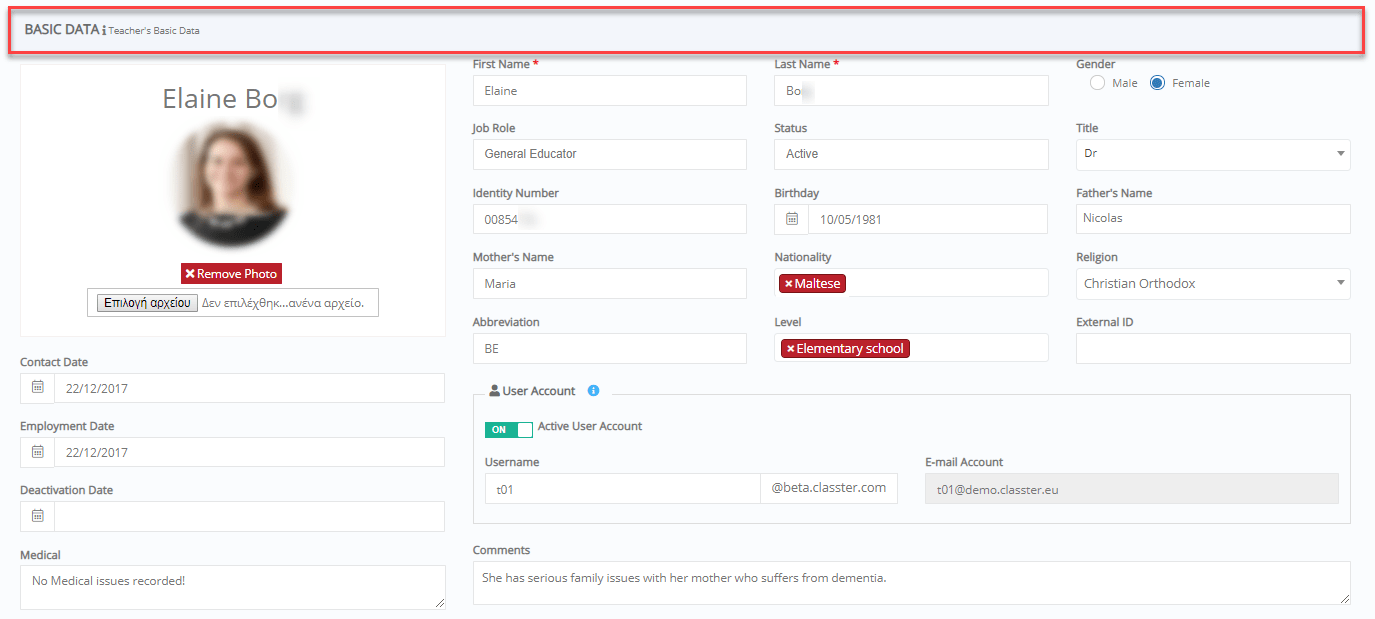
Figure 214
- Insert teacher’s contact such as main address and additional addresses, as well as other data including birth data and immigration status or passport info for teachers who come from abroad (Figure 215).
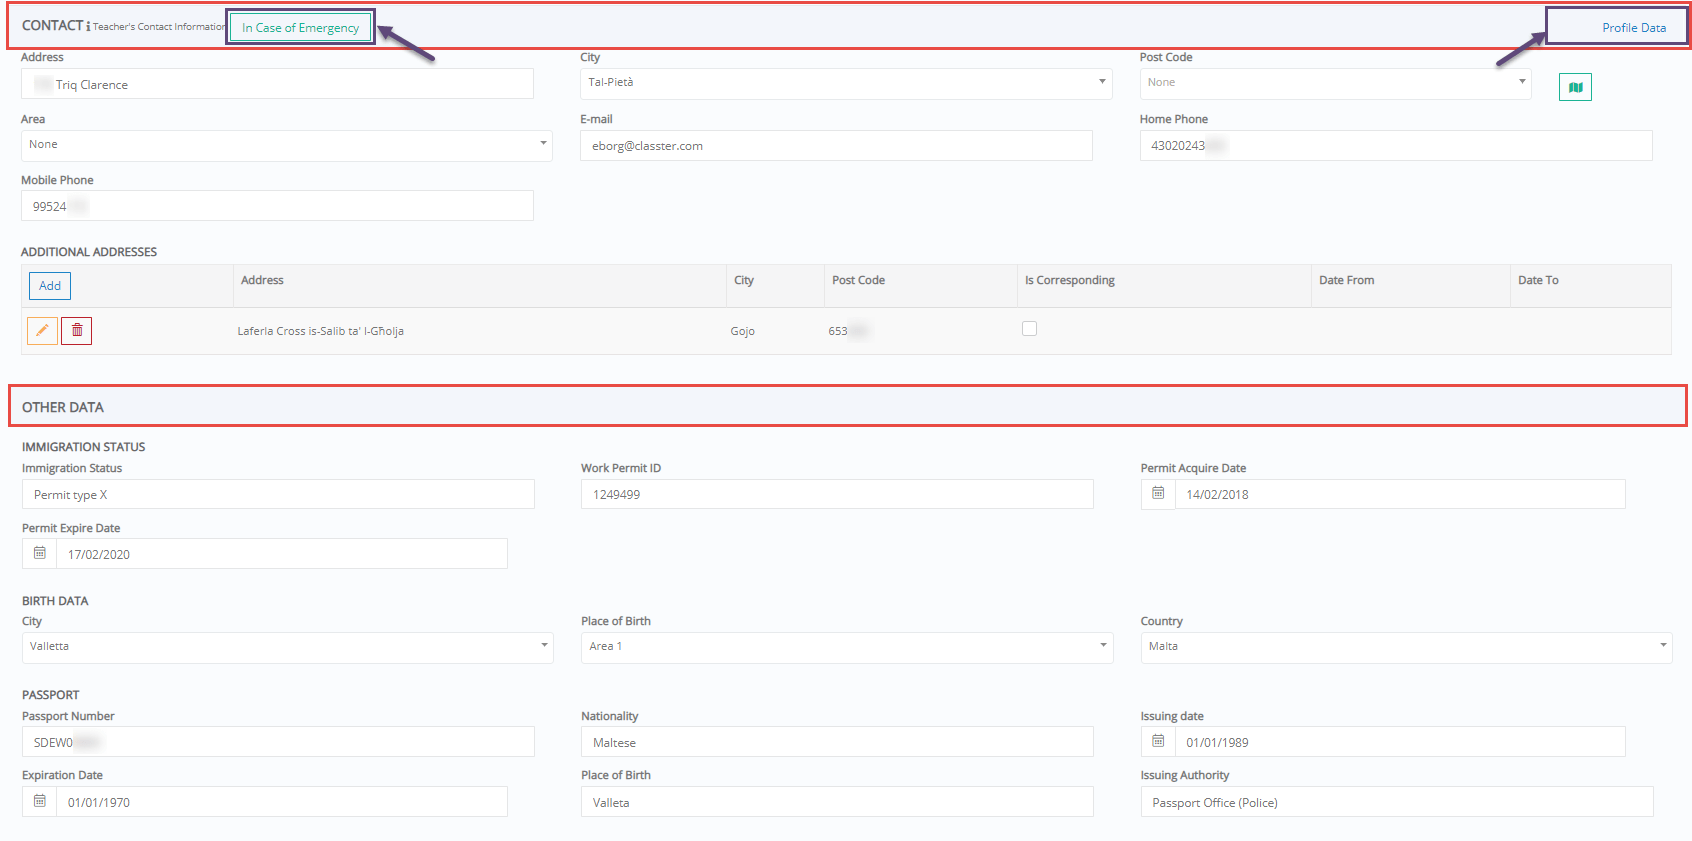
Figure 215
- Click on the ‘In case of Emergency’ button to insert contact information of the person to be contacted in the case of an emergency (Figure 216).
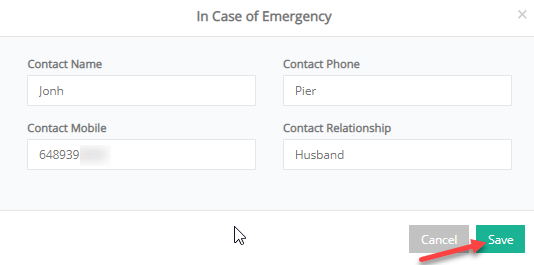
Figure 216
- Click on the ‘Profile Data’ button to see teacher’s contact information card.
- Add the teacher’s remaining holiday days and experience (Figure 217).
Note: These are custom fields created by the admin. (Check Endnote xv)

Figure 217
View
Click on the ‘View’ button to select Card, Grid or Predefined Views (Figure 218).

Figure 218
CARD VIEW
In card view you can see teachers’ info in cards (Figure 219).
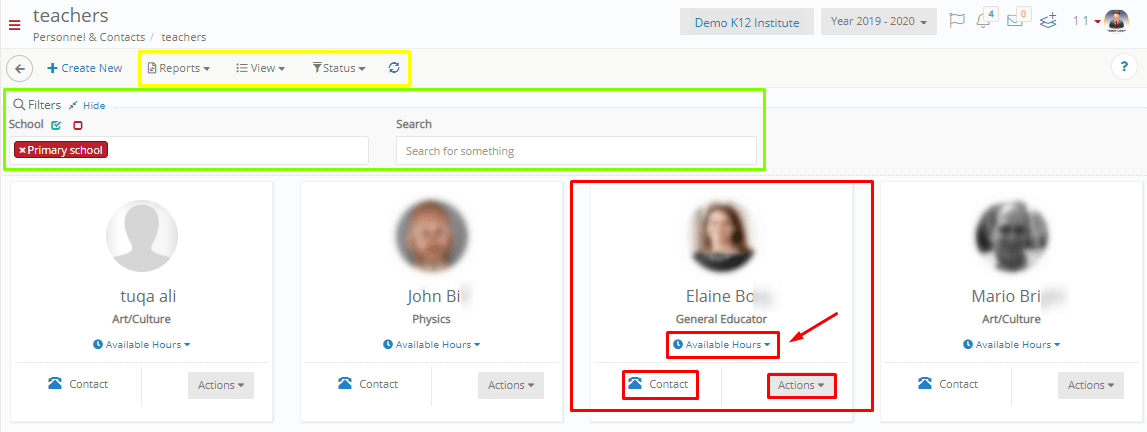
Figure 219
- Click on the ‘Status’ menu to show active, inactive or all teachers (Figure 220).

Figure 220
- Click on the ‘Reports’ menu to produce the available report in pdf (Figure 221), (Figure 222)
![]()

Figure 221
- Use the Group, Subject and Teacher filters to select specific data you want in the report. You can also select the group ordering e.g., show data first per group, then per subject and then per teacher
- Click on ‘Preview Report’ button to show the report
- You can print or export the report using the relevant buttons
Note: Billing Reports are shown in the Financial Manual

Figure 222
Note: In Grid View, there is a different set of reports available.
- At the filters area, select from which Level you want to see teachers.
Note: The filter ‘Level’ is available only if it is set by the admin. If not, then the specific teacher will be included in the search results of every Level.
- Use the Search tool to find a specific teacher.
- Click on the ‘Contact’ button of the card to see teacher’s contact info (Figure 223).
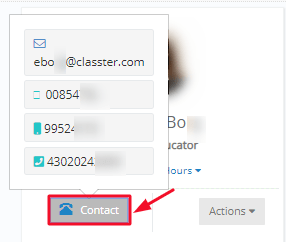
Figure 223
- Click on the ‘Actions’ button to send an email to the teacher (Figure 224).

Figure 224
- Click on the ‘Available Hours’ to check teacher’s available hours for parents’ meetings (Figure 225).
Note: Go to ‘Availability and Constraints’ to check out how you can set the days and hours that the teacher is available to meet parents. Parents can book a meeting through their Classter account. Teachers now have the ability to set their own availability hours so the availability may appear to you, without your intervention.
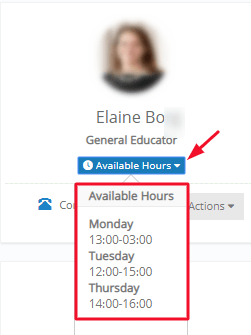
Figure 225
GRID VIEW
In grid view you can see teachers’ info in grid (Figure 226).
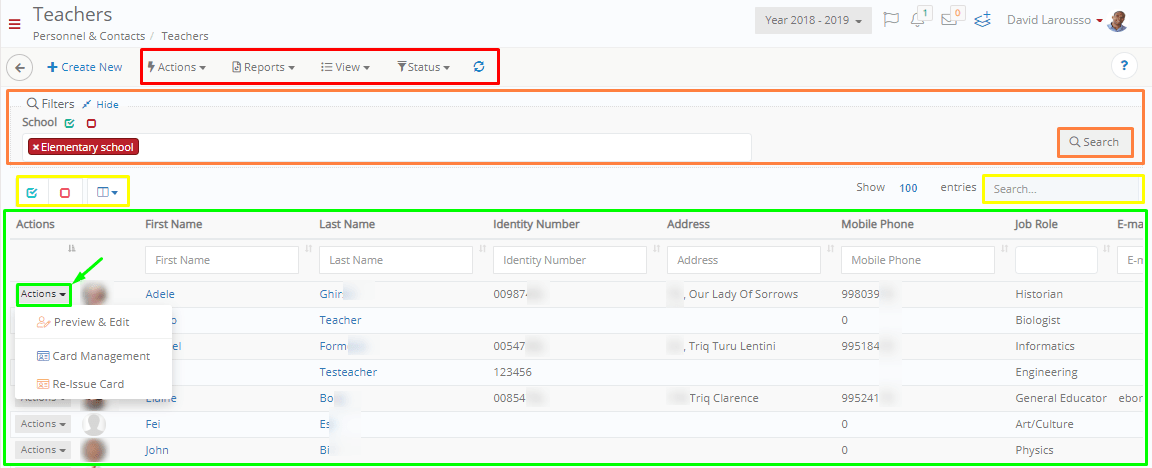
Figure 226
- Click on the ‘Status’ menu to show active, inactive or all teachers (Figure 227).

Figure 227
- Click on the ‘Reports’ menu to show the available reports or export them in pdf (Figure 228).

Figure 228
Reports
- Teacher info
You can print out or export information for the selected teachers (Figure 229).
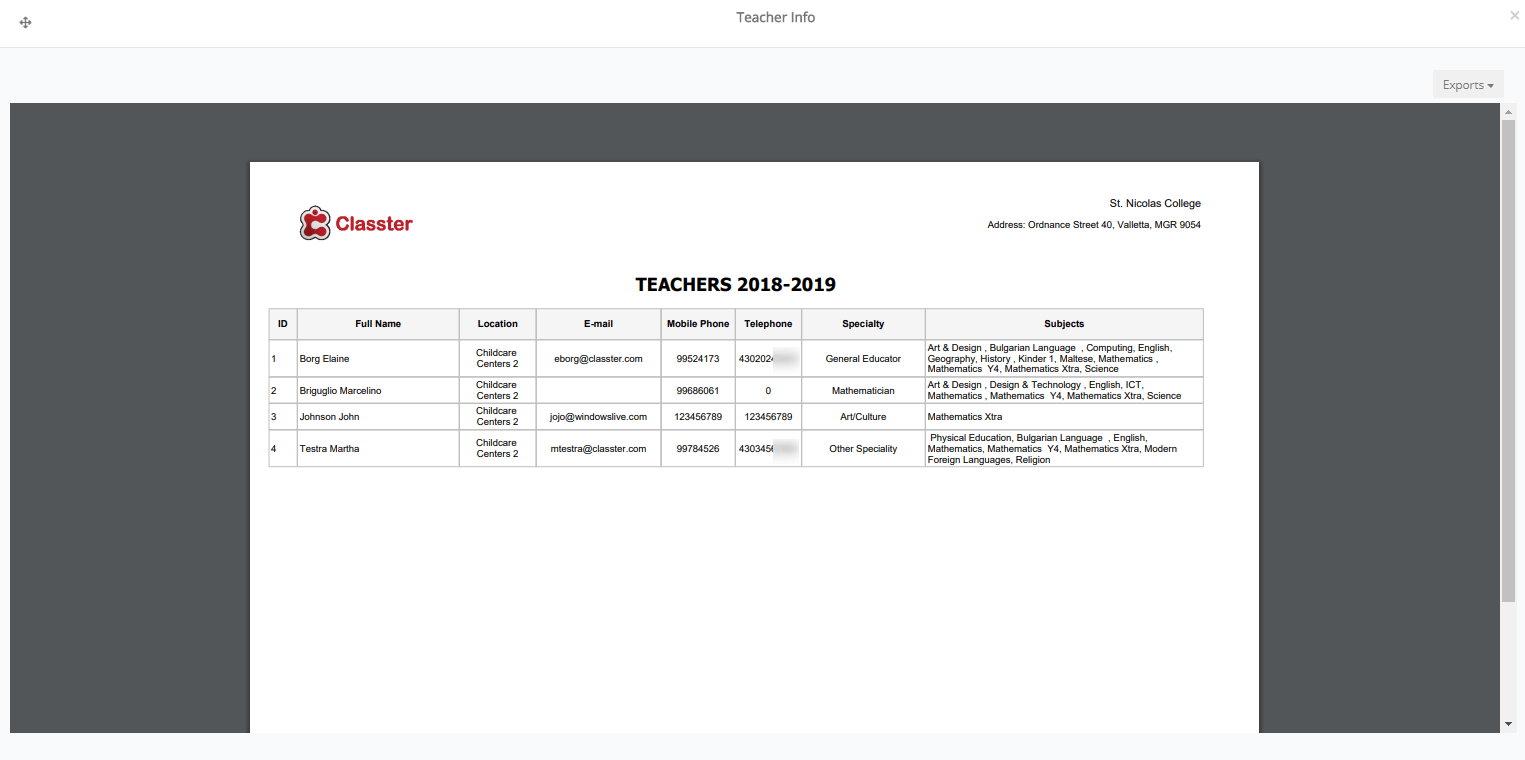
Figure 229
- Teachers Groups Subjects
You can print out or export a list of teachers per group and subject (Figure 230).

Figure 230
- Teachers per Subject
You can print out or export teachers per subject grouped e.g., by grade (Figure 231).

Figure 231
- Click on the ‘Actions’ menu to delete, anonymize, allocate to class, transfer to period, transfer to another institute unit, add to new calendar event or card related actions for the selected Teacher (Figure 232).
![]()

Figure 232
Note:
- After deletion, click on the refresh button to show data correctly.
- ‘Anonymize’ will permanently replace relative’s data with asterisks. There will be no way to undo and recreate the original data once it is anonymized.
Edit
- Click on the Card (Card view) or Actions button > Preview & Edit (Grid view), to edit teacher’s data.
In this section, you can edit teacher’s profile, add employment data, allocate groups and subjects to the teacher, set financial data, check teacher’s remarks & actions, add personal files or links, and set teacher’s availability (Figure 233).
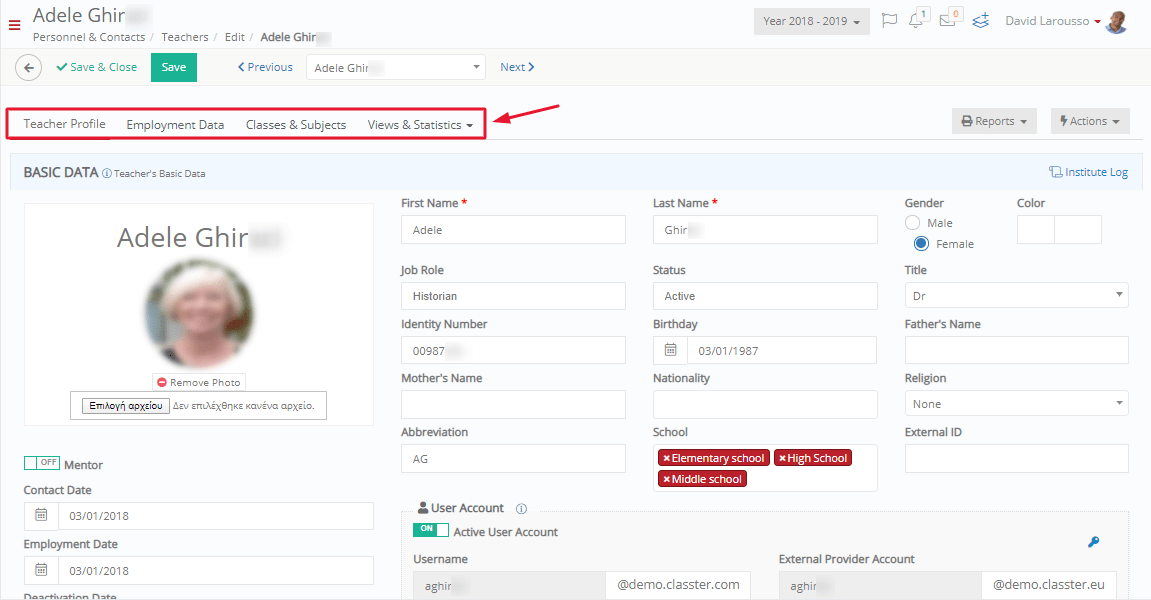
Figure 233
Note: Click on the ‘Reports’ menu to preview, print or export teacher’s data concerning his/her contract, salary changes, working hours per month and timetable (Figure 234).
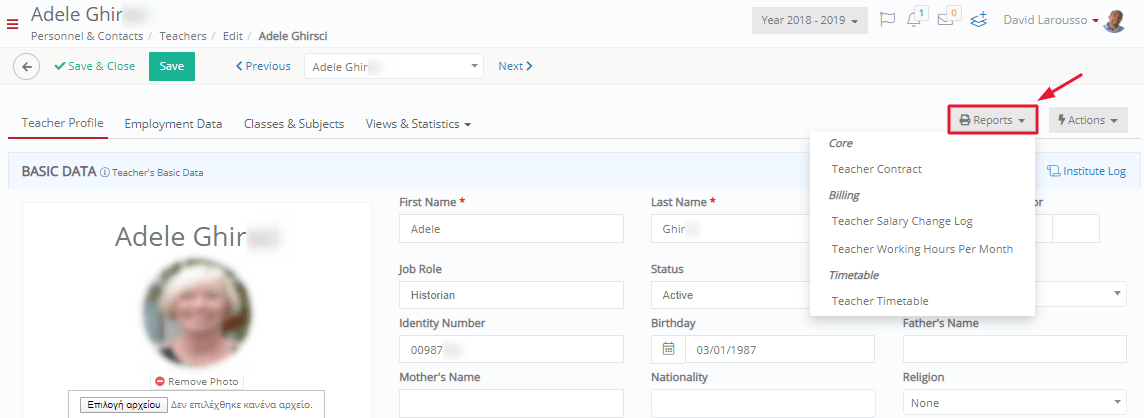
Figure 234
TEACHER PROFILE
You can edit the teacher’s basic data that has been recorded at teacher creation.
EMPLOYMENT DATA
You can add teacher’s employment info, scientific data and working hours (Figure 235).

Figure 235
Note: Drop-down list fields at ‘info’ and ‘scientific fields’, are set by the admin. (Check Endnote xii)
- At the ‘info’ you can define the method of employment e.g., Interview, the employment type e.g., Full time, the Legal Relationship e.g., Contract and the Operational status e.g., Active
- At the ‘scientific fields’ you can add teacher’s scientific fields e.g., Math, and additional data such as the level of knowledge e.g., Degree (BSc)
- At the ‘working hours’ you can check the remaining working hours of the teacher (assigned minus working hours), extra working, reduction and/or non-teaching working hours.
- To add extra working, reduction and/or non-teaching working hours: Select the corresponding tab e.g., Non-Teaching Working Hours > Click on ‘Add’ (Figure 236).
Note: The available categories at each tab are set by the Admin. (Check Endnote xii)

Figure 236
GROUPS/CLASSES & SUBJECTS
You can allocate groups and subjects to the teacher.
- Click on the ‘Allocate to Groups’ button to add a group (Figure 237).

Figure 237
- Click on the On/Off buttons to activate/deactivate teacher’s enrolled groups/classes or subjects (Figure 238).
- At each group you can set the maximum teaching hours and the subject’s status i.e., if he/she is the subject’s basic teacher, assistant, 2nd supervisor etc.

Figure 238
- Uncheck the group if you want to remove it. Click on ‘Yes’ at the warning pop-up window. (Figure 239).

Figure 239