

With Classter’s Admission process, the Admission data can either appear in a sequence in the “Admission data tab” or some can be unified in a distinct section. Additionally, such a section can be configured to appear as a separate tab.
In this manual, we will explain how Document Categories can be used to unify separate Admission documents.
First, let’s begin with the creation of a document category in CONFIGURATION > Main Settings > Dropdown Lists. In Figure 1 you see the interface where you can generally configure the list formats in Classter. In Dropdown Type (1) select System and in Dropdown Lists (2), select Document Category.
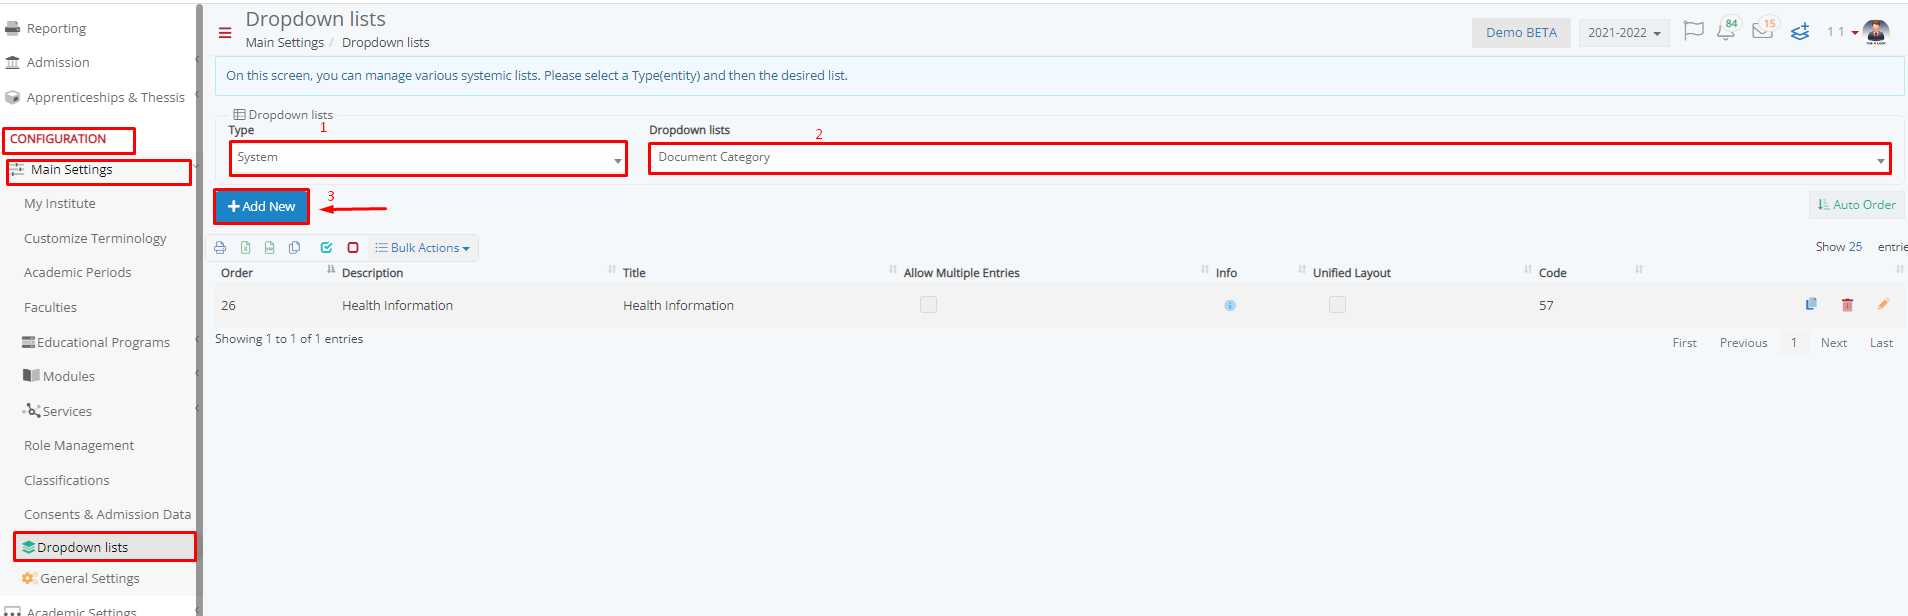 Figure 1
Click on Add New and the following pop-up window will appear. (Figure 2)

Figure 2
- Title: Required, write the title of this document category
- Description: You can add a description of this Document Category
- Info: Add extra information of this Document Category. The info will also be displayed in the admission process.
- Unified Layout: If it is on, then all the admission data will be unified, otherwise, the admission data will appear in different frames
- Allow Multiple Entries: If enabled, it will allow the applicant to answer multiple times the specific section. It is often to use this functionality when asking for acquired degrees or work experience to allow the applicants to add as many as they have.
After configuring the new document category, click on Save.
In case you want to change the properties of this document category, you can go back to the Dropdown list and edit it. (Figure 3)
 Figure 3
To make this document Category a separate tab in the Admission, you must go to the admission setting and select this Category in the “Admission Data categories to be displayed as separated tabs” setting. This setting can be found in CONFIGURATION > Admission > Admission Settings > General Admission Settings. (Figure 4)
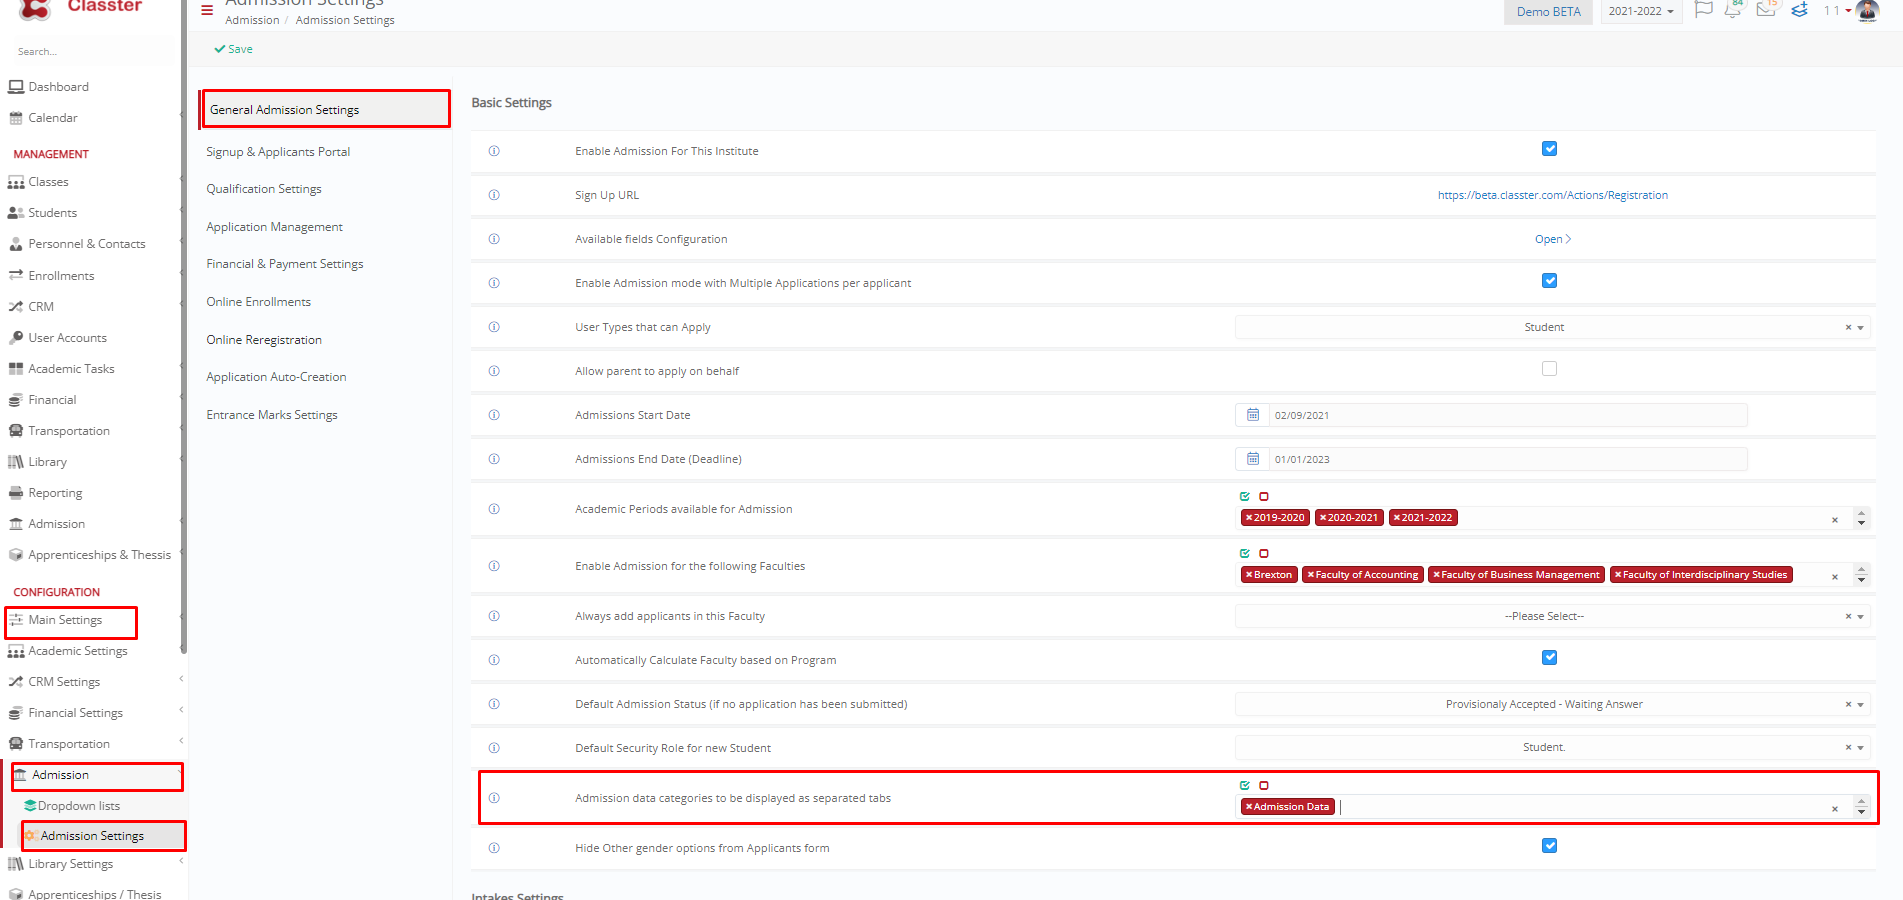 Figure 4
Now, to add the admission data in this specific document category, enter the menu CONFIGURATION > Main Settings > Consents & Admission Data to create or edit the admission data or consents. (Figure 5)
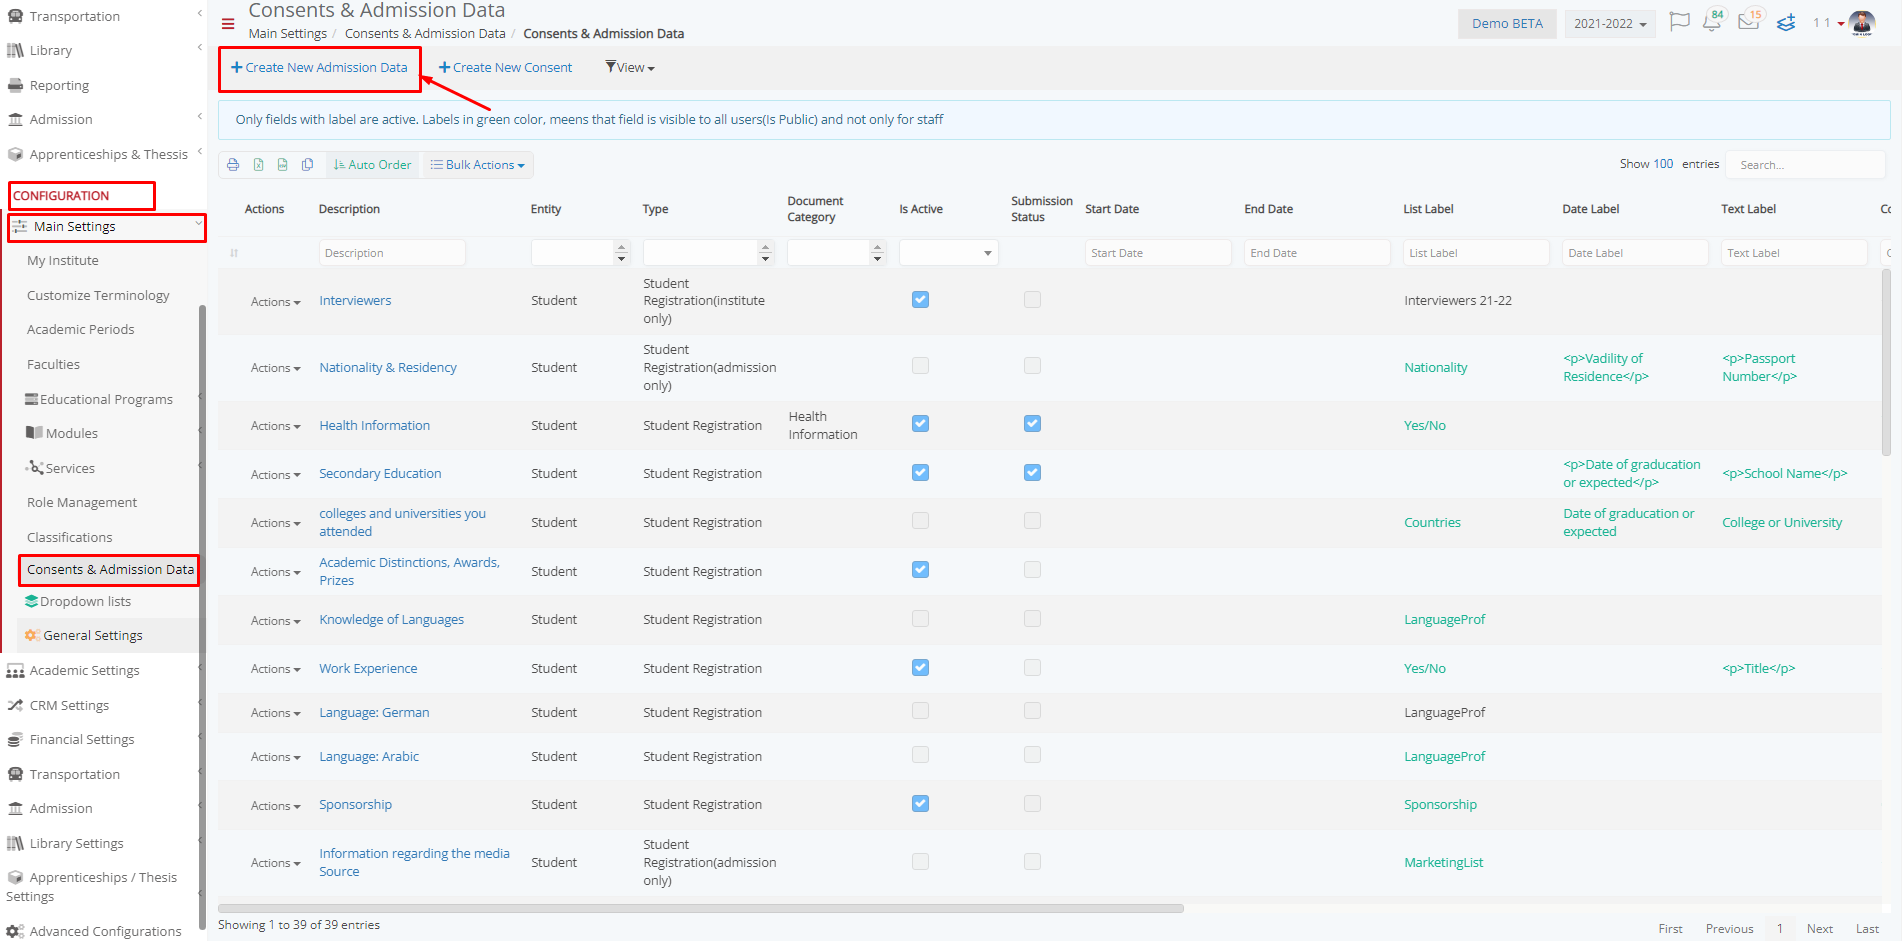 Figure 5
Now, you can group the admission data by selecting the same document category in multiple Admission documents. (Figure 6)
 Figure 6
Let’s take another Admission document and select the same document category (Figure 7). Now you have predefined two different admission documents to belong to the same document category.
 Figure 7
Try adding admission documents to a category by selecting it in the Document Category field as shown in the figures above, and the result on the end user will be like in Figure 8.
 Figure 8
For information on how to create and configure the Admission data documents, check out How Can I Add Admissions Data (Files & Info) in the Application Process? .
Find more or post your questions on our Facebook Community Page. Also, watch our how-to videos on our YouTube channel.