

Introduction
The Classter – Canvas integration offers 3 main functions to the institution that applies it. The First is to create students and teachers on your Canvas platform automatically. The second one is to create subjects/modules on your canvas platform and finally the ability for users such as teachers and students to have a single sign on capability.
The logic behind this integration is to help you create students, teachers, subjects/modules on your classter platform and have those entities be created on your Canvas platform automatically.
Keep in mind that the connection currently works one way, this means that the connection will apply changes from Classter to Canvas and not the other way around. You will still need to set up the subjects/modules that are created on your Canvas platform via Classter.
In the following section we will take a look at how we can establish this connection between Classter and Canvas. Before following the steps described below, please take a moment to make sure you have set up your Classter Portal with all the main entities and structure your institution has and that you have an Admin account for your institutions Canvas platform
Good, now we can begin!
Step 1 of Classter – Canvas Integration
As with all integrations with third party systems you will start out by logging in to your Classter Account as an Admin user. Once you are logged in you can follow the path to the third-party integrations tab of advanced configurations (Figure 1 & 2). Path: Dashboard>Configuration>Advanced Configuration>Third-Party Integrations>Canvas.

Figure 1

Figure 2
Once you are on the Advanced Configuration>Third Party Integrations page, click on the “Canvas” button (Figure 2). You will be redirected to the Canvas Settings page.
Step 2 of Classter – Canvas Integration Settings
On the Canvas Integration Settings page, you will find various fields that must be filled in with information from your institutions Admin Canvas Account (Figure 3).

Figure 3
Options/Fields (Figure 3):
- Enable: This switch turns the connection between Classter and Canvas on or off. The first action should be to switch this option on.
- Token: This field is required for the completion of a canvas integration and is a sort of password that you can find on your Canvas Admin Account. You copy the token from your canvas account to this field.
- URL: Enter your institutions Canvas URL address to this field. We are talking about the url for the sign in page of your canvas account e.g canvas.sampleschool.co.uk.
- Root Account id: This refers to the account you use on Canvas. Some institutions may have up to 2 accounts on canvas. So to fill in this field go to your main account on Canvas and from the URL you see on the top of your browser search field you select the number/s at the end of that URL and copy them to this field. The account url can look like this http://canvas.sampleschool.co.uk/accounts/1?. You will copy the number/s in the end of the url to the root account id field. Note: On a Canvas admin account you will see an admin tab on the left of your screen, click on it and then on the main account you use. This will produce the url you need.
- Sub Account id: If your institution has a second account on canvas follow the same steps described in the previous step with your second account. If you do not have a second account copy the root account id to your sub account id field.
- Canvas Implementation: this menu has two options. One “Class – Subject combination” and two “Class as Term and Subject on Term”. Here you define the way you want the connection between classter and canvas to function. The first option will create class/subjects on the canvas portal based on one default term. The second option will create the class/subjects in multiple terms not just the default. The preferred option is the First one.
- Mapping: This option allows you to connect existing canvas courses with specific class/subjects on classter. You need to copy the provider (canvas) id of a course and past it in the id field next to the classter class/course.
- Once you fill in the fields don’t forget to click on “Save”!
Step 2 Finding a Token on Canvas
To generate a Token (for the token field on classter) (Figure 4) & (Figure 5):
- Sign into your Canvas Admin Account.
- Click on the Account tab on the left side of your screen and click on the settings button.

Figure 4

Figure 5
- Scroll down the settings page to the Approved Integrations section.
- Click on the “+New Access Token” button.
- The system will generate a token for you to copy to the token field in Classter. Tokens look something like this 1lCMndsdecS5amN6wjQZWw5qTklwLgL1ZUBYOLL0.
Once you have found the Token, and entered all the info required in the Canvas settings on classter, the page should look something along these lines (Figure 6):

Figure 6
Step 3 of Classter – Canvas Integration
Now that Canvas settings are setup, you can go to the user accounts page of your classter platform and sync students and teachers with Canvas. Note: Make sure enrollments of students and teachers to classes and subjects has been completed on your Classter Platform
Path: Dashboard>Management>User Accounts (Figure 7).
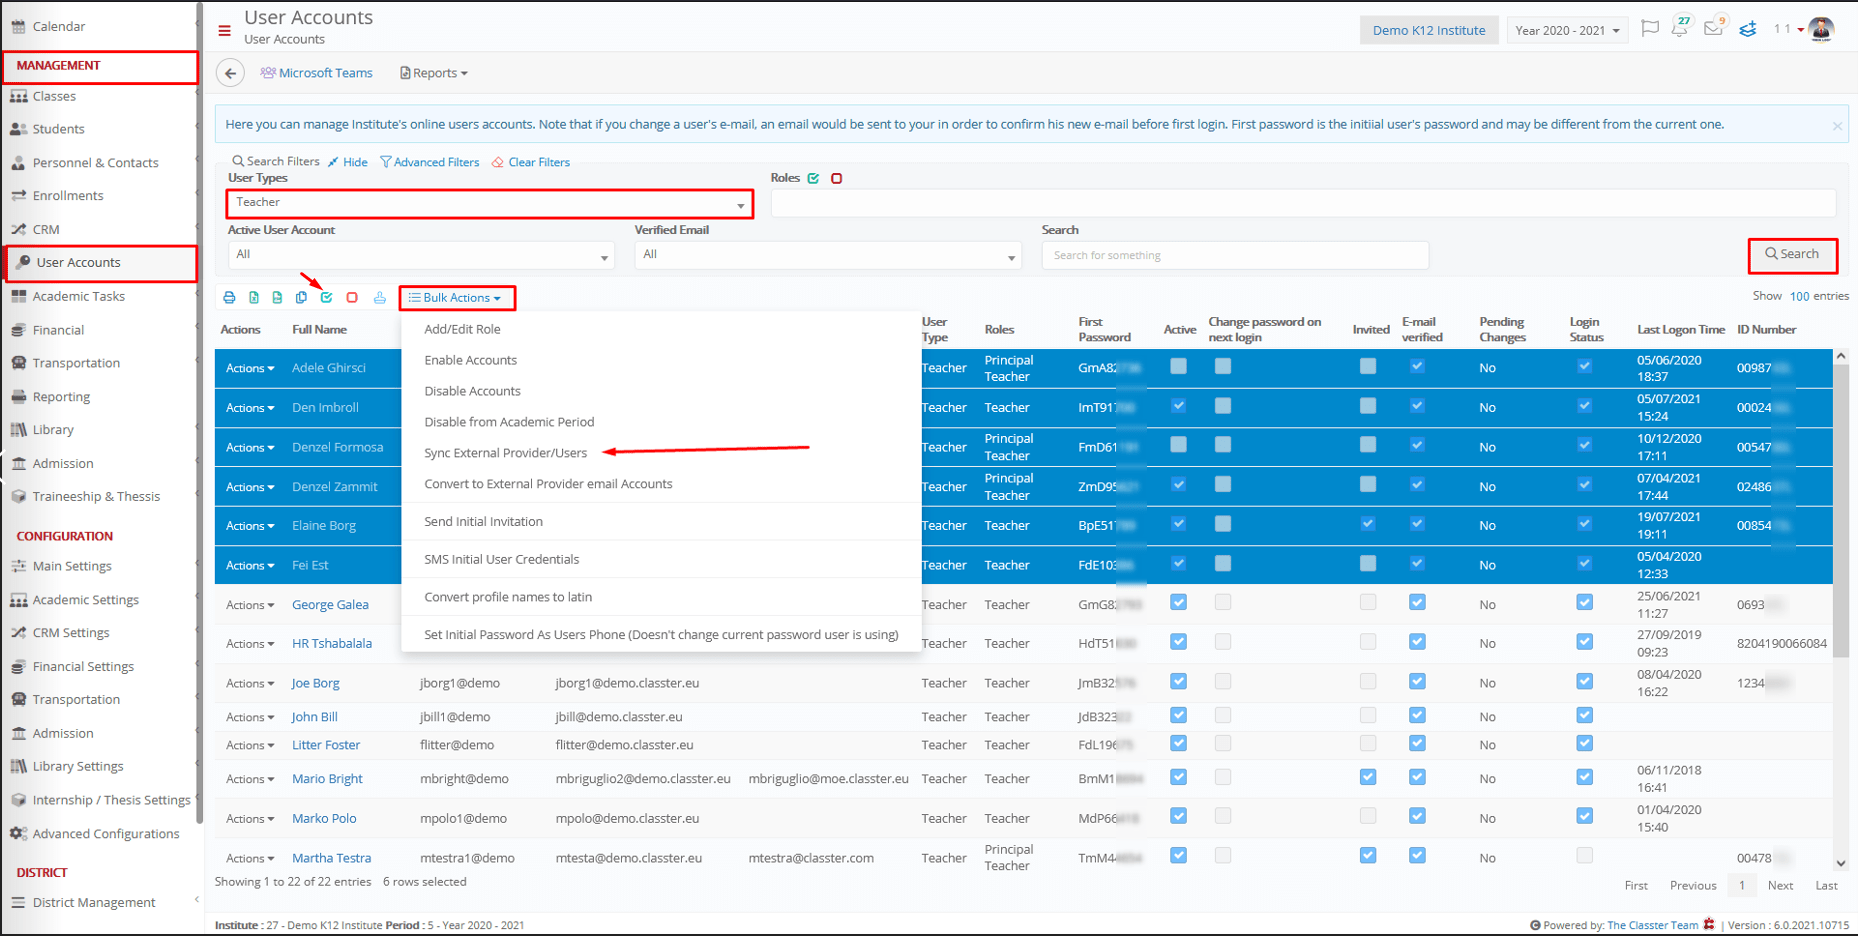
Figure 7
- Once on the user accounts page we select user type Teachers and click on the search button.
- Next, we select all students by clicking on the select all button (selected users are highlighted in blue).
- From the Bulk Actions dropdown menu we click on the “Sync External Provider/Users” button to sync our teachers with Canvas.
- Follow the same steps to sync your existing students with Canvas.
- All students and teachers created on Classter after the integration with Canvas will automatically be created on Canvas.
Wrap-up of Classter – Canvas Integration
Once you have followed the above steps, the system will create the courses on Canvas. This process may take some time to be completed on the part of Canvas. On the User accounts page once you have clicked on the button to sync users you will see the pending changes column switch from No to Yes, this means that the sync process is under way. Once the sync process is complete the pending changes column in the user accounts page will turn back to “No” (Figure 8).
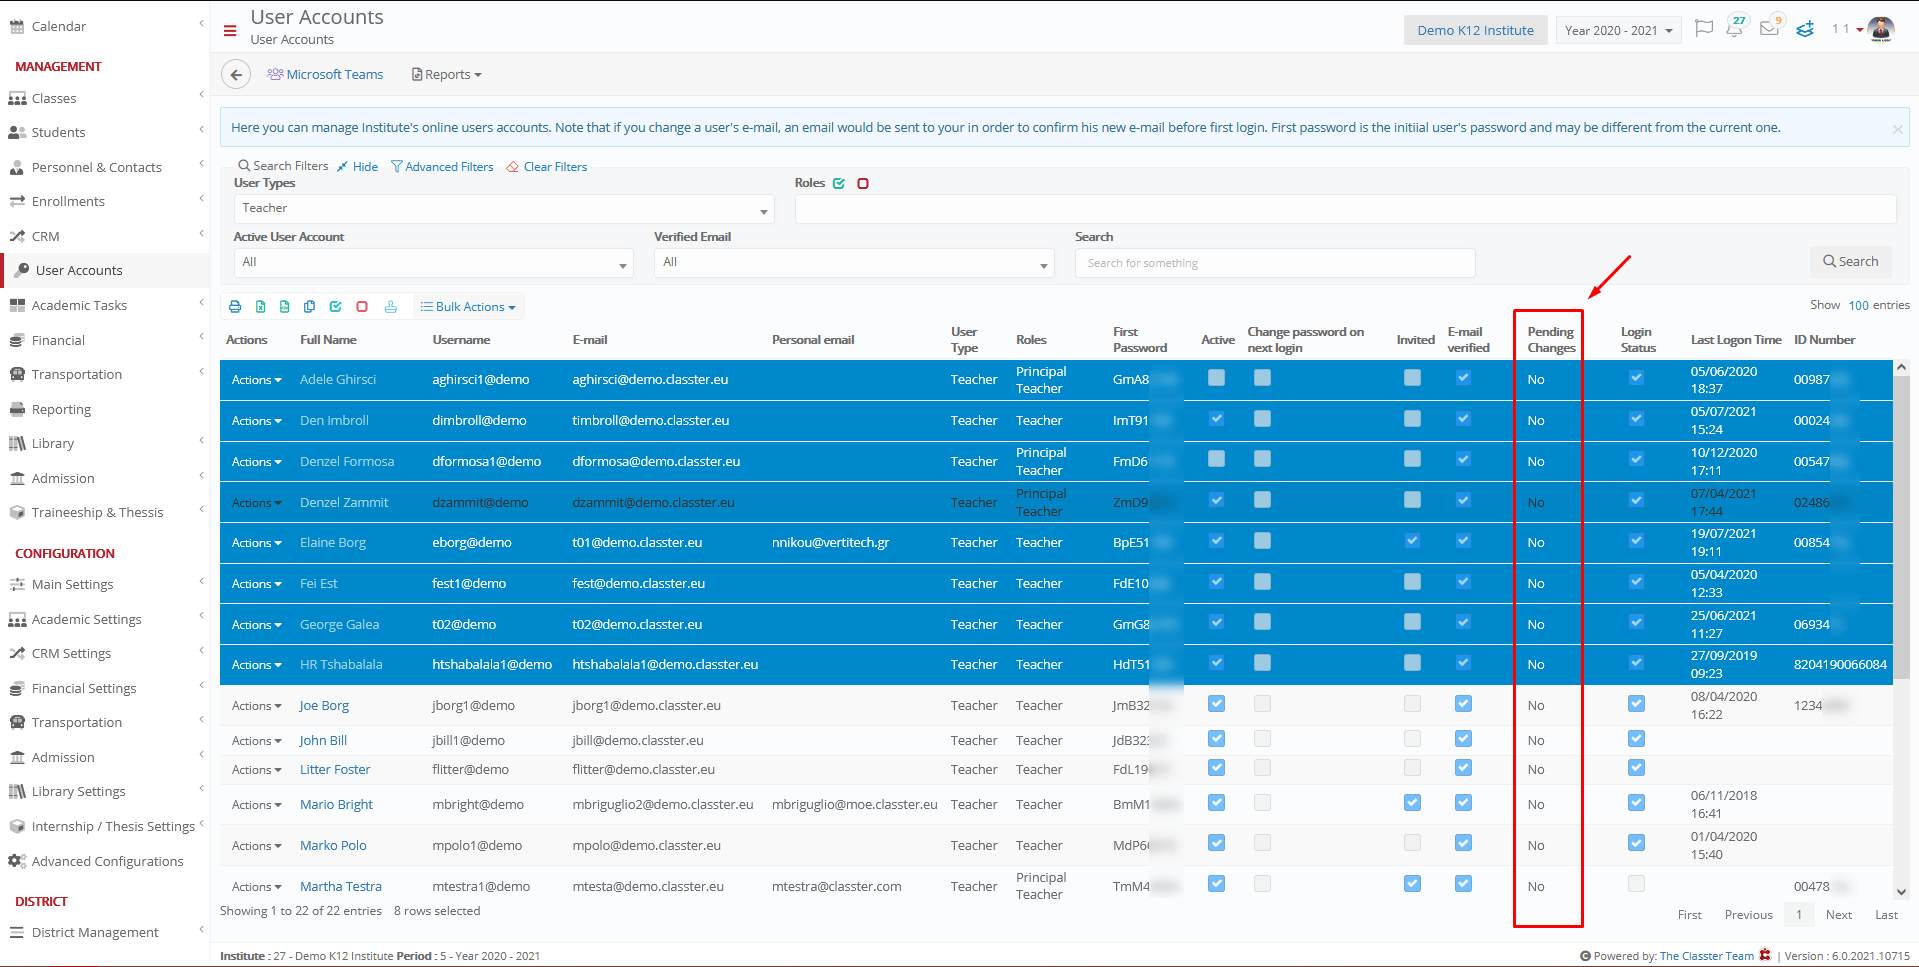
Figure 8
Once the process is complete on both ends (Classter and Canvas), you will be able to see the courses appear on your canvas platform dashboard (Figure 9). Note: You will need to publish your courses from Canvas in order for users to see them.

Figure 9
Existing Classter users will be able to login to Canvas using their classter credentials (username and password). New Students and Teachers who receive their initial invitation email (Figure 10) with their credentials can use them to login to the Canvas platform (Figure 11).

Figure 10
The username and password received by new students or teachers (Figure 10) can be used to login to their canvas portal (Figure 11).

Figure 11