

The timetable can be designed to meet each school’s requirement and is related to one or more timetable periods for teachers who teach a specific unit, a group, or classrooms. The system gives co-teaching options in a unit, group and at teacher level.
To setup the structure of the timetable, go to the Configuration menu. Here, configure Classrooms, Timetable Periods, Constraints, Timetable Categories and Units to be used in the timetable.
Configuration > Academic Settings > Timetable
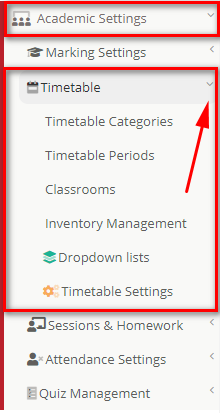
Figure 1
Timetable Categories
In this section, you can create and manage various timetable categories e.g. Main, Exams, Activities etc. (Figure 2).
Configuration > Academic Settings > Timetable > Timetable Categories

Figure 2
For instance, the timetable can be split into two or more categories per Semester, e.g. Main Semester, Secondary Semester. This enables the system to have different timetables within an Academic Period which are logically separated (Figure 3).
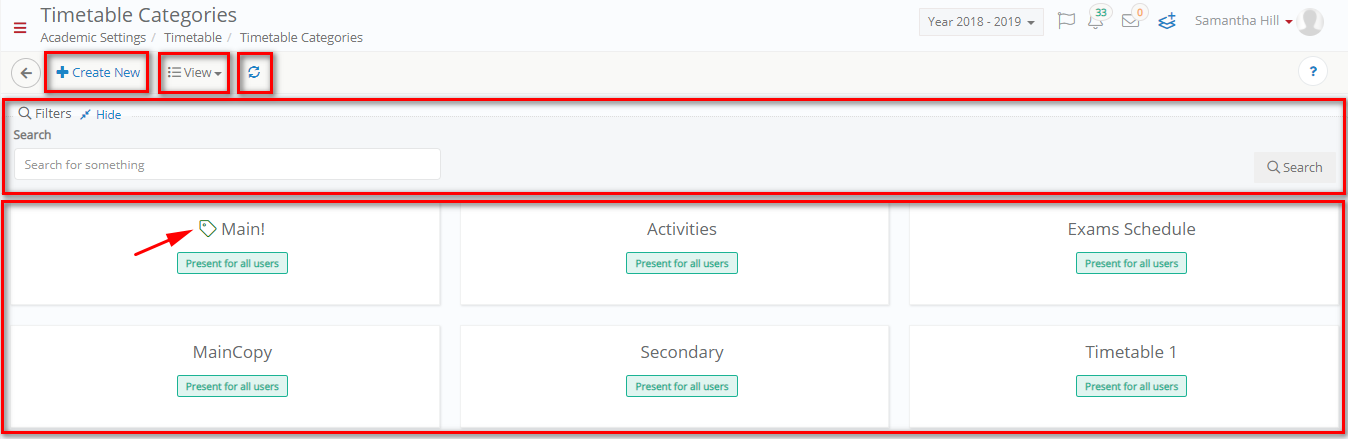
Figure 3
Note: One of the timetable categories must be set as the default (Figure 4).
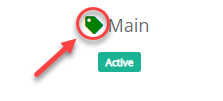
Figure 4
- Use the ‘View’ option to switch between Card or Grid View.
- Use the ‘Refresh’ button to refresh your data after having made any changes.
- Click on the category card to edit or delete a timetable category (Figure 5).
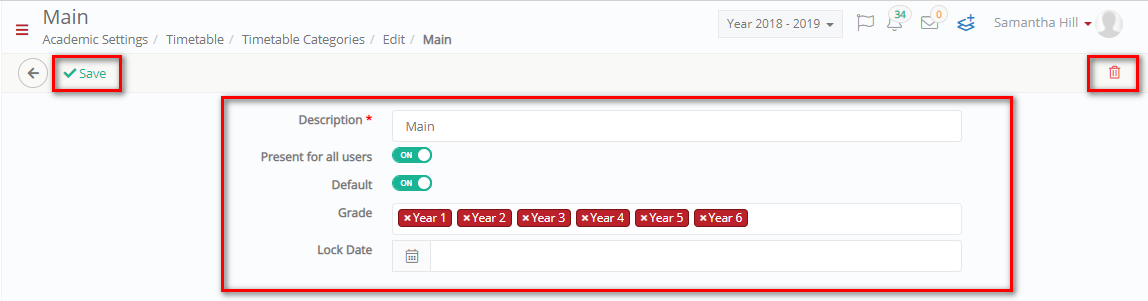
Figure 5
Create New
Click on the ‘Create New’ button to create a new Timetable Category (Figure 6).
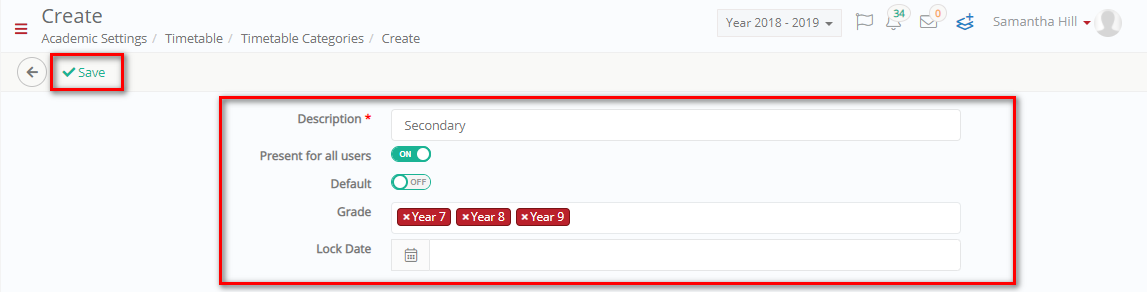
Figure 6
- Enter the category name in the ‘Description’ text box e.g. Secondary.
- Enable the ‘Present for all users’ button to activate the category and make it available to all users (teachers, students, etc.).
- Enable the ‘Default’ option to set the category as the default time category.
- Select the Years that will have access to this timetable category e.g. Year 7, Year 8, Year 9.
- Click on ‘Save’
Note: The lock date is an optional setting and can be left blank. If set, the timetable will be locked after the specified date and will not be editable.
Timetable Periods
In this section, you can create and manage the timetable periods. A period could be a class session hour e.g. 1st, 2nd, 3rd Hour etc., or a break e.g. 1st, 2nd, 3rd Break etc. (Figure 7)
Configuration > Academic Settings > Timetable > Timetable Periods
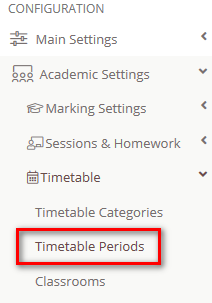
Figure 7
Note: the class session duration may differ from Institute to Institute, so one class session ‘hour’ might equal to 60, 45 or 30 minutes. Please also note that according to your attendance settings, this could affect the absences submission (i.e. if you want to have one absence per hour or one absence per whole session like ‘Mathematics from 9:00 to 11:00 a.m.).
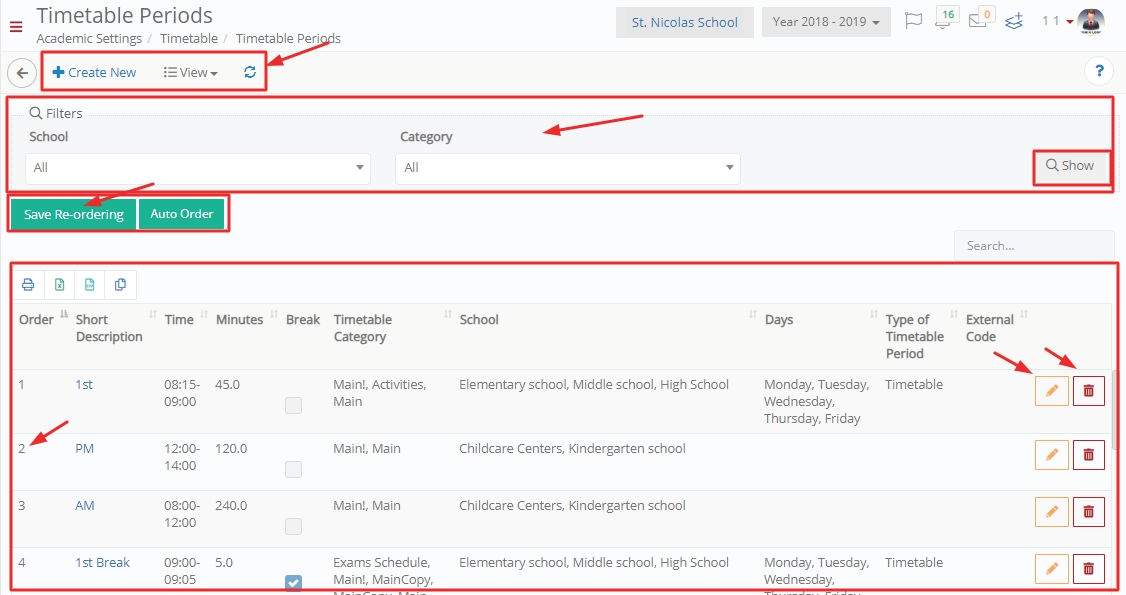
Figure 7
- Use the ‘School’ and ‘Category’ filters to show the available timetable periods.
- Use the View option to switch between Card or Grid View.
- Click on the edit button to edit the selected timetable period or on the delete button to delete it.
- Use the Refresh button after editing or deleting the timetable period to make sure that data is updated and synchronized.
- To reorder the timetable period, drag and drop an entry from its initial position to the preferred position then click on “Save Re-ordering”.
Create New
- Click on the ‘Create New’ button to create a new timetable period (Figure 8).
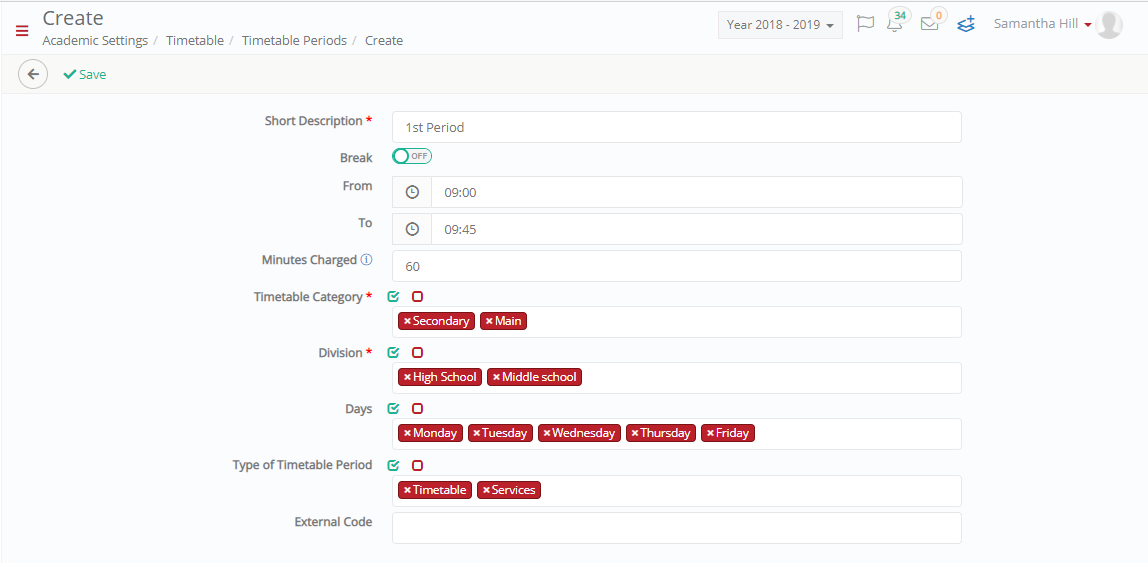
Figure 8
-
- Enter the Timetable Period name in the short description text box e.g. 1st Period.
- Activate the break switch if the period being created is a break period.
- Set the start (From) and end (To) time of the period e.g. From 09:00 To 09:45.
- The minutes charged for the period is automatically calculated based on the from and to time e.g. 45 minutes.
- Select a timetable category from the available drop-down list e.g. Main, Secondary.
- Select the Level (Division) that the period will be available for e.g. High School, Middle School.
- Select the days of the week that the period will apply to.
- Select the type of the timetable period e.g. Timetable or Services.
- Use the external code if you want to import a timetable from a third-party application.
- Click on ‘Save’.
Note: When creating a new Timetable Period, the External Code is important if you are going to import a Period from another Institute or import the timetable from a third-party application.
Classrooms
You can create and manage the classrooms that will be available in the timetable (Figure 10).
Configuration > Academic Settings > Timetable Classrooms
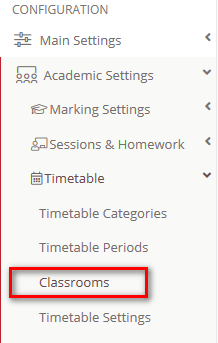
Figure 9
- Classrooms can be created as part of an institute or not in institute
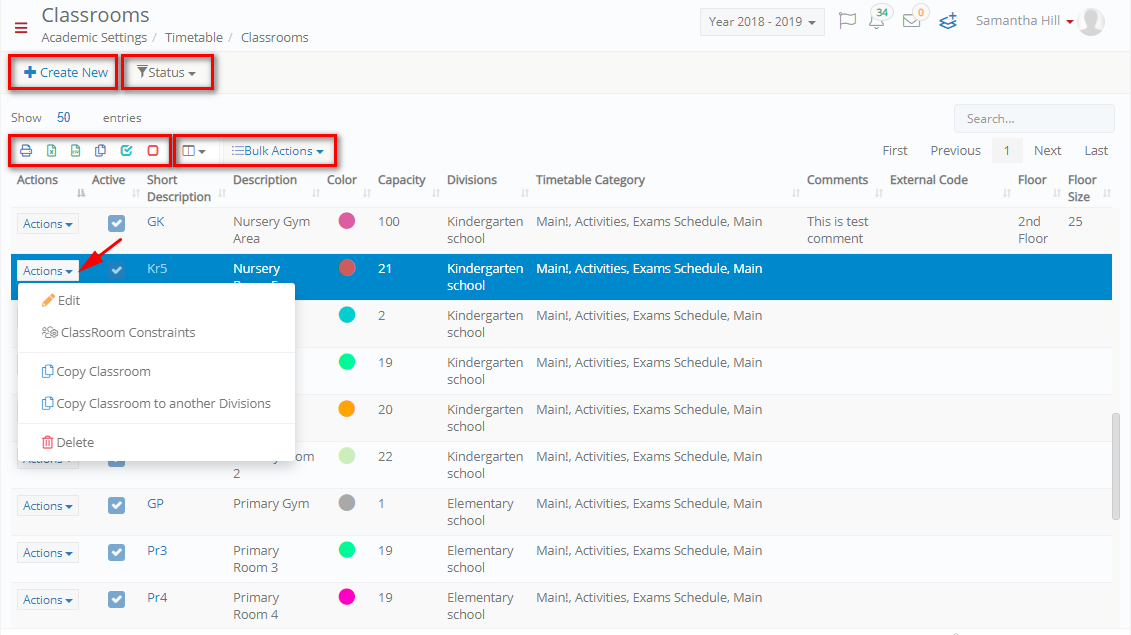
Figure 10
- Use the ‘Manage Column’ button to show/hide classroom information e.g. hide the external code column
- From the Actions dropdown button, you can:
- Edit a classroom
- Add classroom constraints
- Make a copy of the classroom or copy classroom to another level/school/division by clicking on the respective buttons.
- Delete a classroom
- Select a classroom or multiple classrooms and click on the Bulk Actions button to:
- Transfer and make a classroom available to other institutes (Figure 11).
- Make a copy of the classroom or copy classroom to another level/school/division by clicking on the respective buttons.
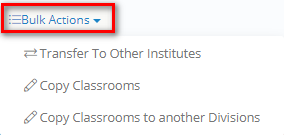
Figure 11
At the ‘Transfer to Other Institutes’ window (Figure 12):
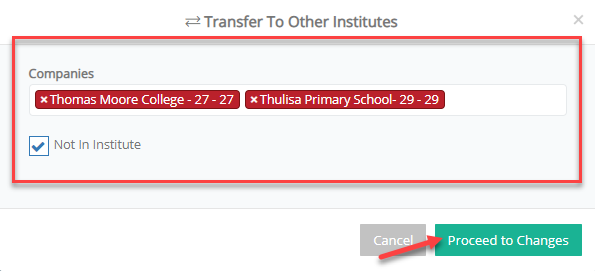
Figure 12
- Select the Institute(s) you want to make the classroom available to.
- Check the ‘Not in Institute’ box if you want to state that the classroom doesn’t belong to the selected institute (Availability of this button depends on you having the District Management module).
- Click on ‘Proceed to Changes’.
Create New
Click on the ‘Create New’ button to create a new Classroom (Figure 13).
The Create New Classroom window is subdivided into Main Data, Other Data and Third-Party Integrations sections.
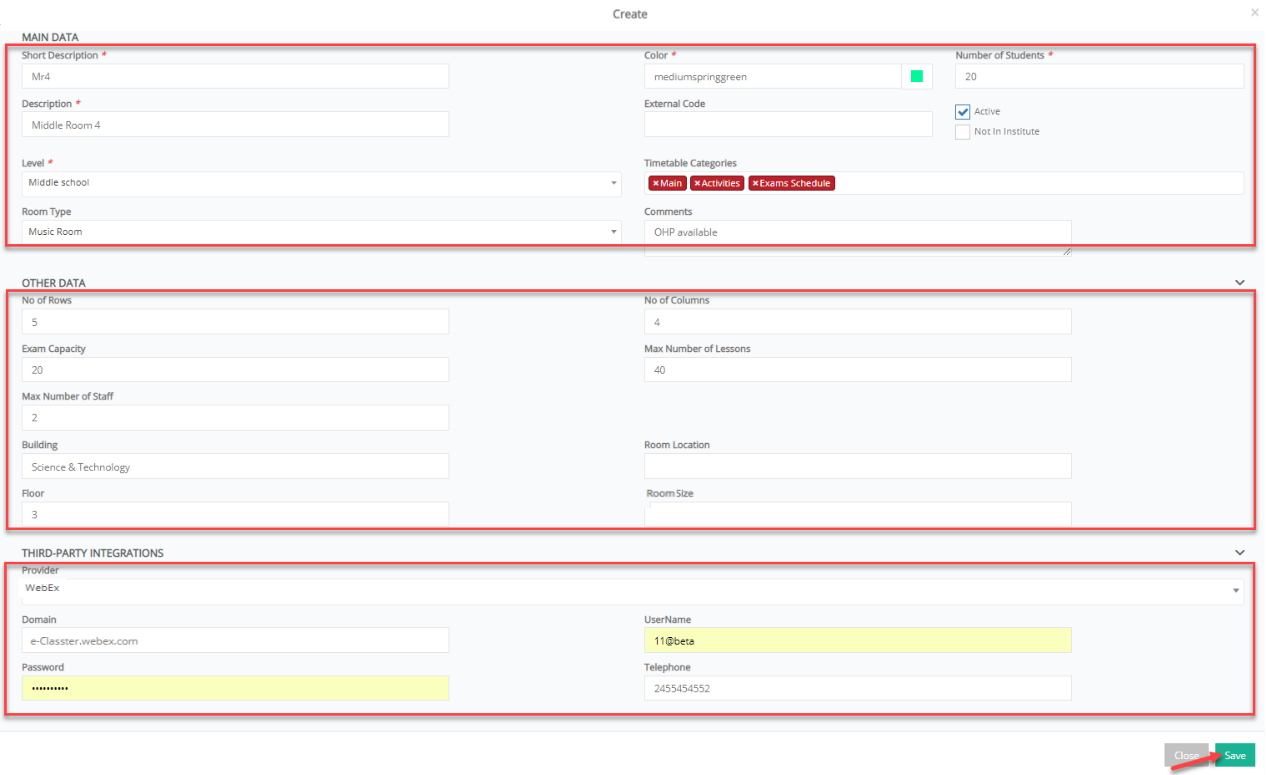
Figure 13
- At the Main Data area, you can add:
- Short Description: This is the classroom name that will appear on the timetable e.g. Mr4
- Description: A more detailed description of the classroom e.g. Middle Room 4
- Level: The Level that the classroom belongs to
- Room Type: The type of the room e.g. Classroom, Lab, Gym etc.
- Color: It is the color that the classroom will have on the timetable
- External Code: An external code of the classroom, used when we import a timetable from a third-party application
- Timetable Categories: Select which categories the classroom will be available to e.g. Activities
- Comments: Additional comments regarding the classroom e.g. Projector available
- Number of Students: The capacity of the classroom (enter 0 to state that there is no restriction in capacity)
- Active: Check if you want the classroom to be active in the timetable
- Not in Institute: Check this box if you want to state that the classroom does not belong to the Institute
Note: Fields with a red asterisk are mandatory.
- At the Other Data area, you can add:
- No of Rows: The number of desk rows available in the classroom e.g. 5
- Exam Capacity: The room capacity, regarding number of students, during an official exam session e.g. 20
- Max Number of Staff: The maximum number of staff that can concurrently teach in the classroom e.g. 2
- Building: The building where the classroom is located e.g. Science & Technology
- Floor: The floor where the classroom is located e.g. 3
- No of Columns: The number of desk columns available in the classroom e.g. 4
- Max Number of Lessons: The maximum number of lessons that can concurrently be enrolled in the classroom e.g. 2
- Room Location: Information about the room location
- Room Size: The size of the classroom
- At the Third-Party Integrations area, you can connect the physical classroom with a virtual classroom so that students may join a real-time eLearning session.To configure the virtual room, add:
- Provider: The provider of the service e.g. WebEx, Zoom.
- Domain: The domain used e.g. e-Classter.webex.com
- Username: The username used for the WebEx service connection
- Password: The password used for the WebEx service connection
- Telephone: The telephone used for contact reasons in case the WebEx service connection fails
- Click on ‘Save’.
Inventory Management
You can create and manage the learning resources of the institute in inventory management e.g. projectors, laptops, printers, etc. (Figure 15).
Configuration > Academic Settings > Timetable > Inventory Management
Figure 14
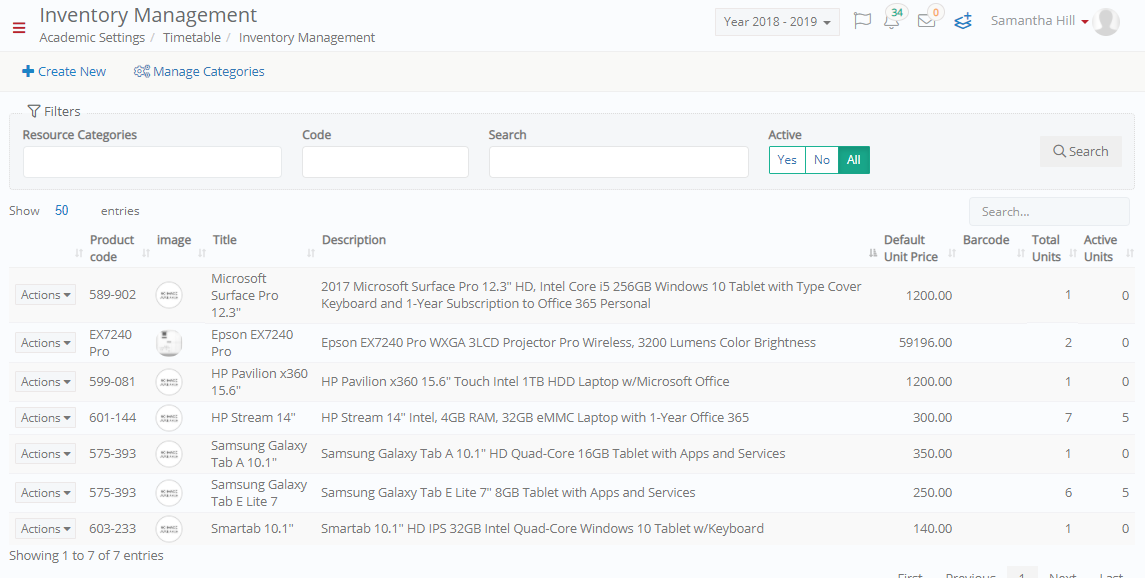 Figure 15
- From the Actions dropdown button, you can edit or delete an inventory item.
- Using the Manage Categories option, you can define the different resource categories e.g. Personal Computers, Speakers, Projectors, etc.
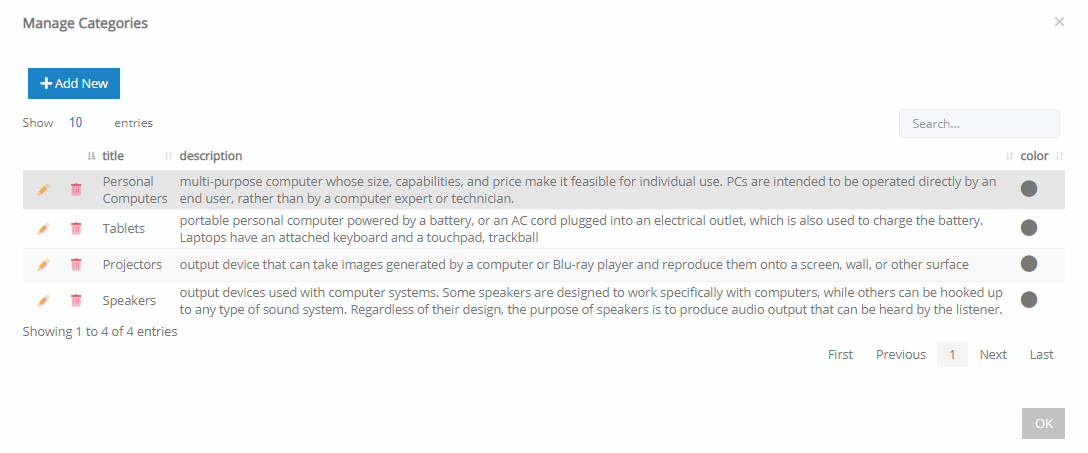
Figure 16
- Use the filters, resource categories, code, search to find resources in specific categories.
Create New
- Click on ‘Create New’ to add a new resource (Figure 17).

Figure 17
- Add a product code and the title of the resource.
- Add a detailed description of the resource.
- Add the number of units of the resource item available.
- Add the serial number, quantity, status, unit price, etc., of each item added.
- Save.
Dropdown Lists
In the timetable dropdown lists section, you can find the classroom types (Figure 19).
Configuration > Academic Settings > Timetable Dropdown lists
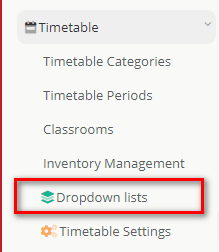
Figure 18
- Select the Classroom type from the Dropdown list filters.
- Use the Copy option to create a copy of the classroom type.
- Click on the edit button to edit the selected classroom type or on the delete button to delete it.
- To reorder the classroom type, drag and drop an entry from its initial position to the preferred position then click on “Save Re-ordering”.
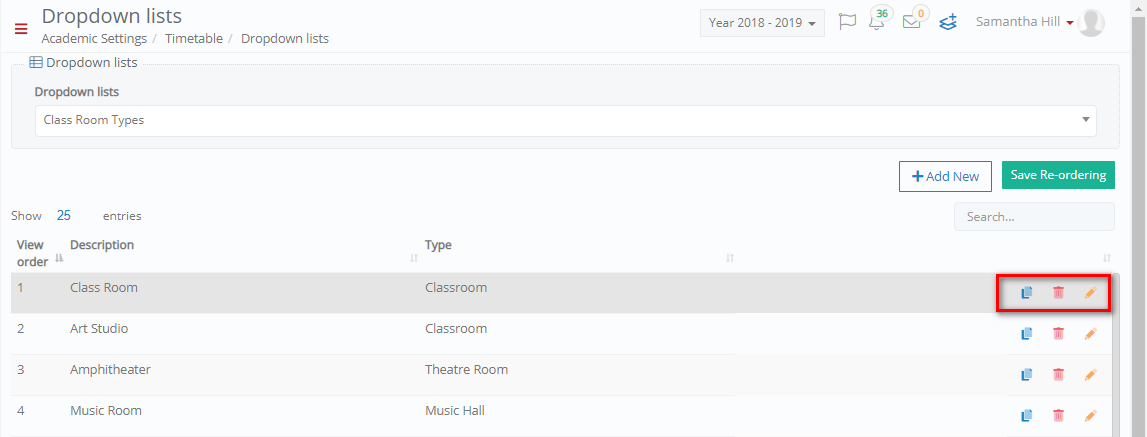 Figure 19
Add New
- Click on the ‘Add New’ button to add a new classroom type (Figure 20).
- Add a description, select a type then save.
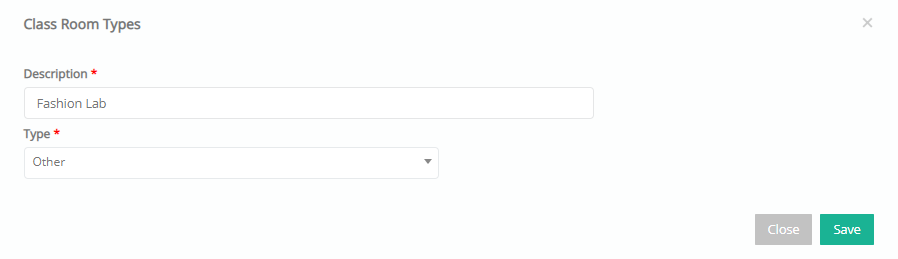
Figure 20
Timetable Settings
In this section, you can configure the basic timetable settings (Figure 21).
Configuration > Academic Settings > Timetable > Timetable Settings

Figure 21
The following settings are available (Figure 22):
- Show timetable comments to the following user types: Allows you to select the user types that will be able to see the timetable comments e.g. Students, Teachers.
- Classroom utilization is per: Select where the classroom will be available to use e.g. current institute (institute) or across all institutes (cross institute).
Note: Enabling Cross Institute classroom utilization, allows cross-institute management of classroom availability when creating timetables. This feature only works if all classrooms were created in or added to all institutes. - Use same continuative timetable periods as one session: By checking this option sessions that continue into another timetable period will be viewed as one session in the timetable e.g Math is 2 hours, so instead of two sessions Math 11.00-12.00 and Math 12.00-13.00, there will be one session Math 11.00-13.00.
- Timetable calendar time slot (for calendar view option): Here you should define the number of minutes used to split the timetable calendar. E.g. if you define 30 then the timetable calendar view will be split into 30 minutes rows (e.g. 09.00,09.30, 10.00 etc.).
- Make classroom selection mandatory in all timetable entries: Check this box to make the selection of a classroom mandatory when creating timetable sessions.
- Timetable sessions can overlap: Check this box if you want to allow a session to overlap with another session. For example, Group A has a timetable entry for ‘Subject A’ starting 09.00 and finishing at 10.00. If this setting is activated, then the end user can add another session for the same Group starting at 09.30.
- Default Min Minutes of Timetable Period per Lesson: Enter the minimum default minutes of timetable period per session/lesson e.g. 60 minutes.
- Create enrollments when timetable creation: This option if selected will add all the entries in from timetable creation to the Teachers/Lecturers enrollments. If this option is not selected, then any lecturer enrollment you may make will not be connected to the Teacher/Lecturer enrollments. This option depends on the way you wish your institution to work.
- Default minutes duration on timetable views: Enter the minimum default minutes of timetable period as viewed on the timetable e.g. 60 minutes.
- Show hours on timetable views: Check this box to show hours on the timetable calendar views.
- Show break slot on timetable views: Check this box to show slots that have been marked as a break on the timetable calendar view.
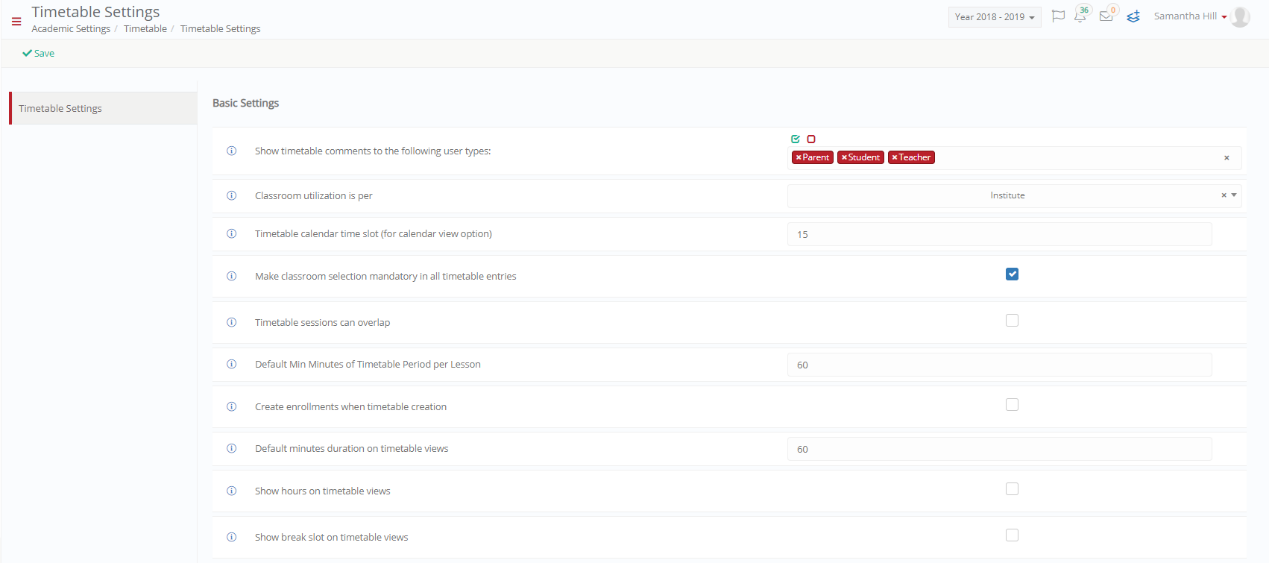 Figure 22
Note: Terminology is configurable and may vary from institution to institution e.g. Groups can be Classes and Subjects may be Units etc.
- This is customizable and will depend on the terminology used by the institution, e.g. Grade, Year, etc.
- This is customizable based on the terminology used by the institution e.g. Level, Division, School, etc.
- Level is a customized terminology; therefore, it may differ in your configuration e.g. Location, Division, School, etc.
- Available in future versions.