

Classter’s pointing system works as a point-based reward system.
Note: For this system to work fully, we need to have the CRM module, otherwise it works partially.
Pointing System Settings
To configure the pointing system, go to: Configuration > Academic Settings > Marking Settings > General Settings
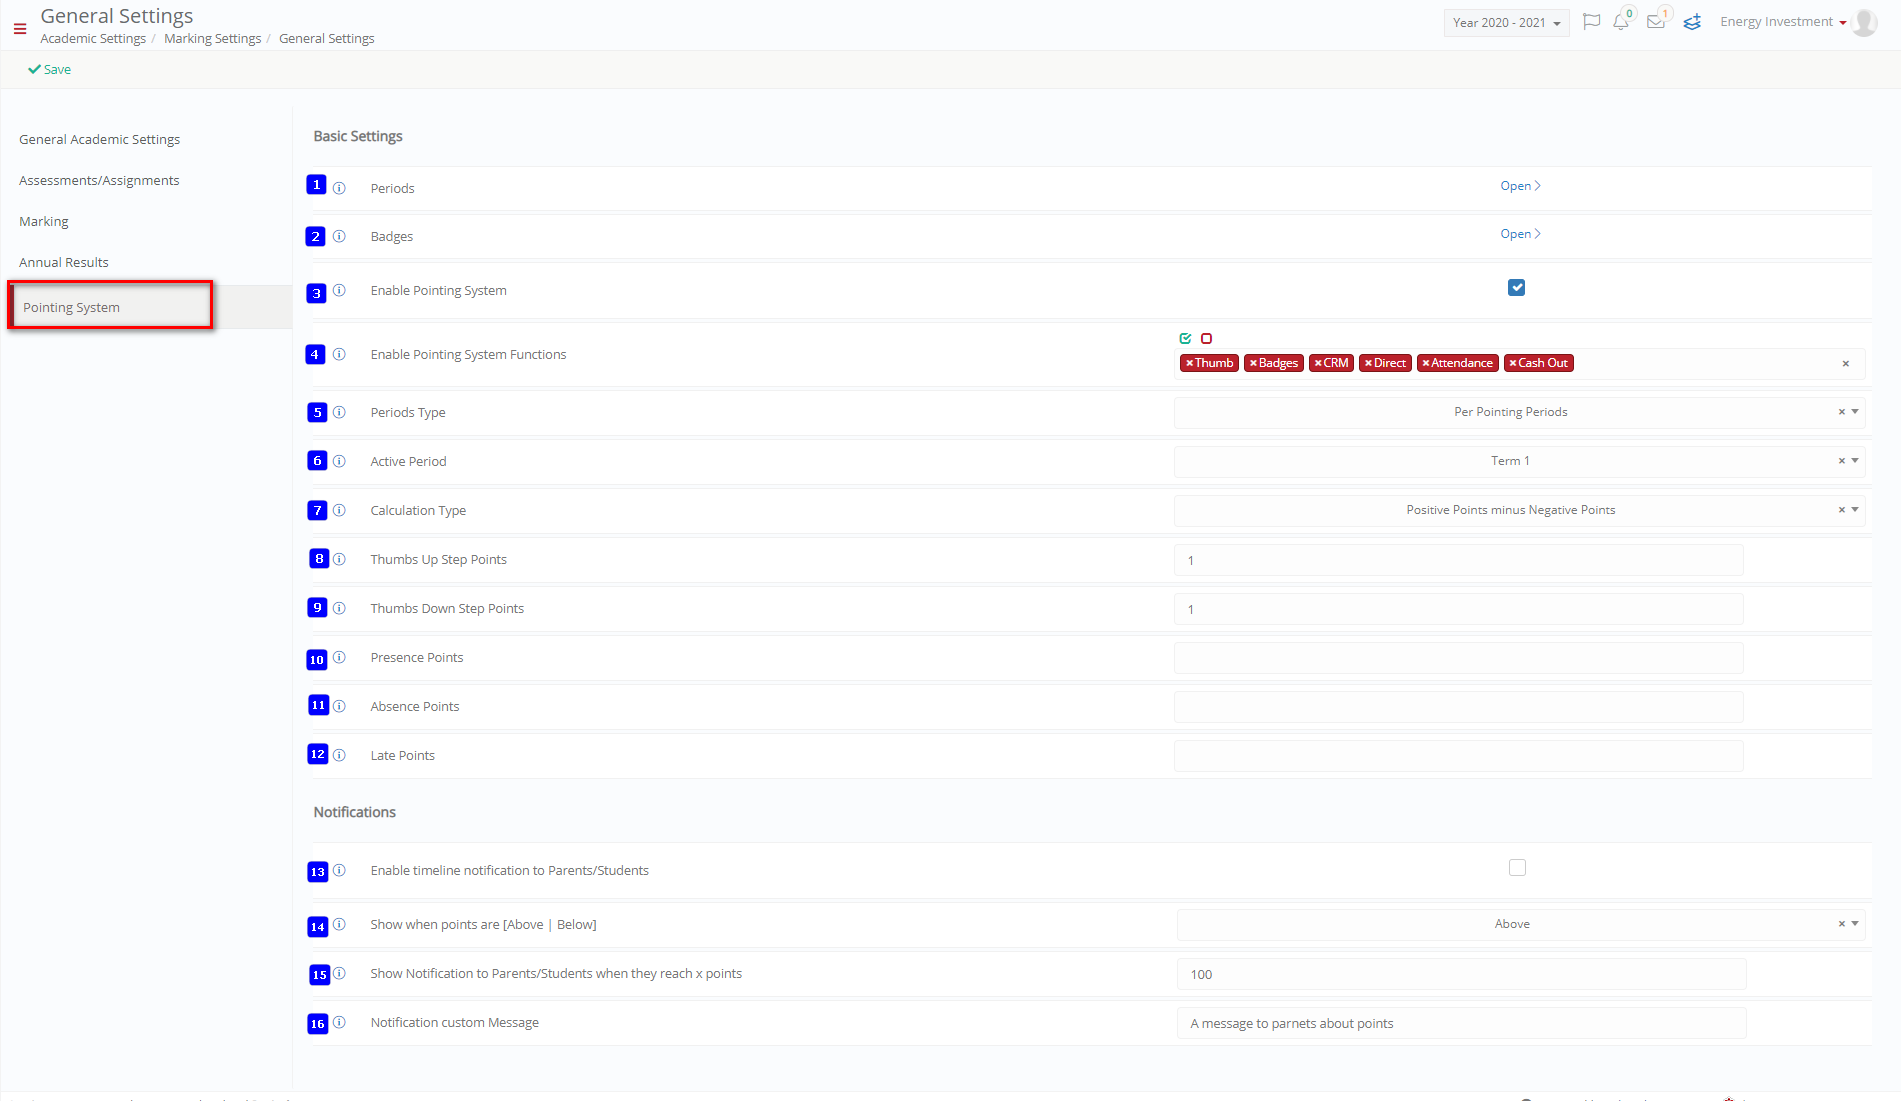 Figure 1
Basic Settings
- Periods: To create periods for the pointing system, click on the link ‘Open’ to get redirected to the Pointing System Periods Dropdown Lists. Here you can create periods to be used in the pointing system. Note: There is no need to create the period here if it would be identical to the marking period used by the institution, i.e. if the Periods Type is set to Academic Period.
- Badges: To create Badges to be used in the pointing system, click on the link ‘Open’ to get redirected to the Badges Dropdown Lists.
- Enable Pointing System: Check this box to activate the use of the pointing system across the institution.
- Enable Pointing System Functions: Select which pointing system functions to enable. That is, how the points will be assigned. For example, with cash out, you can convert forms to badges. Other pointing system functions include:
• Badges,
• Thumb (Up and Down),
• Direct,
• CRM,
• Attendance (Absences, etc.),
• Cash out.
- Periods Type: These are possible period types:
• None: For this setting, the points never expire and are carried over from one academic period to the next. This can be used for a unique pool of points.
• Academic Period: This uses the configured school period. Points expire after the current academic period.
• Per Pointing Periods: This uses the periods configured in the Pointing System Periods Dropdown List.
- Active Period: Here, we define the active period to be used for the pointing system. This is the period configured in Pointing System Periods Dropdown List. This needs to be changed when the term changes/ a new term starts. Note: The points are assigned based on the current date if there is no active period set.
- Calculation Type: The calculation type can be:
• Positive points minus Negative Points,
• Sum of All (only positive points),
• Positive & Neutral Points minus Negative Points (here neutrals also count as positive).
- Thumbs Up Step Points: This is the number of points to be assigned when a thumbs up is given. E.g. 2 means two points will be added when a thumbs up is given.
- Thumbs Down Step Points: This is the number of points to be deducted when a thumbs down is given. E.g. 2 means two points will be deducted when a thumbs down is given.
- Presence Points: This is the point that will be given for an attendance presence. E.g. If 1, 1 point will be added for being present.
- Absence Points: This is the point to be deducted for absences. E.g. If 2, 2 points will be deducted for being absent (without justification).
- Late Points: This is the point to be deducted for lateness. E.g. If 1, 1 point will be deducted for being late.
Notification Settings
- Enable timeline notification to Parents/Students: Check this box to enable sending of notifications to students and parents.
- Show when points are [Above | Below]: Choose if notifications are to be sent when points are above or below the configured threshold in Show Notifications to Parents/Students when they reach x points.
- Show Notifications to Parents/Students when they reach x points: This will notify parents and students when the students reach the configured point limit.
- Notification Custom Message: Add the custom message to be displayed to parents and students when they get the notification.