

In Classter, when you are using the Application Manager, both application and student statuses are used, while there are always some basic preconfigured application statuses.
Applicants can see the application status in their portal (Figure 1). In this example, the applicant has submitted an application and can see the application status which is Submitted.
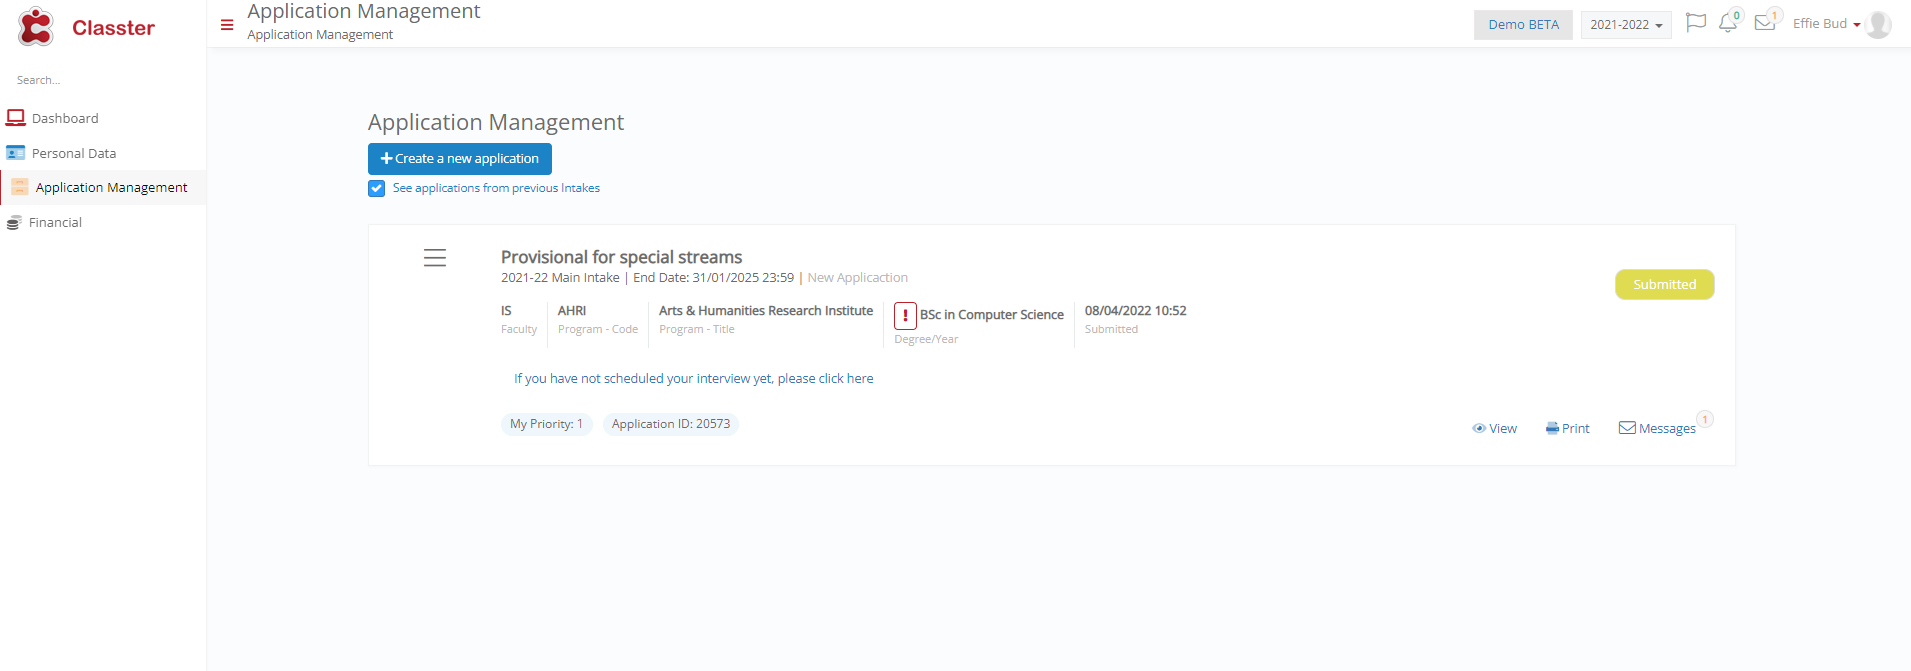 Figure 1
As a back-office employee, you must create or use an already existing provisional status type.
To do that, navigate to the menu: Configuration > Admission > Dropdown lists and select the Application Status Dropdown list. (Figure 2)
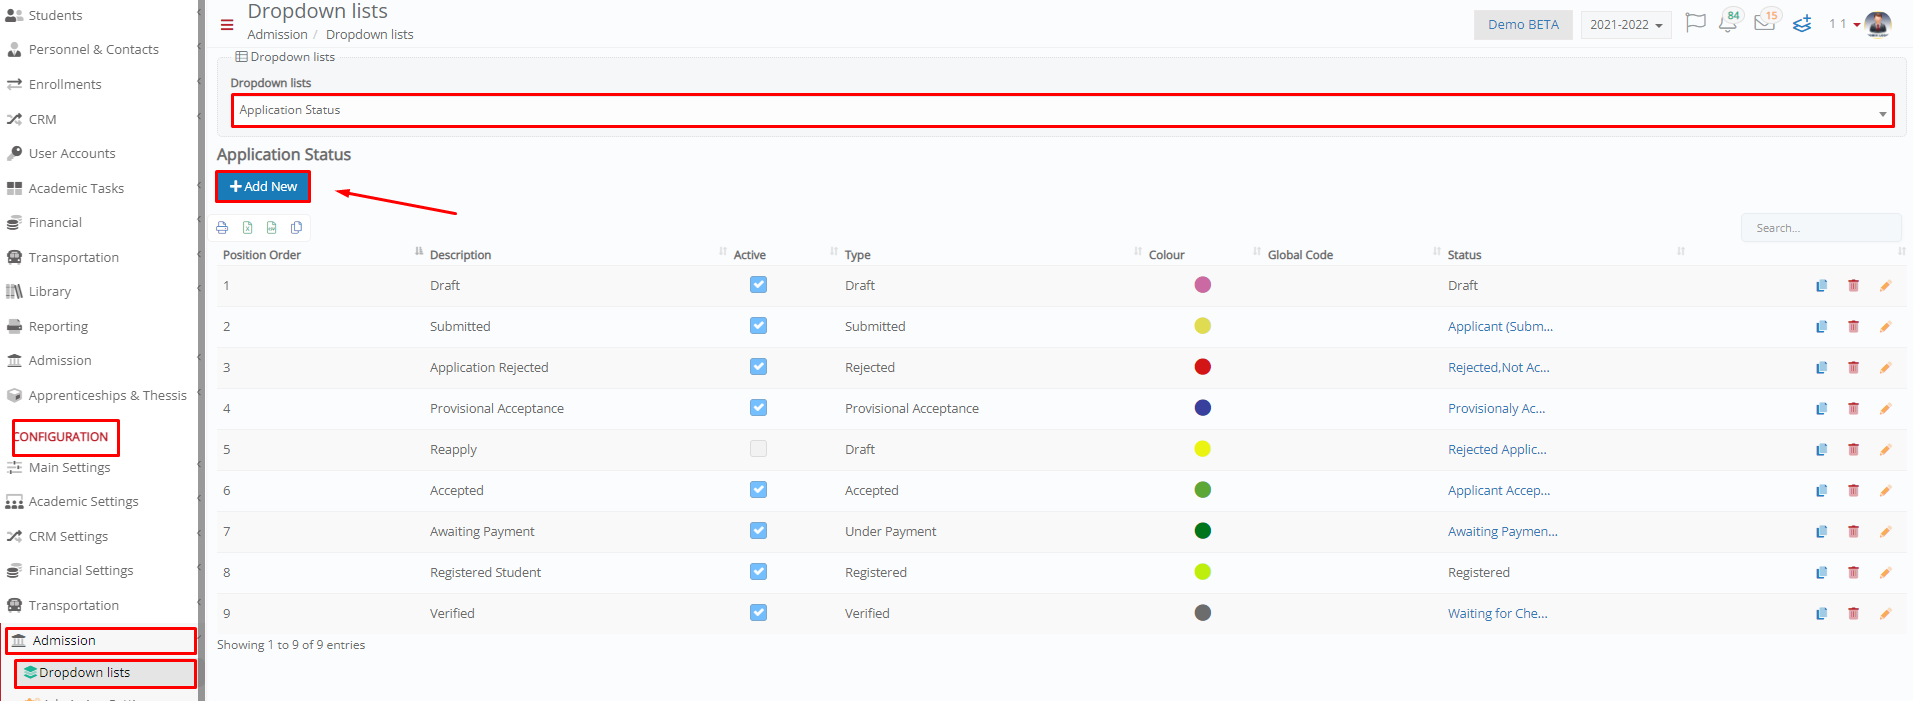 Figure 2
Each status has a position order, description, type, colour, and is connected with a Student status. You can also activate or deactivate those statuses. Provisional status is the status that allows the end-user to choose whether to accept the offer or not.
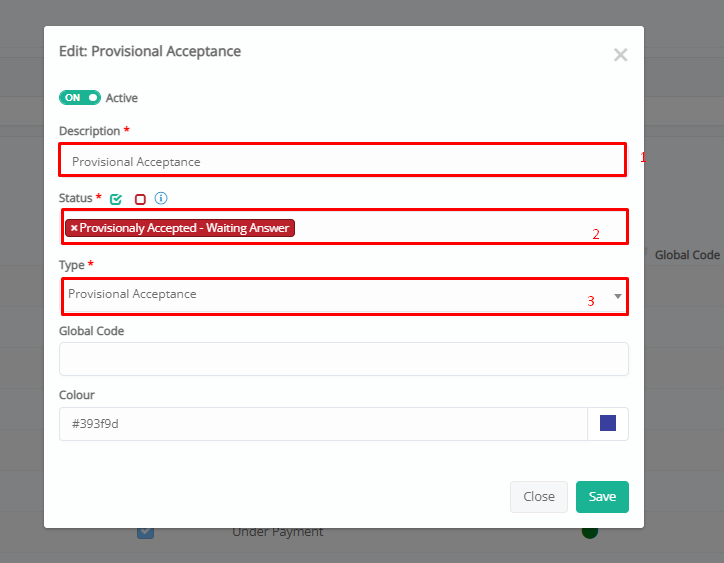
Figure 3
Click on the Add New/Edit status button and the window in Figure 3 will pop up. Fill in the fields accordingly as described below:
- Description: Fill in the description.
- Status: Select a student Status. If it doesn’t exist, leave it empty.
- Type: Select the Provisional Acceptance type of the application.
If there is no appropriate Student status, you must create one to connect it to the corresponding application status.
Go to CONFIGURATION > Main Settings > Dropdown Lists and select the type of Student and the dropdown list Status.
Click on the corresponding buttons to add a new status or edit one. (Figure 4)
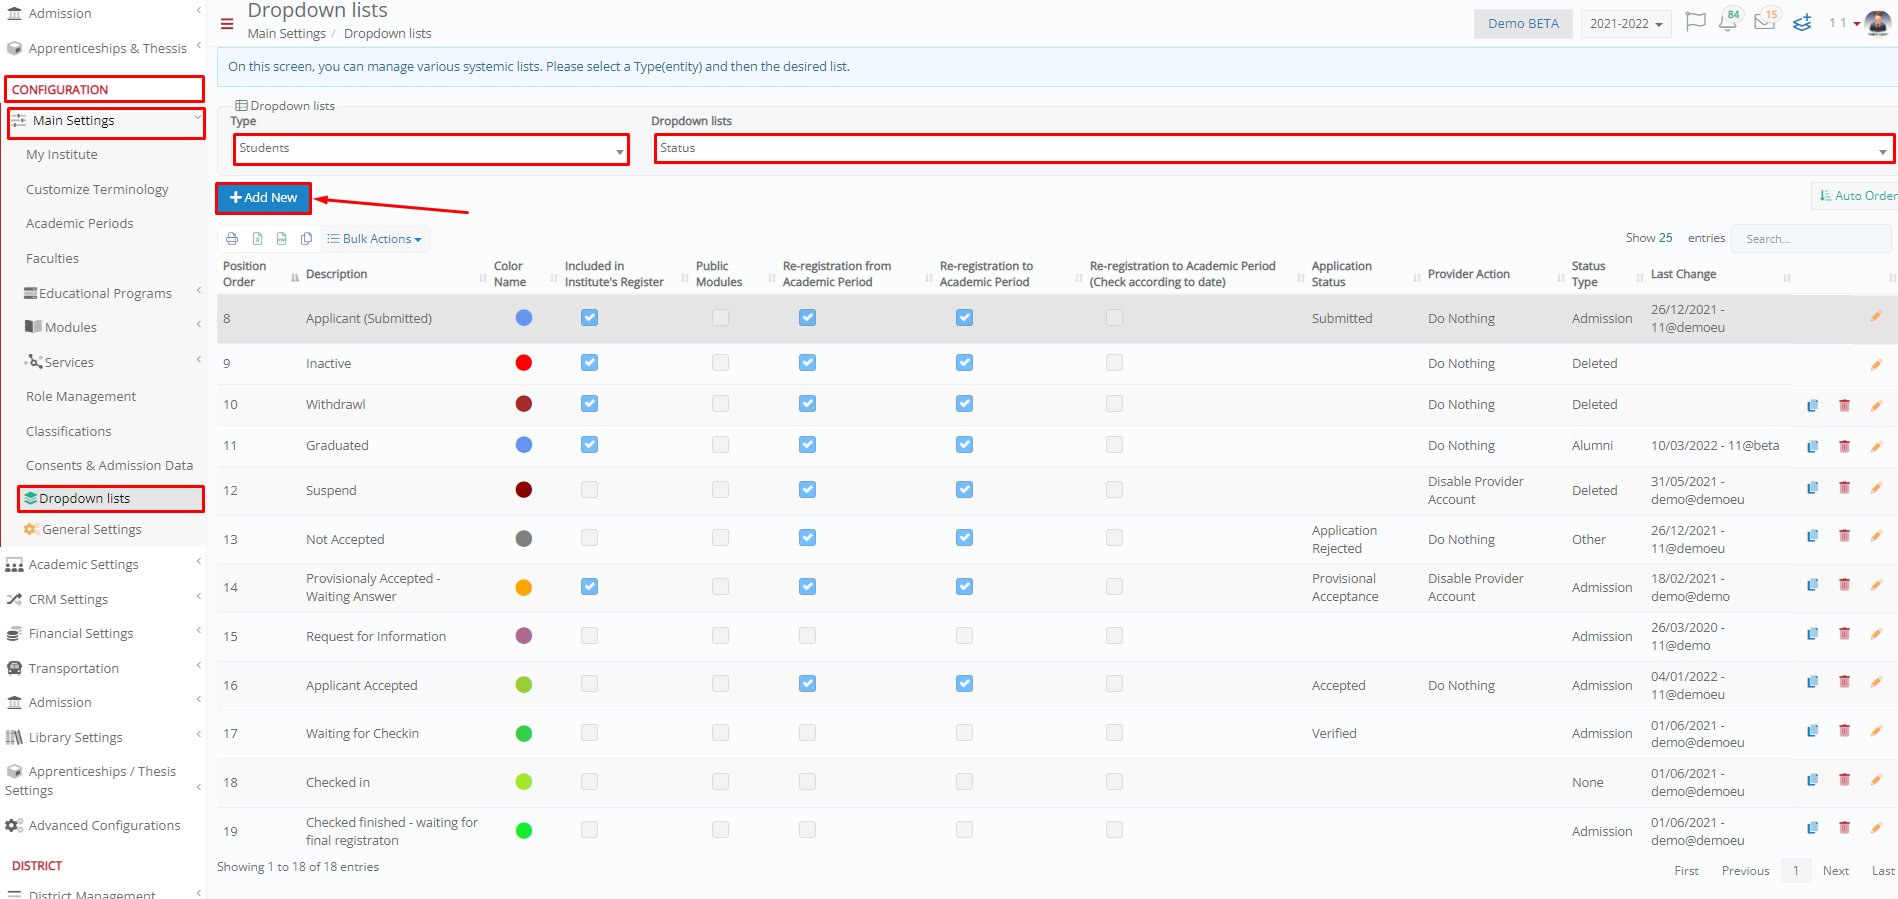 Figure 4
The following window will pop up (Figure 5). Fill in the appropriate fields,
- Description: This is the name of the status, only back-office employees can see this description.
- Status Type: Select admission
- Application Type: Select the status you have created in the previous steps.
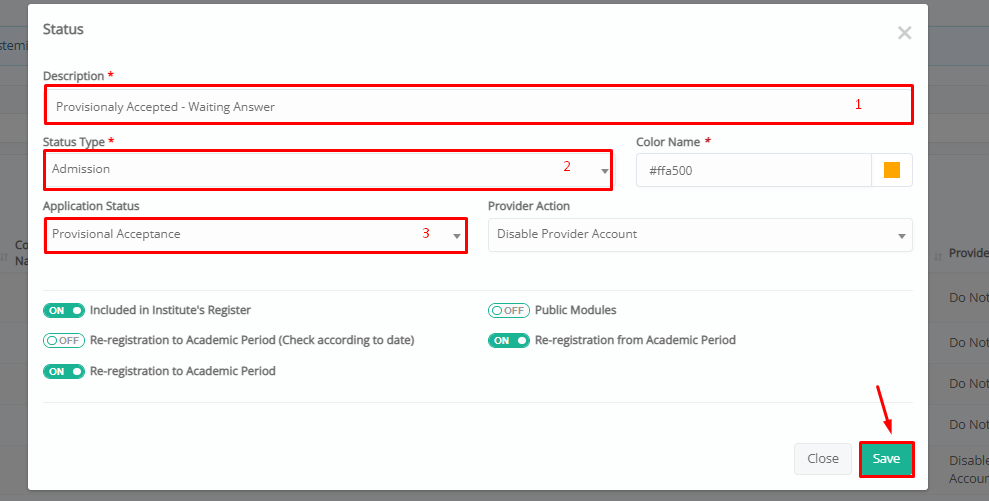
Figure 5
Fill in the form and click Save. Now you have configured both Application Status and Student status, which are also connected.
Now an employee needs to change the Student’s status to the one created. To do that, go to MANAGEMENT > Admission > Application Management and select the Student’s application to change the status. By clicking actions, a menu appears. Select change status for this application and a pop-up window will appear. (Figure 6 & 7)
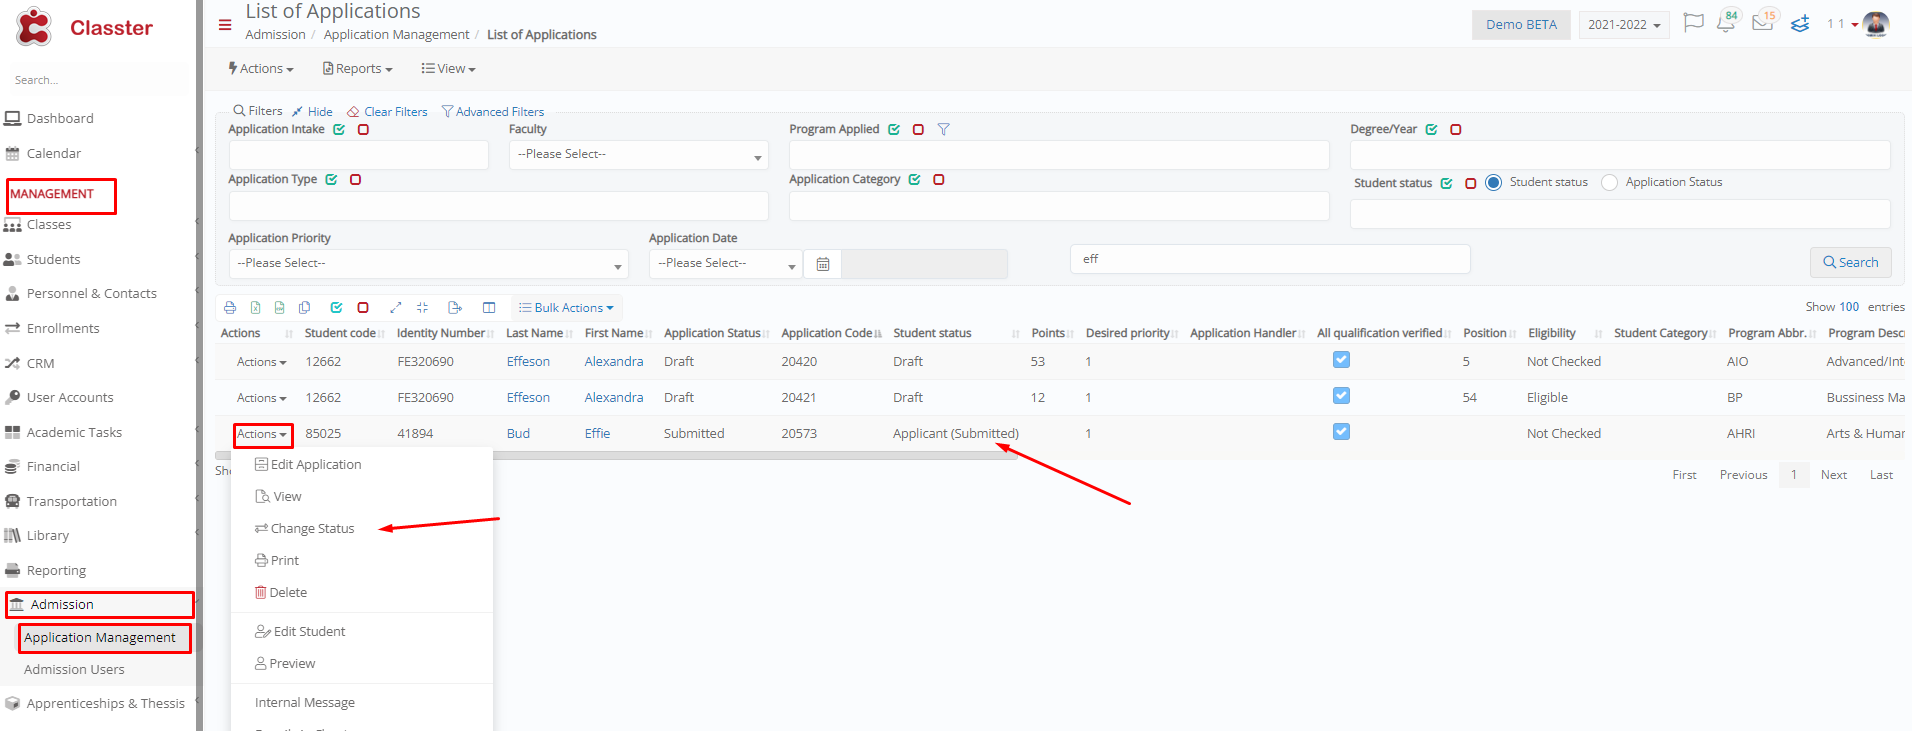 Figure 6
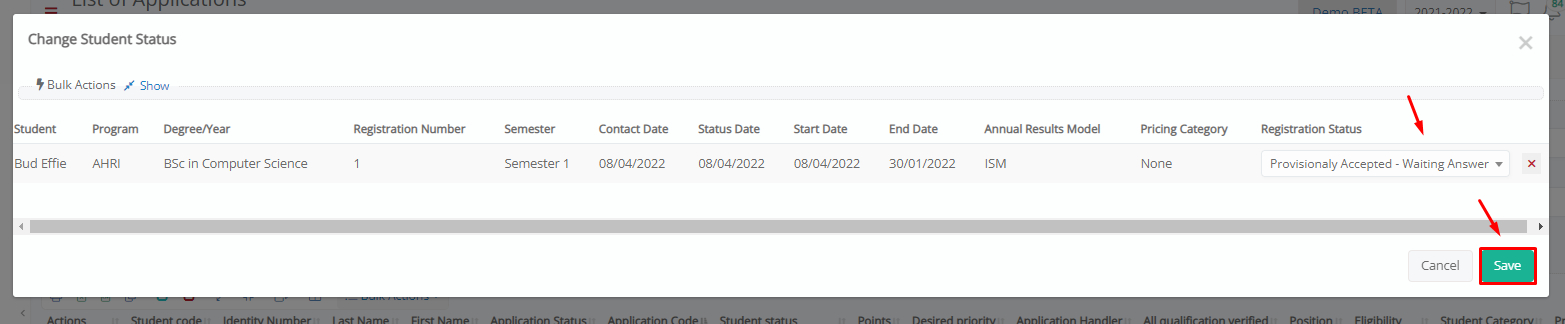 Figure 7
The Applicant will be able to see the new status and the options of accepting or rejecting the offer in the Application Management menu. (Figure 8)
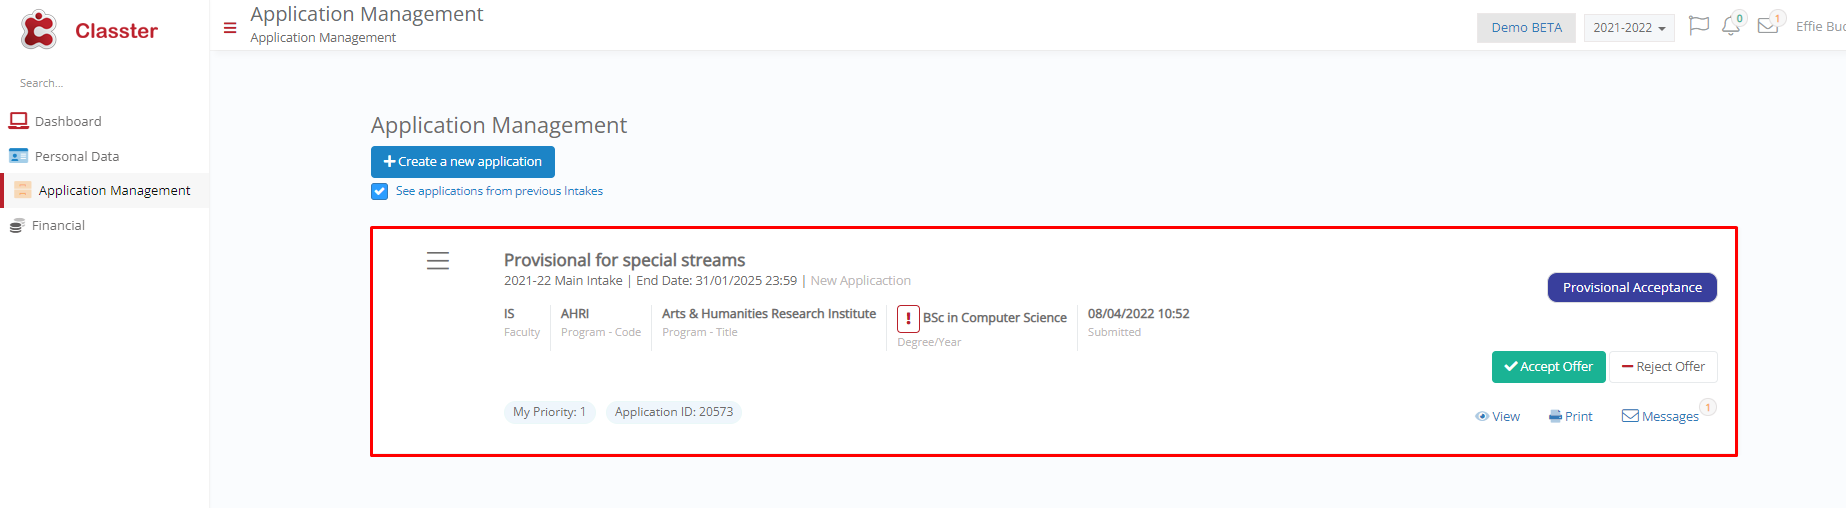 Figure 8
Case 1: Accept Offer
If the Applicant accepts the offer, a warning will appear. The information text in the warning is editable in the admission settings. (Figure 9)
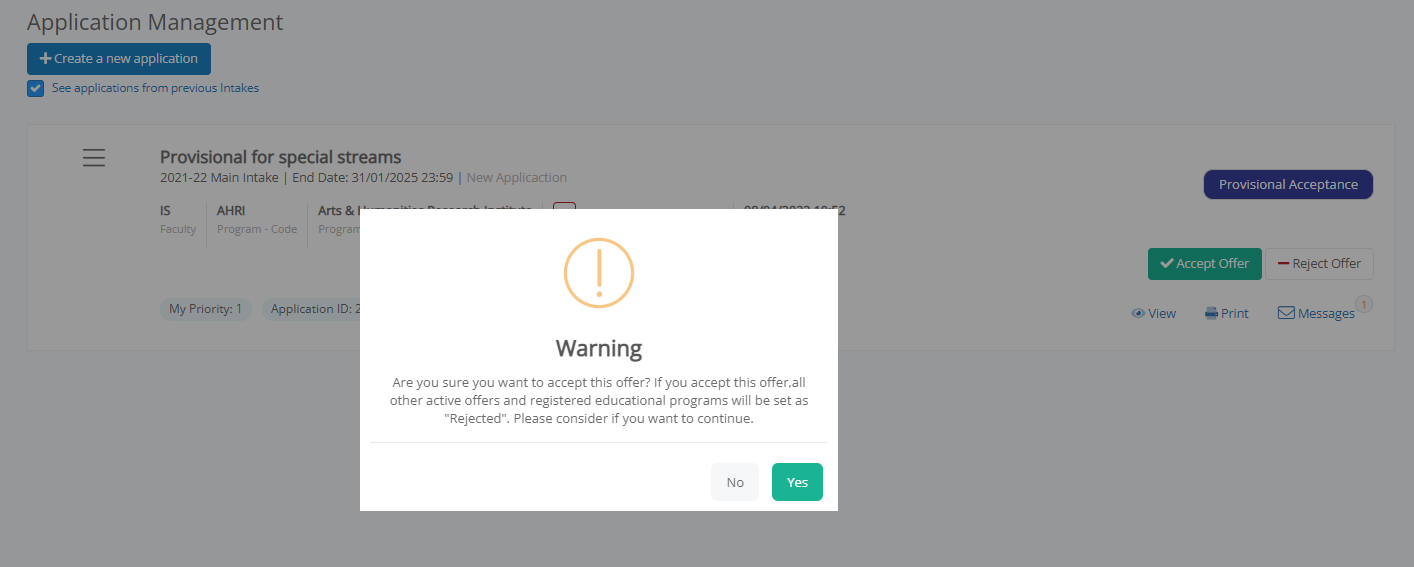 Figure 9
After the acceptance, the status will change as shown in Figure 10. Which status will be selected when a student accepts an offer is a matter of configuration in the settings.
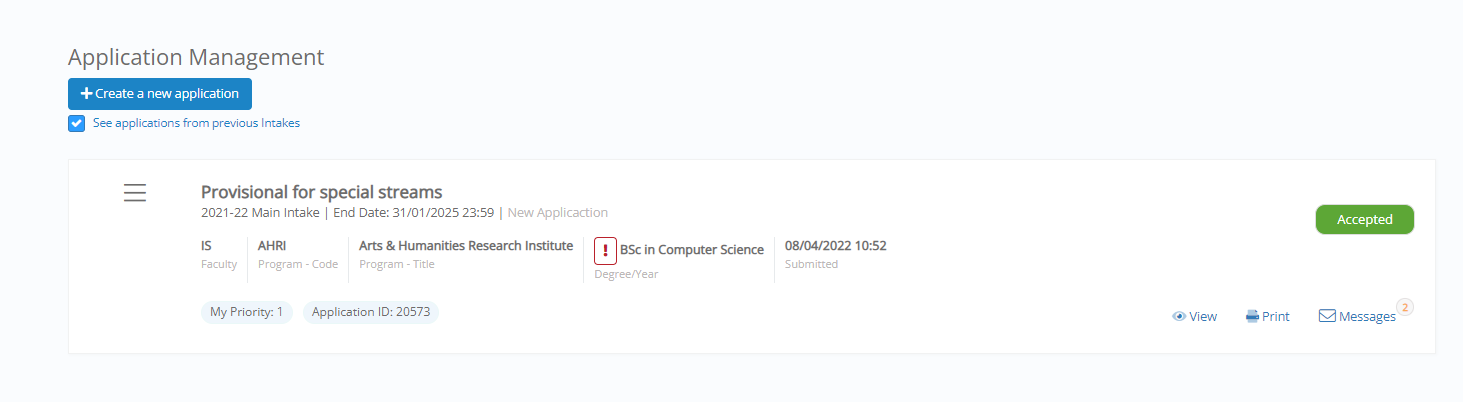 Figure 10
Case 2: Reject Offer
If the user rejects the offer, then a window as in Figure 11 appears. Classter will ask the reason of the rejection.
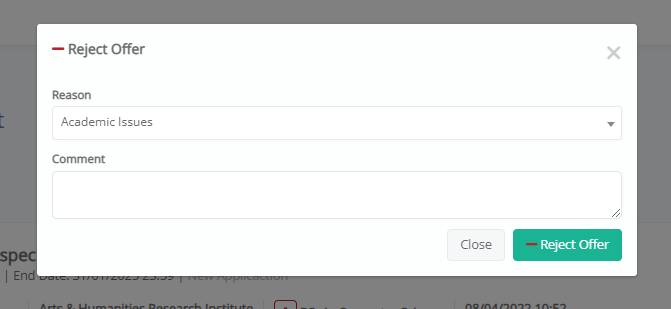
Figure 11
After clicking the “Reject Offer” button, a warning message will appear (Figure 12).
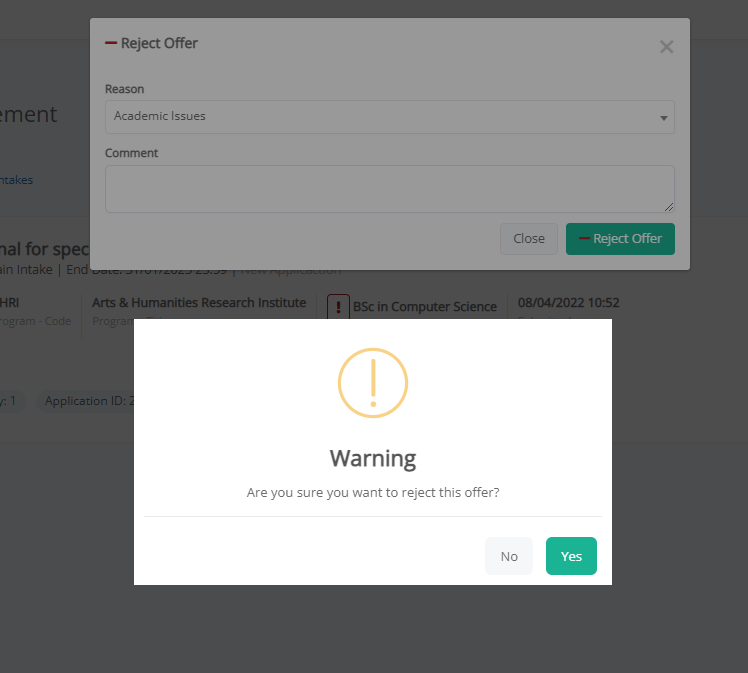
Figure 12
When the applicant rejects an offer, the status of the application will change as in the case of the acceptance. Which status will be selected when a student rejects an offer is a matter of configuration as well. (Figure 13)
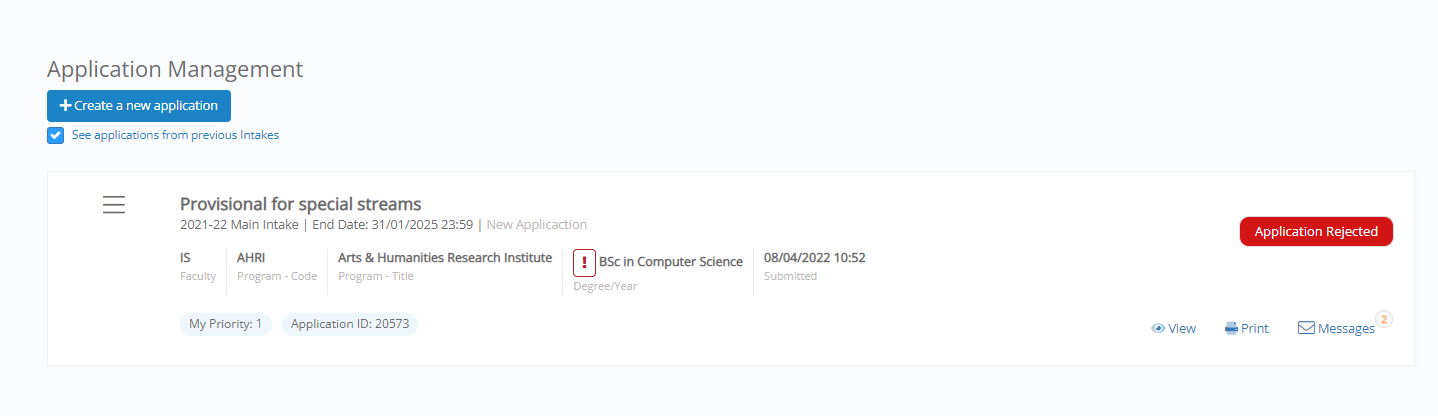
Figure 13
Note: The settings regarding the whole acceptance/rejection process can be found in CONFIGURATION > Admission > Admission Settings > Application Management in the Application Acceptance & Rejection Settings section.
Find more or post your questions on our Facebook Community Page. Also, watch our how-to videos on our YouTube channel.