

Educators in Classter assigned with a Mentor role can navigate to their students’ profiles, view their data and perform several actions like send messages, schedule a meeting, or keep notes and remarks.
How can I find the students that I am advising?
Go to “My Students” and apply the ‘I am their Mentor’ filter in order to get the related students list. (Figures 1 & 2)
 Figure 1
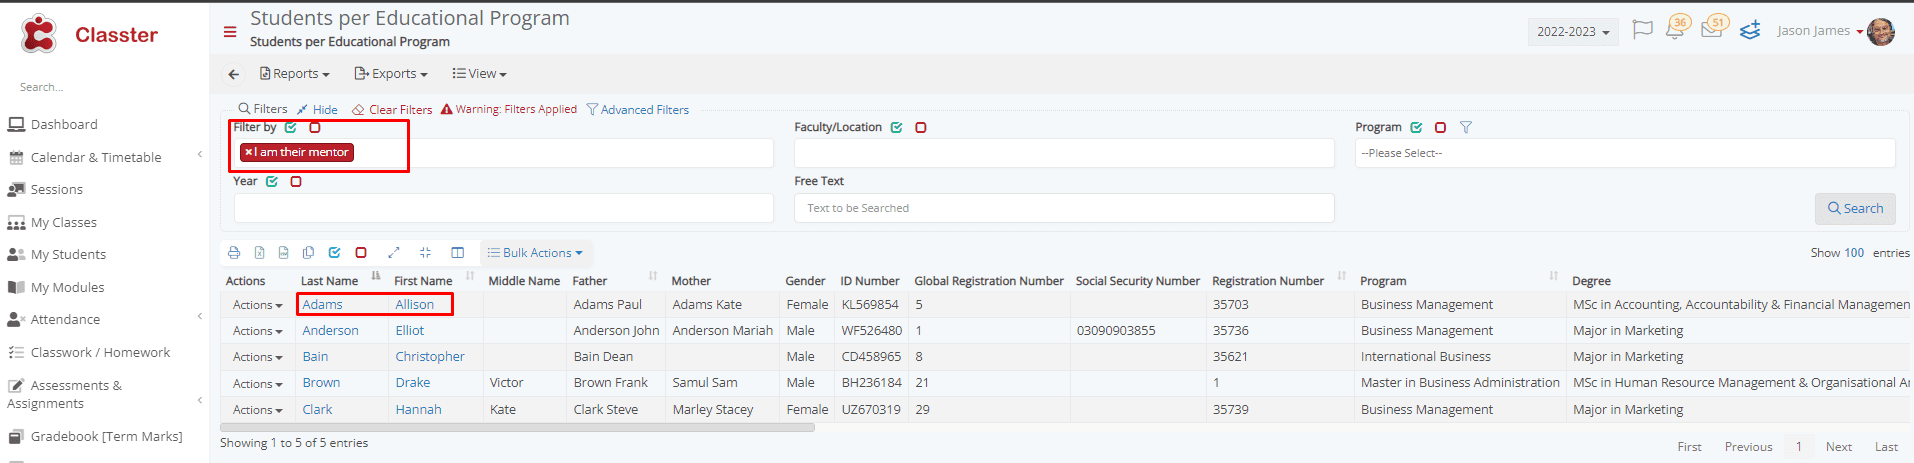 Figure 2
How can I view data related to the students that I’m advising?
You just need to click on the student’s name (Figure 2) and you can view performance data, attendance and remarks of other Educators or Administrative staff related with the student. (Figure 3)
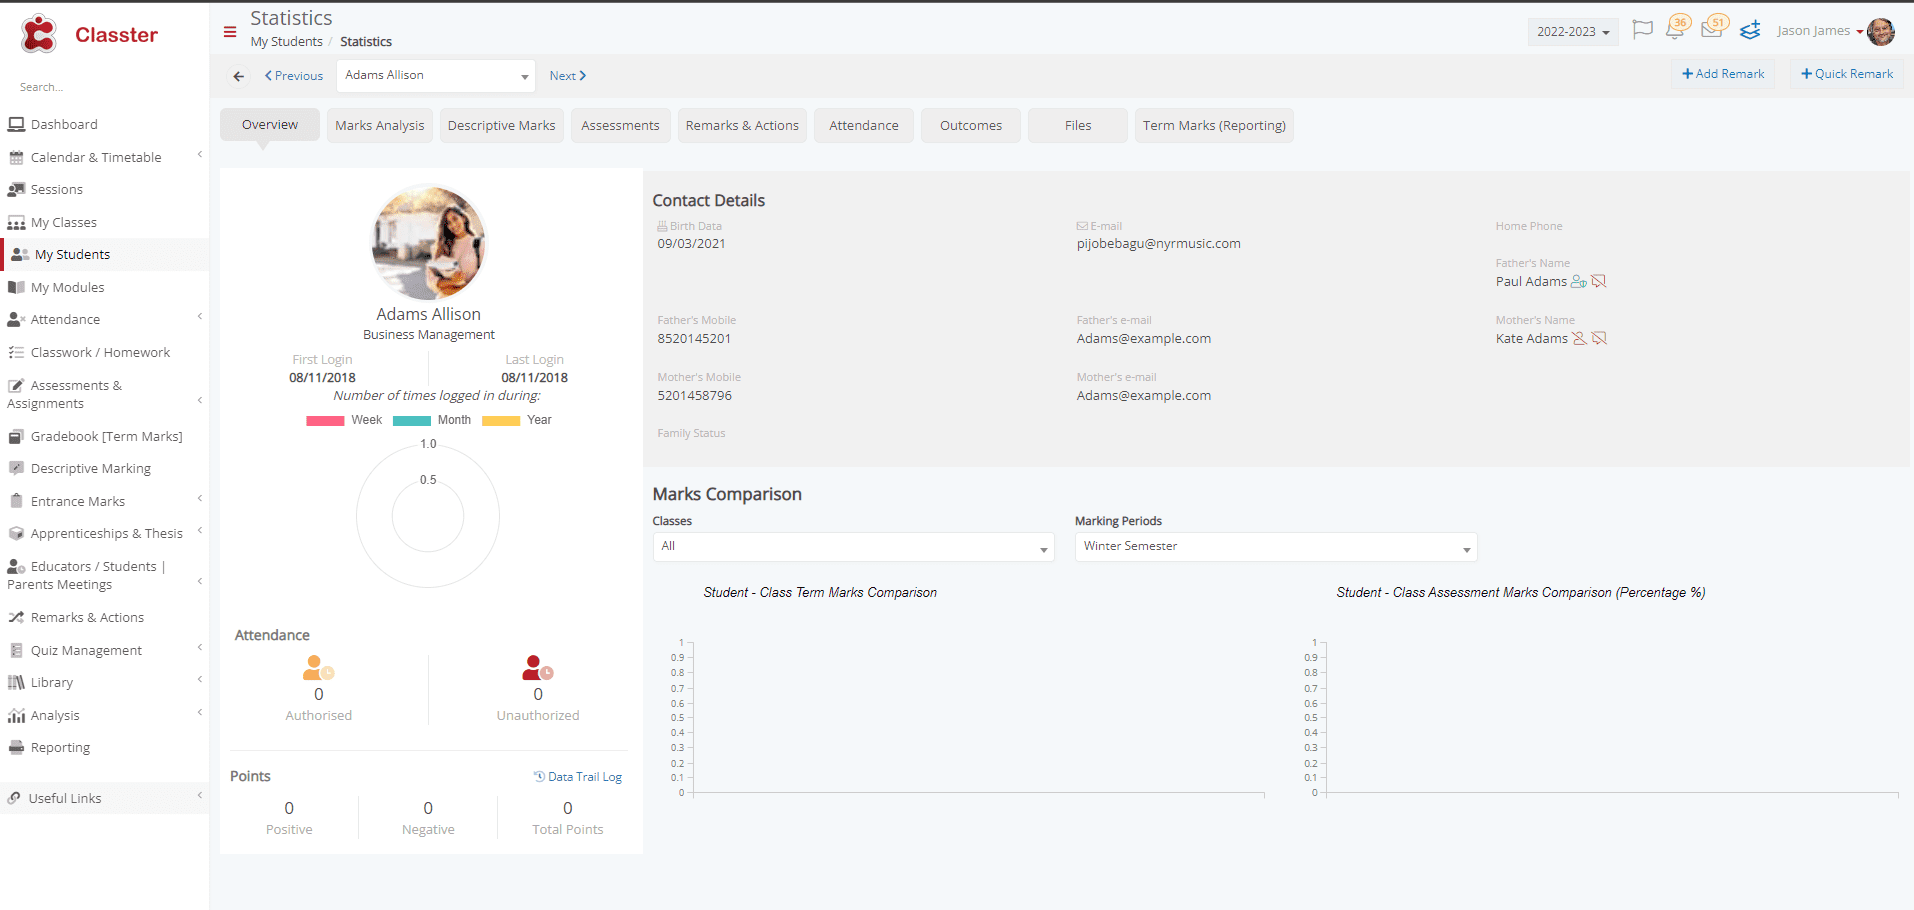
Figure 3
How do I communicate with my students?
From the actions button, you can send an Internal message or an email. (Figure 4)
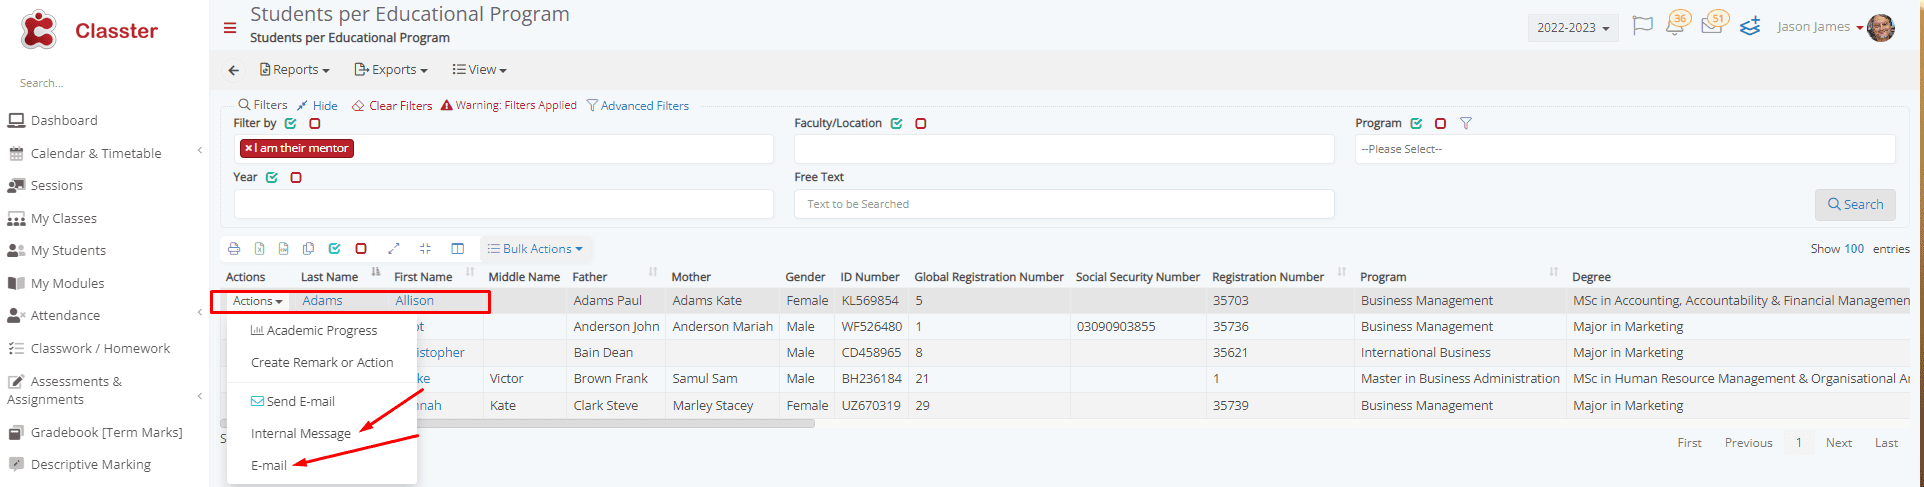 Figure 4
The internal message will appear in the student’s message center on their portal, or as a notification in their mobile app. (Figure 5)
The email will be sent to their declared email address.
![]()
Figure 5
How do I make a general remark for a student?
From the list or the student profile, you can add your remarks and comments (Figure 6).
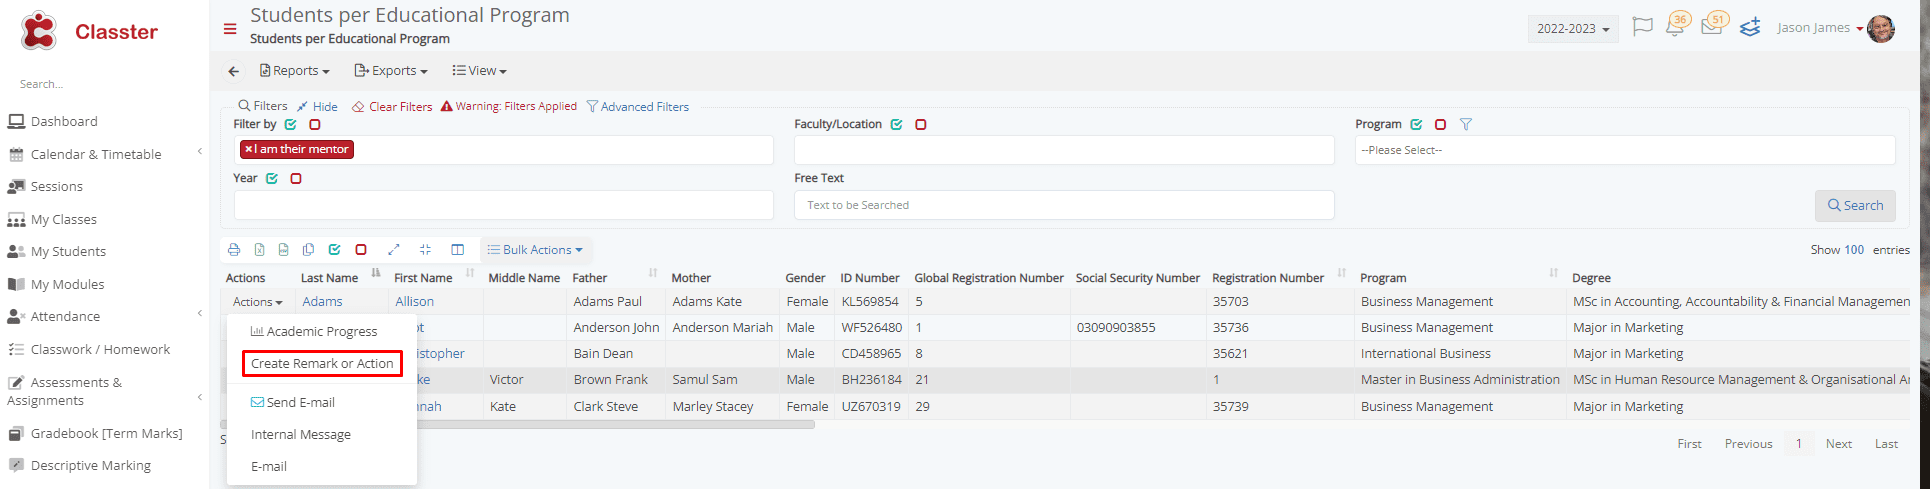
Figure 6
A popup window will open for you to write down all the information needed. (Figure 7).
Click on the “Save” button after creating the remarks.

Figure 7
How do I schedule and invite student(s) to a meeting?
From the students list, you can select one or more students and invite them to a meeting.
The steps are: Select a student -> Go to Bulk actions -> Select the “Add to calendar event” option. (Figure 8)
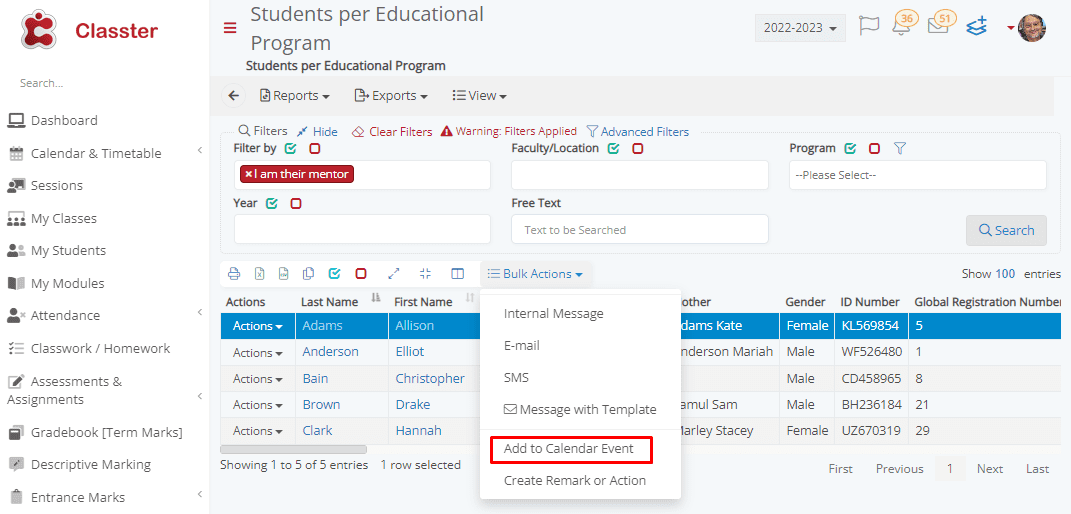
Figure 8
In the next step, the system will ask you to schedule the event, click on the “OK” button. (Figure 9)
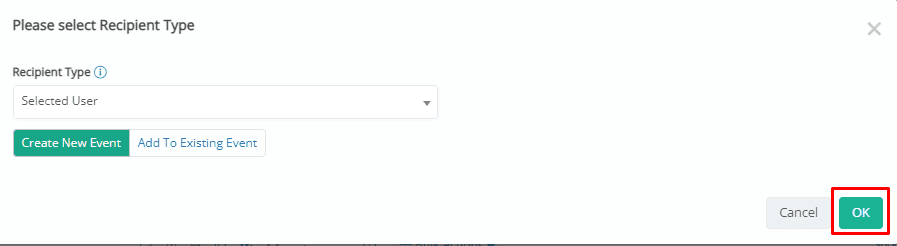
Figure 9
Schedule your Event by adding the right Category -> Meeting, start-end time, title of the meeting and the subject.
Attach files that are related to the meeting. In the description you can add the link of the meeting in case this is an online session. (Figure 10)
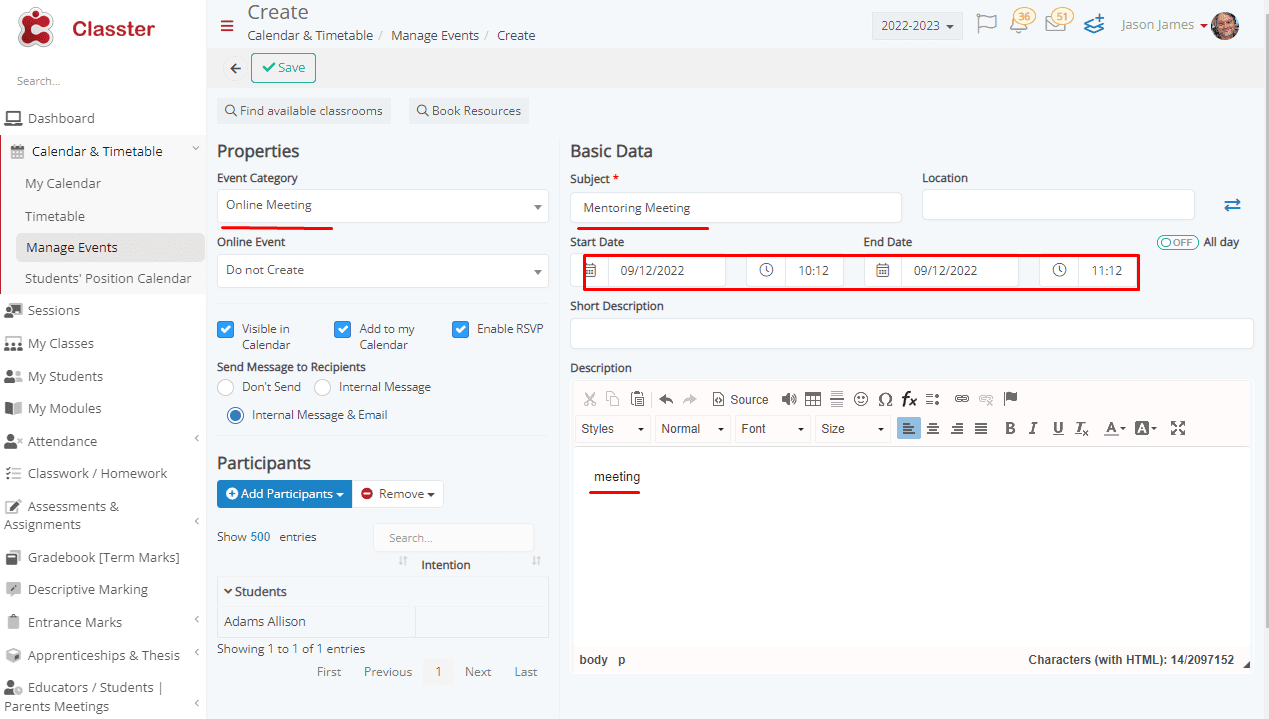
Figure 10
By selecting Internal Message and email, the system will send this also to the student, inviting them by email and internal message. Students will also be able to view that meeting in their calendar. (Figure 11)
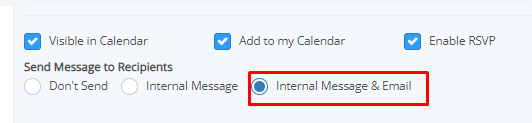
Figure 11
How do I write general comments after the meeting?
From The “Actions” menu (Figure 12) -> Click on the “Create Remark or Action” option, but in this case you need to select the Remark category “Meeting Notes”. (Figure 13)
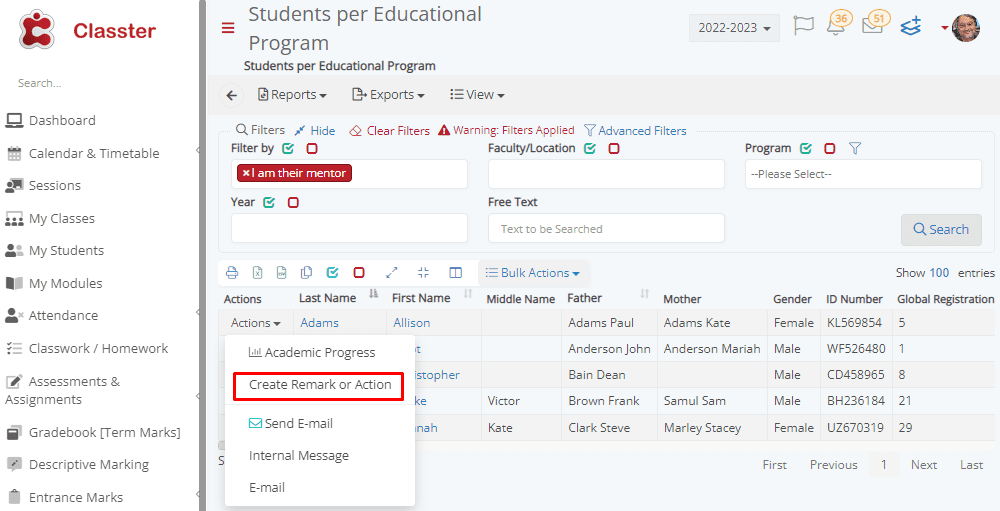 Figure 12
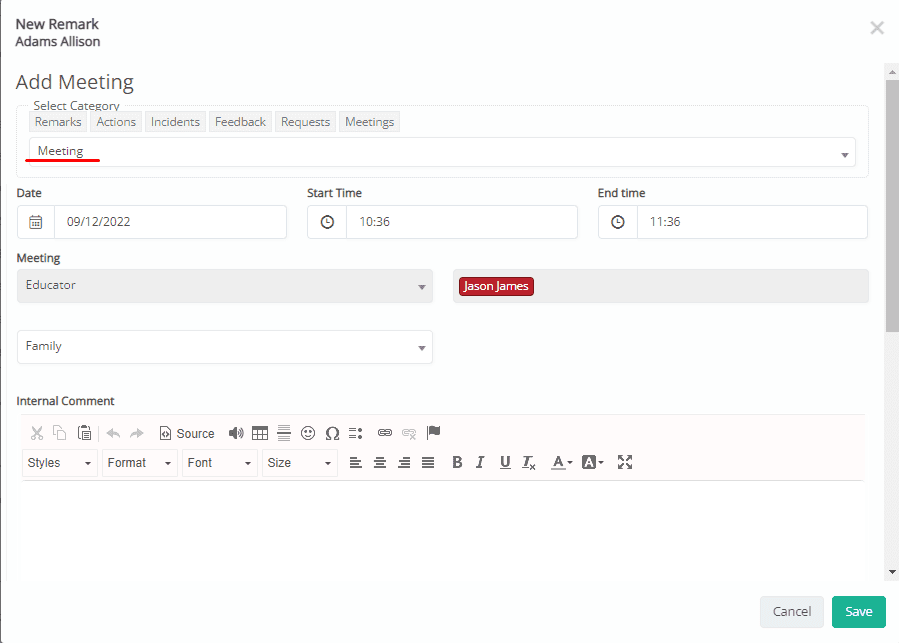
Figure 13