

- Select the ‘Accounting’ tab.
- You can see the current period’s invoice totals and the ones without arrangement; debit invoice total minus credit invoice total, which results to balance (Figure 120).
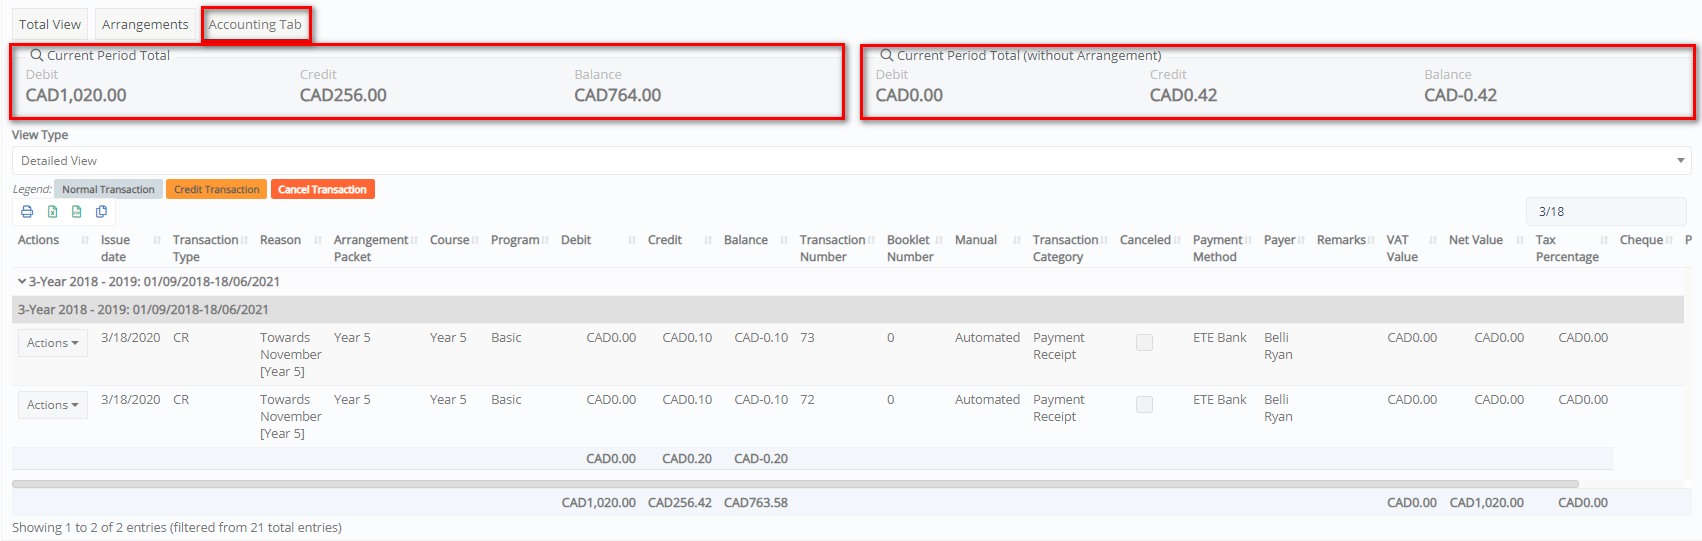 Figure 120
View Type
- Select the ‘View Type’ e.g., Detailed view (Figure 121).

Figure 121
Detailed View
- Select ‘Detailed View’ to see all invoices in detail (Figure 122)
 Figure 122
View per Transaction and Installment
- Select ‘View per transaction and installment’ to see invoices per transaction type and instalment (Figure 123)

Figure 123
View per Transaction
- Select ‘View per transaction’ to see invoices per transaction (Figure 124)

Figure 124
Note: ‘At the Legend’ you can check the colors e.g., canceled transactions will be in red color.
Actions
- Click on the ‘Actions’ button to manage the transaction (Figure 125).
Note: Depending on the current accounting status, you will have different options in the Actions menu.

Figure 125
Preview
- Select the ‘Preview’ option to view the Invoice, and print or export it e.g., to PDF (Figure 126)

Figure 126
Credit Invoice
- Select the ‘Credit Invoice’ option if you want to refund money e.g., a student has paid 500€ deposit for a school that he wants to cancel, but he still must pay 100€ cancelation fee (Figure 127).
-
- At the ‘Invoice and Payment’ pop-up window, select the invoice type from the ‘Series’ drop-down list e.g., DI Credit Invoice.
- Insert the amount you want to refund e.g., 400,00€ at the field ‘Total’. Notice that as soon as you enter the amount, the ‘Refund Amount’ field is updated.
- Click on ‘Save’

Figure 127
- At the accounting tab, the credited transaction will be added in orange colour (Figure 128).

Figure 128
Cancel Invoice
- Select the ‘Cancel Invoice’ option to cancel an invoice (Figure 129).
-
- Select the ‘CN Cancel Invoice’ at the financial types field
- Click on the ‘Save’ button
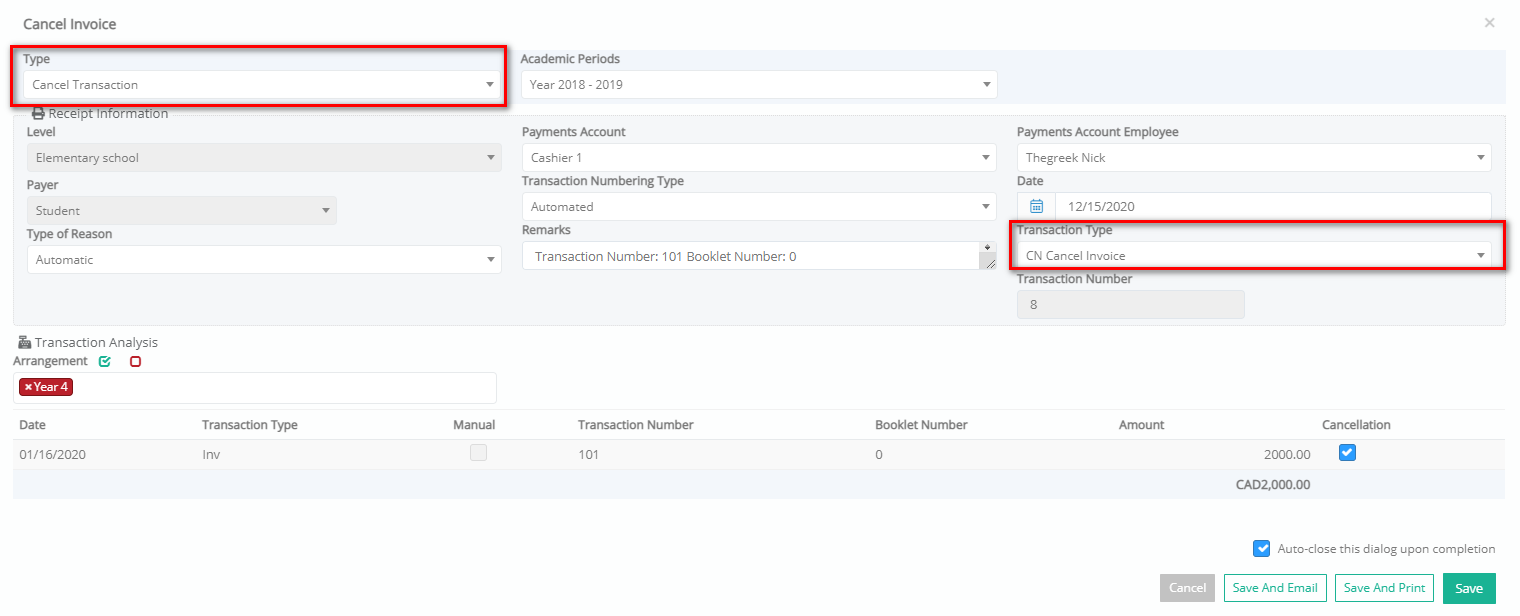 Figure 129
-
- At the accounting tab, the cancelled transaction will be added in red colour (Figure 130).
 Figure 130
Show to End Customer / Hide from End Customer
- Select the ‘Show to End Customer’ or ‘Hide from End Customer’ option to show/hide financial data in the end user’s portal. Under the column ‘Published/Visible’ you can see which transactions will be shown and which would not (Figure 131).
 Figure 131
Note: The financial data will be published to the selected contact’s portal (Figure 132).

Figure 132
Change Arrangement
- Select the ‘Change arrangement Without Arrangement’ option to change the arrangement in case you have mistakenly chosen the wrong arrangement at the creation of the transaction.
-
- Once you click on the function, a submenu will appear so that you can select the arrangement that you want.
- At the ‘Without Arrangement’ pop-up window you can optionally add a comment about the reason of the instalment and/or transaction change (Figure 133).
- Click on the ‘Save’ button to complete the change.

Figure 133
Change Payer
- Select the ‘Change payer’ option to select a different payer (Figure 134).
-
- Select the payer from the drop-down list
- Click on the ‘Save’ button to complete the payer change

Figure 134
Delete
- Select the ‘Delete’ option to delete the transaction. Click on ‘Yes’ at the warning message (Figure 135).

Figure 135