

Classter supports integration with Microsoft’s School Data Sync.
Although we implemented integrations with Office 365 and Teams before, it was not possible to support the SDS functionalities until now.
Step 1: Office 365 integration
The integrations for Office 365, Teams, and SDS can be found in CONFIGURATION > Advanced Configurations > Third-Party Integrations in Office 365. (Figure 1)
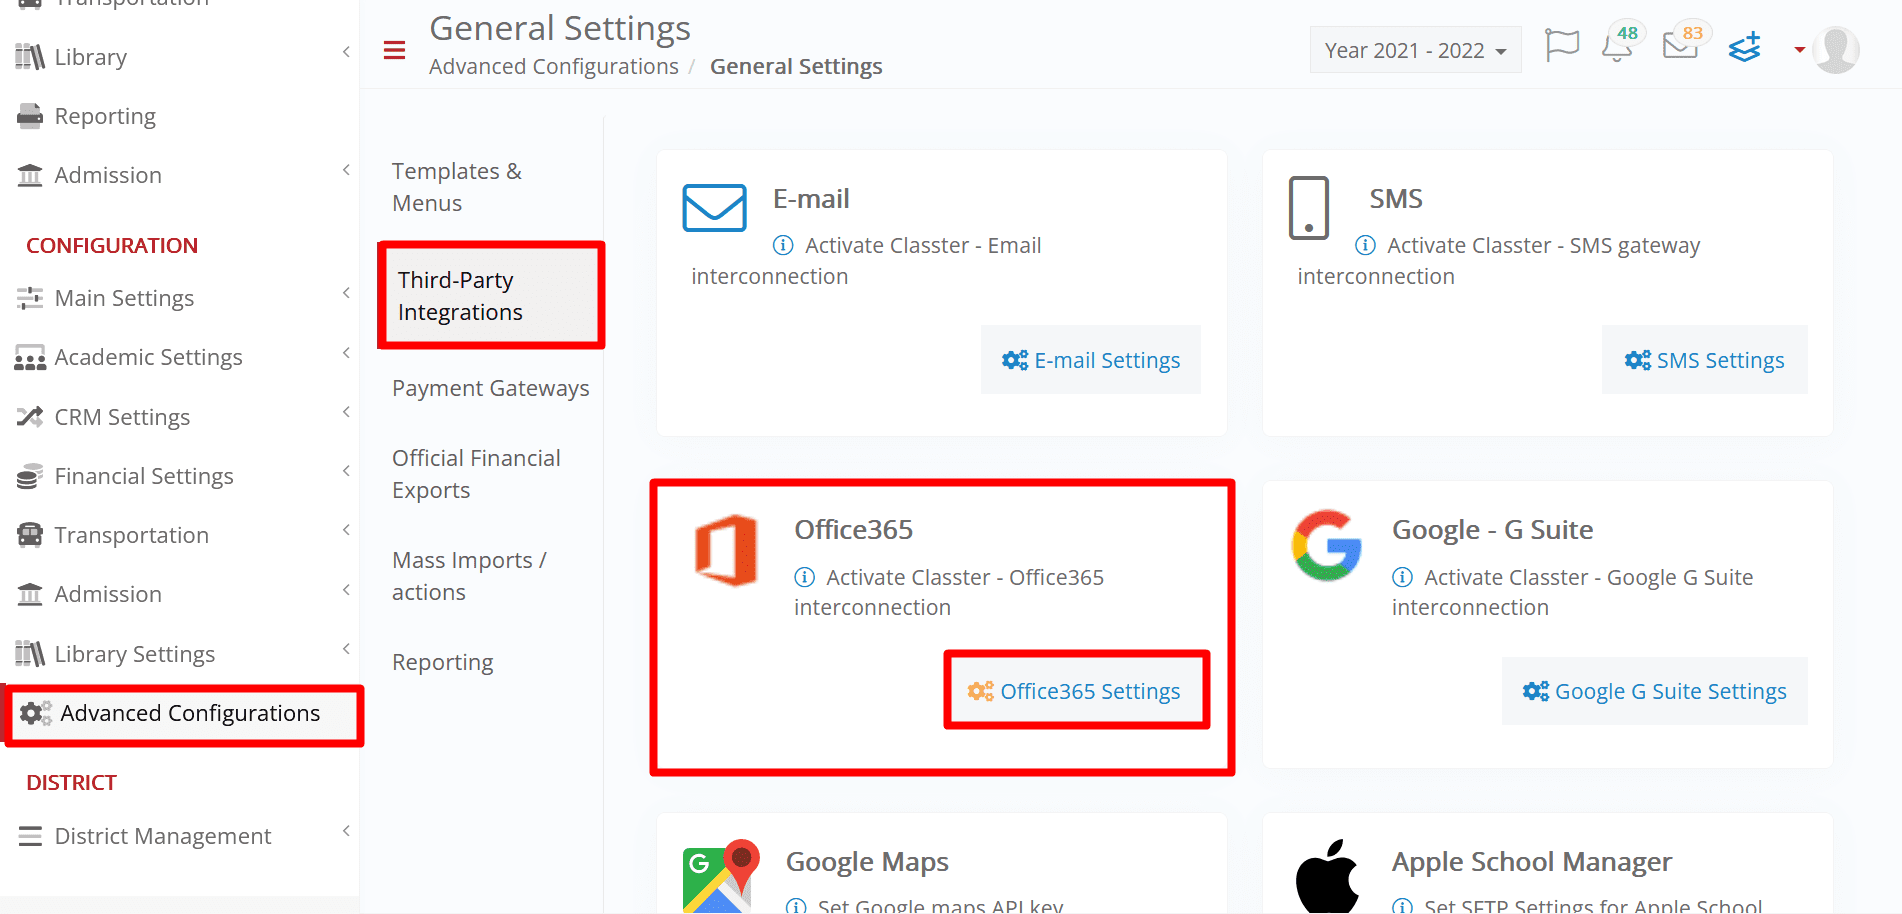
Figure 1
When clicking on “Office 365 Settings” the user will see every Microsoft-related integration in a separate tab. (Figure 2)
Figure 2
So, the first step is implementing the Office 365 integration. For more information and instructions on the matter, check out our Integrate Office 365 with Classter & Integrate with Office 365 for Education Manuals.
Step 2: Activating SDS Integration from Classter.
Now, since Office 365 is integrated, it’s time to start the SDS integration. First, we must switch on the Enable button. (Figure 3)
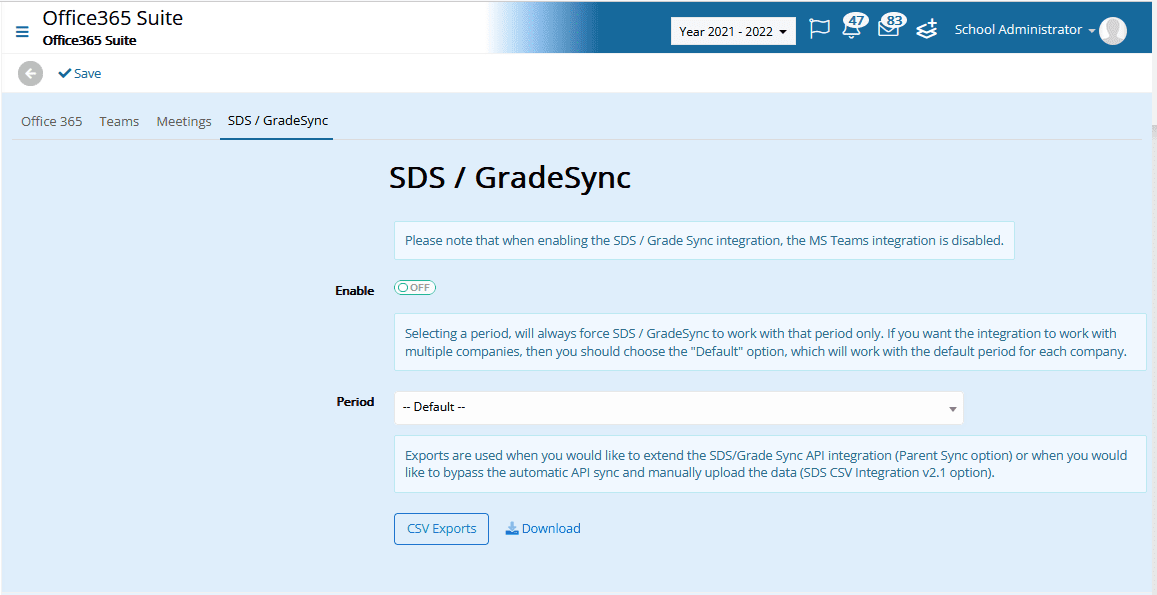
Figure 3
When we do so, a window will pop up where we have to select the Assessment types to be used for getting the Marks from the MS Teams’ Assignments. (Figure 4)
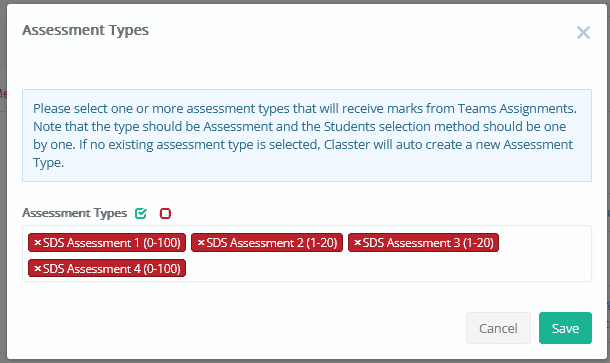
Figure 4
Let’s take a moment here to explain this a bit further. In the Teams environment, there is no such thing as an Assessment type.
This means that since nothing is differentiating one assessment from another in Teams, the integration cannot know which assignment type to use from Classter.
So, when an assignment is created in Teams, Classter will create a new assessment that is suitable for the case.
The Assessment Types that will be considered must always be:
- Assessments (not Quizzes or Assignments)
- The Student selection must be one by one (not Per Class) (Figure 5)
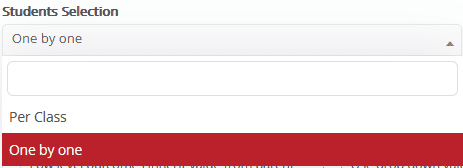
Figure 5
If those two criteria are met, the assessment type will be available here for selection.
The workflow is this; when the Students are graded in Teams and the assignment is returned to them, Classter will create an assessment for those Students and save the marks.
The assessment type that will be used will be defined by the marking range of the assessment in comparison with the “Points” field in Teams and also from the Grade & Subject availability fields on the Assessment Type.
So, when a Student is Graded in Teams, Classter will search for the available assessment types. First, it will rule out any unsuitable Assessment Types based on the Grade & Subject availability fields (the grade/year must be included in the grade field and the subject must not be included in the subject field).
Then the system will compare the “Points” field in Teams, (which is the maximum mark a student can get, e.g., 20) with the marking ranges of the remaining available Assessment Types.
If only one matches, it is used. If more than one matches the mark limit, then Classter will use the first one alphabetically.
In the case that none matches the mark limit, then Classter will search for an Assessment type with a higher Marking upper limit than that set in the Teams assignment and will select the first one it finds. (Figure 6)
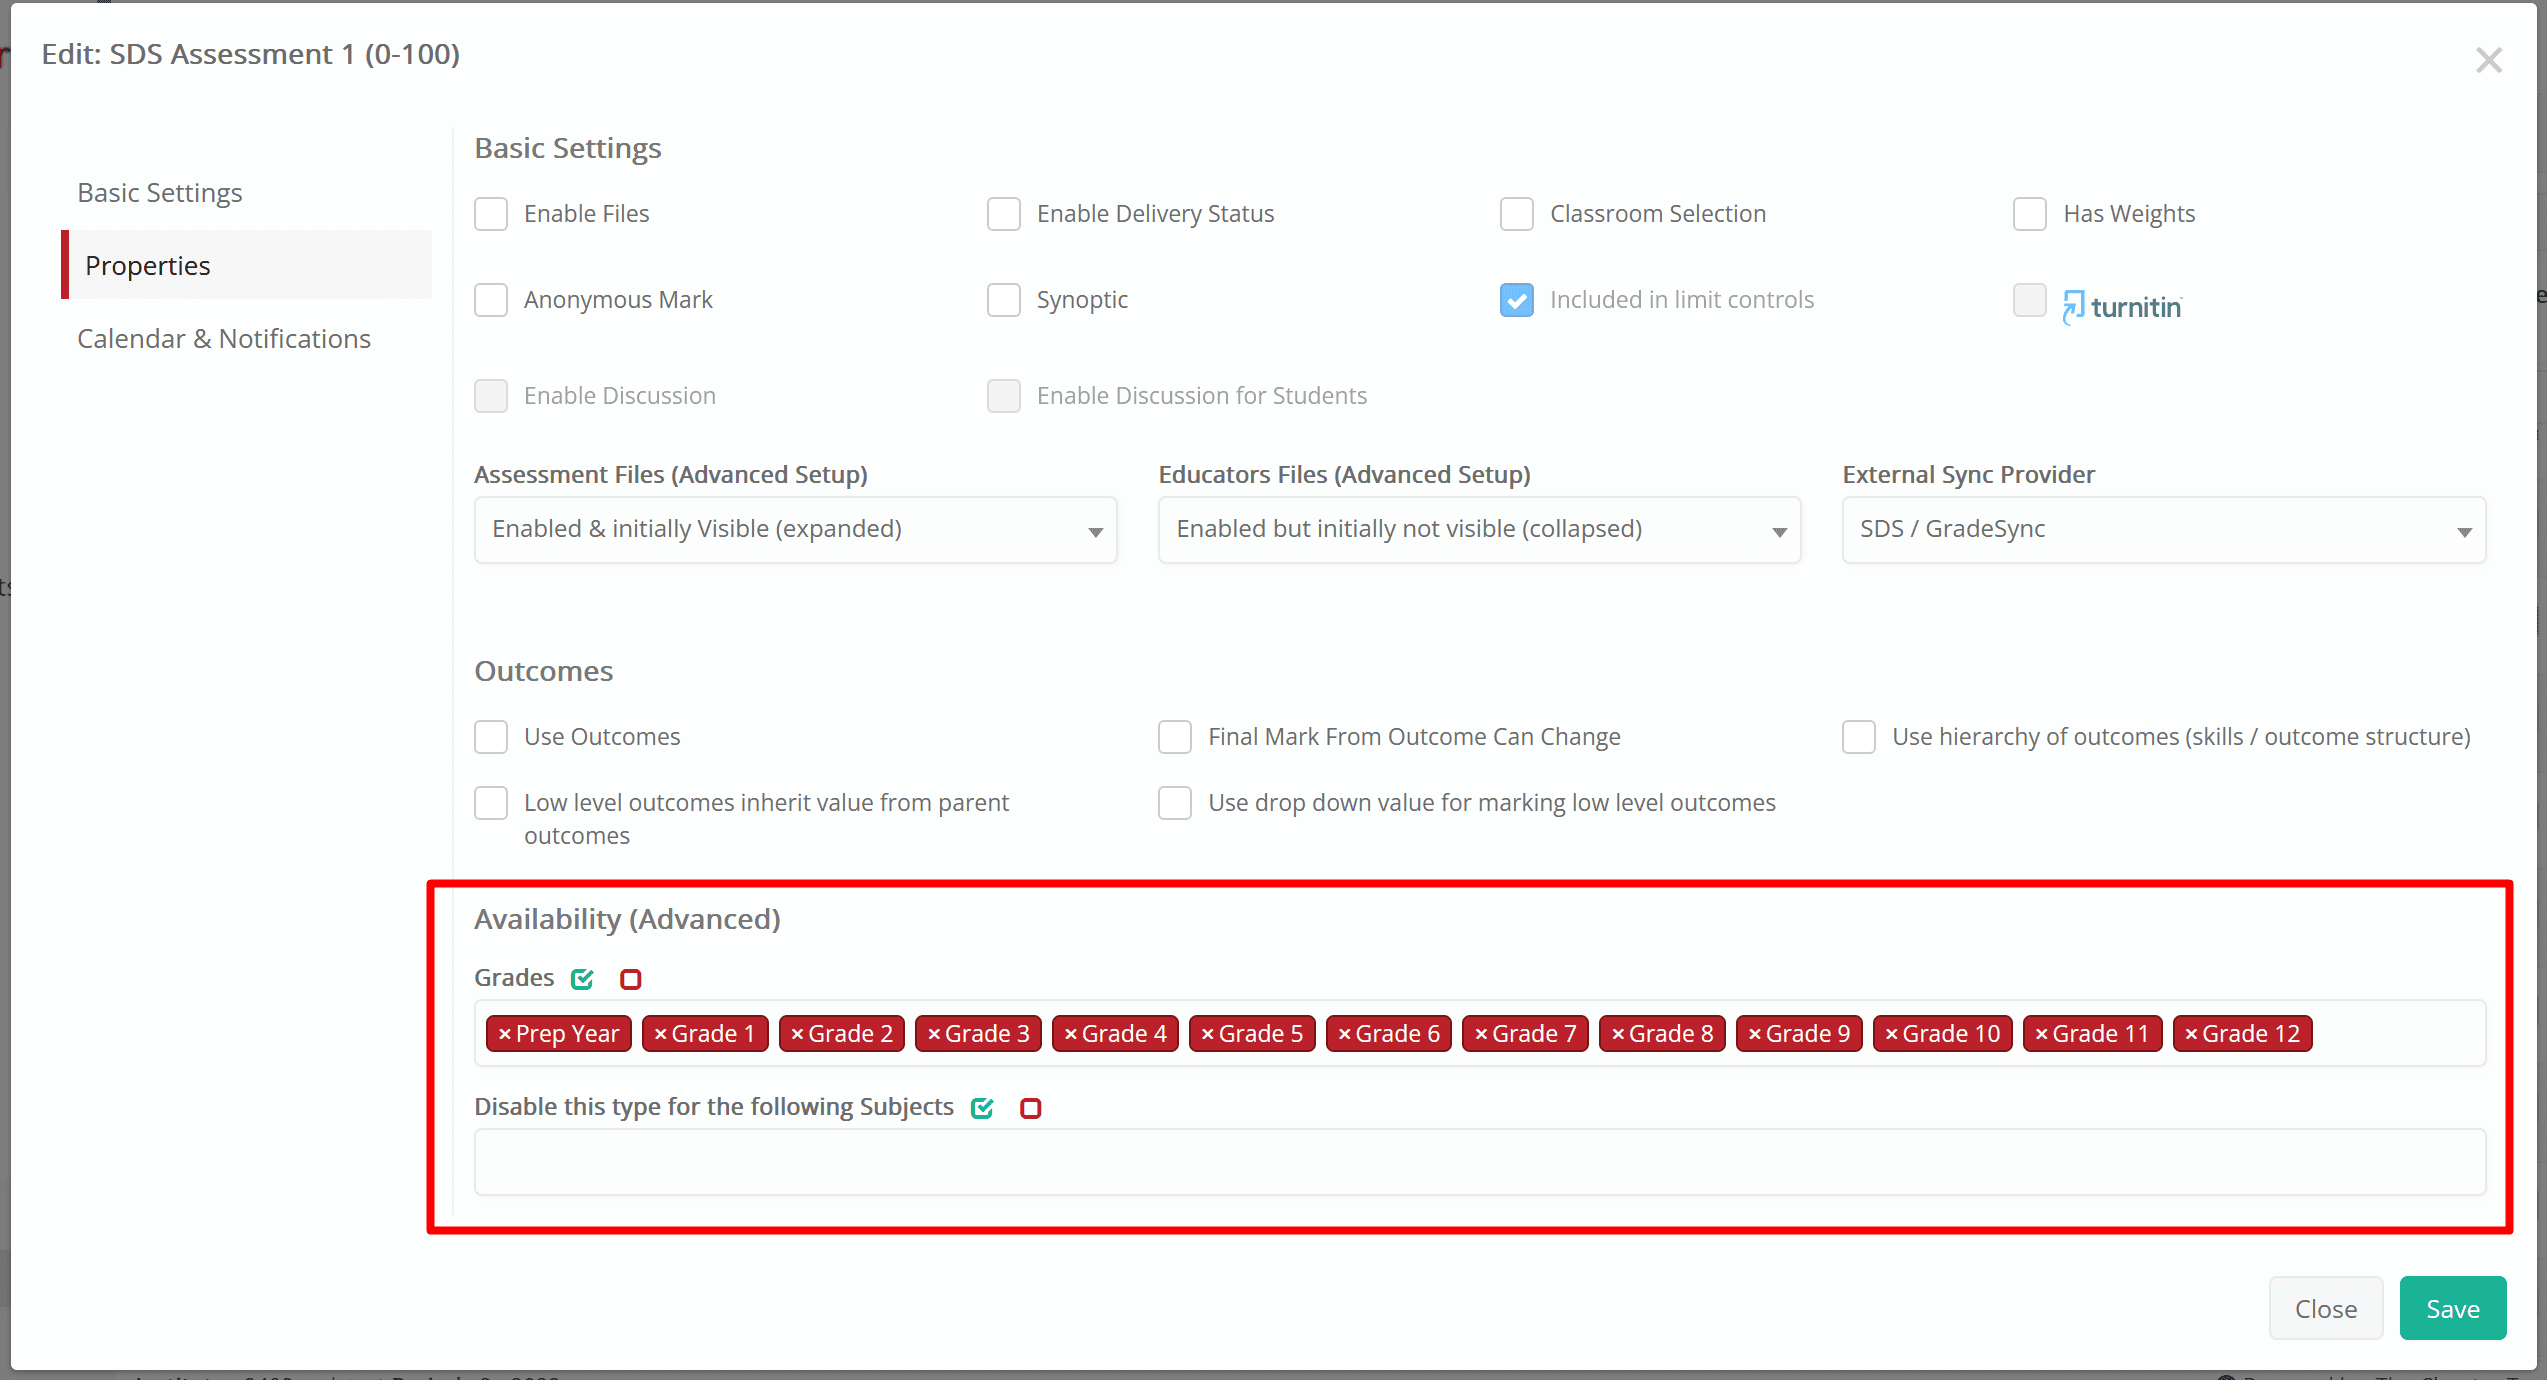
Figure 6
Note: From the above, it is clear that if you are already using Classter and have complicated marking scenarios that use many different assessment types, quizzes and assignments, that functionality might not be supported by the integration, or you might have to modify your configuration in Classter. If that’s the case, contact our team for guidance.
When the button is finally Active and the integration saved, two fields will appear, one with a “Client ID” and one with a “Secret”. Those will be used to configure the integration from the SDS side.
In the SDS / GradeSync integration tab, there is also a period field. This one is optional and when set, the integration will sync data to the selected academic period. If not configured, the integration will work for the default academic period.
Step 3: Activating SDS Integration from SDS
Now it’s time to configure the SDS side. Go to https://sds.microsoft.com/ and sign in with your Institute’s Office 365 account.
Then, from the menu on the left, click on +Add Profile. (Figure 7)
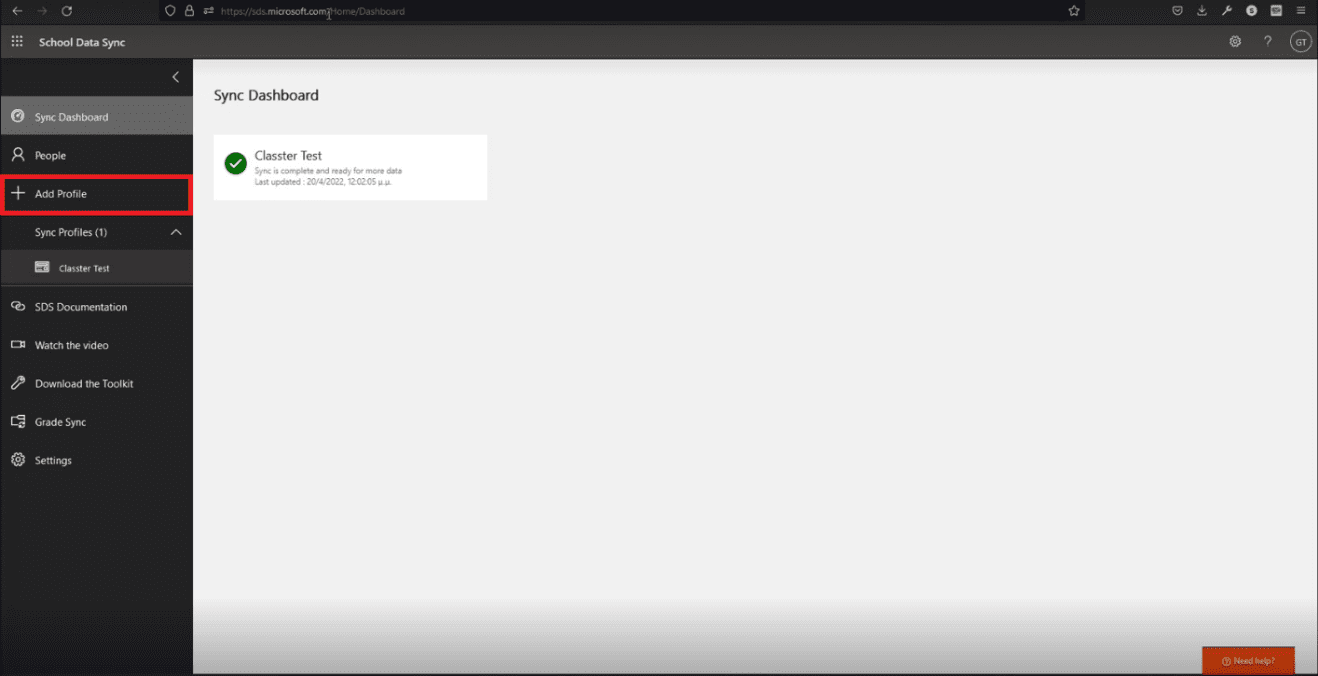
Figure 7
Note: For every Academic Period a New Profile must be created and the integration done again.
On this screen, you get to do the following:
First, you need to enter a profile name. (Figure 8)
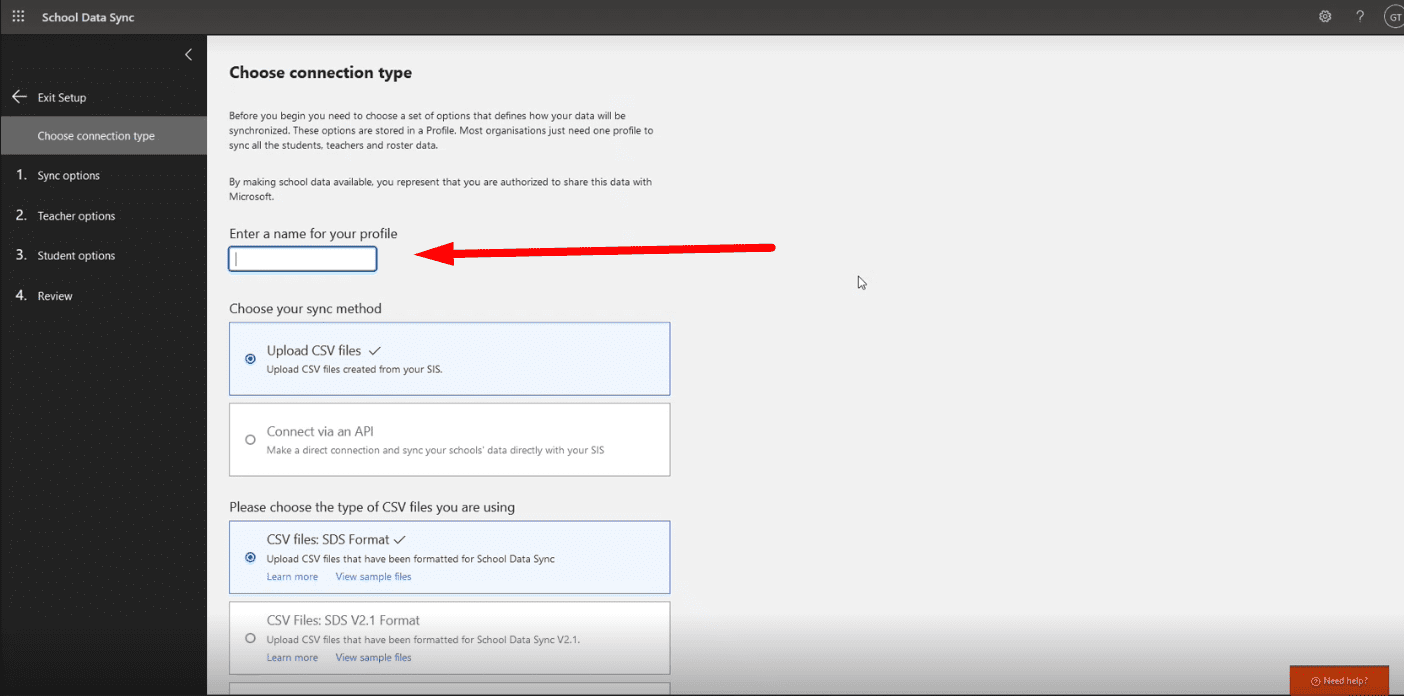
Figure 8
Then, you need to select which type of integration suits your needs.
The first option is by selecting the “Upload CSV files” as a sync method and the “CSV Files: SDS V2.1 Format” as the type of CSV files used, as shown below. (Figure 9)
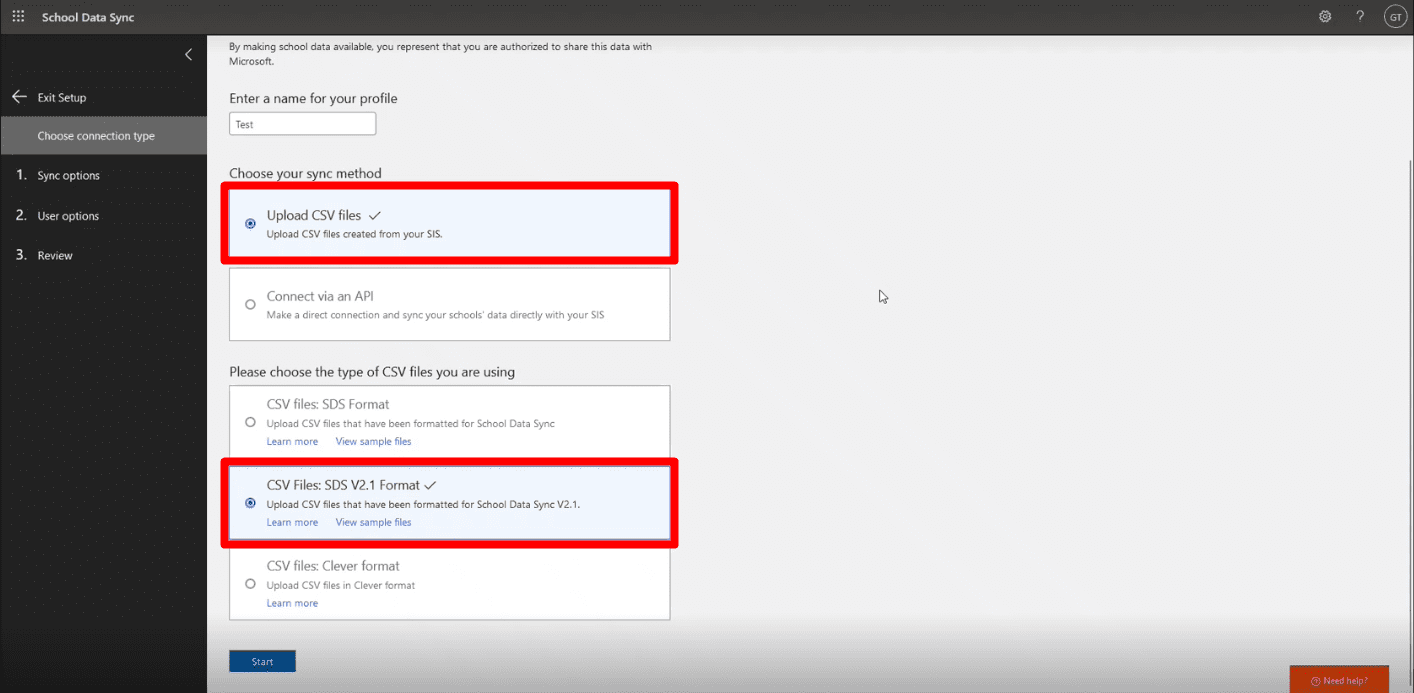
Figure 9
This way allows you to decide when a sync of data should happen. This has the upside of deciding when the sync will happen, but the drawback is that it requires doing the sync manually.
Another drawback is that connections of students in Classes/Groups that get deleted in Classter will not be updated.
The second option is by selecting the “Connect via an API” as a sync method and the “OneRoster API” as the service used. Select Classter from the list. (Figure 10)

Figure 10
This configuration automatically syncs the data, so it is recommended to use. When using this configuration, avoid resetting the sync. If you do so, you will get the same problem of not updating the SDS of connections that got deleted in Classter.
Note that in any case, teams already created in the SDS cannot be connected with existing groups/classes of Classter. This kind of mapping is not supported by Microsoft!
After selecting the sync method of your choice, click on start.
On the next page, the fields in Figure 11 must be configured.
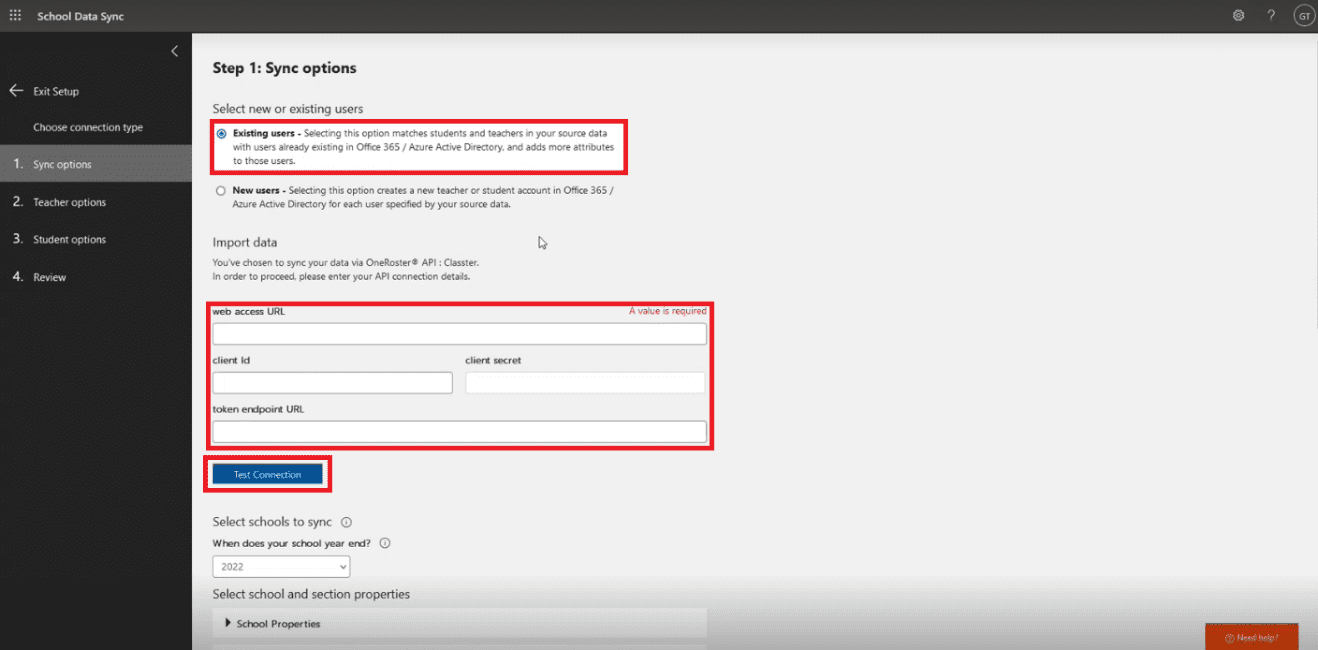
Figure 11
- Always select the Existing Users option.
- In the web access URL field, fill in: https://oneroster.classter.com/ims/oneroster/v1p1
- In the Client ID and Client Secret fields, fill in the Client ID & secret you have from step 2 above.
- In the token endpoint URL field, fill in: https://identity.classter.com/ids/connect/token
- Then, click on Test Connection
In the Select schools to sync section, select the Institutes for which the integration will work.
If you don’t have a multi-institute setup, you will only get the one institute you have for selection. (Figure 12)
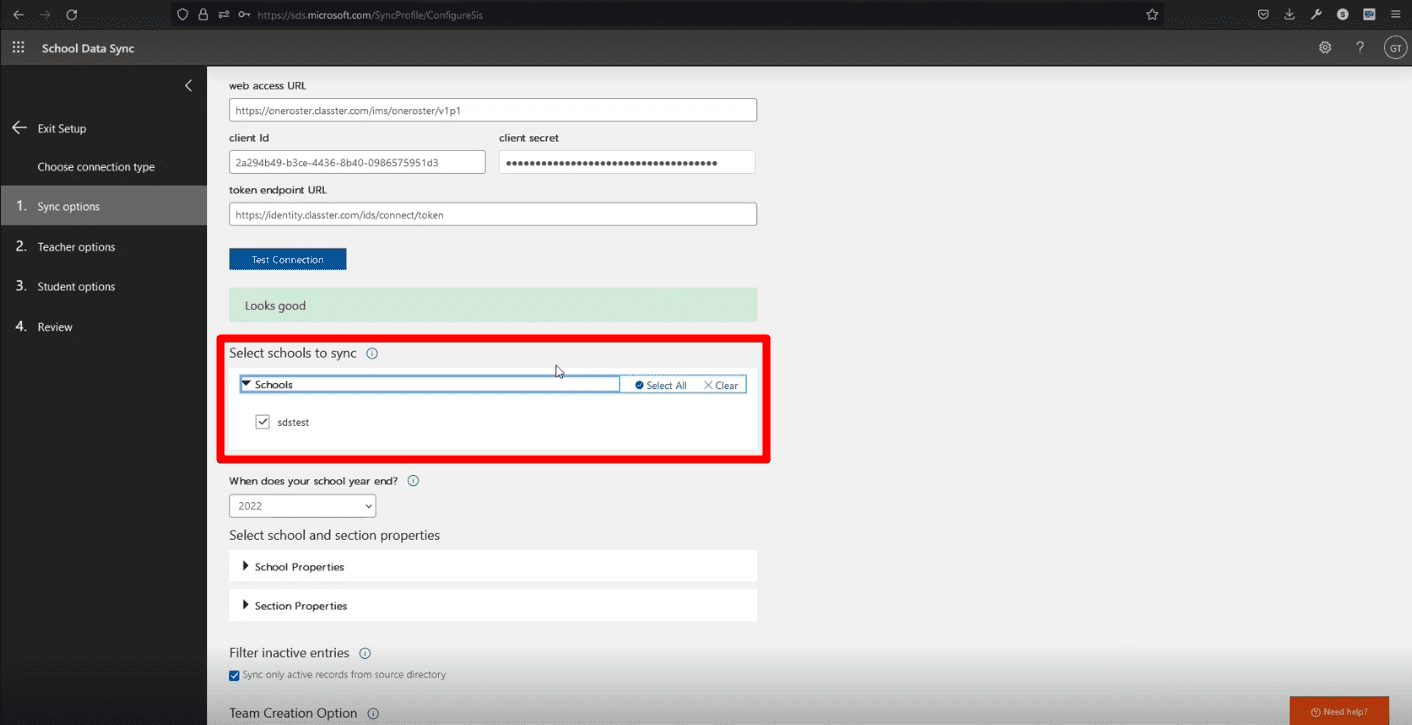
Figure 12
The “When does your school year end” field doesn’t have to be configured.
All the property options shown Figure 13 are a matter of what you require, so based on your needs, choose which of those should be checked.
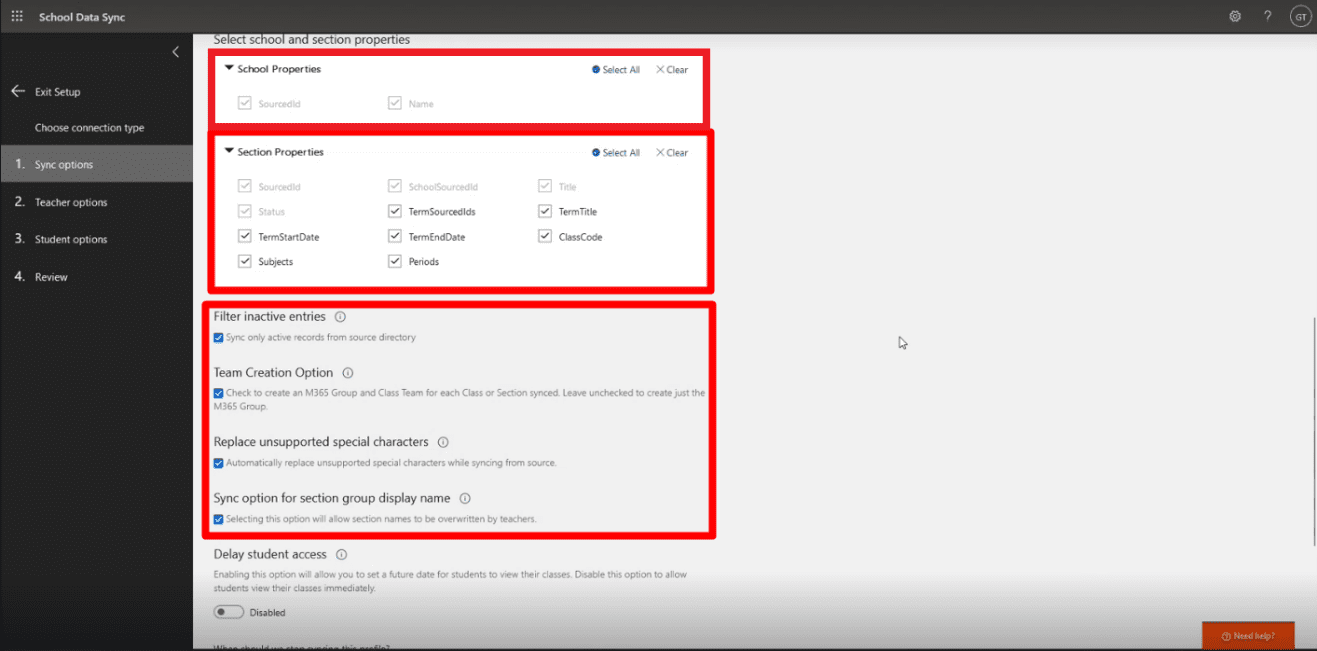
Figure 13
The Delay in student access is optional, but rather insignificant since the students won’t have access to the teams anyway until the teacher invites them.
The field defining the end date of the profile is very important. It is recommended to set the same date here as the end date of the Academic period used in Classter. (Figure 14)
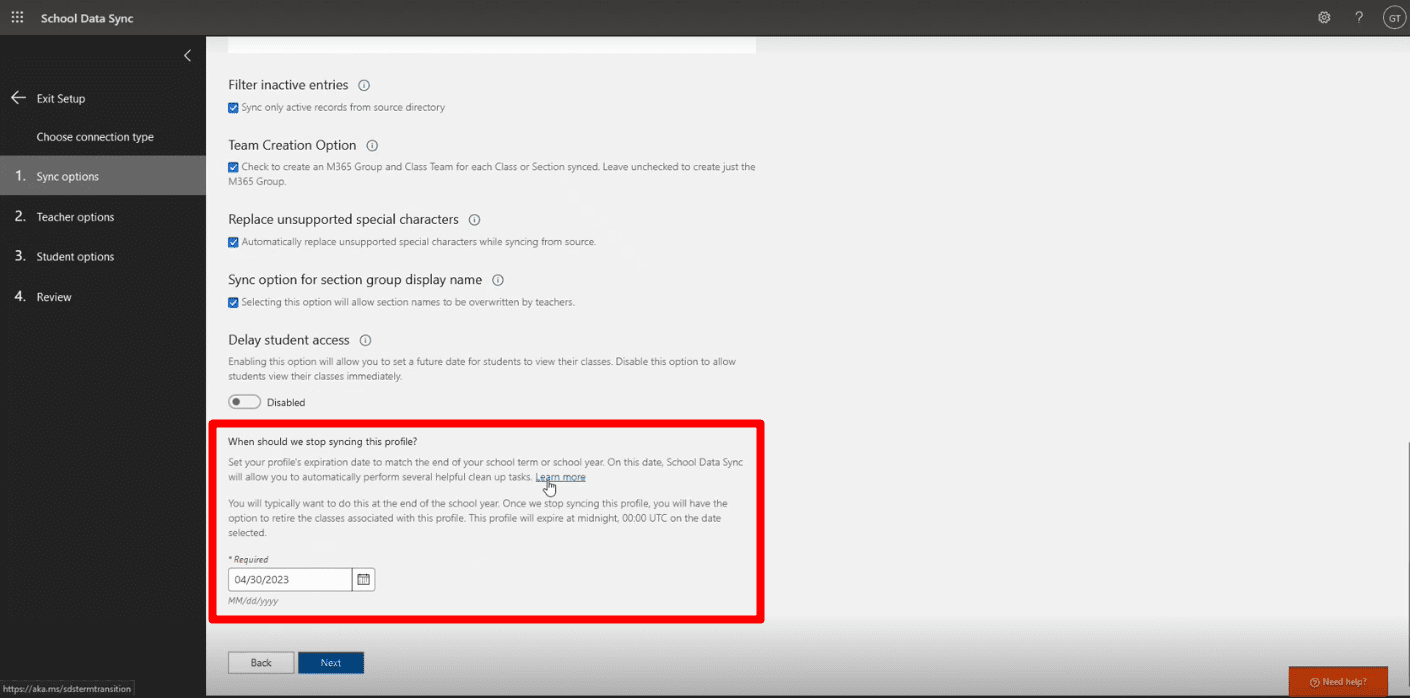
Figure 14
When the deadline is met, the profile will be deleted and anything synchronized will be put into the archive.
In the Teacher options section, we have the following fields:
- Primary key (Source Directory): select the “Username” option
- Primary key (Azure Active Directory): select the “userPrincipalName” option
- Domain (optional): Always leave it blank (Figure 15)

Figure 15
Then select the Teacher Properties by checking the boxes and clicking next. (Figure 16)
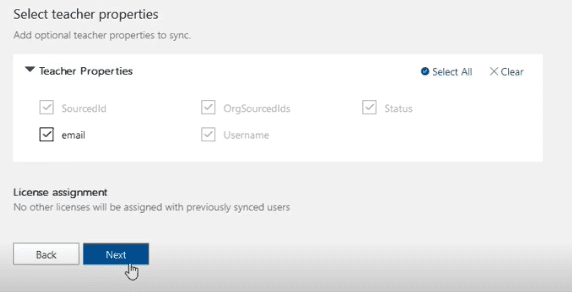
Figure 16
Similarly, select the Student Properties by checking the boxes and clicking next.
After that, you get a review of what you have set, and you must click on create profile to finalize the creation of the profile. (Figure 17)

Figure 17
Note that classes are exclusively created in SDS and their configuration takes place there. They are not connected with Classter.
Step 4: Grade sync
This is somewhat an optional step, since it is not required for an institute to use assessments through SDS. The integration though provides this connection as well for the Institutes that want to use it.
So, in the Grade Sync tab, you need to fill in the fields shown in Figure 18.
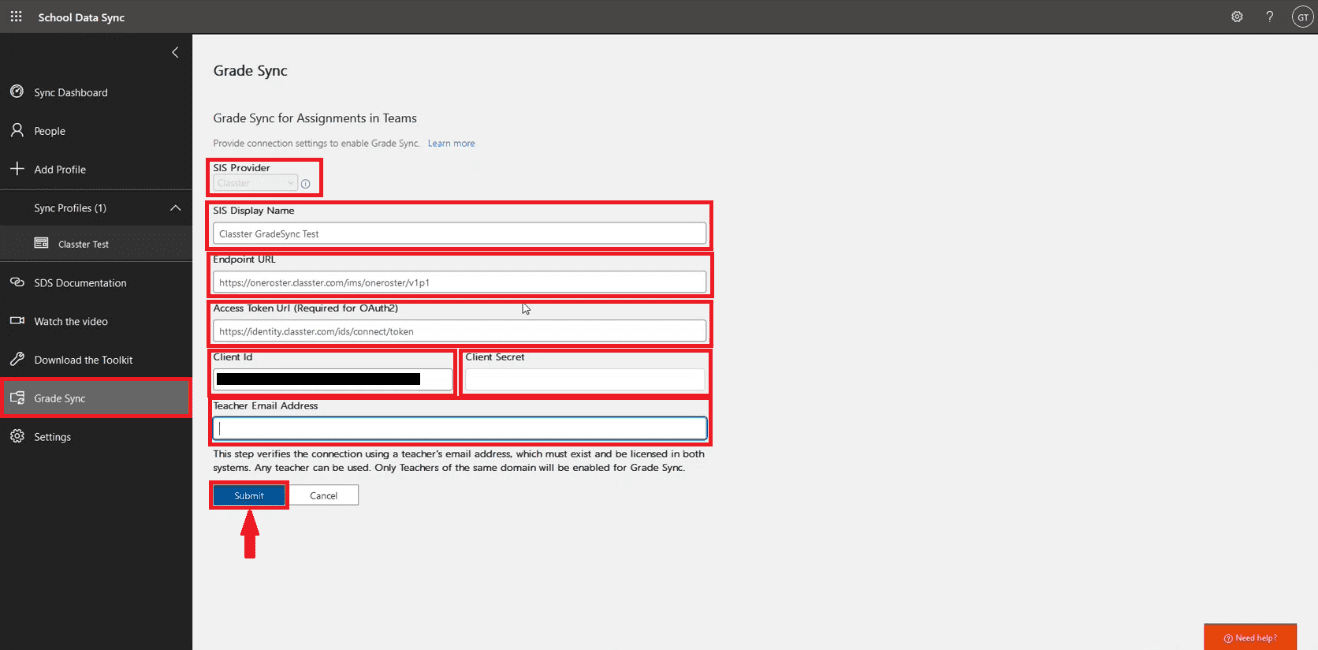
Figure 18
- SIS Provider: Select Classter
- SIS Display Name: Fill in a description
- Endpoint URL: https://oneroster.classter.com/ims/oneroster/v1p1
- Access Token URL (Required for OAuth2): https://identity.classter.com/ids/connect/token
- Client ID: The Client ID you got from Classter
- Client Secret: The Secret you got from Classter
- Teacher Email Address: The Institutional Email Address (the one provided from Office 365) of any Teacher that exists in both systems (for verification purposes).
It is mandatory for all Teachers to have an institutional email address with the same domain as the one entered here in order to be able to use the GradeSync functionality.
Then click submit.
A view of the functionality
For an institute that uses the Grade sync, Teachers must enable the Assessments for the Teams they are part of.
That is done when a Teacher selects a Team and goes to the Assignments Tab. (Figure 19)
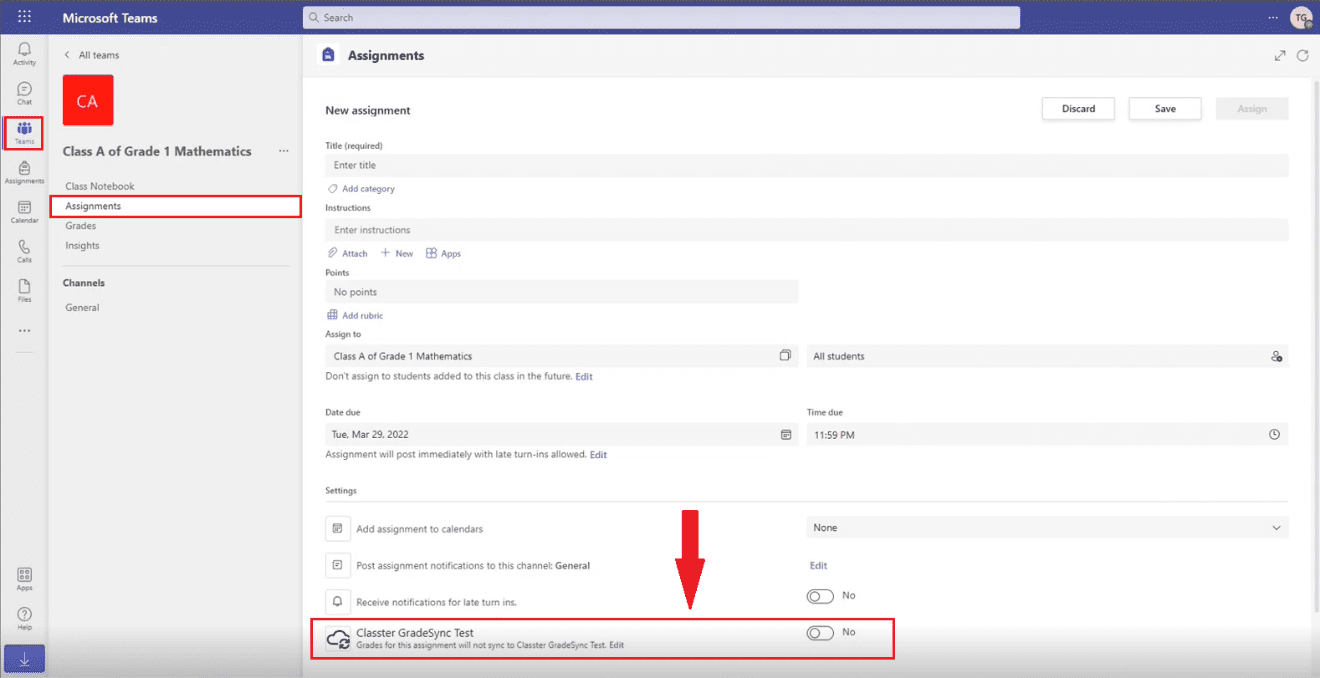
Figure 19
When this is switched on, the Teacher will receive a verification code in his/her email to fill in the pop-up window shown in Figure 20.
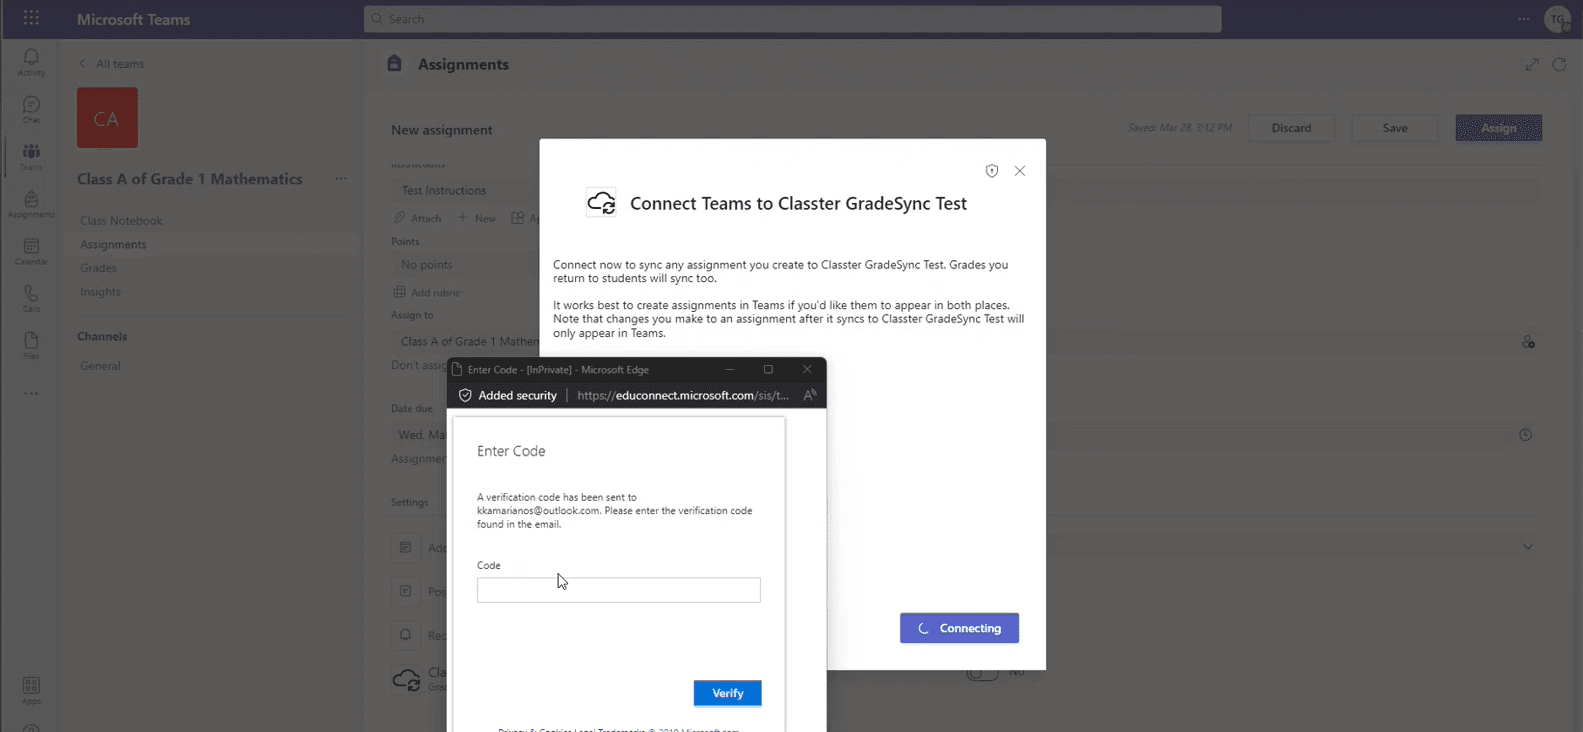
Figure 20
This must be done by all the Teachers to all the Teams/Classes they intend to use assessments once, in the beginning of the Academic period/opening of the profile.
The Students cannot see the Teams they are connected in until the Teacher activates them in Teams.
The Teachers will get a message in Teams, informing them there are Students waiting to join. (Figure 21)
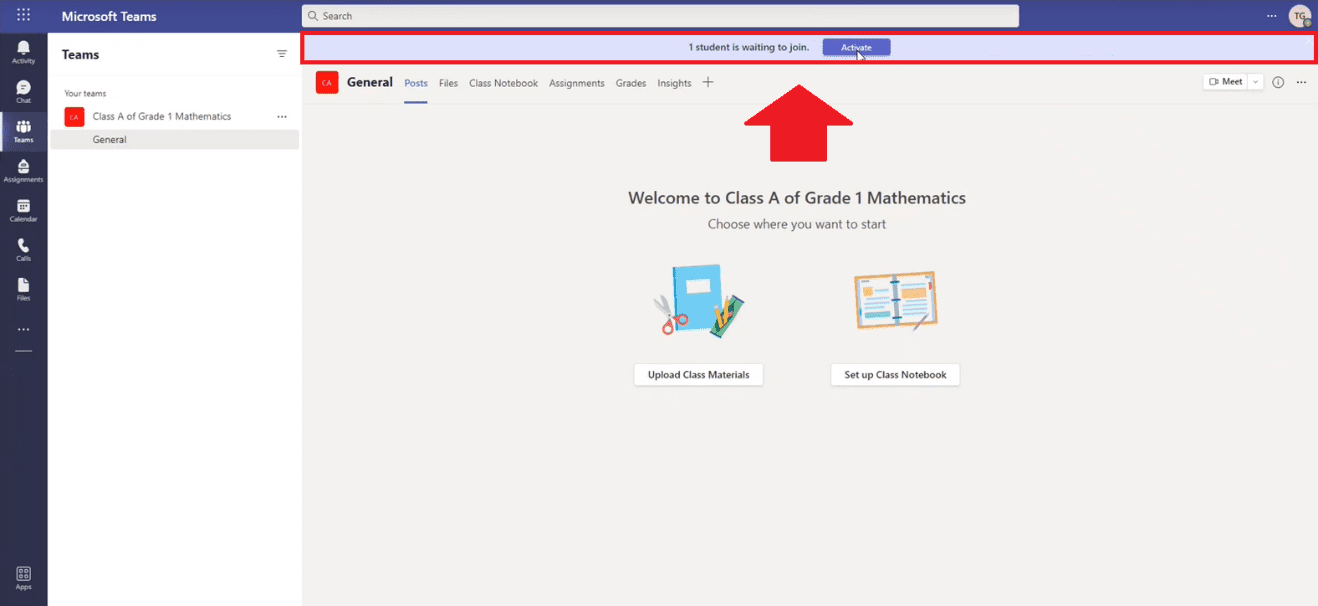
Figure 21
When the Teachers click on Activate, a pop-up window will ask for confirmation. (Figure 22)

Figure 22
Once confirmation is given the Students will gain access to the Team. (Figure 23)
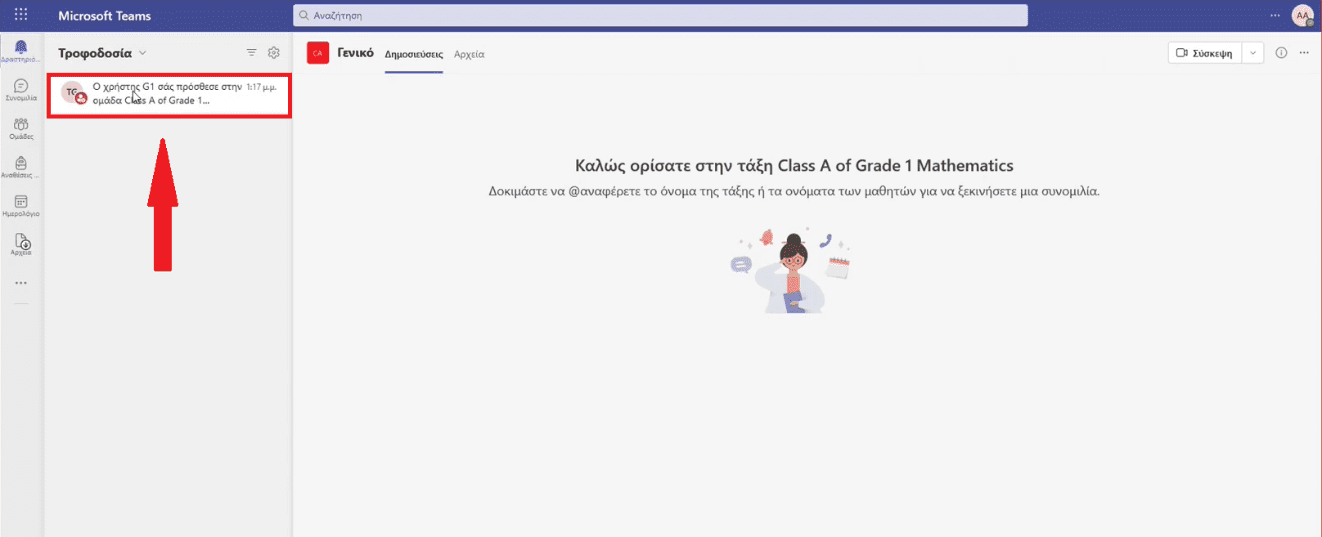
Figure 23
Notes:
- Although the SDS integration regarding the profile must always take place at the beginning of the academic period and cannot be modified throughout the year, that’s not the case with the Gradesync functionality.
Any time throughout the Academic period, you can add more assessment or exclude Assessment types to be used by the integration. When creating/editing an Assessment Type, in the Properties tab you will find an External Sync Provider field where you can select the SDS / GradeSync option.
By doing so, the Assessment Type will be available to be used based on the criteria we explained above. (Figure 24)
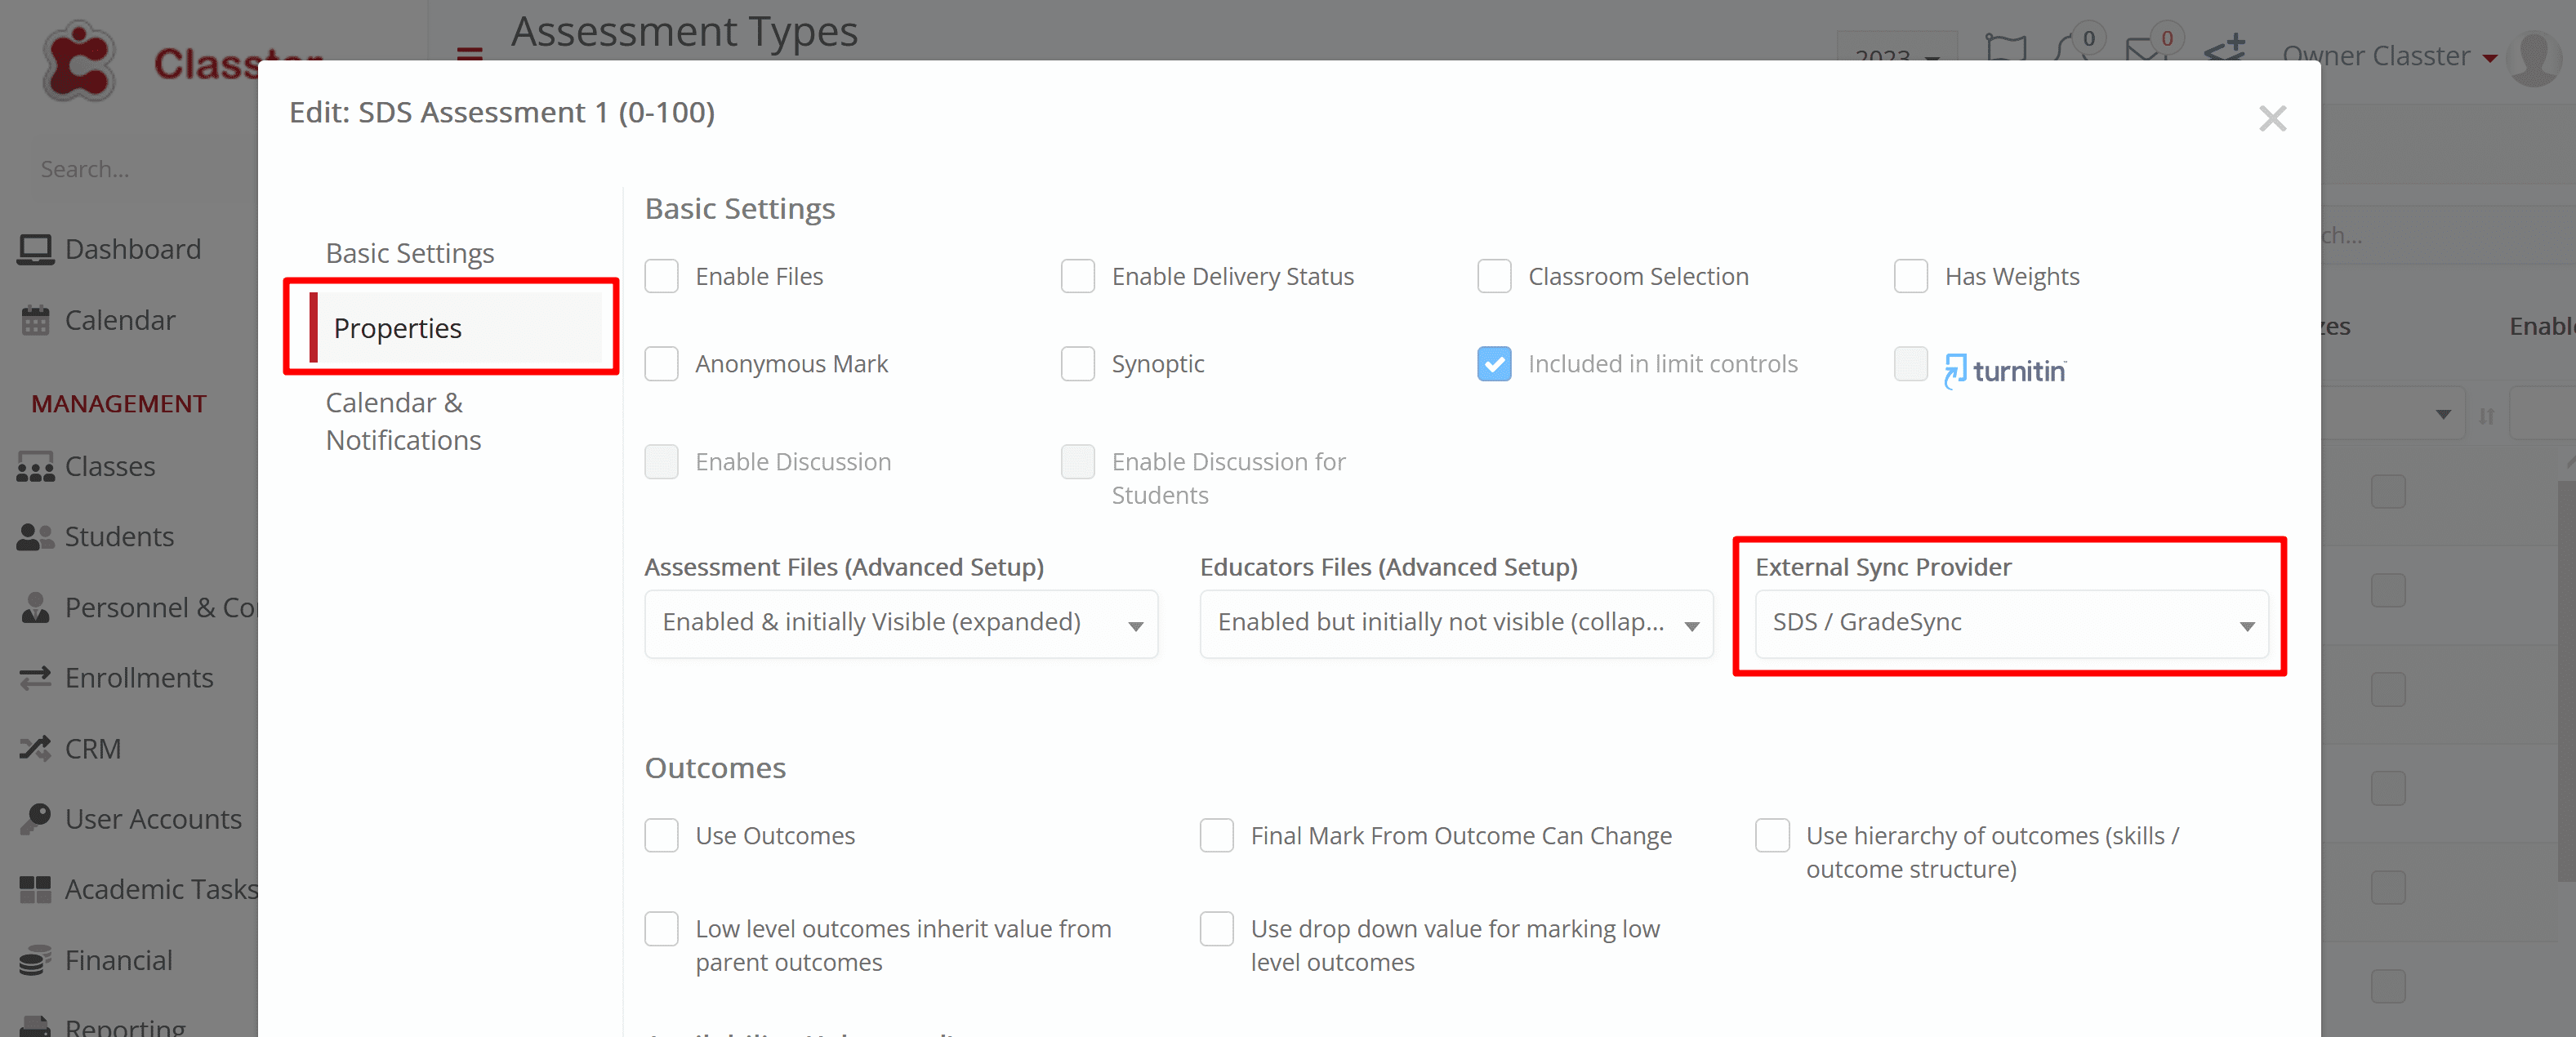 Figure 24
- When an Assessment Type is selected for use from the SDS / GradeSync integration, the included in limit controls checkbox will always automatically be checked.
- If a Teacher creates an Assignment on Teams and forgets to switch on the Classter Gradesync radio button, the Teacher can enable it after the creation and Return again the Marks in order for Classter to get them.