

Route Categories
Route Categories is a method to categorize routes into groups or areas e.g. City Center or Down Town. Thus, it will be easier to filter groups in reports or web forms. This feature is highly recommended, if you have a lot of routes e.g. more than 80 routes per day. You can add and manage route categories.
- Use the edit and delete buttons, to edit or delete the selected route category. (Figure 13)

Figure 13
Add a new route category. (Figure 14)
Click on ‘Create New’ to create a new route category.
- Add a route category description
- Select a color
- Click on ‘Save’, to add the route category in the list.
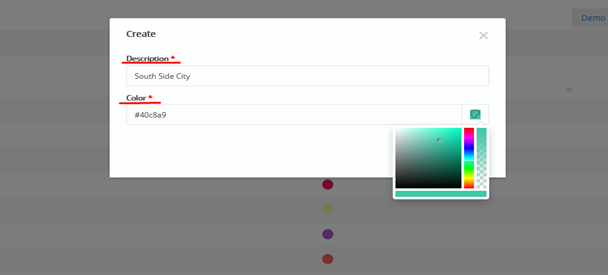
Figure 14
Zones
A Zone defines the direction and frequency within which routes are executed. Usually, there are one or two morning zones (to the school), and multiple afternoon or evening zones (from the school). Thus, the zone of the route defines the orientation of the bus e.g. Inwards=To Institute. (Figure 15)
- Use the edit and delete buttons, to edit or delete the selected zone.

Figure 15
Click on ‘Create New’ to create a new zone. (Figure 16)
- Set a description e.g. ‘Noon’.
- Select a direction type e.g. ‘From Institute’.
- Define a period e.g. ‘From 15:10 To 16:10’
- Define the Years
- Click on ‘Save’.
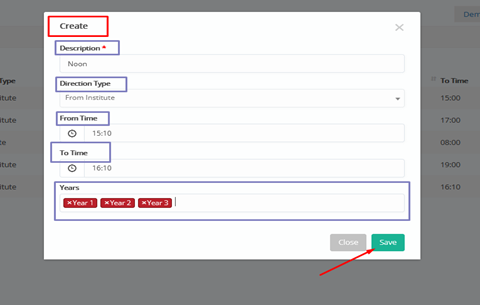
Figure 16
Routes
You can create and manage routes, defining all their characteristics (Figure 17).
- Use the edit and delete buttons, to edit or delete the selected route.
Note: You cannot delete a route if it is used.
- You can filter your routes based on the ‘Zone’, the ‘Route Category’, ‘Adresses’ or ‘Stops’.
- We can also use the Status filter, in which we can return the routes that are Inactive. (Figure 18)
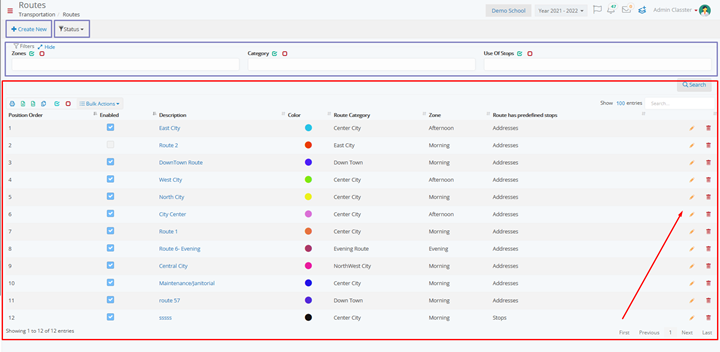
Figure 17
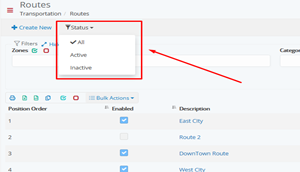
Figure 18
Click on ‘Create New’ to add a new route. (Figure 19)
-
- Add a route description (and/or full description)
- Select route color, zone and category
- Define if the route has predefined stops
Note: If the Route has pre-defined stops, then students will be picked-up from the selected pre-defined stop. If not, then students are picked up, one by one, from the provided address. - Check the ‘Enabled’ checkbox, so the route is Active.
- Click on ‘Add New’ to set the route frequency i.e. which days of the week will the route be available.
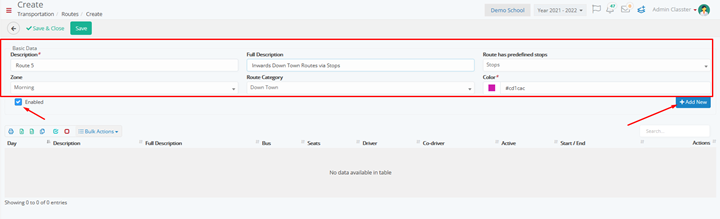
Figure 19
-
- Select day, bus, driver and co-driver. (Figure 20)
- Select the start/end time and position type. (Figure 20)
- Define the start/end location either by entering the address details or by using the ‘Find Location in map’ button to select the address. (Figure 21)
- Tick the option Active to make the route available
- Click on ‘Save’
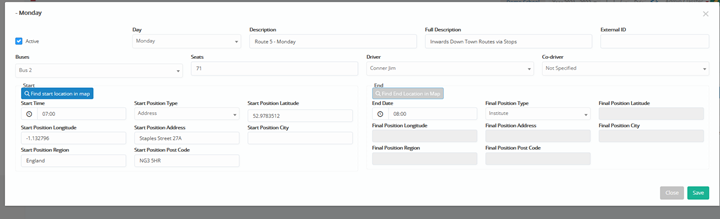
Figure 20
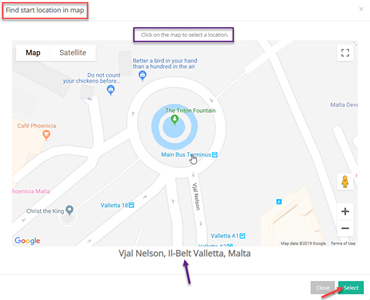
Figure 21
We have created our first route. (Figure 22).
Use the edit and delete buttons, to edit or delete the selected route day, under the ‘Actions’.

Figure 22
Use the ‘Copy to selected days’ button, in order to copy the selected route to the rest of the week days you want. (Figure 23)
- Select the day(s)
- Click on ‘Copy’ to copy the route to the selected days.
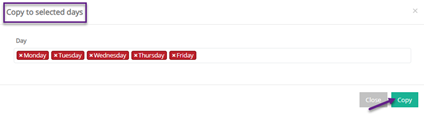
Figure 23
Use the ‘Route Stops’ button, in order to set stops for the selected route. (Figure 24) 
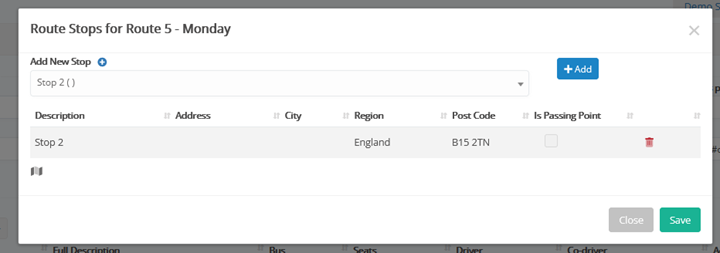
Figure 24
Route Stops
In this section you can define and manage the route stops where students will be picked up from or dropped-off at. It is used when the transportation system is set to pick-up and drop-off students collectively from the predefined route stop of their choice, instead of their home address (Figure 25).

Figure 25
Use the edit and delete buttons, to edit, delete or transfer students between stops of the selected route stop.
Use the search field to find a specific route stop.
You can print, copy or export the list of route stops by clicking on the respective buttons.
Add Route Stops (Figure 26).
- Click on the ‘Create New’ button.
- Enter the route stop’s description.
- Enter the route stop’s address, city, area, post code.
Note: Alternatively, click on the map to select the location. - If we activate “Crossing point – no stop”, we can define a stop as a crossing point and not as a stop for gathering or dropping off students. This action is completed in order to facilitate the path of the route we have created.
- Click on ‘Save’ for the route stop to be added on the list.
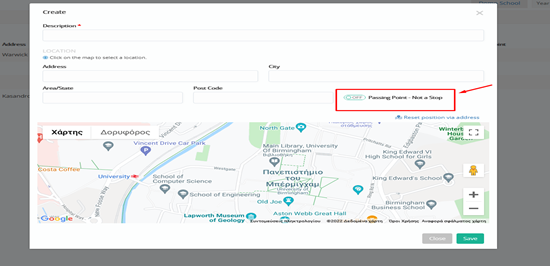
Figure 26