

Watch the How-to Video

Action Buttons
![]()
Academic Year
To select a different academic year:
- Click on the drop-down box (and select an academic year from the available list.
The page will be refreshed and will represent the academic data of the selected year.
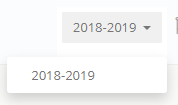 Figure 2
Note: If you are unable to see previous academic years, please notify the School Systems Administrator.
Interface Language Icon
- Click on the Languages Icon
 in the user Actions Area and then choose your preferred Language (Figure 3).
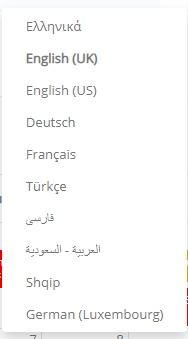 Figure 3
Note: If you are unable to find your language of preference please notify the School System Administrator.
Announcements
- By clicking on the announcements icon
 you will be redirected to the announcements page (Figure 4):
 Figure 4
- On this page you will be able to see any announcements (Figure 5).
- You also have the option of sorting them based on their status “Read” or “Unread”.
- You can also sort announcement based on Category e.g Announcements.

- To see announcements in detail just click on the “Announcement” button located in the bottom left of the announcement box.
 Figure 5
User Profile
To access your User Profile and edit your personal information you need to go to the User Action area in the top left corner of your screen.
- First click on the small arrow next to your name (Figure 6)
![]() Figure 6
Figure 6
- Next click on My Profile (Figure 7)
 Figure 7
- Next you will arrive at your profile page that contains your personal information.
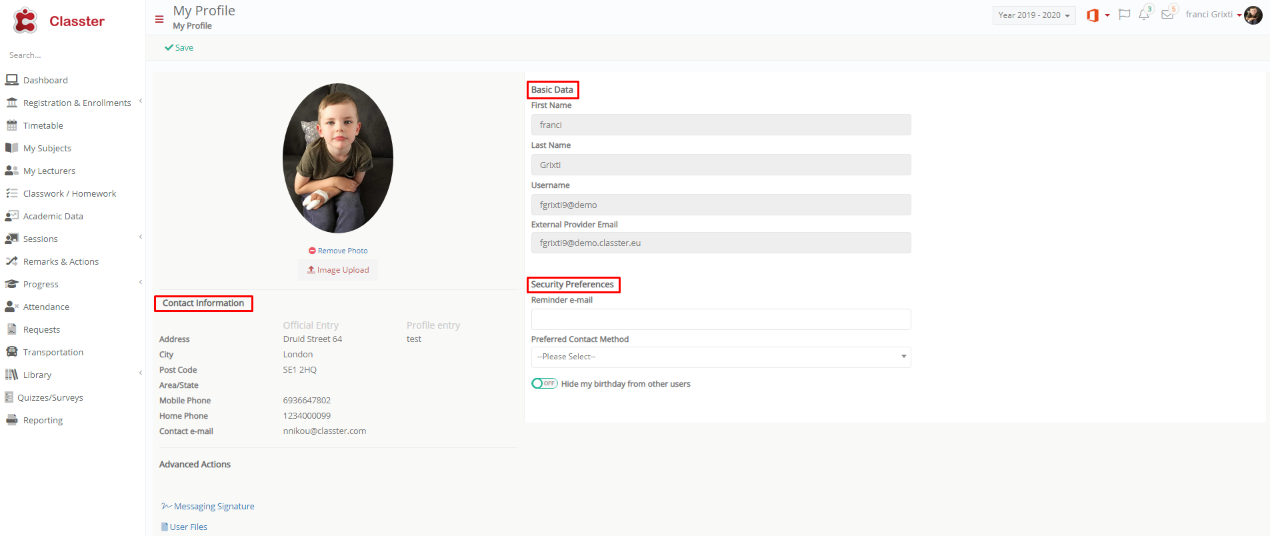
You are given the ability to Add or Edit any of the following information:
- Basic Data
- Contact Information
- Photograph
- Security Preferences
 Advanced Actions
After you have made your changes click on
- Remember! You must enter your email and a preferred method of communication to receive security messages (Figure 8).
 Figure 8
- You are able to add a signature for all your messages (Figure 9 – 10)
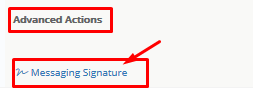 Figure 9
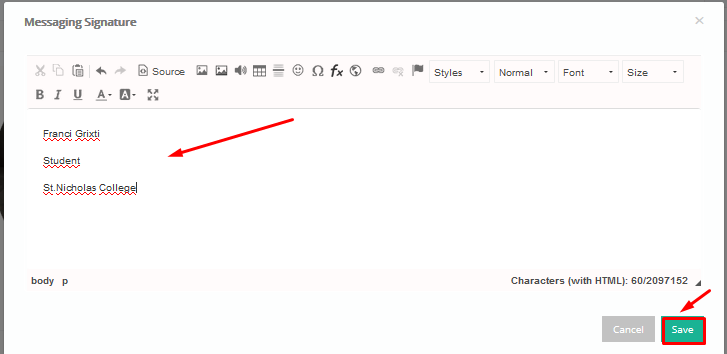 Figure 10
- Write down your signature details in the text box.
- Click on the “Save” button to save your signature.
Message Center
Here you are able to Send/Receive messages to and from Teachers or the Institution.
 From the User Action area click on the envelope icon
- Next click on the Read All Messages button.

- You will arrive at the Message Center Inbox (Figure 11).
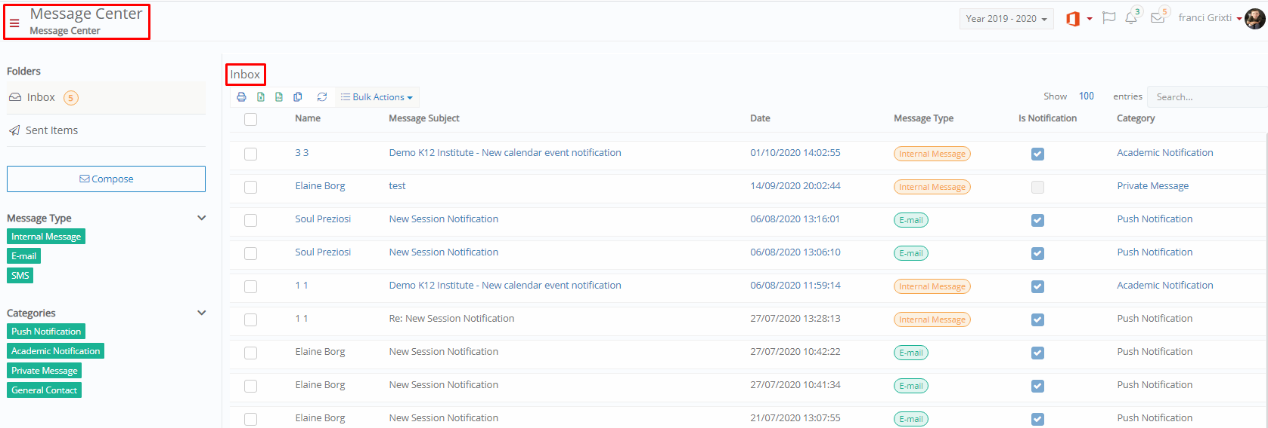 Figure 11
Note: The Envelope icon also shows you if you have new/unread messages.
Opening/Receiving/Replying to Email or SMS messages
- Click on the envelope button, to open the Message Center.
- Click on “Read All Messages” button.
- Select Inbox or Sent items, to see the incoming or sent items (Figure 12).
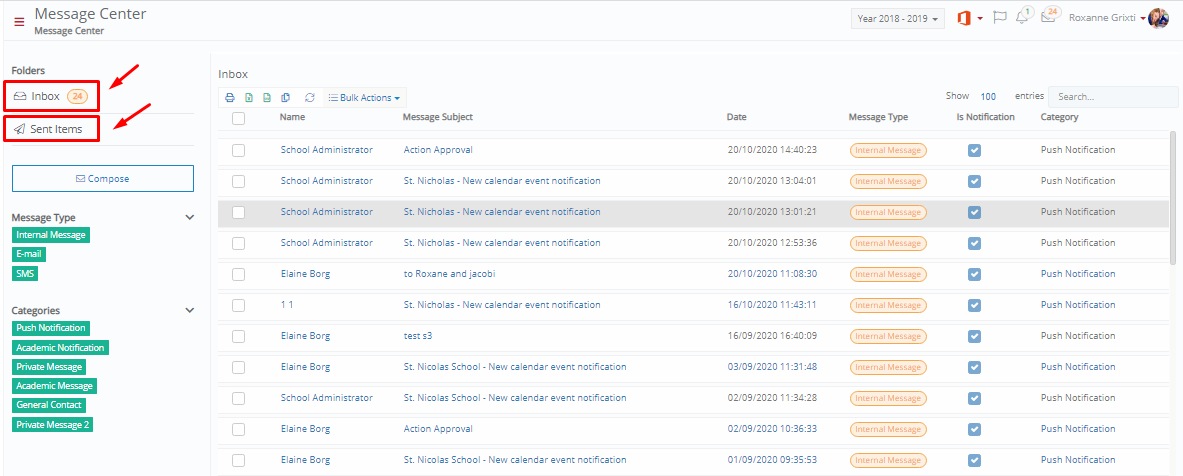 Figure 12
- Click on the email Name or E-mail Subject to open the message (Figure 13):
 Figure 13
- When you have opened the message (View Message) you can choose to reply or print the message (Figure 14).
 Figure 14
Composing Messages
- You open the Message Center, underneath the Inbox and Sent Items button you will find the Compose button (Figure 15).
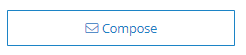 Figure 15
- Click on “Students” or “Lecturers” to choose a that type of recipient for your message and then fill in the “To” and “Subject” fields (Figure 15a).
 Figure 15a
- Write your message and then press Send (Figure 15b).
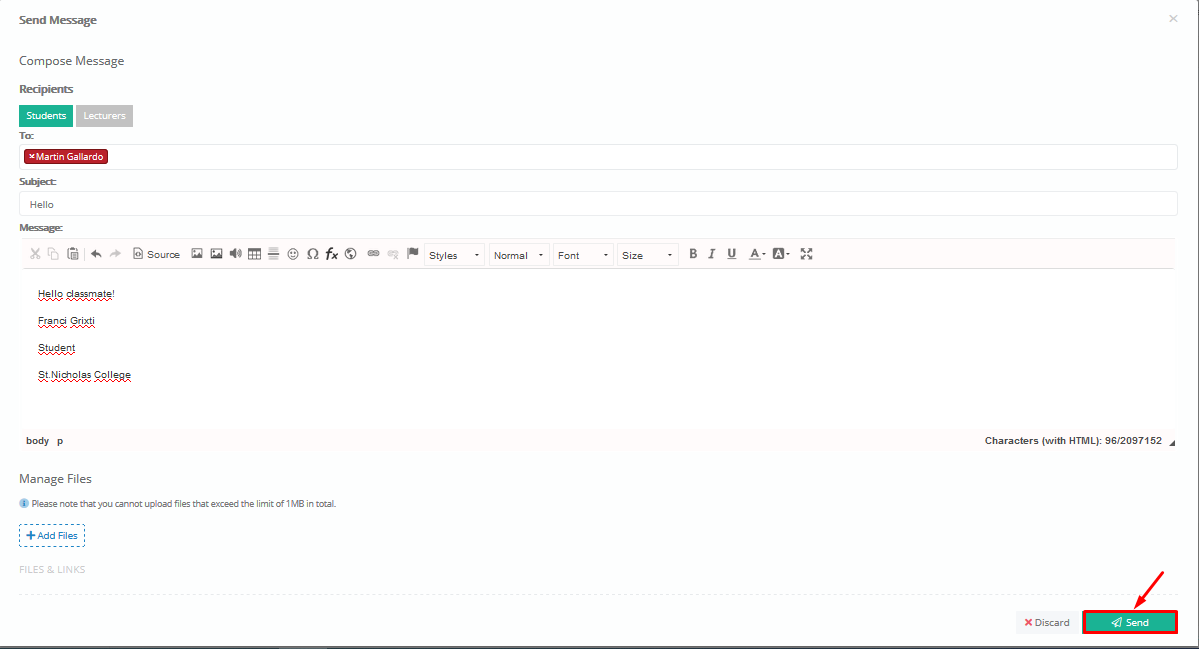 Figure 15b