Let’s discover together how can Classter integrate with Google Workspace.
First, you will need a Google Workspace account.
To create one, visit the official Google website by clicking here.
Step 1
Click on the “Get Started” button and fill in your details in the next steps. (Figure 1)
Figure 1
Step 2
If you have carefully completed the registration process, you will be taken to the Admin Console home page.
Go to the Security > Access and data control > API Controls menu. (Figure 2)
Step 3
Press “MANAGE DOMAIN WIDE DELEGATION” and then “Add new“.
(Figures 3 & 4)
Step 4
Fill in the following information.
- Type “105665636440034667261” in the “Client ID” field,
- Paste “https://www.googleapis.com/auth/admin.directory.group,https://www.googleapis.com/auth/admin.directory.user,https://www.googleapis.com/auth/admin.directory.domain.readonly,https://www.googleapis.com/auth/classroom.courses,https://www.googleapis.com/auth/classroom.rosters” in the “OAuth Scopes (comma-delimited)” field,
- then click on “AUTHORIZE”. (Figure 5)
Step 5
After doing this, you need to head back to the Classter portal, in the Google Workspace Settings page, to continue. (Figure 6)
First, you need to click on the “Activate” button. (Figure 7)
Let’s explain the available fields one by one (Figure 8):
- Enable option:
By clicking on the Activation button, you will be automatically redirected to the Google Workspace page to log in to your account. After doing so, you will get redirected back to Classter again, where the rest of the fields will be available for configuring. - Username field:
Enter your Google Workspace Username here. - Student Domain Account dropdown:
This dropdown will be filled in automatically with the different domains you own in your institutional Google Workspace account. Select the appropriate one to be used for Students. - Teacher Domain Account dropdown:
This dropdown will be filled in automatically with the different domains you own in your institutional Google Workspace account. Select the appropriate one to be used for Teachers. - Parent Domain Account dropdown:
This dropdown will be filled in automatically with the different domains you own in your institutional Google Workspace account. Select the appropriate one to be used for Parents. - Staff Domain Account dropdown:
This dropdown will be filled in automatically with the different domains you own in your institutional Google Workspace account. Select the appropriate one to be used for Admins/Employees.
Sync Users with Google Workspace!
You will need to complete this step for existing users once.
After integration, users will be automatically synchronized.
Step 1:
- Go to “User Accounts” list in the Classter portal.
- Select the teachers/students you want to synchronize.
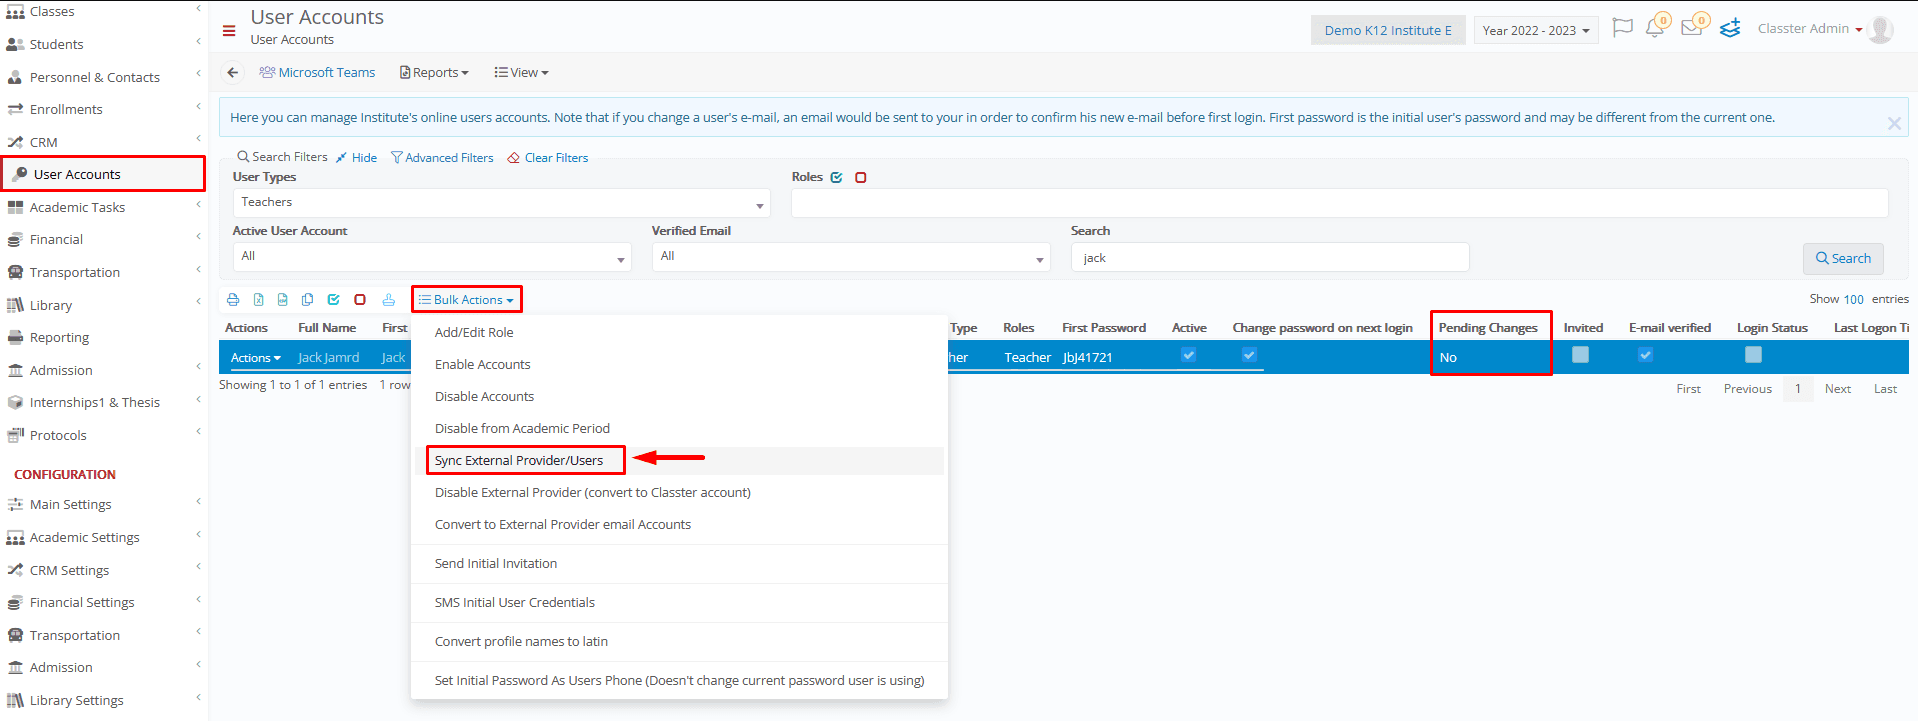
- In Bulk actions, click on the “Sync External Providers/Users” option.
- When “No” appears in the “Pending Changes” column, the synchronization is complete. (Figure 1)
Then, teachers need to go to the Google Classroom website and enter their details.
Step 2:
- Click on the “Classroom” icon as shown in Figure 2.
- Click on the “Accept” button on the courses you want to synchronize.
- In the “Classwork” section there is a “Create” button to create a new assignment (Figure 3)
- Select the type of classwork you want to create.
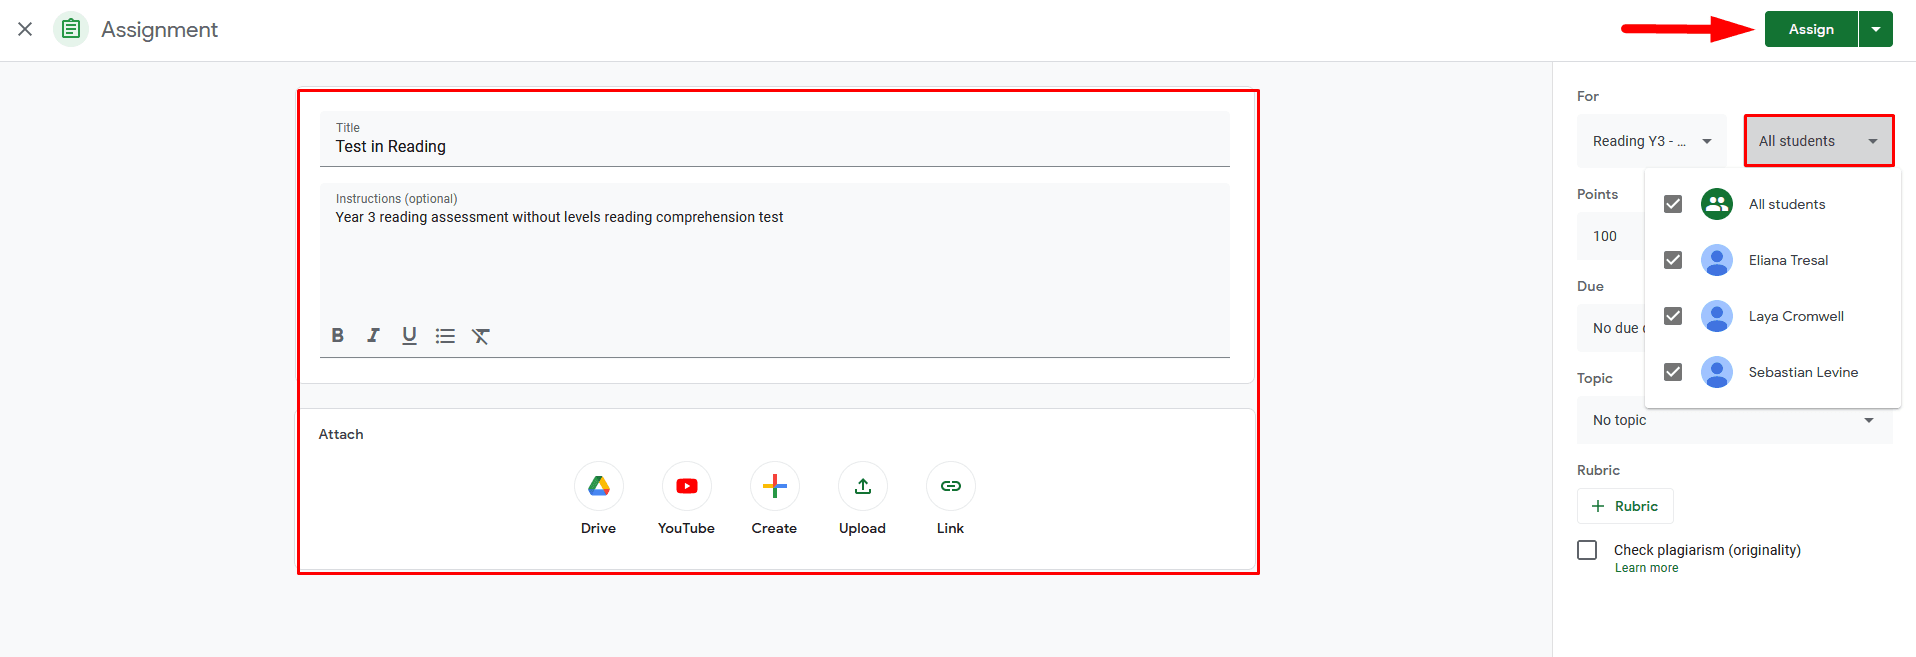
- Fill in the necessary fields and select the students you want to assign, finally click on the “Assign” button (Figure 4)
In order to grade an assignment, click on it and enter the grade for the corresponding student and return. (Figure 5)
Sync with Google Classroom!
To sync the graded assignment with Classter, the teacher needs to follow this path: Quick Actions > Actions Menu > Sync with Google Classroom. (Figure 6)
- Select the class and the subject and click “Search”.
- Select the assessment you want to synchronize and click “Sync Assignments” from the Bulk Actions button. (Figure 7)
Figure 7
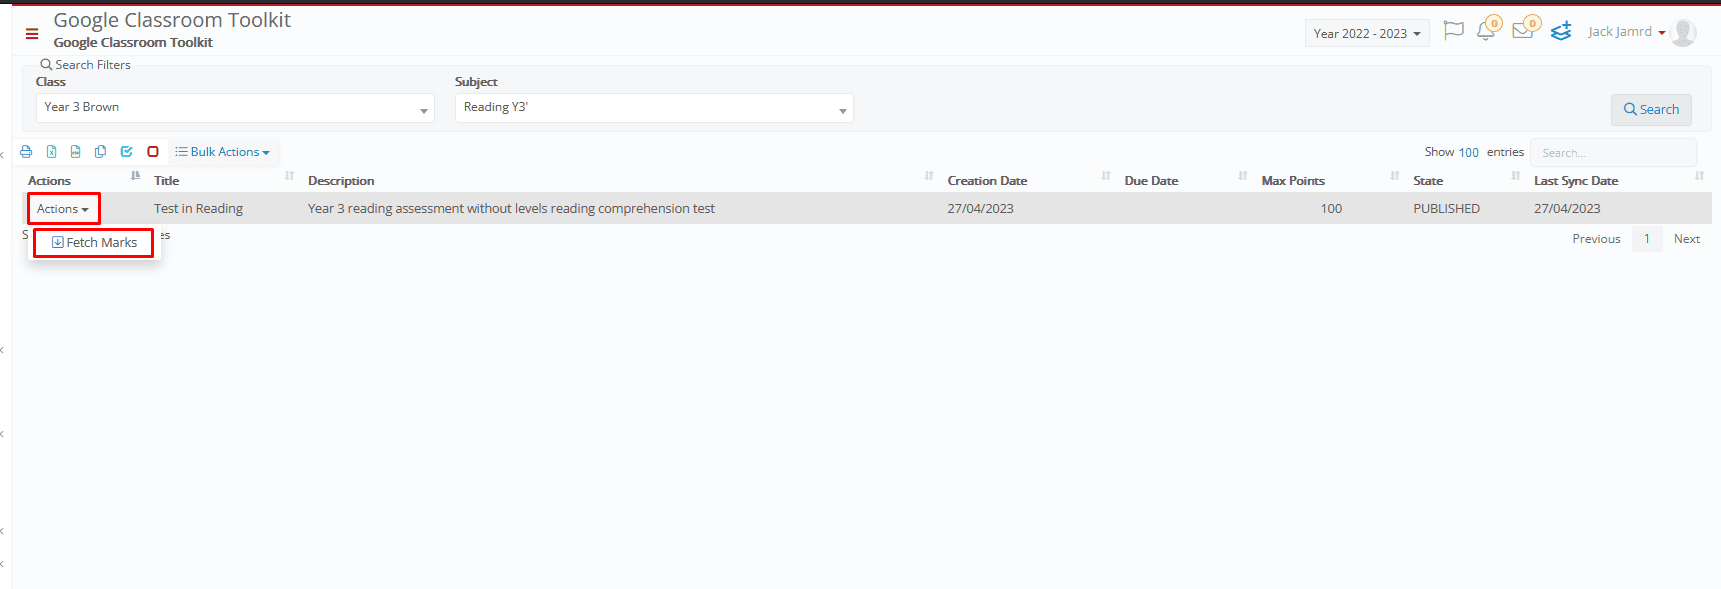
Once the sync is complete, tap Actions > Fetch Marks > Sync Marks as shown in Figures 8 & 9
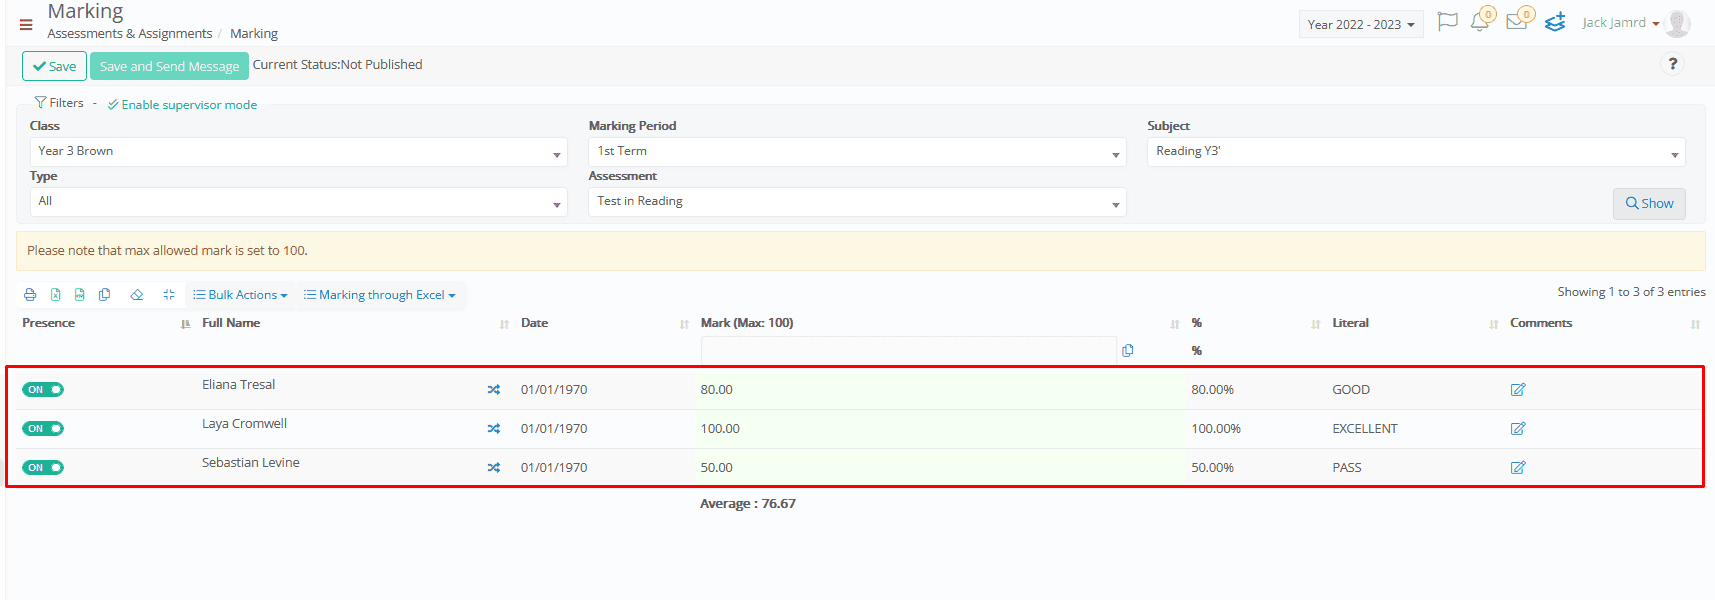
Assessment and grades have been successfully synchronized as shown in Figure 10


