

The first step to Descriptive Making Configuration is to Create Marking Criteria.
To do this you need to be logged on to the Classter portal as an Administrator. Once you are logged on you must follow the Path: Dashboard > Configuration > Academic Settings > Marking Settings > Marking Criteria (Figure 1).
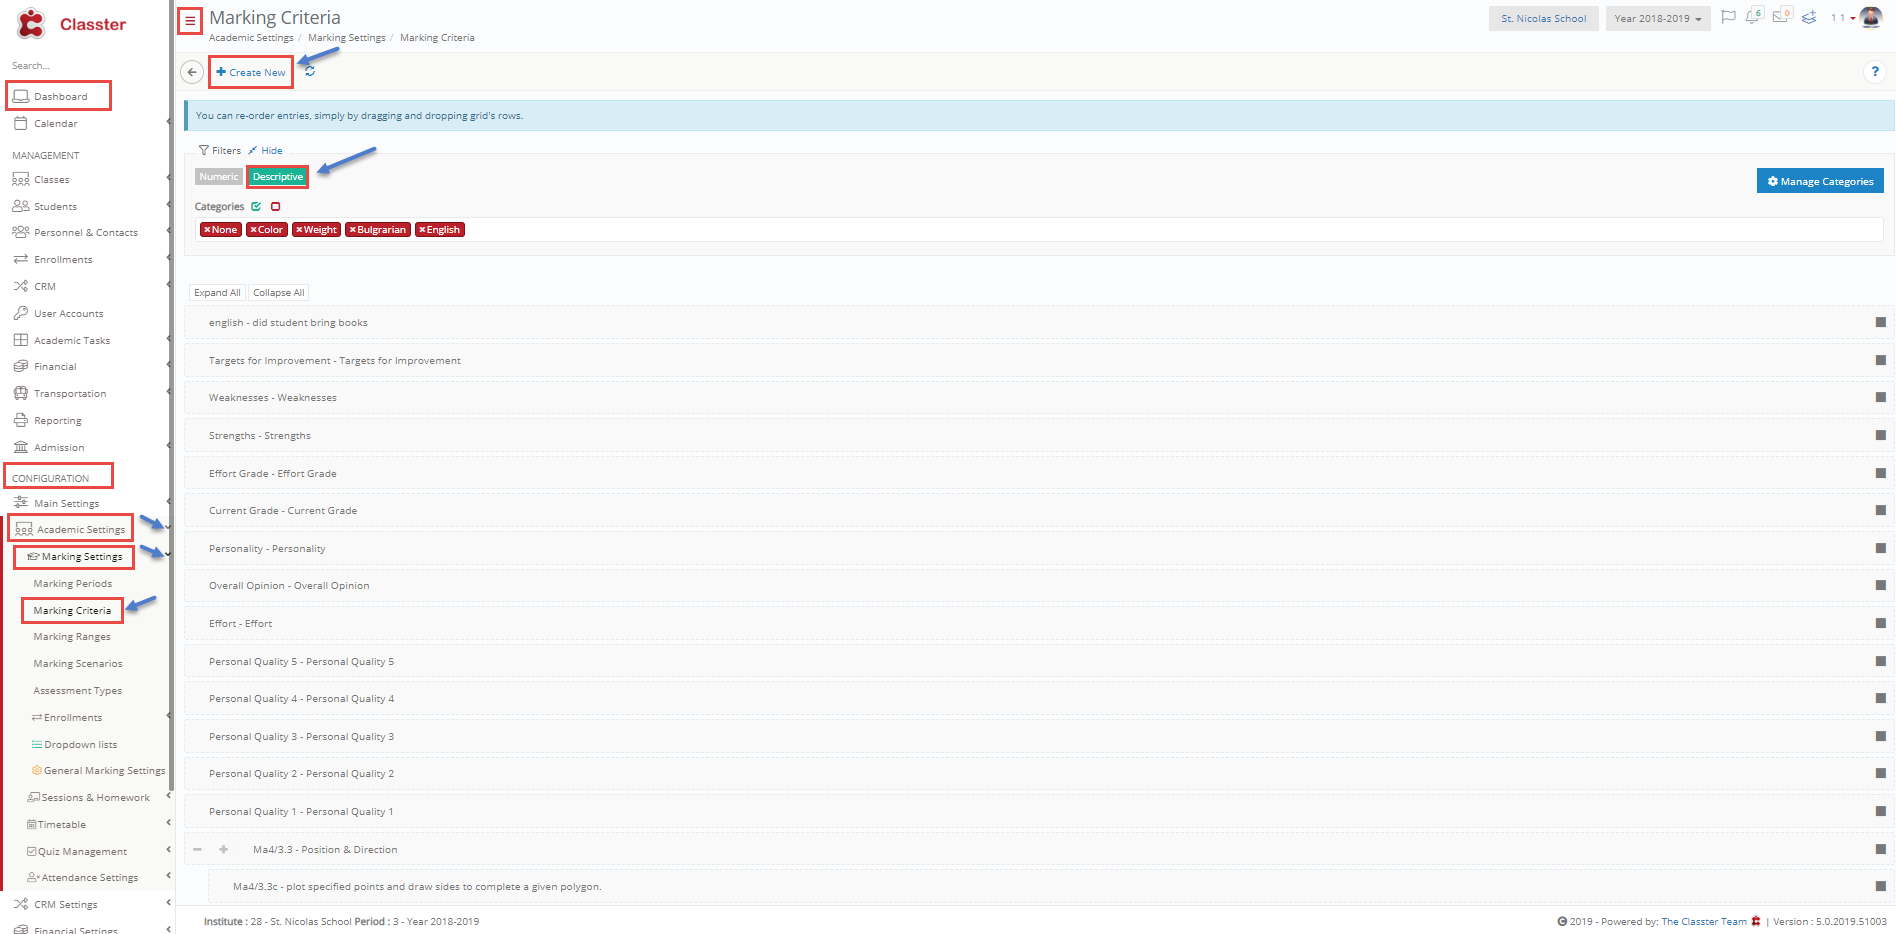
Figure 1
- You will have to choose Descriptive Criteria by clicking on the Descriptive button (Figure 1).
- You will be able to see all existing Descriptive Marking Criteria (Figure 1).
- You can move a Criterion up and down in the list by drag and drop (Figure 1).
- You can also Edit existing Criteria by clicking on the edit button next to each Criterion
 (Figure 1).
To create a new criterion you need to go to the top right of the page and click on the +Create New button ![]() (Figure 1)
(Figure 1)
Create New Criteria
Once you have clicked on the button you will see the following page appear (Figure 2).

Figure 2
- Enter Abbreviation e.g EN 1.1 (optional)
- Enter Description e.g Spelling (required)
- Choose Category if you wish to add this criterion to a specific category e.g English (optional)
- Click on the on-off switch to set the use of Descriptive or Numeric Marling. If the switch is on that means you will be using Descriptive Marking (required).
- Once you are done click on save to save a new criterion (Figure 2).
Note: Fields with a red asterisk are mandatory. You will be unable to save criterion if a mandatory field is empty.
Edit Criteria
From the main page of the Marking Criteria, you need to click on the descriptive button to view all descriptive criteria. Find the criterion you wish to edit and click on the edit button next to the description (Figure 3).

Figure 3
- Click on the Edit button (Figure 3)
You will see the Edit page for the chosen criterion (Figure 4).
 Figure 4
- You can change criterion Abbreviation (Figure 4).
- You can change the criterion Description (Figure 4).
- You can add a criterion to a new category or no category (Figure 4).
- You can turn Descriptive Marking on or off (Figure 4)
- Click on the Delete button to delete this criterion (Figure 4).
- Click on the Save button to save changes (Figure 4).
Note: Fields with a red asterisk are mandatory. You will be unable to save criterion if a mandatory field is empty.
You are also given the ability to add subgroups in any Criterion you create as you can see below (Figure 4a):

Figure 4a
On the main page of Marking Criteria, you can view the Descriptive Marking Criteria you have created or edited and add a sub-criterion (Figure 4a).
- Click on the + button to add a sub-criterion (Figure 4a).
Once you click on the + button you will be directed to a creation page (Figure 4b)

Figure 4b
- You need to fill in the fields for your new sub-criterion (Figure 4b)
- Click on the ‘Save’ button to save the sub-criterion (Figure 4b).
Manage Categories
Categories are groups that allow you to better organize the criteria you create by categorizing them (Figure 5).
In the main page of Marking Criteria, you will notice a button on the far left of your screen that is named ‘Manage Categories’ (Figure 5).

Figure 5
- Click on the Manage Categories button in order to go to the Manage Category page.
You will now be able to view the Manage Categories Page (Figure 6).
 Figure 6
- You can see existing Categories with Descriptions and Color codes (Figure 6).
- You can Delete a Category by clicking on the Delete button (Figure 6).
- You can edit a Category by clicking on the edit button (Figure 6).
- You can create a new Category by clicking on the +Create New button (Figure 6).
- You can search for a specific category by entering a description in the search field (Figure 6).
- You can define the number of results presented by changing the number between ‘Show Entries’ e.g 20.
Create New Category
Once you click on +Create New you will see a pop-up window (Figure 7).

Figure 7
- Enter a Description e.g ESL English (Figure 7).
- Choose a color e.g Blue (Figure 7).
- Click on Save to save the new category (Figure 7).
Edit Category
If you click on Edit you will be able to edit a category (Figure 6).
Once you have clicked on edit a pop-up window will appear (Figure 8).

Figure 8
- You can change the Description (Figure 8).
- Choose a different color (Figure 8).
- Click on Save to save the changes you made (Figure 8).