

Watch the How-to Video

My Subjects
- Use the filters to see the Subjects you are teaching, supervising, you are a 2nd supervisor, approver or reviewer at, and select the enrollment status i.e. Basic, Assistant etc. (Figure 48)
- You can also use the search field in the filters to locate a specific subject.
- You can view or edit the selected Subject’s info or Lesson Planning.
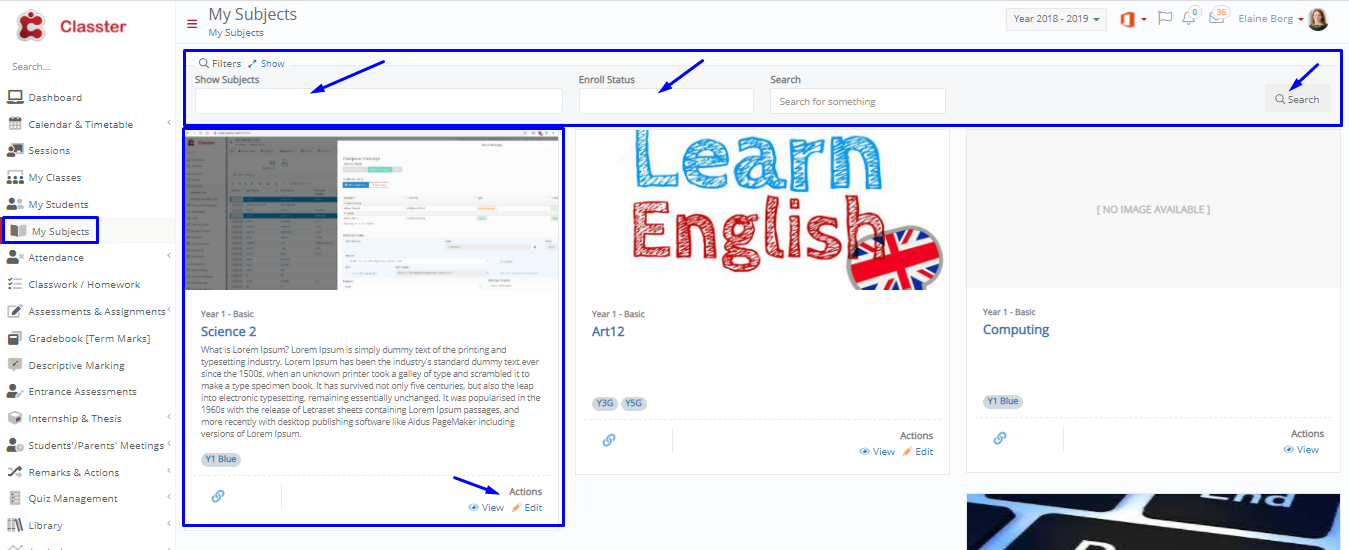 Figure 48
View Subject
- Under the “Actions” section of the subject’s card, you can click on view.
- Select View.
Included in Figure 49:
- On the view page you can see the classes/groups that have this subject enrolled.
- You can view the subject image and a short subject description.
- You can view upcoming Sessions, Events, Assignments and view files that have been attached to this specific subject.
In the tabs section of the page you can view the following tabs:
- ‘About Subject’ tab. You can see the about subject text, a short description, photo, general info, syllabus, subject format and FAQ (Figure 49x).
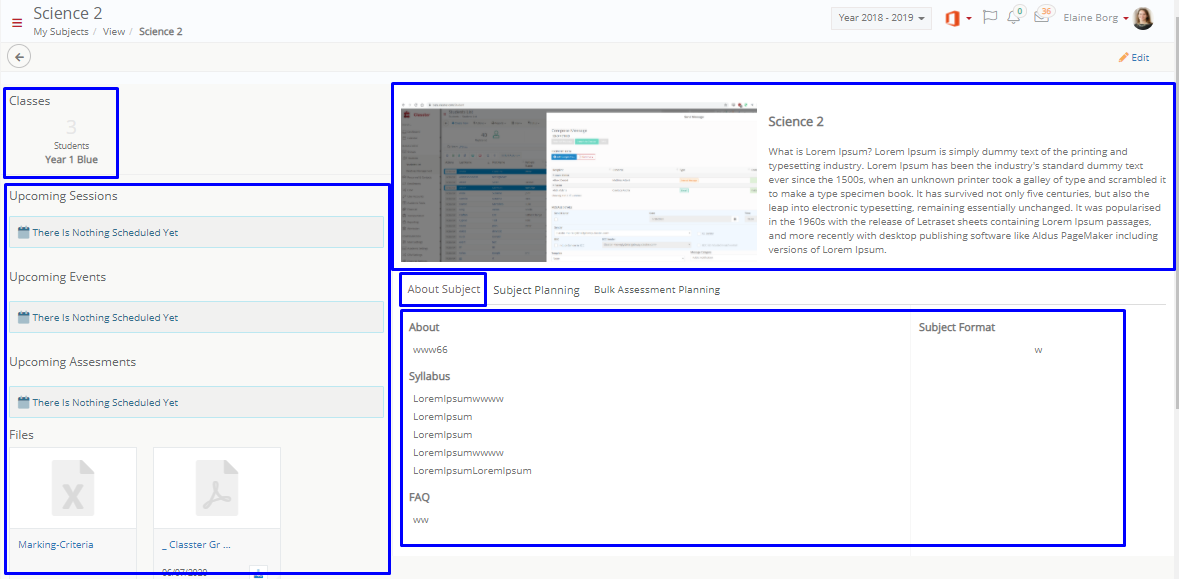 Figure 49
- “Subject Planning” tab. You can see the teaching structure of the subject (Figure 50).
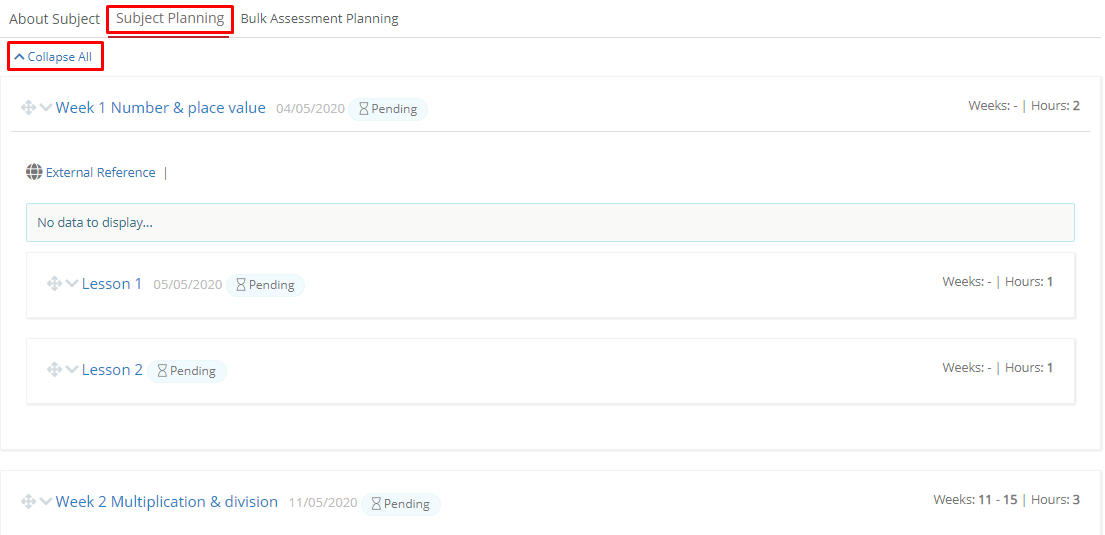 Figure 50
- “Bulk Assessment Planning” tab, here you can see the assessments in bulk regarding this subject for all classes this subject is enrolled too.
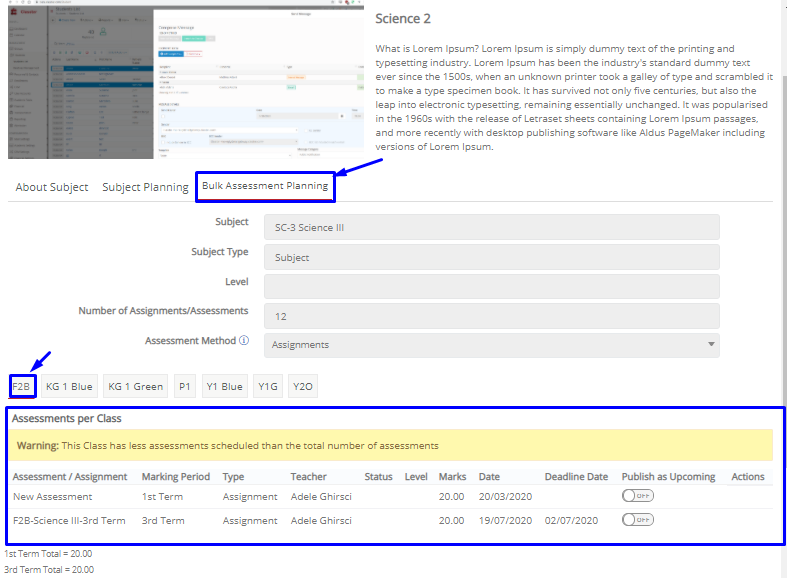 Figure 50a
Edit Subject
- Click on the ‘Actions Menu’ at the subject’s card, were we previously clicked on view (Figure 48).
- Select Edit to edit all the subject’s information at the About Subject and Subject Planning tabs (Figure 50b), as described previously in the “View” button.
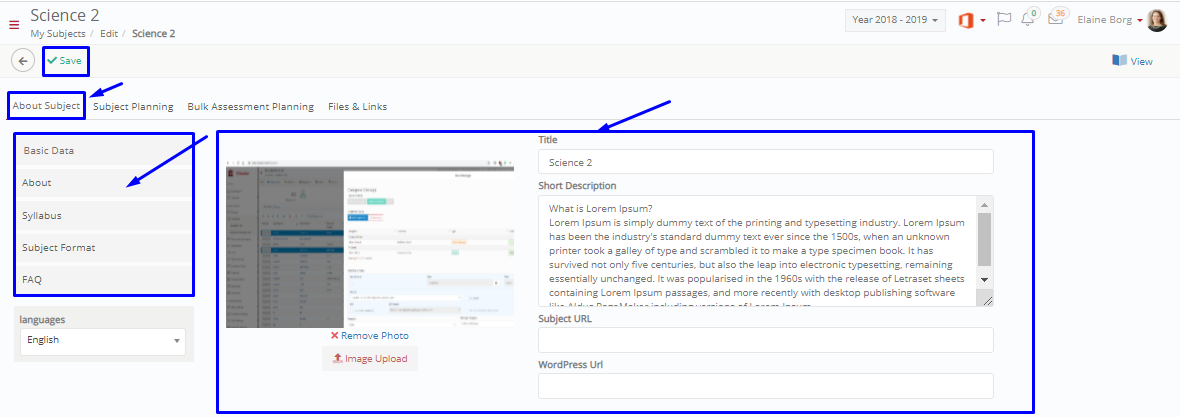 Figure 50b
- At the Edit menu you can also manage subject’s Bulk Assessment Planning. (Figure 51)
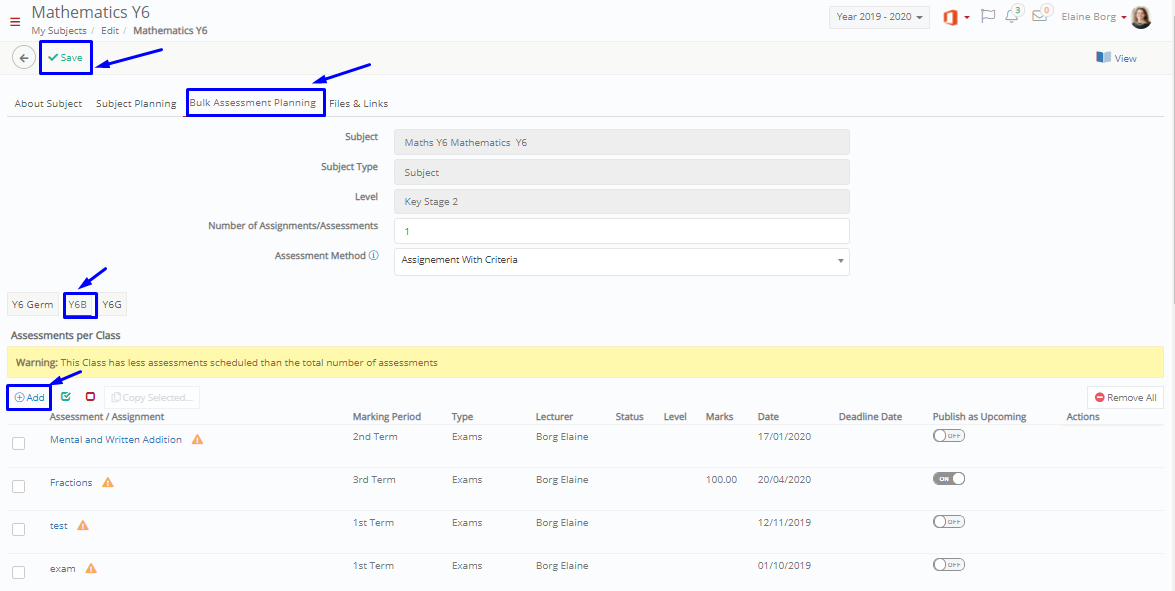 Figure 51
- Set the Subject, Subject Type, Level, Number of Assignments/Assessments and Assessment method
- Click on ‘Add’ to add assessment (Figure 52)
- Enter the assessment Title you want or click the title button to add the suggested one
- Select the Teacher
- Select the Date
- Select the academic period
- Select the type
- Add the marks at the criterion area and activate the assign button
- Activate/Deactivate the Publish as Upcoming setting
- Click on ‘Save’
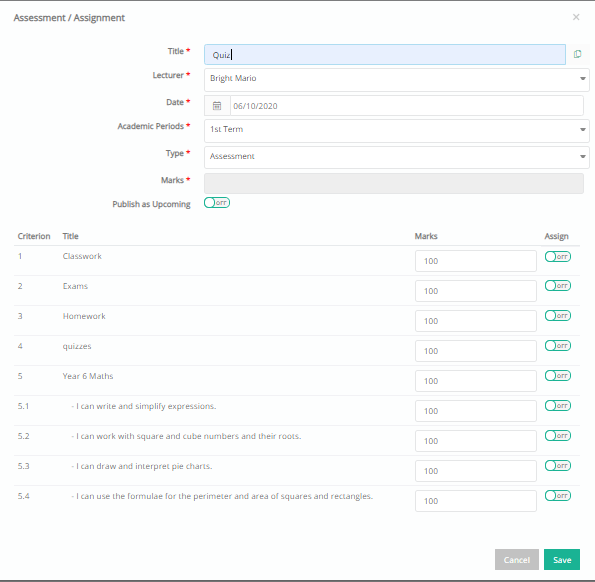 Figure 52
- You can edit assignment(s) data
- Check the criteria details at the Criteria Review area
- Click on Save
Files and Links tab (Figure 52a):
- You can upload Files, Links to the specific subject.
- Files are then available to all enrolled in this subject.
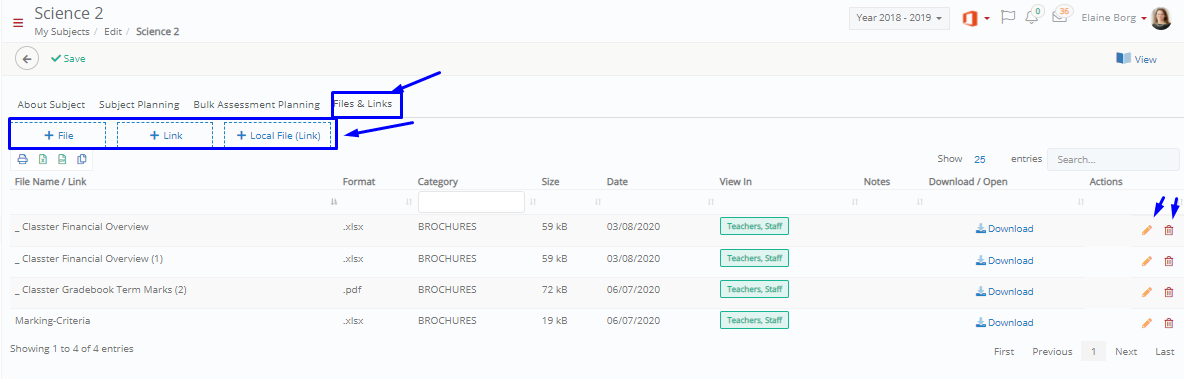 Figure 52a