Overview
The Application Status feature tracks each applicant’s progress through the admission stages. Typical statuses include Draft, Submitted, Registered, and Rejected, though institutions may customize this according to their workflow.
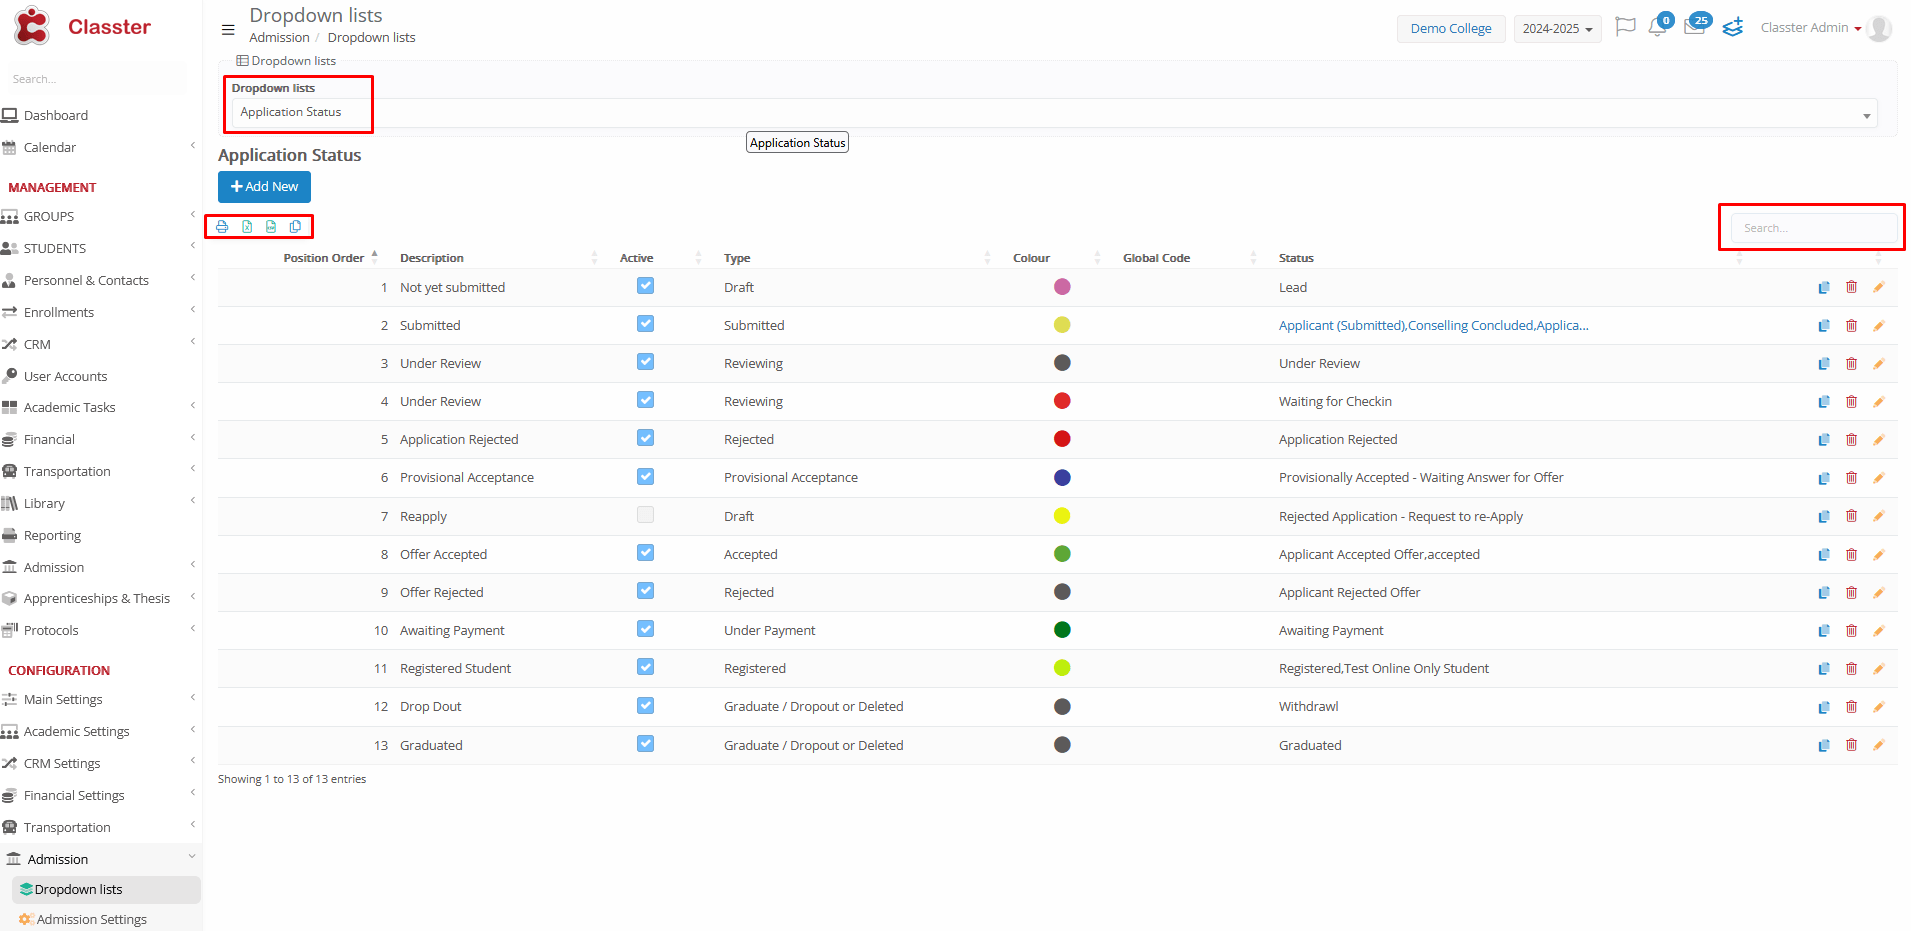
To configure your institution’s Application statuses, navigate to Configuration > Admission > Dropdown lists > Application Status from the lists and Add new or Edit an existing one.
Basic actions on the Admission Dropdown lists page:
- Dropdown Filter: Select “Application Status” from the admissions dropdown menu to view the list, which loads automatically and displays in a table view.
- Sort Options: Hover over icons to view tooltips for Print, Export (Excel/CSV), Copy. Use the sorting arrows to toggle ascending/descending order.
- Search Bar: Quickly locate specific statuses via the built‑in search functionality.
Creating a New Status
Click + Add New to launch the creation dialog.
Required fields (indicated by a red asterisk):
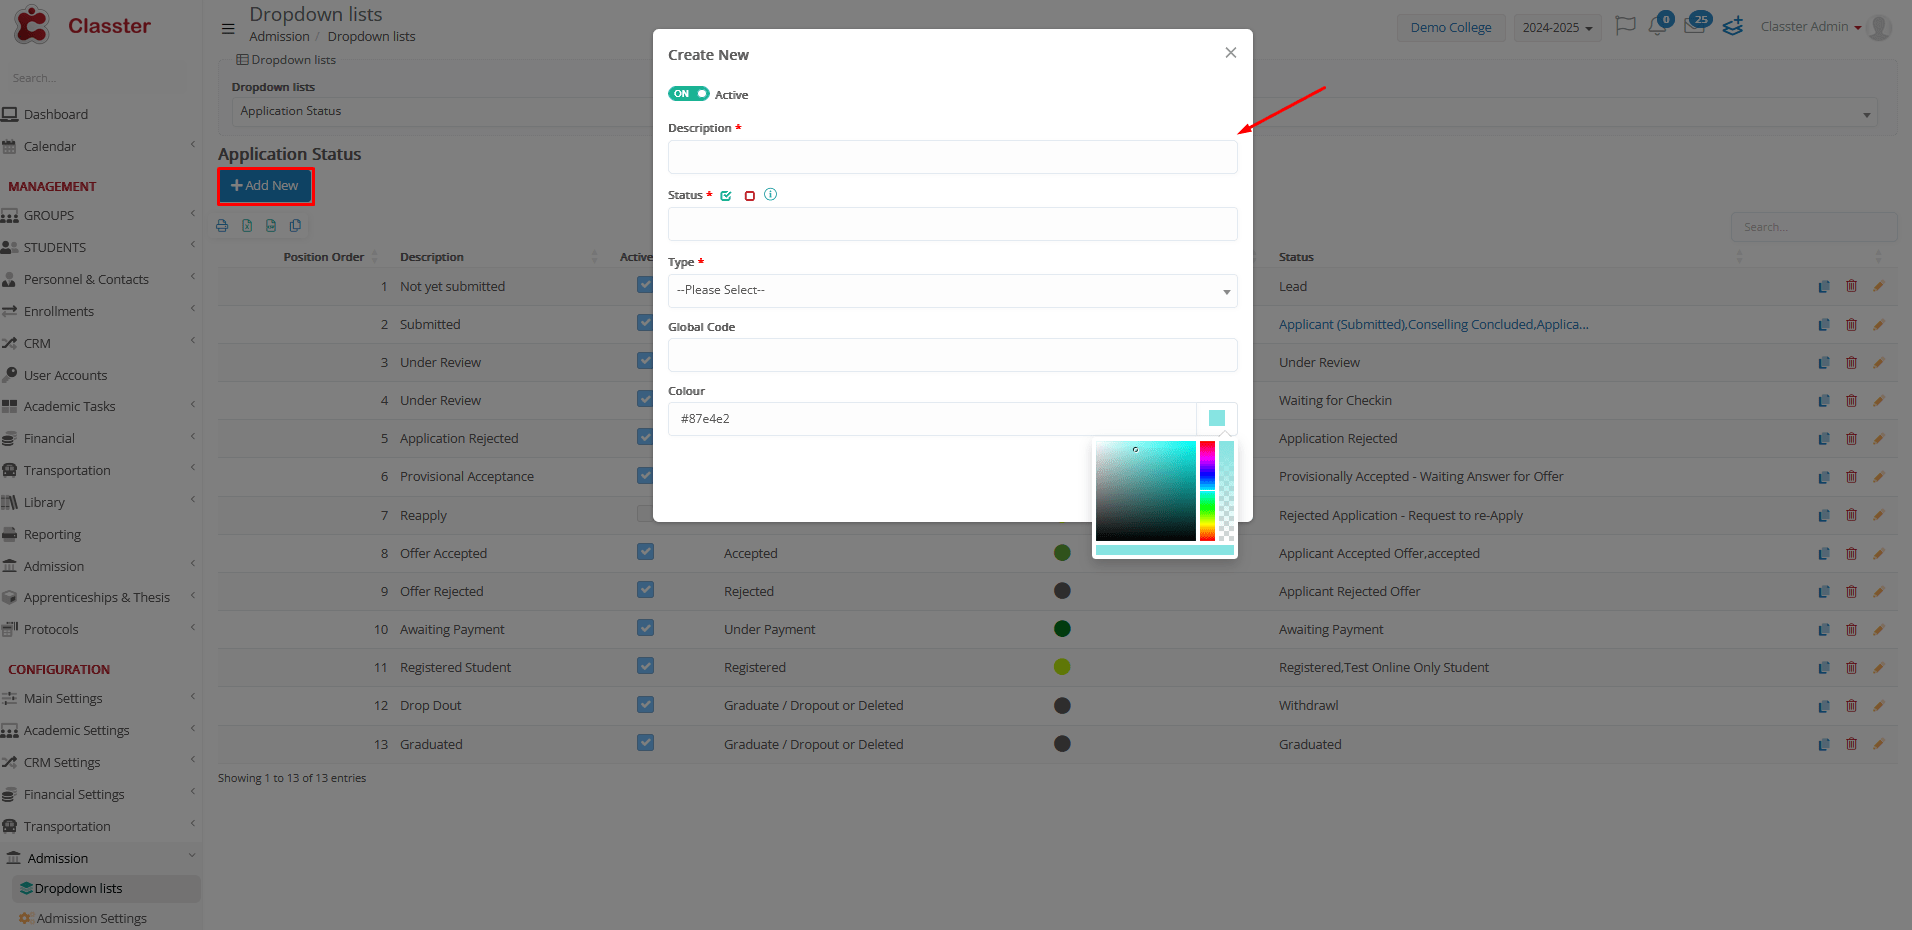
- Active: Enable to make the status usable.
- Description: Provide a label such as “Application Rejected” or “Awaiting Admissions Board Decision.”
- Status (Student Status): Select one or more student statuses to associate with this application status. This mapping determines what student status is applied when this application status is assigned.
🔒 Note: An application status may be internally processed and updated to reflect institutional workflow changes, but the applicant may not see any visible change if multiple student statuses are associated with that application status. This allows for backend tracking without affecting the applicant’s view of their application progress.
- Type: Choose from types like “Rejected” or “Accepted.”
- Global Code: Numeric code referenced by backend systems.
- Color: Assign a color for visual tracking.
Click Save to apply for changes.
Editing an Existing Status
Click the Edit button next to a status to change it in the popup dialog.
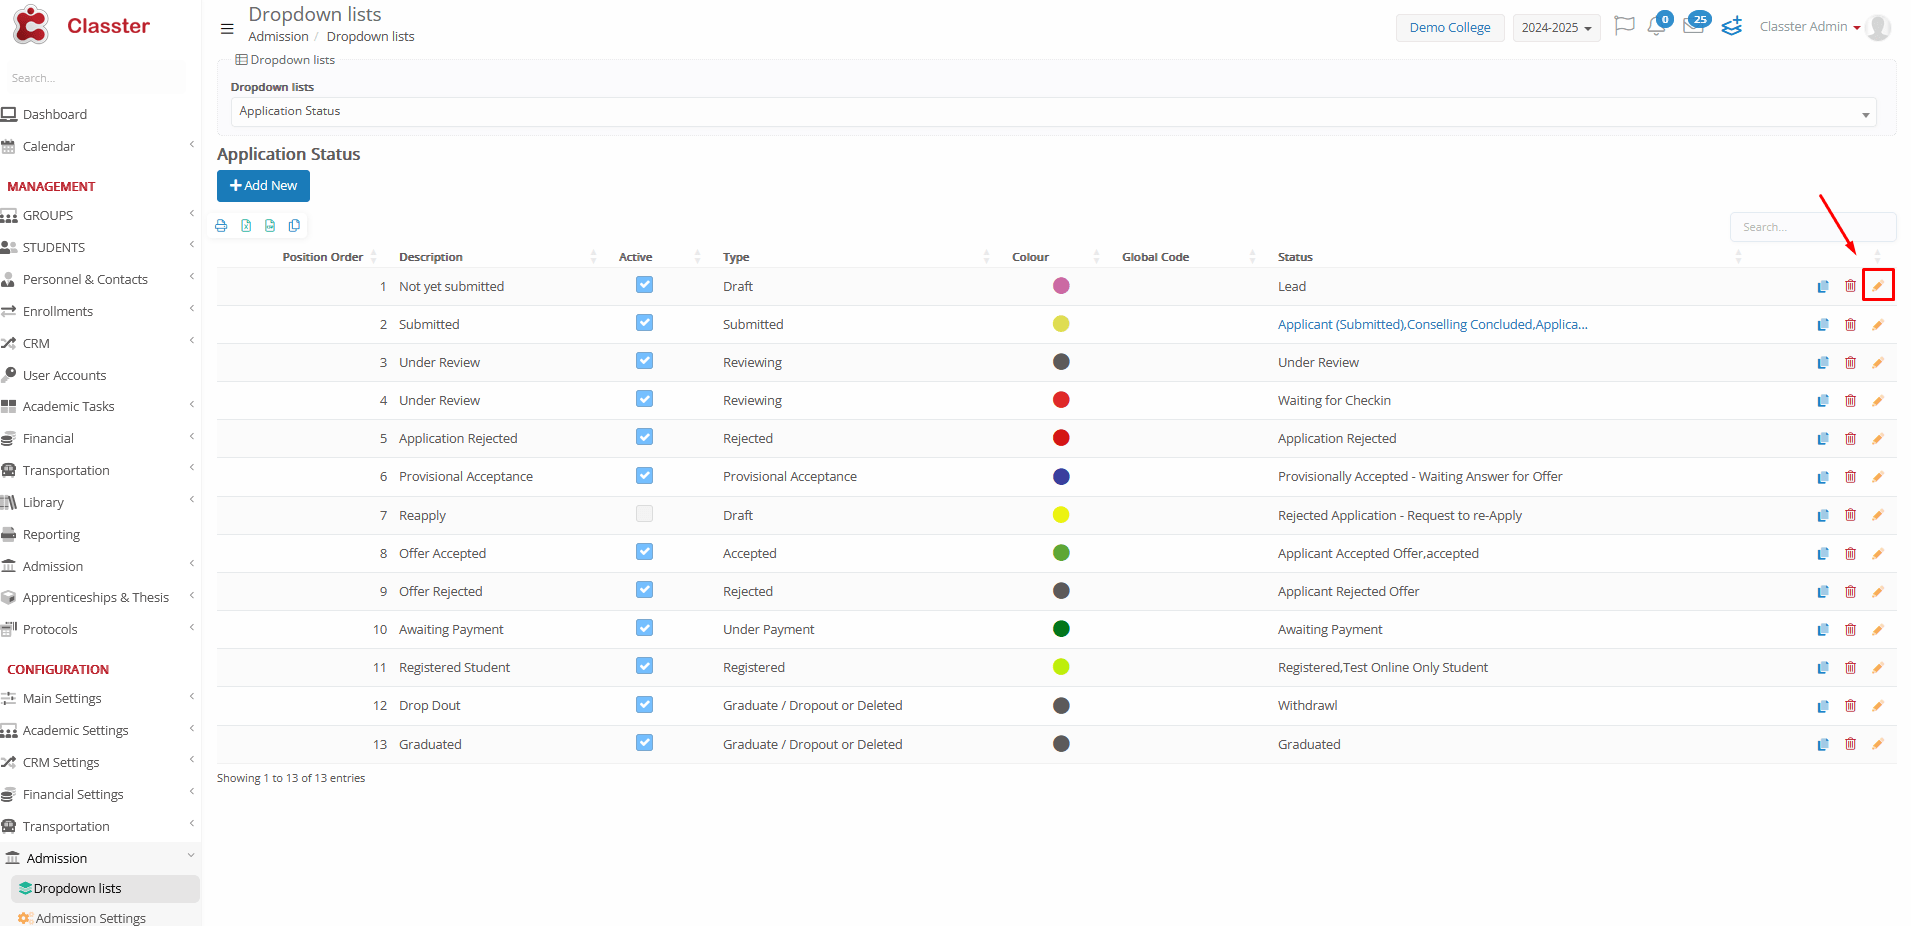
All previously listed fields can be updated: Active, Description, Status, Type, Global Code, Color.

Click Save to commit your changes.
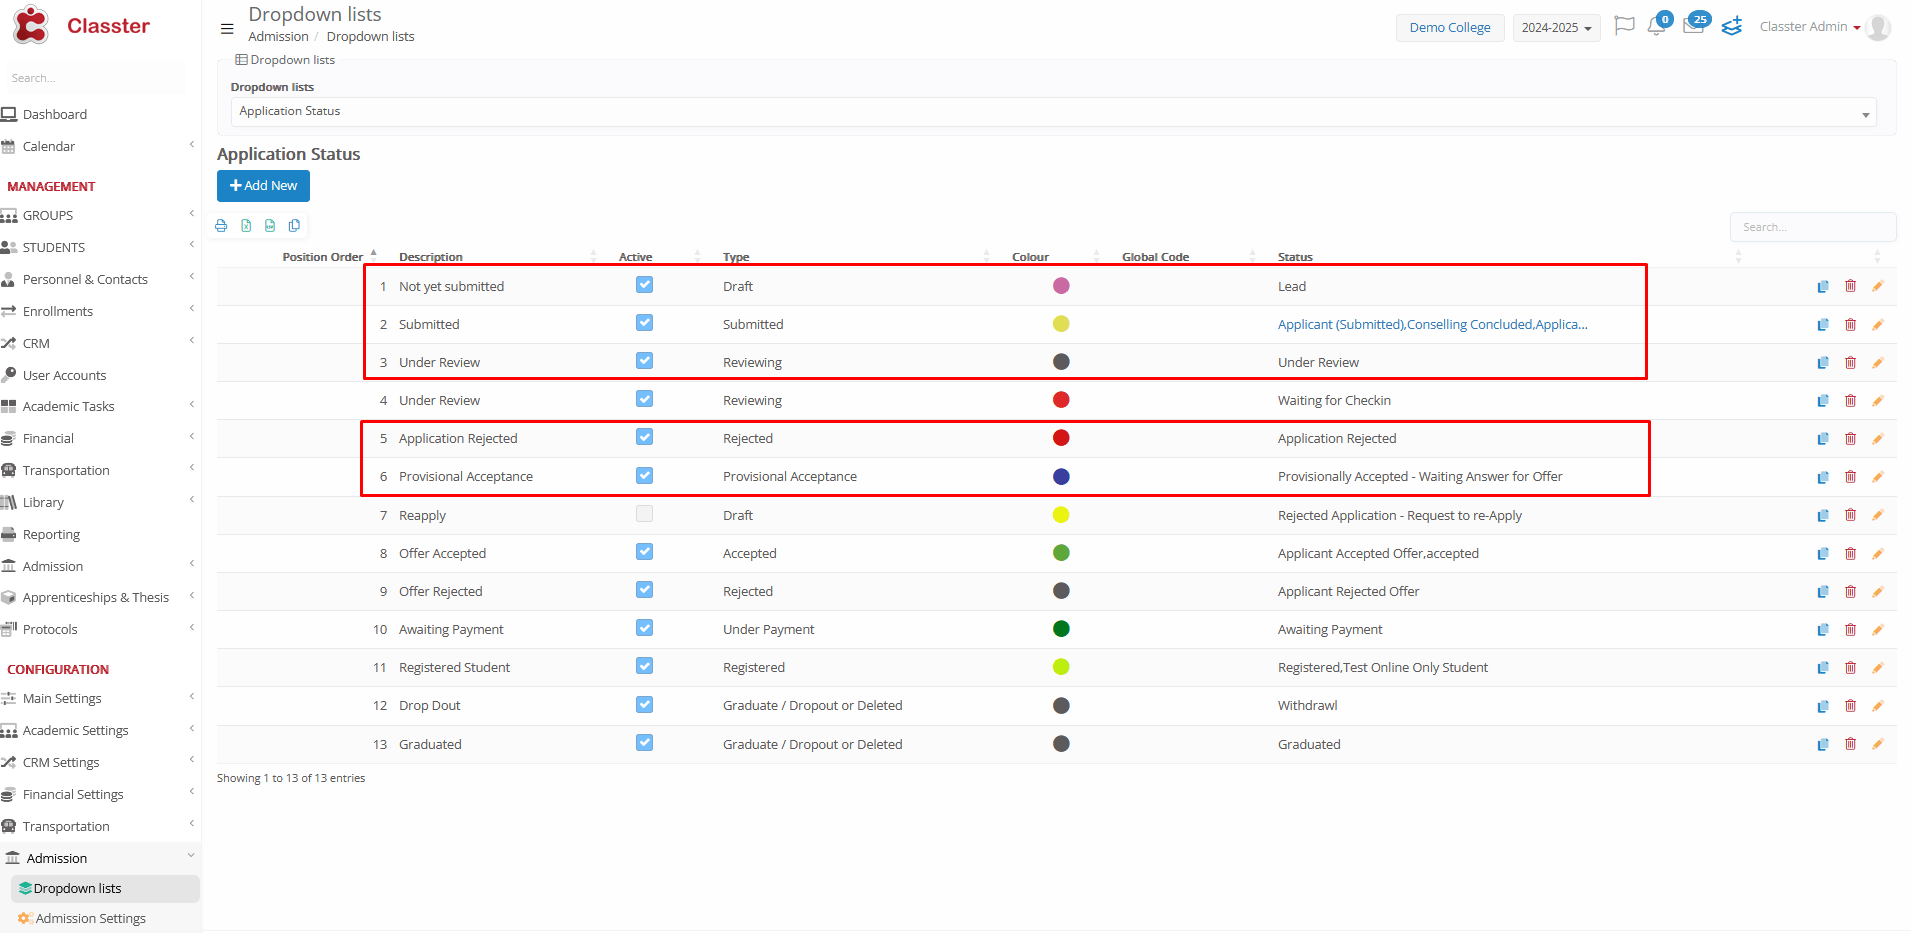
Example Status Workflow Table
| Description (Application Status) | Type | Color | (Student) Status |
| Not yet submitted | Draft | Purple | Lead |
| Submitted | Submitted | Mustard yellow | Applicant (Submitted), Counselling Concluded, Applicant (via Agent) |
| Under Review | Reviewing | Gray | Under Review |
| Application Rejected | Rejected | Red | Application Rejected |
| Provisional Acceptance | Provisional Acceptance | Blue | Provisionally Accepted – Waiting Answer for Offer |
(This is a generic example; adapt to your institution’s processes.)
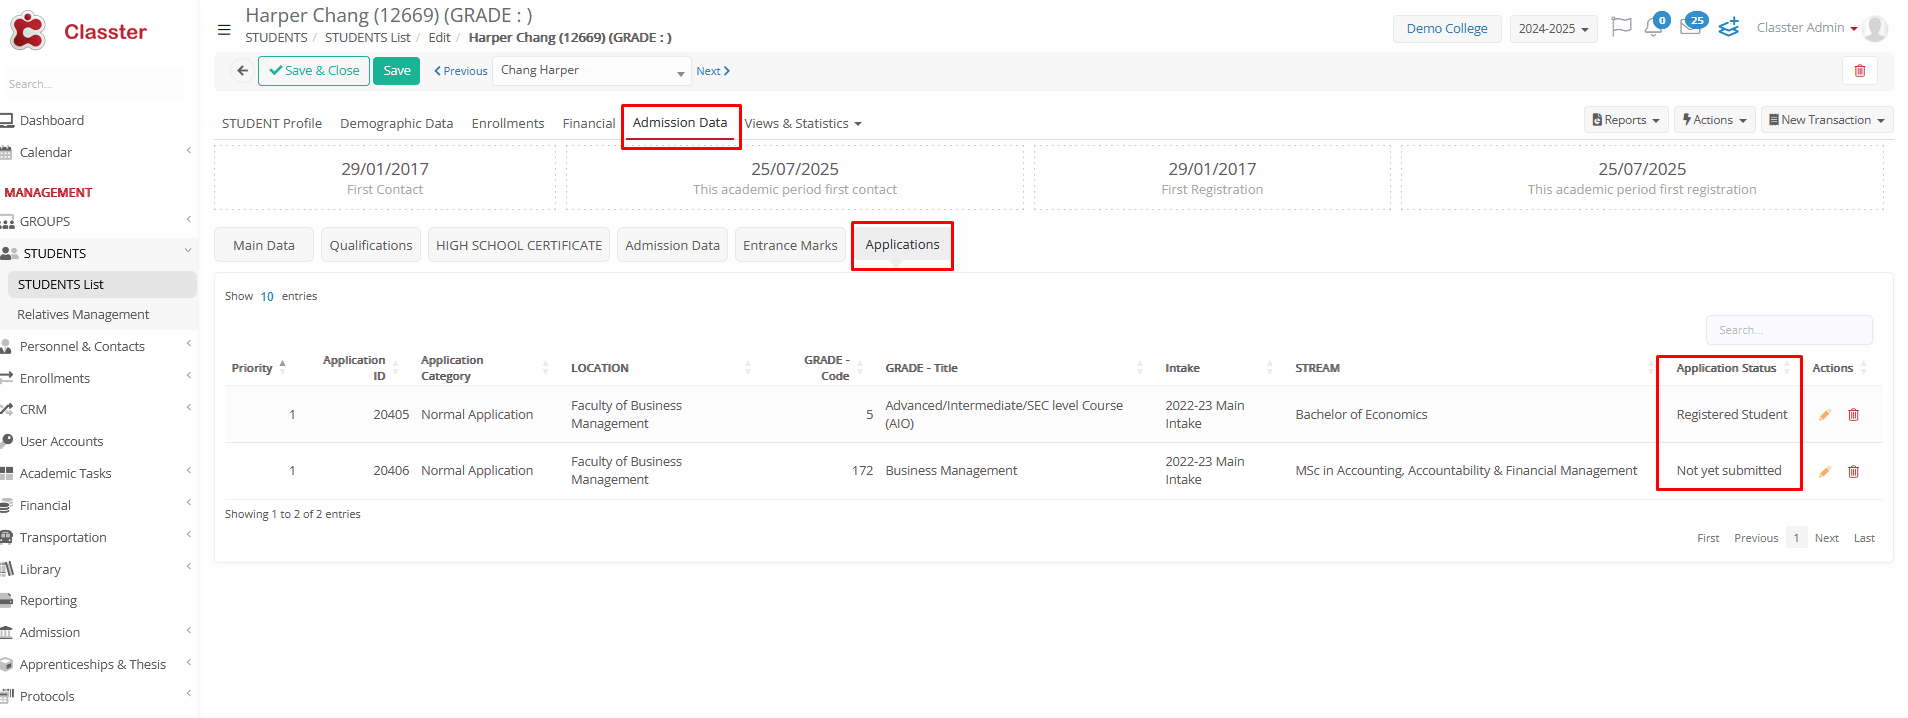 (Application Status on Student Form > Admission Data > Applications)
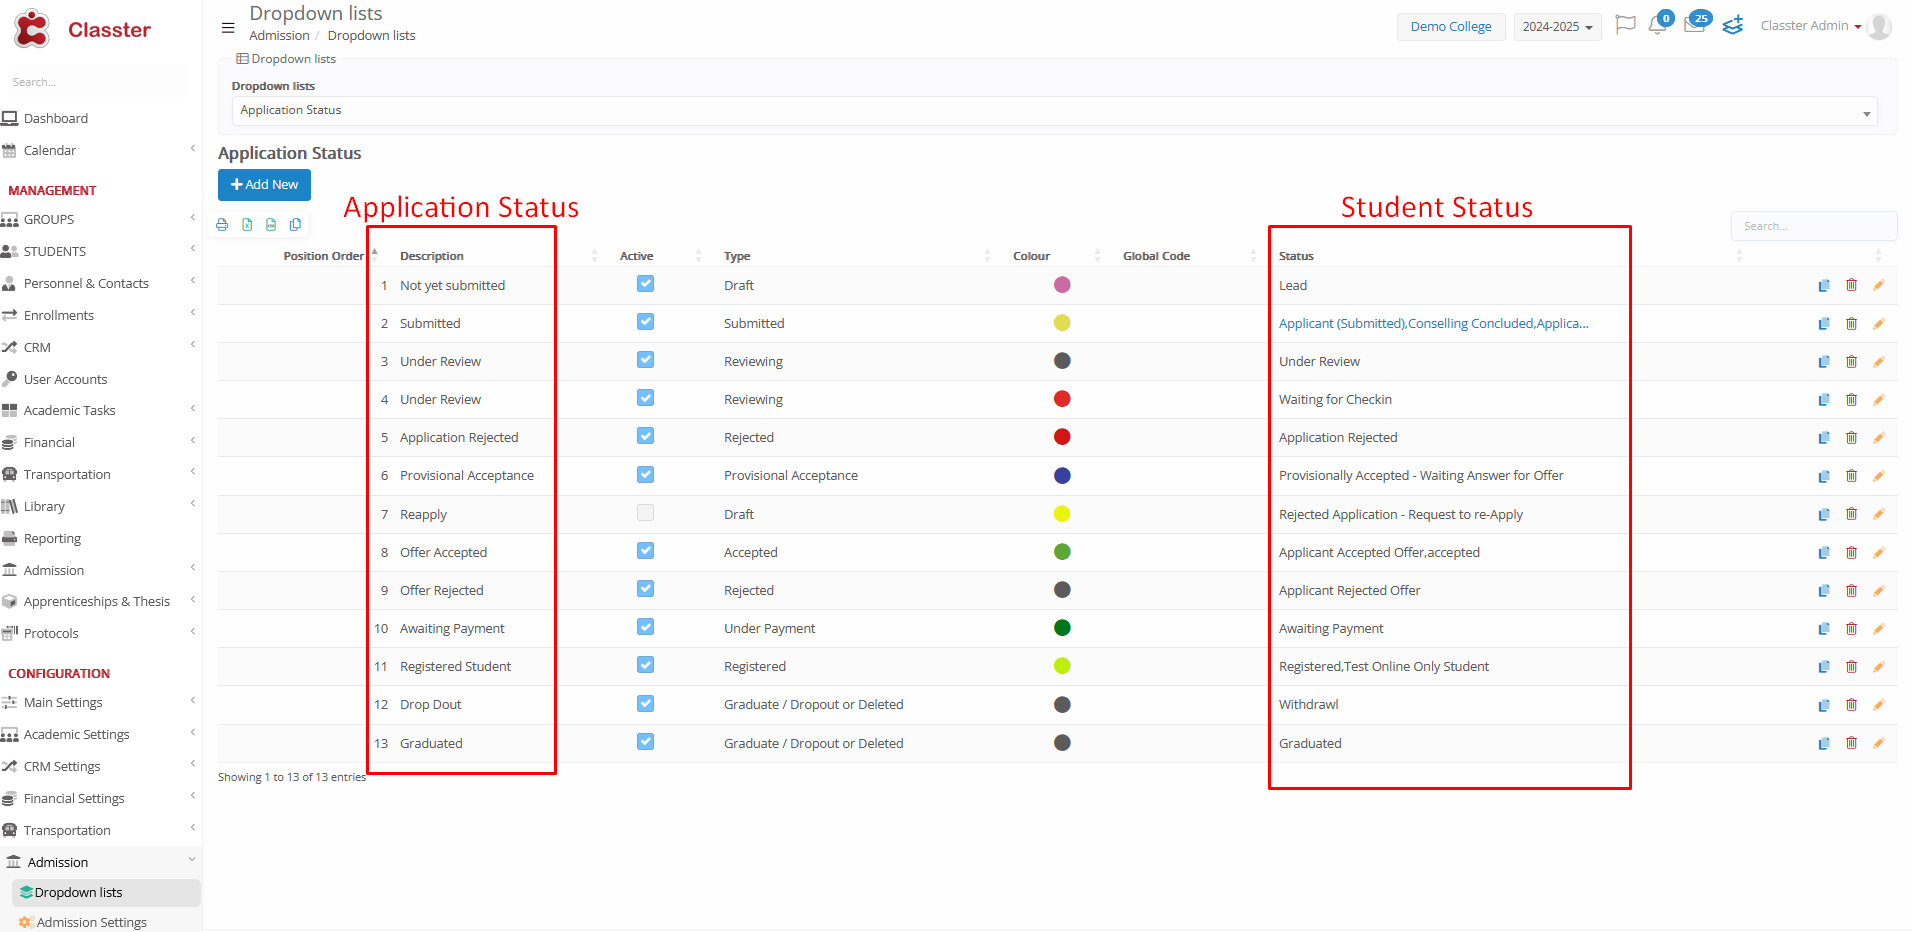
Application Status vs. Student Status
| Term | Description |
| Application Status | Tracks the progress of a specific program application. This is what the applicant sees, though back-office users may see more detailed internal statuses tied to backend workflows. |
| Student Status | Reflects the overall enrollment status per educational program. Used internally to manage the student’s official standing in each program (e.g., Lead, Applicant, Registered). |
Student Status Configuration
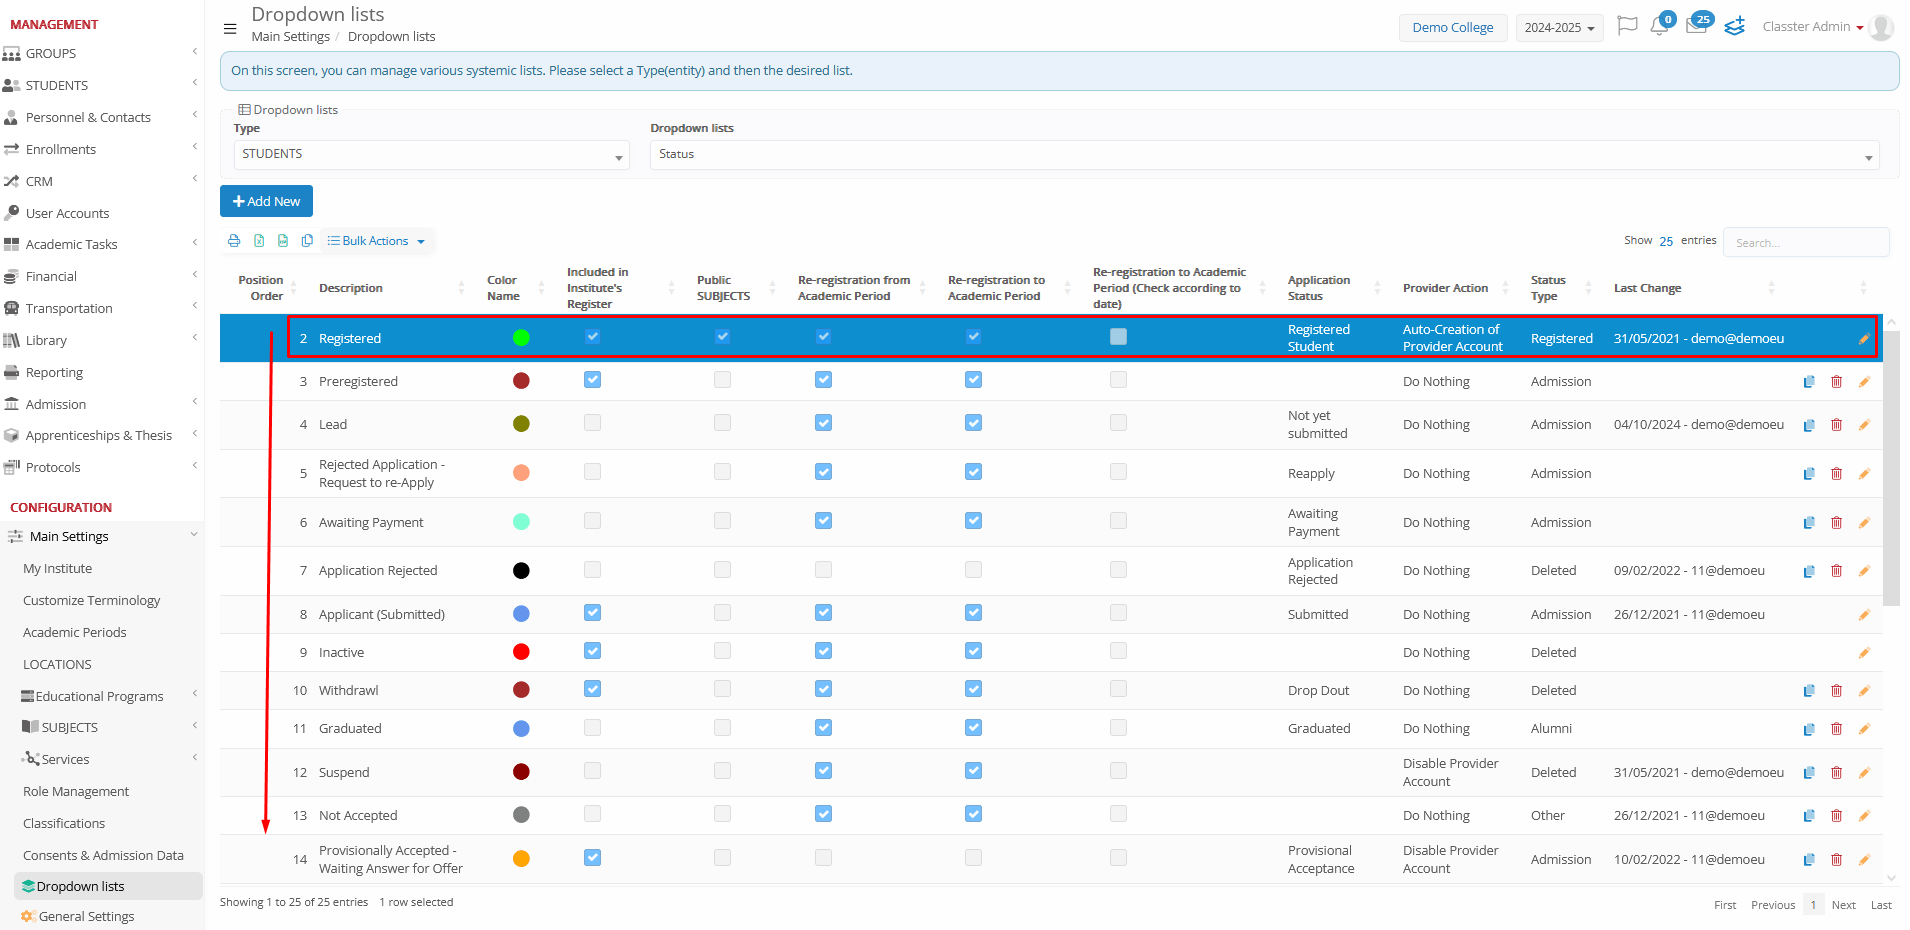
Navigate to Main Settings → Dropdown Lists → Students → Status
Relationship and Behavior
- Each application status is typically connected to a corresponding student status but may also be linked to multiple student statuses depending on configuration needs.
- When a student is enrolled in multiple programs, each program maintains an independent application and application status.
- The student status is determined by evaluating the statuses of all active applications and selecting the one higher in the dropdown list hierarchy.
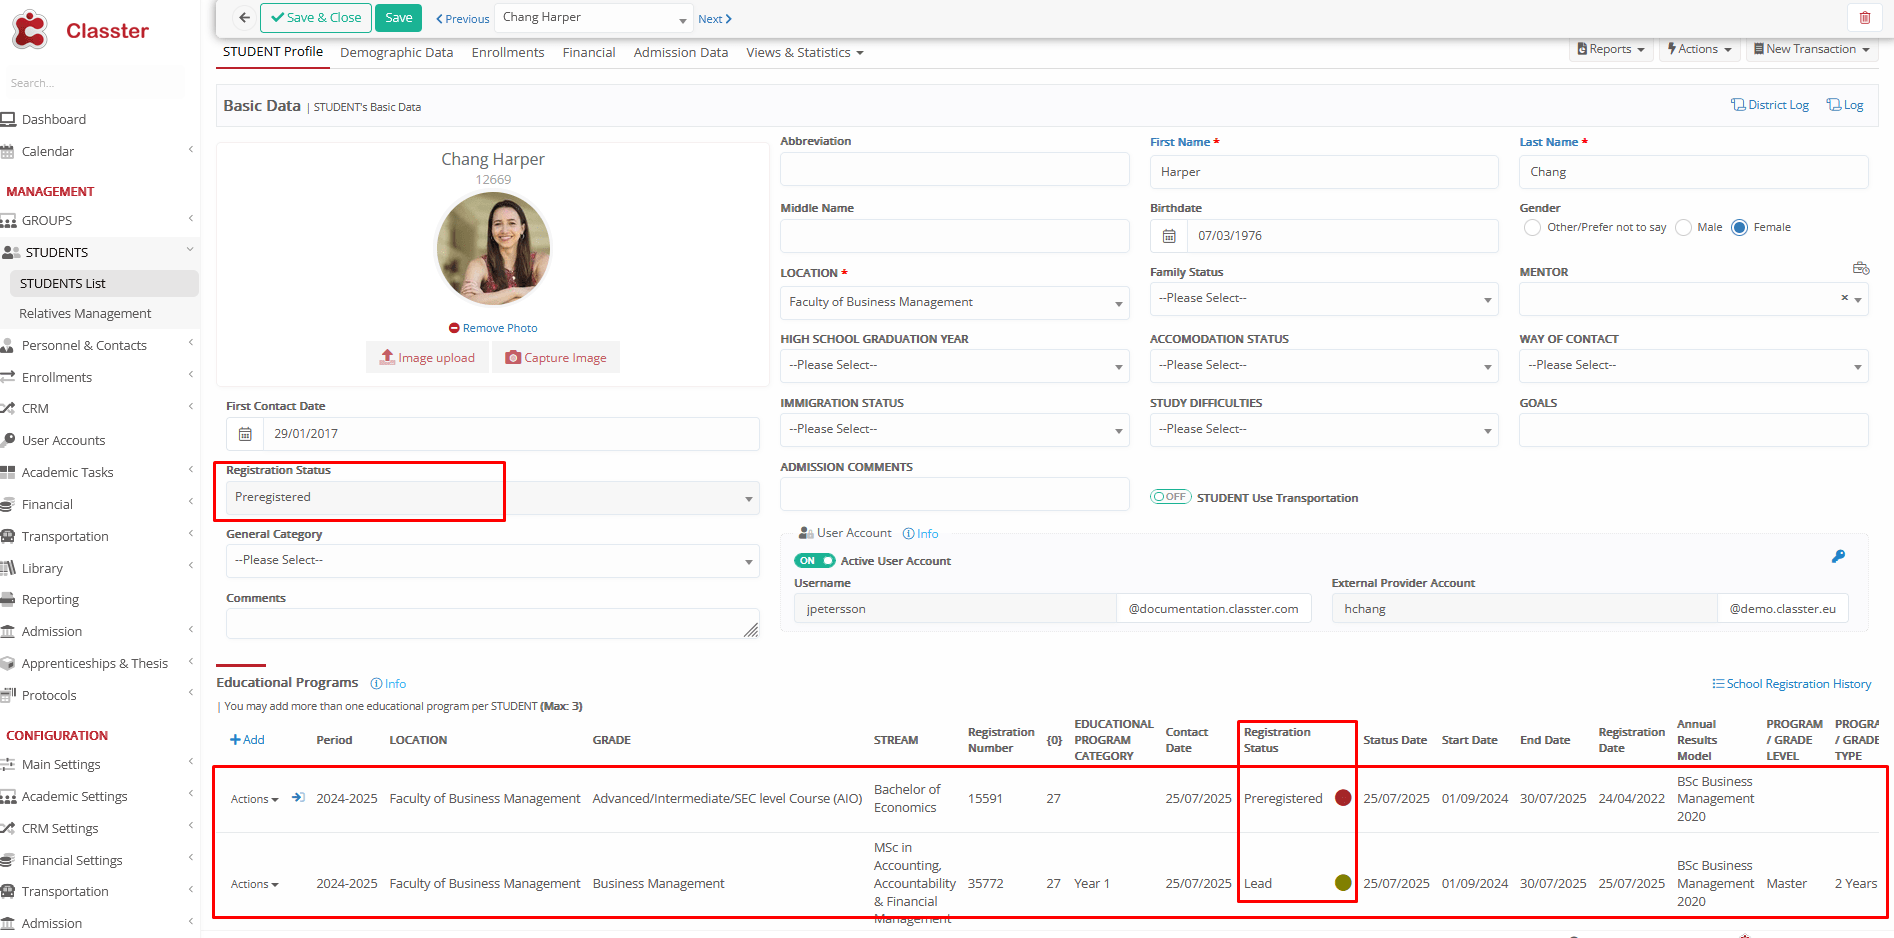
(Applied for 2 Educational Programs and has 2 Student Statuses – Registration Statuses- Preregistered is higher in the Hierarchy and therefore takes that as default for the student)
-
- The position in the Student Status dropdown list influences hierarchy, except for “Registered”, which always takes priority regardless of its position.
- If the program with the highest status is downgraded to one lower than “Lead”, the student status is recalculated and updated accordingly.
- The program with the highest status appears first in the student’s program list.