

In Classter, you can allow Students or their Parents to self-enroll in optional Courses/Subjects and Services while being already registered to main Grade or Program. The Configuration that needs to be completed requires the use of classifications.
Let’s create an example of an online enrolment of an optional subject. The flow of this example is divided in three simple steps:
Step 1: Creation of a module/service – Employee’s Portal
Step 2: Creation of a classification – Employee’s Portal
Step 3: Enrollment for the elective – Student’s portal
Step 1: Navigate to CONFIGURATION > Main Settings > Modules > List of Modules and create new module. (Figure 1)

Figure 1
Select the optional category, include a program and a degree, write a description and save the module like in Figure 2.

Figure 2
Step 2: Create a classification for this module, that will make it available for enrollment.
Go to CONFIGURATION > Main Settings > Classifications and create a new classification. (Figure 3)
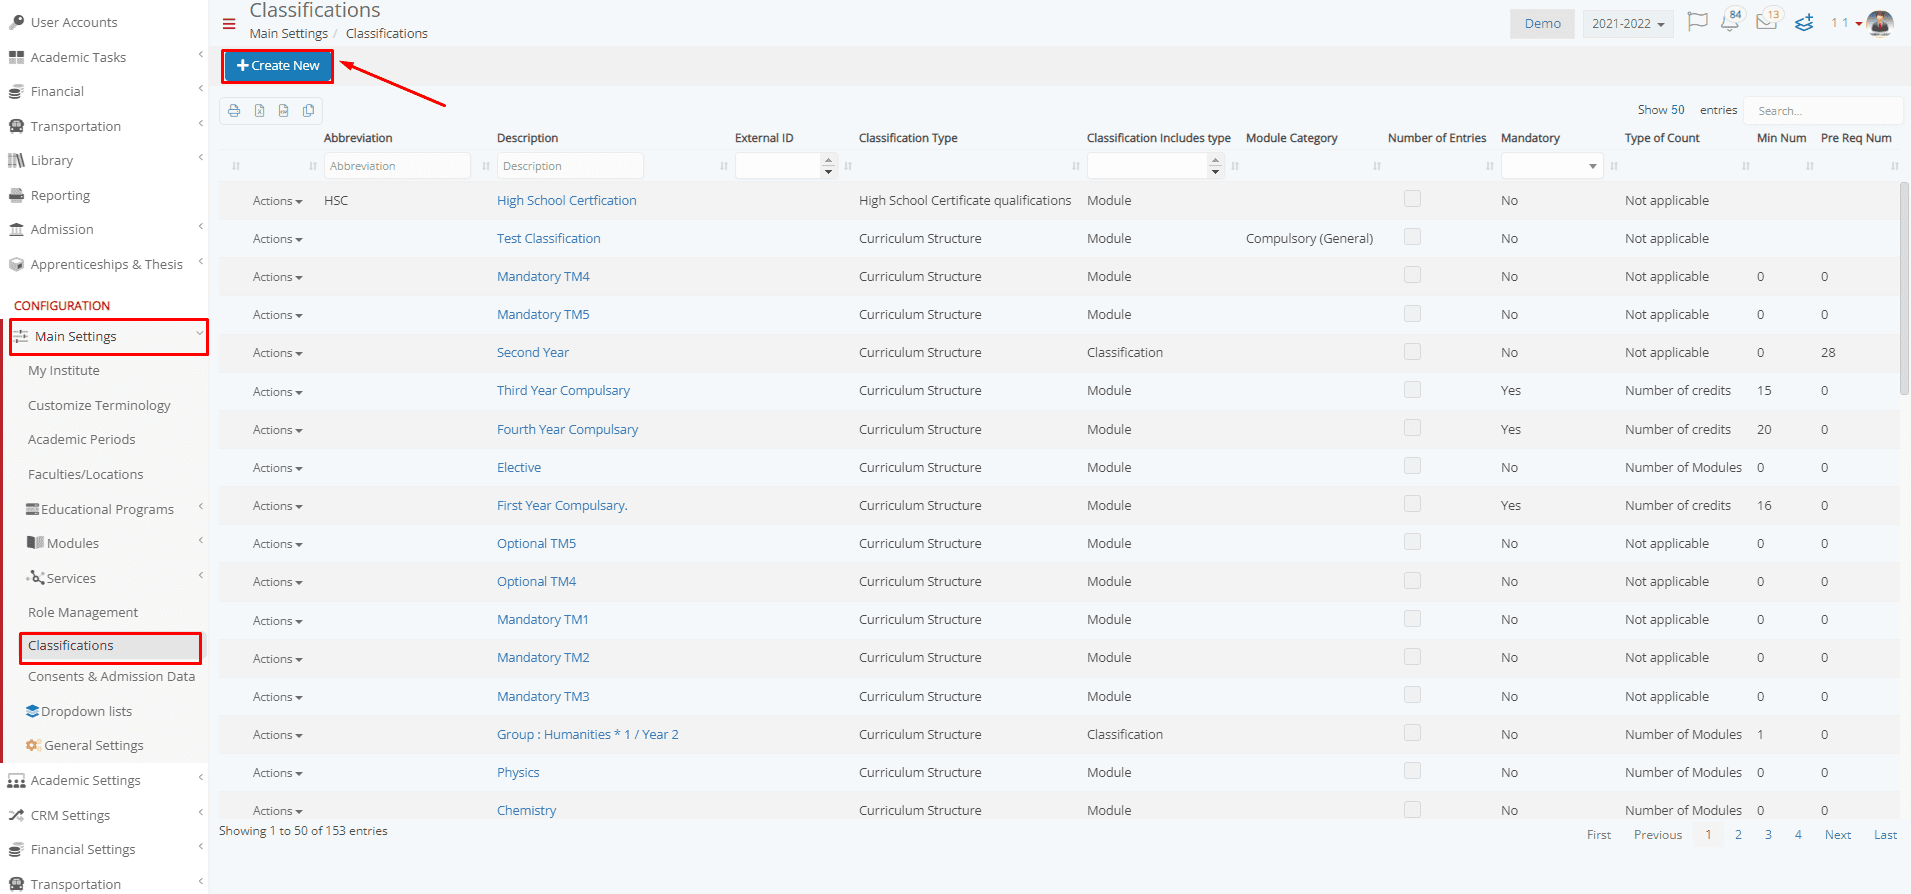 Figure 3
The classification popup window will appear to fill in the details. (Figure 4)
 Figure 4
- Write a Description. This description will be visible at the student’s portal, and as a classification it will appear as a group including all the available modules.
- In Classification Type there are two options. The first one is to select the “All Online enrollments/Admission”. This way, the modules included will be available for enrollment both in the Online Enrollments menu and in the Online Re-registration, and also in the Admission process for the new applicants. If you only want them available in the Online Enrollments menu, then you have to select the Type “Online Enrollments”.
- On the “Includes” field, you must select the modules you want to have available for enrollment on the student portal. Please note that each module is connected to at least one program. Only the users that are enrolled in the program(s) or apply for that program(s) will be able to see the program’s modules on the online enrollment section.
- If you want to configure the classification for services, select the Classification includes type field and then on the “Includes” field select the appropriate services
Keep in mind that with the proper configuration of the Classification, a maximum and minimum number of enrollments can be set, as well as a required number of enrollments that the Student/Applicant needs to make.
Step 3: In the student’s portal, the student navigates to the menu Registrations and Enrollments > Online Enrollments.
In this section, all available services and modules via classification for the corresponding program are listed. (Figure 5)
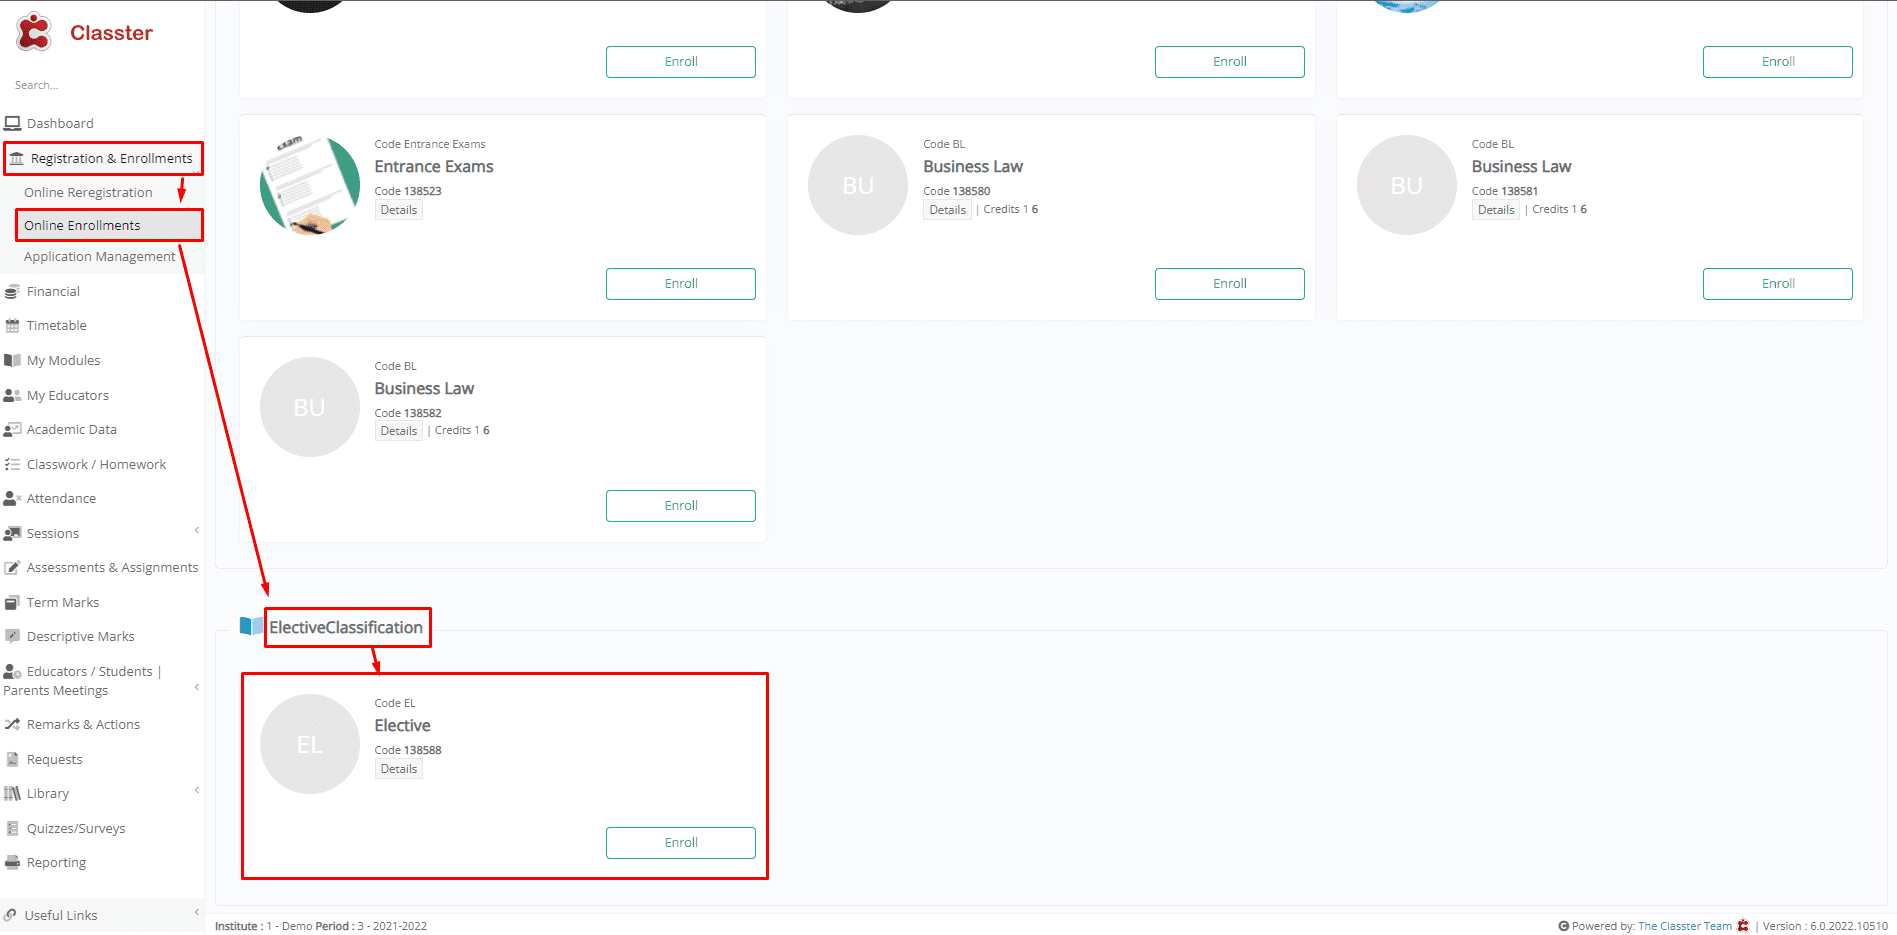 Figure 5
Note: Some subjects or services might come with a cost.
If that’s the case, in the Online Enrollments menu, the price will be visible to the Parents/Students. (Figure 6)

Figure 6