

From Classter Main Menu > Configuration > Advanced Configurations > Third Party Integrations tab (Figure 12).
 Figure 12
Go from Main Menu>Configuration > Advanced Configurations > Third – Party Integrations > click on Webex.
Note: The Webex license is stored either as a Virtual Classroom or as a Lecturer.
 Figure 13
Options: the same as described in the beginning of the manual.
- Enable On/ Off: switch Webex on or off (Figure 13).

Figure 13
- Choose your Connection Type from drop down menu (Figure 14):
- Select Using Lecturer Personal Account
 Figure 14
Login to the Lecturer portal: From the Dashboard > Click on your picture/ avatar > Click on my profile (Figure 15).
 Figure 15
Once you have clicked on my profile, you will be taken to the lecturers’ profile page (Figure 16).
Choose an Online meeting Provider, in this case: Webex (Figure 16).
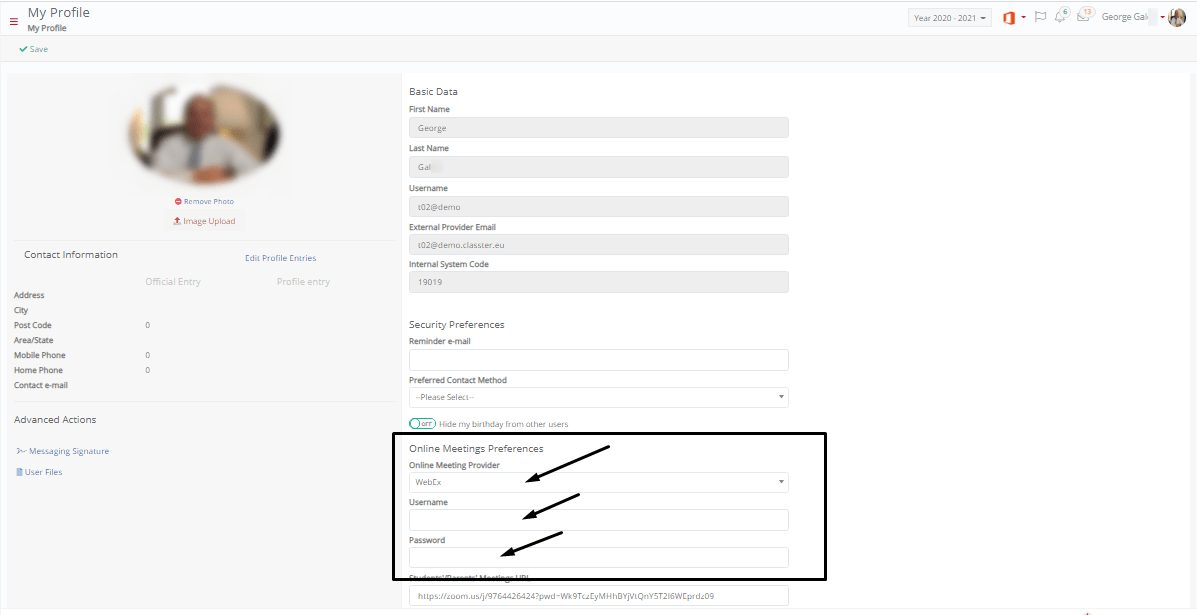
Figure 16
Now go to Webex and copy Username and Password to the fields you see on the Lecturer profile page (Figure 16).
You can now create sessions the same way we showed earlier in the manual. Below we describe how to create a session from timetable using a Webex Lecturer.
Create a Session from Timetable using a Webex Lecturer
Create a Session From Timetable
Click on Main menu > Configuration > Academic Settings > Timetable > Classrooms and choose a classroom (Figure 17 & 18).

Figure 17
 Figure 18
- Create or edit a classroom (Figure 18).
- Once you click on create or edit a classroom, fill in the fields in the Third-Party Integrations section Provider (Webex) – Username – Password (Figure 19).
 Figure 19
Click on the ‘Save’ button to save changes (Figure 19).
From the Main menu > Academic Tasks > Sessions & Homework > Click on Session List (Figure 20).
 Figure 20
Click on the ‘Create from Timetable’ button to create a session from the timetable (Figure 21).

Figure 21
Fill in the Session List filters, School, Categories, View Type, Classes, Range, Days
Auto-Create sessions using the timetable (turn it on) and click search (Figure 22).
 Figure 22
In this case there are two sessions. Click on the ‘Save Timetable Suggested Session’ and it will auto create the Webex Meetings and Sessions (Figure 23).
 Figure 23