Classter’s re-registration process is highly configurable. An educational organization can require from students (or their parents) different kind of information according to its needs. That information is divided into separate tabs, similar to those of the application process for new students.
Let’s see an example of all the tabs that can be configured in the Re-registration process.
The available tabs on re-registration are:
- Selection of the program
The first tab is the selection of the educational program to which the student will be registered in the selected academic period. (Figure 1)
This field is always part of the process. For more information on how to set up which programs will be available for selection and based on which criteria, check out this Article.

Figure 1
- Contact Details/Personal Data
In this tab, you can require an update of the student’s personal information. (Figure 2)
The name/label of the tab can be changed in terminology. In order for this tab to be enabled in the re-registration process, the “Ask for Personal Data Update” setting must be checked.
That setting, along with all the rest concerning the re-registration process, is located in CONFIGURATION > Admission > Admission Settings in the Online Re-registration tab.
 Figure 2
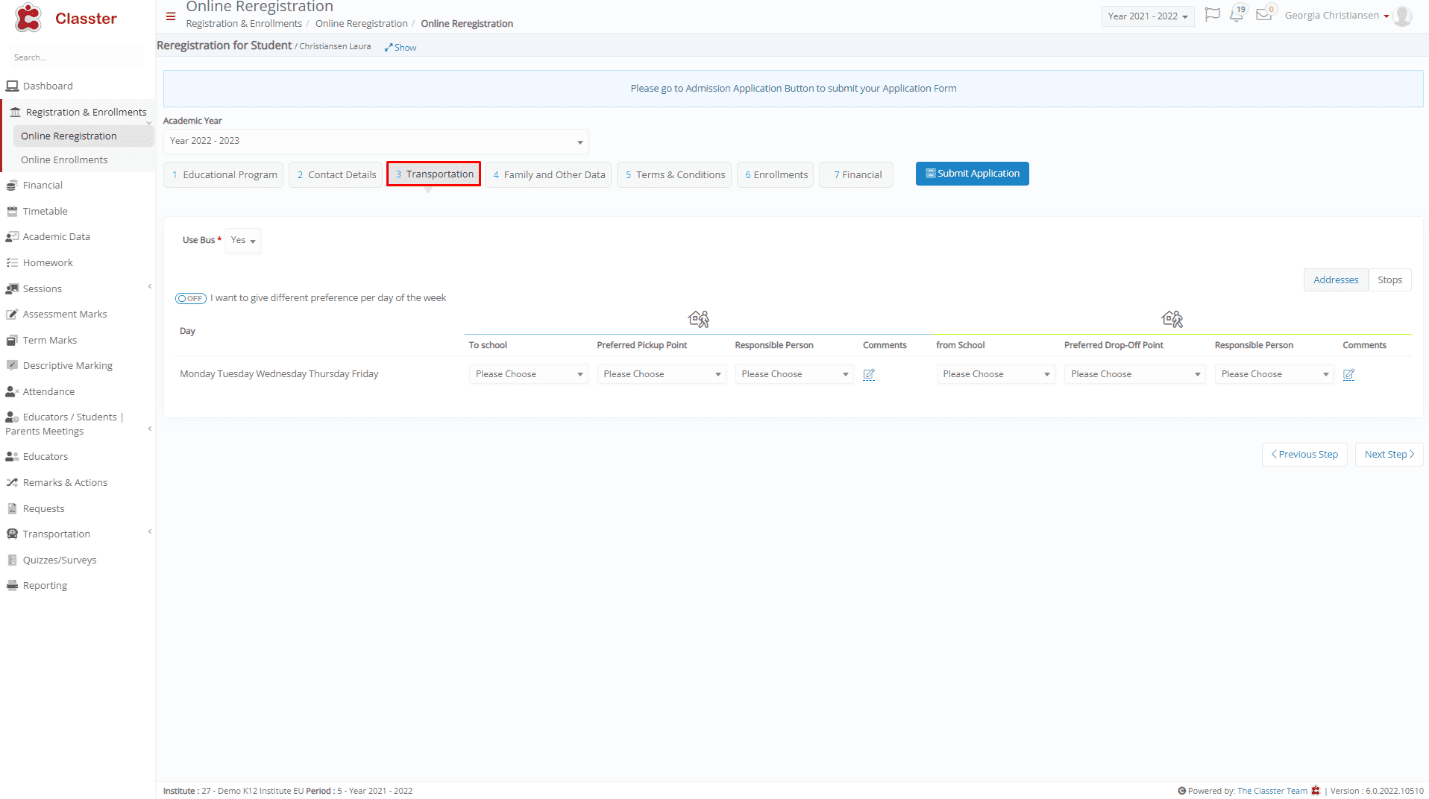
- Transportation
To enable the Transportation tab in the re-registration process (Figure 3) and allow students/parents to provide bus route intentions, the “ Ask for Transportation Intentions” setting must be enabled.
 Figure 3
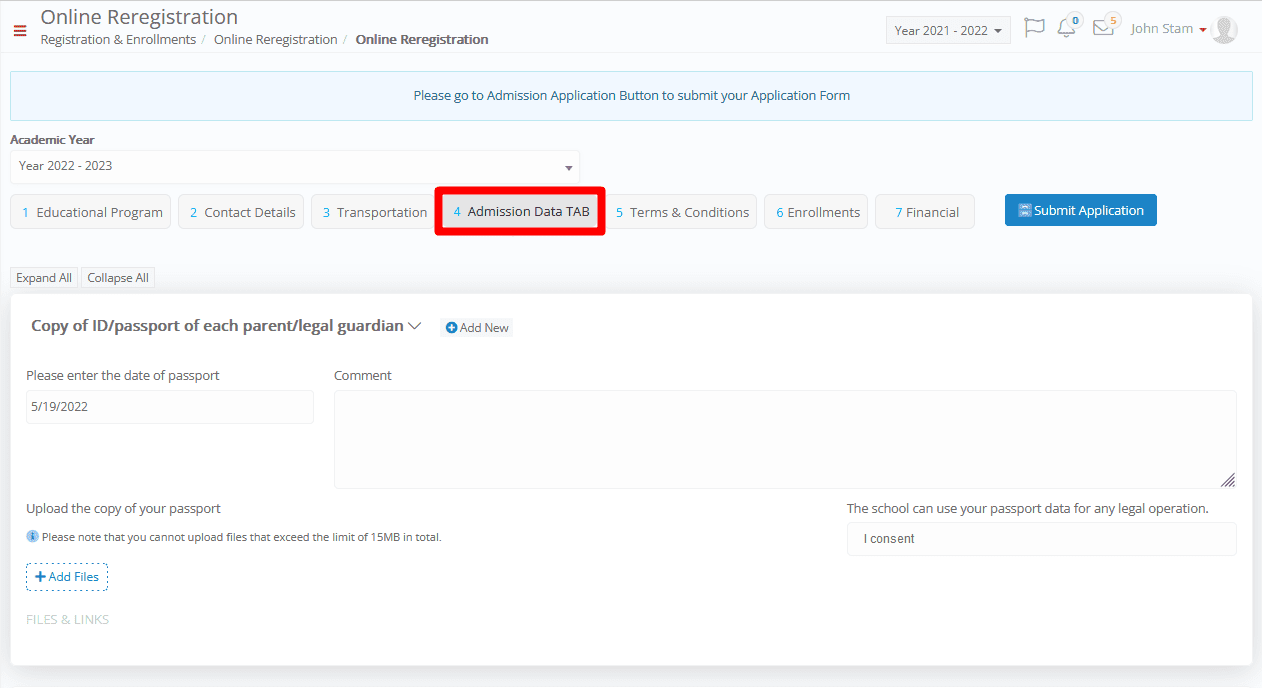
- Admission Data
In this tab, you can require from the student/parent to fill in information in Admission documents.(Figure 4)
To enable this tab, you must enable the “ Ask for Admission Data” setting.

Figure 4
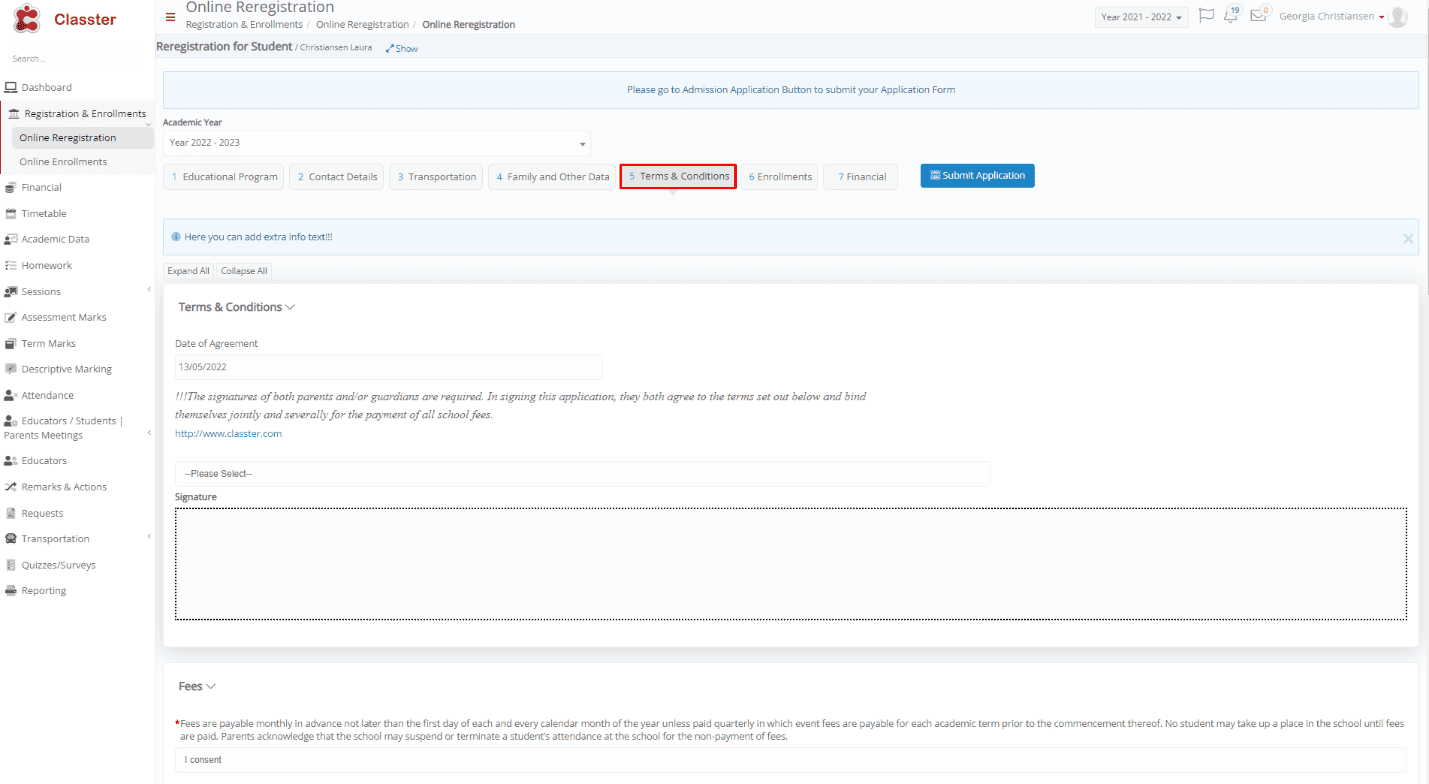
- Consents (Terms & Conditions)
When this tab is enabled, the student/parent is required to fill in the consents that are required in the re-registration process. (Figure 5)
To enable this tab, the “Ask for Consents” setting must be active.
 Figure 5
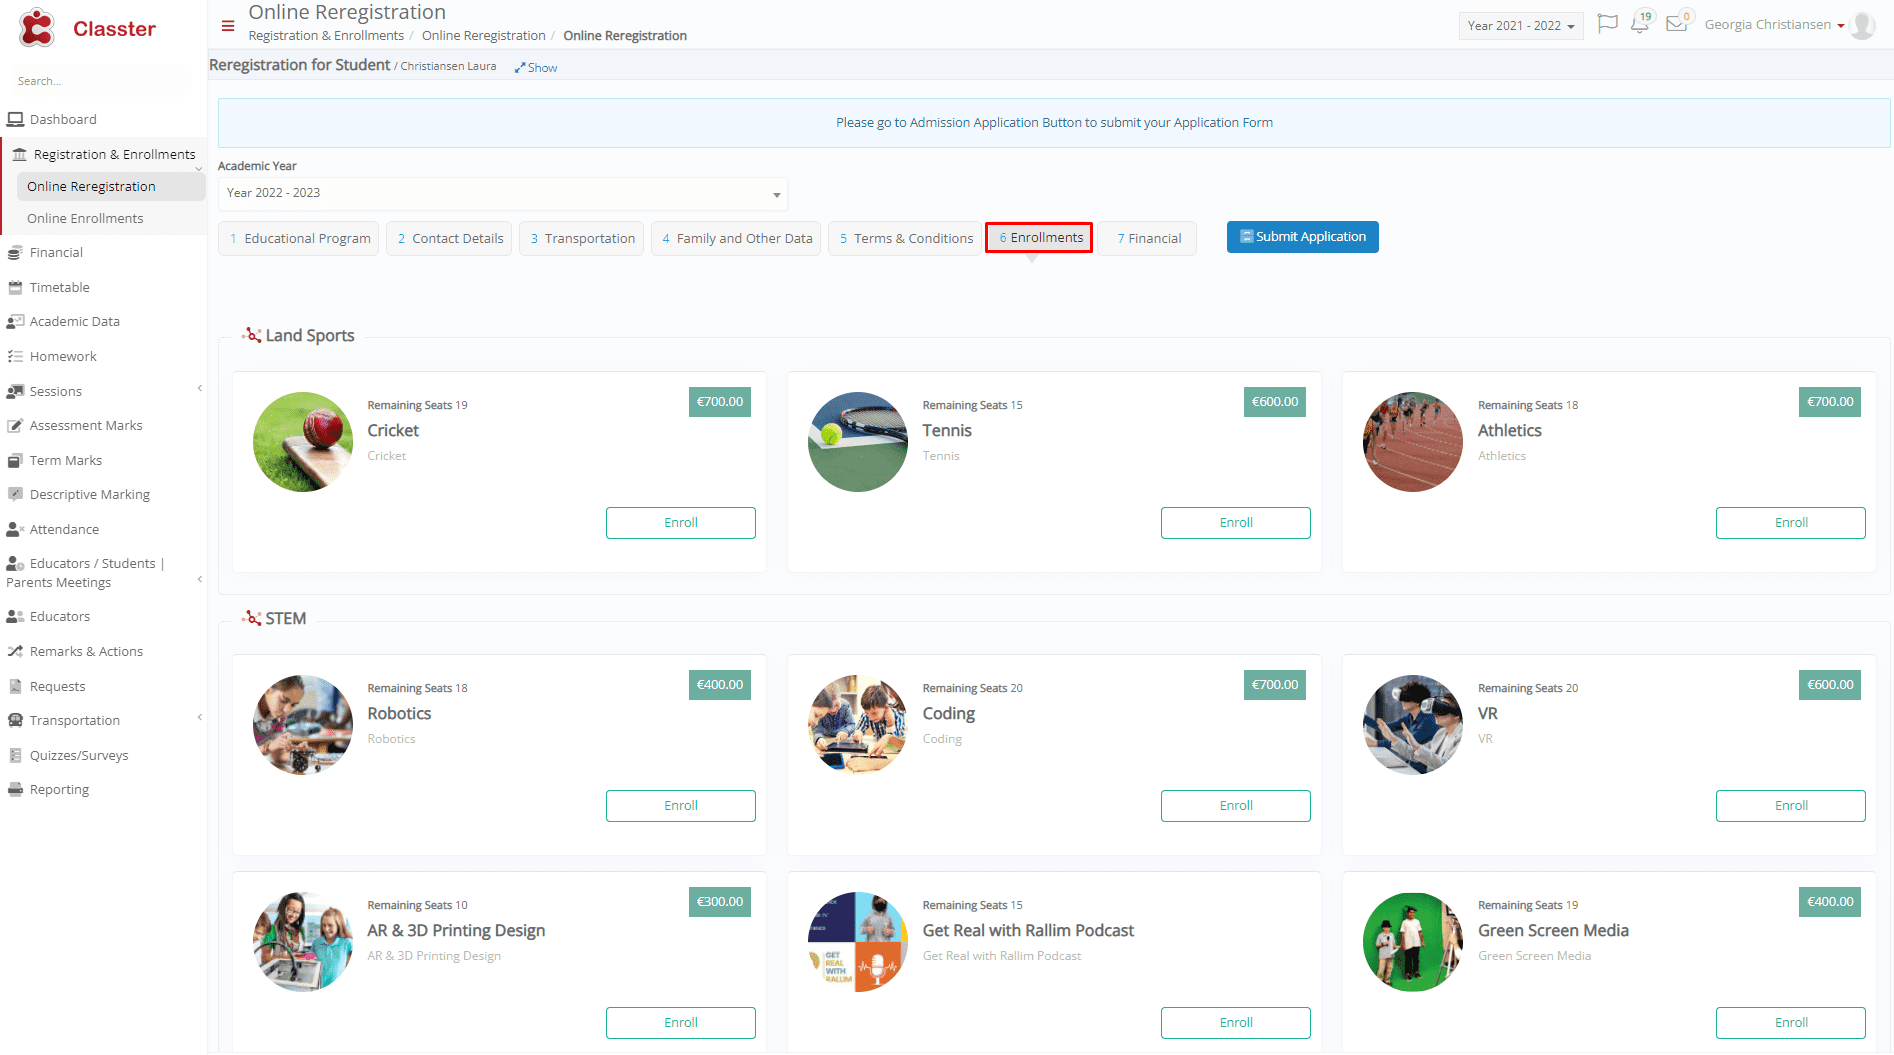
Enrollments
The online enrollments tab can include both services and subjects based on the institute’s configuration. (Figure 6)
Whether you want to enable enrollment for services, or for subjects or both, this tab will be enabled. The respective settings are “Enable Subject Enrollments” and “Enable Services Enrollments”.
 Figure 6
- Financial Agreement
In the Financial Tab, the user is asked to create a financial agreement. (Figure 7)
Depending on the configuration, that might be just acknowledging and agreeing to the default financial agreement or creating one by choosing from a variety of options of arrangement plans, billing plans and tax reductions.
To enable the financial agreement in the re-registration process, the “Ask for Financial Agreement” setting must be enabled.
 Figure 7
Find more or post your questions on our Facebook Community Page. Also, watch our how-to videos on our YouTube channel.


