

To make the marking process easier, we are able to use the “Set Subject Academic Settings” page. Here you can assign marking ranges, criteria, scenarios to one or many subjects at a time.
To reach this page follow the path: Dashboard>Configuration>Academic Settings>Marking Settings>Enrollments>Set Subject Academic Settings button (Figure 4).
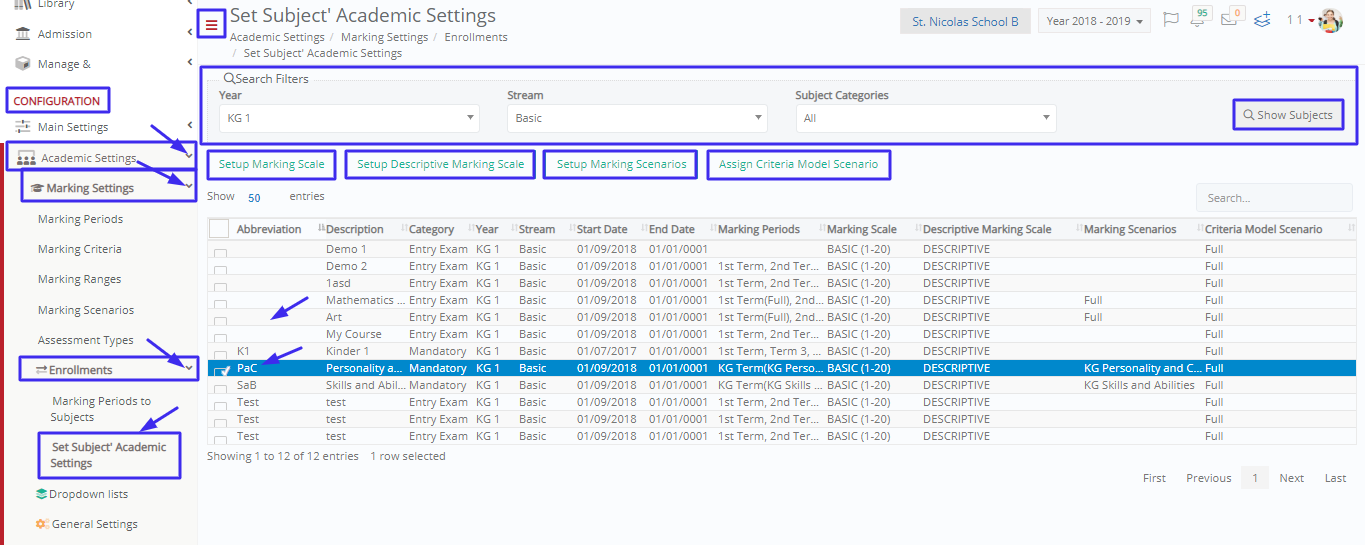 Figure 4
- On this page you can search for subjects from any stream and/or year.
- Once you have searched for the subjects you want, you can select one or more of them, by clicking on each subject (It will turn blue).
- Now once you have selected the subjects you can begin by setting up their Marking Scale. Click on the “Setup Marking Scale” button (Figure 5). You will be able to add a numeric marking scale for all the selected subjects. Marking Scales are created in the marking ranges page located under marking settings.
- You can then click on the “Setup Descriptive Marking Scale” button. You will be able to add a descriptive marking scale for all the selected subjects (Figure 6). Descriptive Marking Scales are created in the marking ranges page located under marking settings.
- You can “Setup Marking Scenarios” by clicking on the respective button. You will be able to add these scenarios (Numeric and Descriptive) to all selected subjects (Figure 7). You can create descriptive and numeric marking scenarios in the Marking Scenarios page under Marking Settings.
- Lastly you can “Assign Criteria Model Scenarios” by clicking on the respective button. This scenario is used for defining what learning outcomes will be used in assignments. You can assign a criteria model scenario to all the selected subjects (Figure 8). These scenarios are usually descriptive and are created in the Marking Scenarios page under Marking Settings.
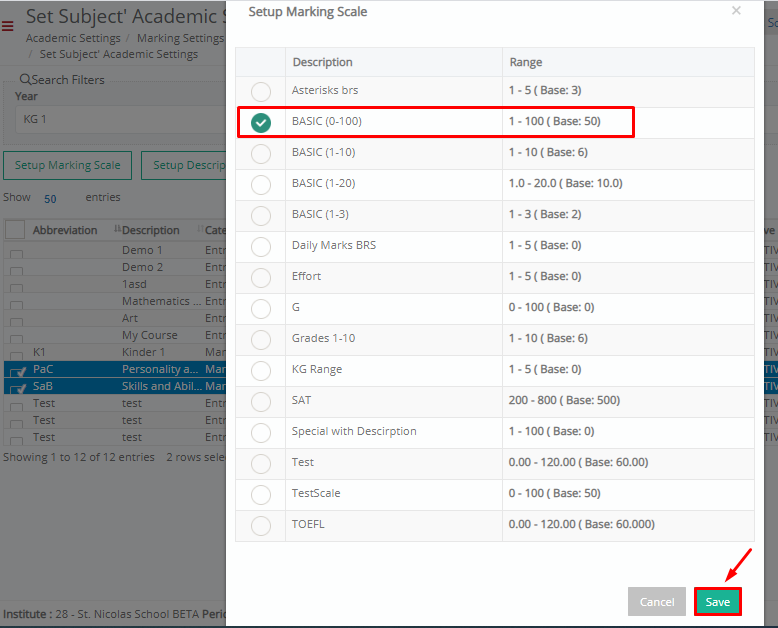
Figure 5
- Once you click on the Setup Marking Scale button, you will see a popup window with a list of marking ranges.
- Select a Marking Range and click on Save.
- Marking ranges define the scale of marking for a specific subject/s e.g from 0-100.
- Once you make your selection click on the save button.

Figure 6
- Once you click on the Setup Descriptive Marking Scale button, you will see a popup window with a list of descriptive marking ranges.
- Select a Descriptive Marking Range and click on Save.
- Descriptive Marking ranges define the non-numeric scale of marking for a specific subject/s e.g from 0-5 which has a numeric value for the purpose of helping the system understand a descriptive mark. An example is 1=Bad, 5=Excellent etc.
- Once you make your selection click on the save button.
 Figure 7
- Once you click on the “Setup Marking Scenario” button you will see the above popup window.
- In this popup window you can view the existing marking periods for the selected subjects and select them.
- You can choose which Marking Scenario you wish to use for the specific marking period as well as the Descriptive Marking Scenario. You are not forced to choose both numeric and descriptive. Marking Scenarios are created in the Marking Scenarios page under Marking Settings. Each marking scenario numeric or descriptive is comprised of marking criteria (created in the marking criteria page of Marking Settings.
- Once you make your selection click on the save button.
 Figure 8
- Once you click on the “Assign Criteria Model Scenario” button you will see the above popup window appear.
- Here you can select a Marking Scenario that will be used for learning outcomes in assignments that have to do with the specific subjects.
- These marking scenarios are also created in the Marking Scenarios page and are usually descriptive as they have to do with learning outcomes.
Once you make your selection click on the save button.