

The reason for adding an application category is to classify the applicant and to set rules for this category of applicant e.g., Age restriction 23 (Figure 32).
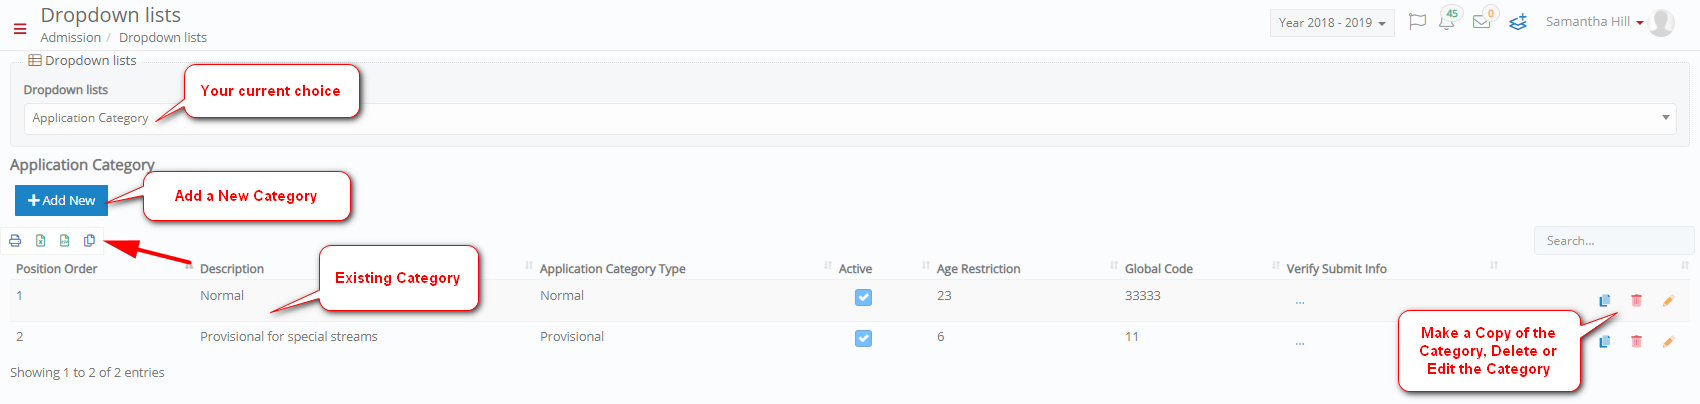 Figure 32
From the dropdown list menu, you have chosen Application Category (Figure 32):
Create New Application Category
Click on +Add New to add new category (Figure 32).
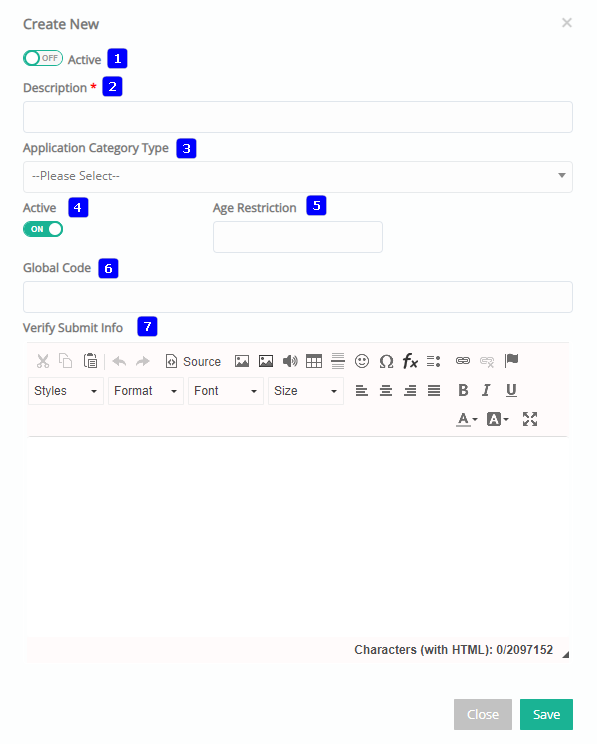
Figure 33
- Active: Click on Active to make the Category visible or invisible in the application.
- Description: Edit Description of the category.
- Application Category: Choose Application Category Type from the drop-down list (Figure 39) (Figure 40). Here you have 5 options that define the type of application a student is creating.
- Normal means that all is well, and all requirements are met, and the student may proceed to apply normally.
- Provisional means exactly that that this application type has some requirements that need to be met so this type of application when submitted is provisional.
- Provisional (Maturity, Marks, and SEN) means that this application type is provisional and based on the applicant meeting a specific age, attaining specific marks, or providing info regarding special educational needs.

Figure 34
- Active: Click on Active to make the Category visible or invisible in the application.
- Age Restriction: Click on the text box Age Restriction to change age limit of the application.
- Global Code: Click on text box Global Code to identify category with the institution e.g 3333 varies from institution to institution ask your Admin.
- Verify Submit Info: This is the information presented to applicants to verify their application before submission.
Click on save button to save the new category.
- Click on the
 button to view the categories in ascending or descending order (Figure 35, Yellow Arrows).
 Figure 35
- Use the buttons to copy, print or export (Excel, Csv) Application Categories (Figure 36).
![]()
Figure 36
- Hover over a button to show the explanation of the buttons function e.g ‘Print’.

Figure 37
- Use the Search tool to find a specific category (Figure 21).
![]()
Figure 38
Edit Application Category
Click on the edit button to edit the existing category (Figure 32).
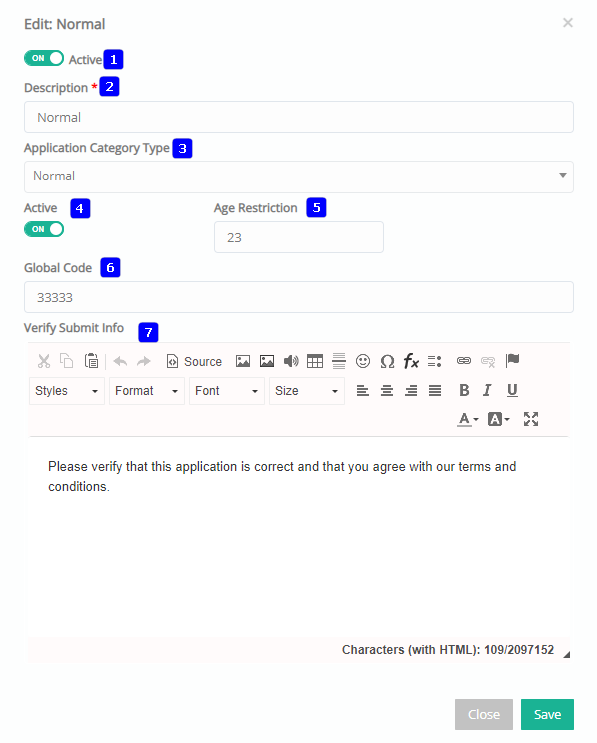
Figure 39
Once you have clicked on edit you will see a pop-up window (Figure 39)
- Active: Click on Active to make the Category visible or invisible in the application.
- Description: Edit Description of the category.
- Application Category: Choose Application Category Type from the drop-down list (Figure 39) (Figure 40). Here you have 5 options that define the type of application a student is creating.
- Normal means that all is well, and all requirements are met, and the student may proceed to apply normally.
- Provisional means exactly that that this application type has some requirements that need to be met so this type of application when submitted is provisional.
- Provisional (Maturity, Marks, and SEN) means that this application type is provisional and based on the applicant meeting a specific age, attaining specific marks, or providing info regarding special educational needs.
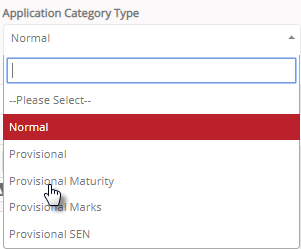
Figure 40
- Active: Click on Active to make the Category visible or invisible in the application.
- Age Restriction: Click on the text box Age Restriction to change age limit of the application.
- Global Code: Click on text box Global Code to identify category with the institution e.g 3333 varies from institution to institution ask your Admin.
- Verify Submit Info: This is the information presented to applicants to verify their application before submission.
Click on save button to save changes to the existing category (Figure 39).