

Quick Navigation
This section will be talking about Sessions and Homework both important parts of Academics. You will see how you can manage your Sessions and Homework.
You can add and manage sessions and homework, and check the sessions’ evaluation analysis (Figure 3).
Figure 3
Session List
- Use the filters to show sessions for specific teachers, groups, and range (Figure 4).
- Use the ‘Actions’ button of a session to edit, delete or lock/unlock it.
- Use the ‘Actions’ menu to lock/unlock the selected sessions
Note: when you lock a session, the teacher will not be able to edit or delete it.
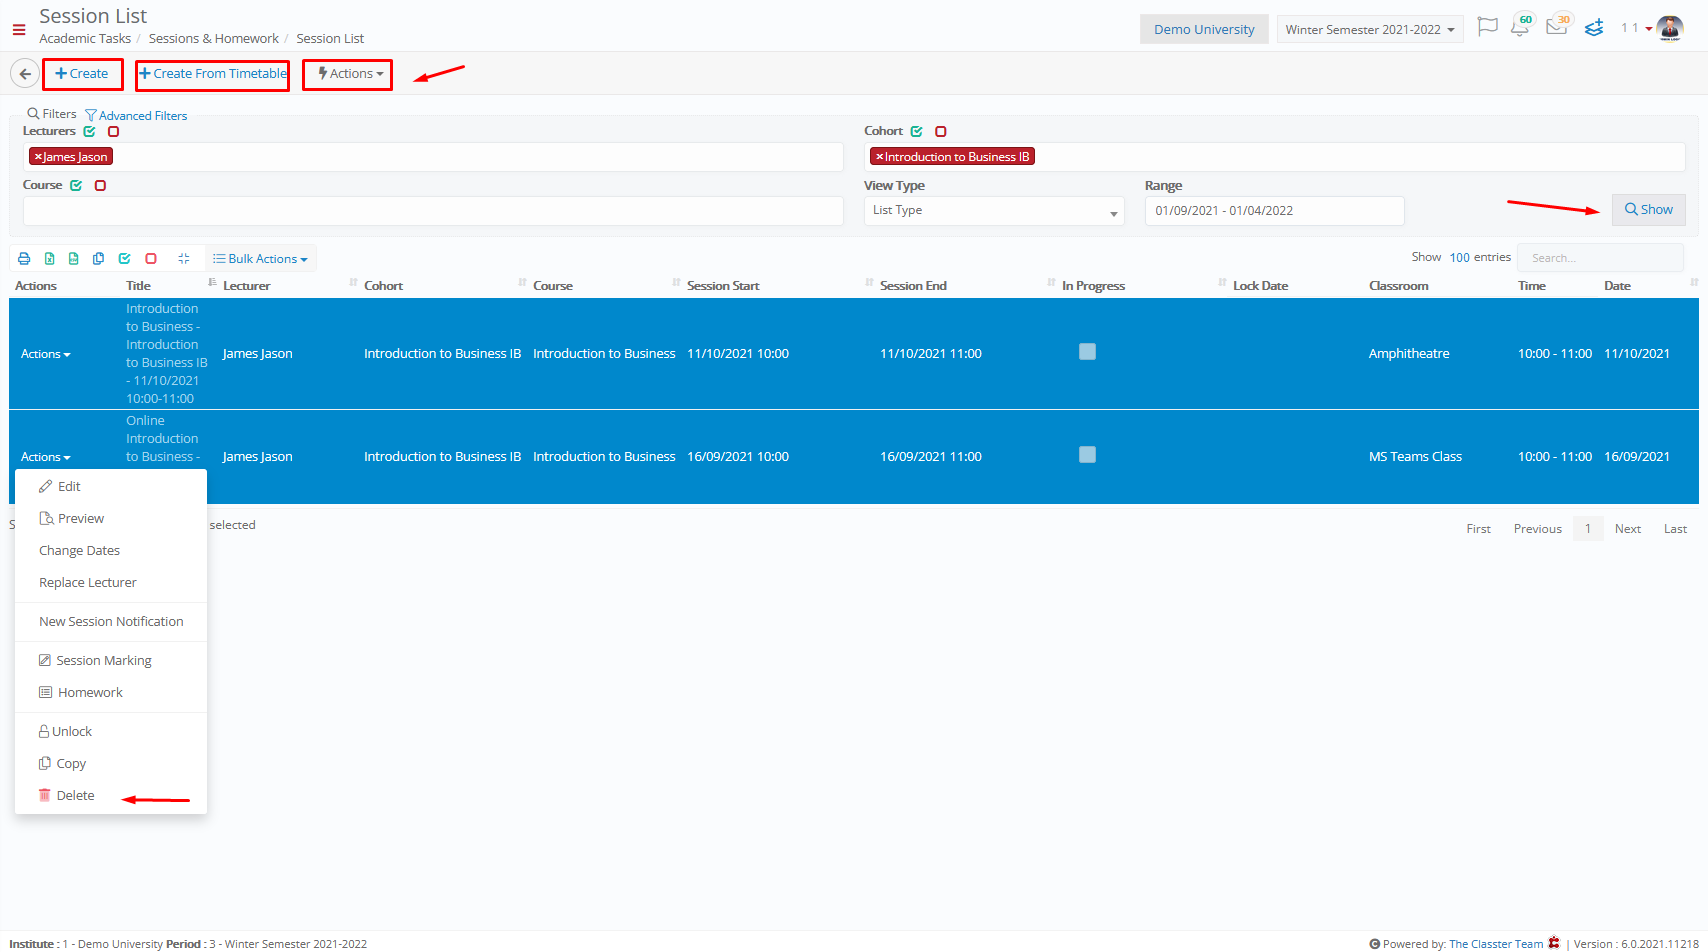
Figure 4
CREATE NEW
- Click on ‘Create New’ to create a new session (Figure 5).
Figure 5
- Add the session’s data (Figure 7).
- Select lecturer, group and subject
- Set session date, start and end date
- Write a title or click on the ‘Create session title’ button to automatically add a title
- Activate the ‘Is Public’ setting in order to add the session on the teacher’s/students’ calendar
- Select Lesson Planning
Note: The Lesson Planning drop-down list is available only if lesson plans have been added to the subject.
- Add comments or click on the ‘copy comments from lesson plan’ to copy the lesson plan’s comments
- Optionally, you can add assessments, bibliography, files or links.
Note: If a library book is set in the subject, then you can deactivate the ‘Bibliography’ setting so that it shows automatically the relevant book and pages (Figure 6).

Figure 6
Click on ‘Save’ to save and continue in this page (used mostly by teachers who are fill in the session during the lesson, in order to avoid losing data due to page time out) or ‘Save & Close’.
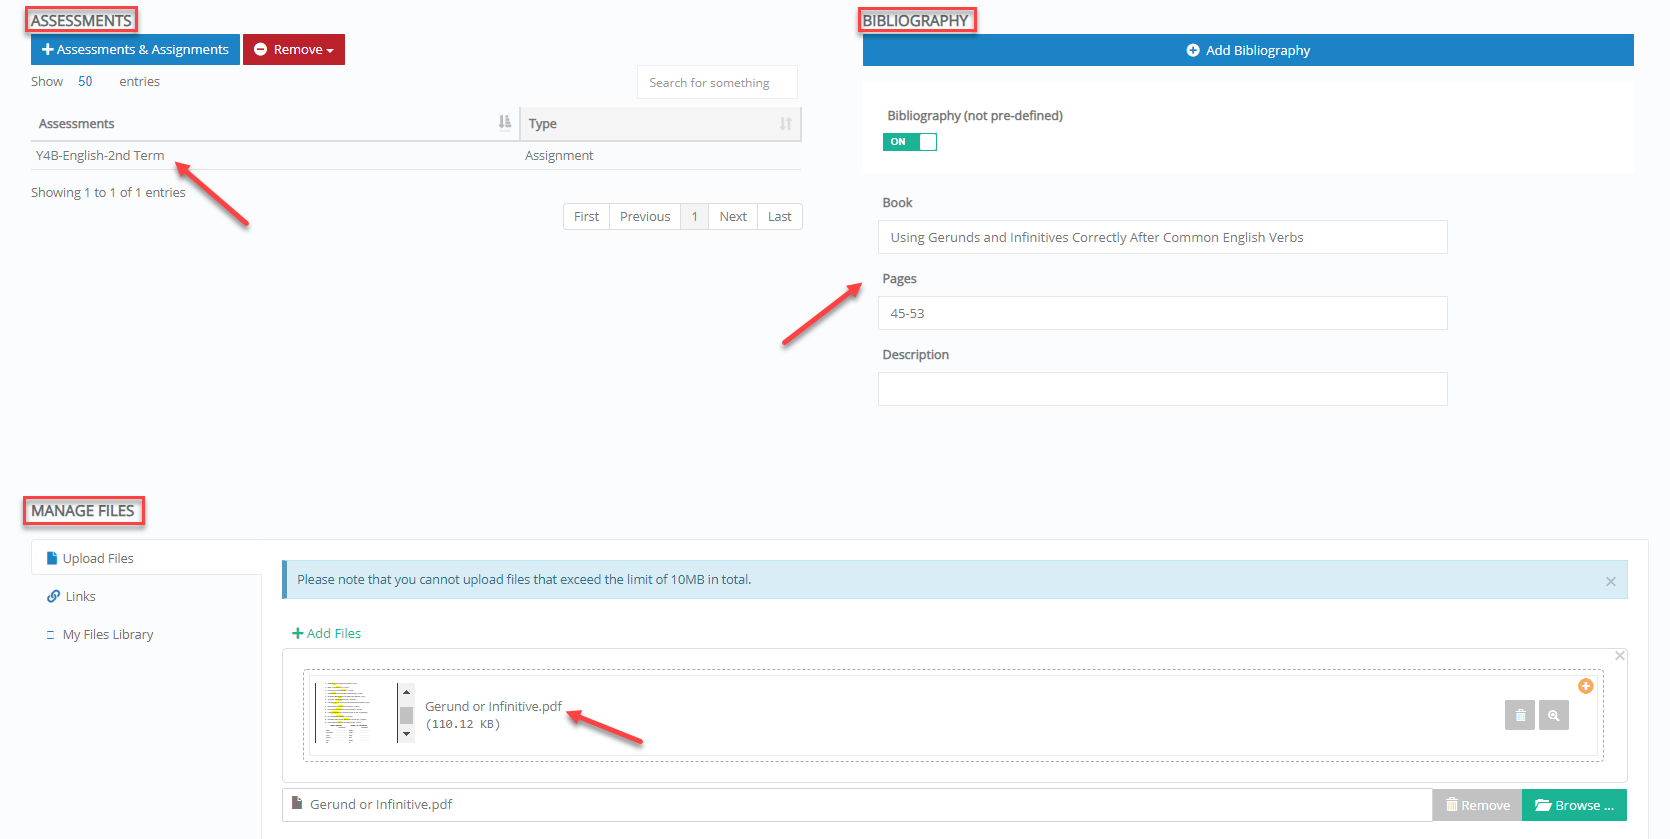
Figure 7
Alternatively, you can create a session using timetable slots or auto-create sessions using the timetable (Figure 4).
Note: This option is available only if activated by the admin.
Create a session using timetable slots (Figure 9):
- Use the filters to show the timetable for a specific timetable range e.g. 28/01/2019 – 01/02/2019.
- Click on the cross at the specific group, day and time e.g. F2G, Monday, 3rd you want to add a session.
Use the filters to refresh the teachers and subjects drop down lists, so that it contains teacher and/or subjects using existing enrollments. Activate the first filter, to filter lists by teachers and subjects or activate second or third one if you want to filter only by teachers or subjects (Figure 8).
Note: If you don’t use the filters, all teachers and subjects will be available in the drop-down lists.

Figure 8
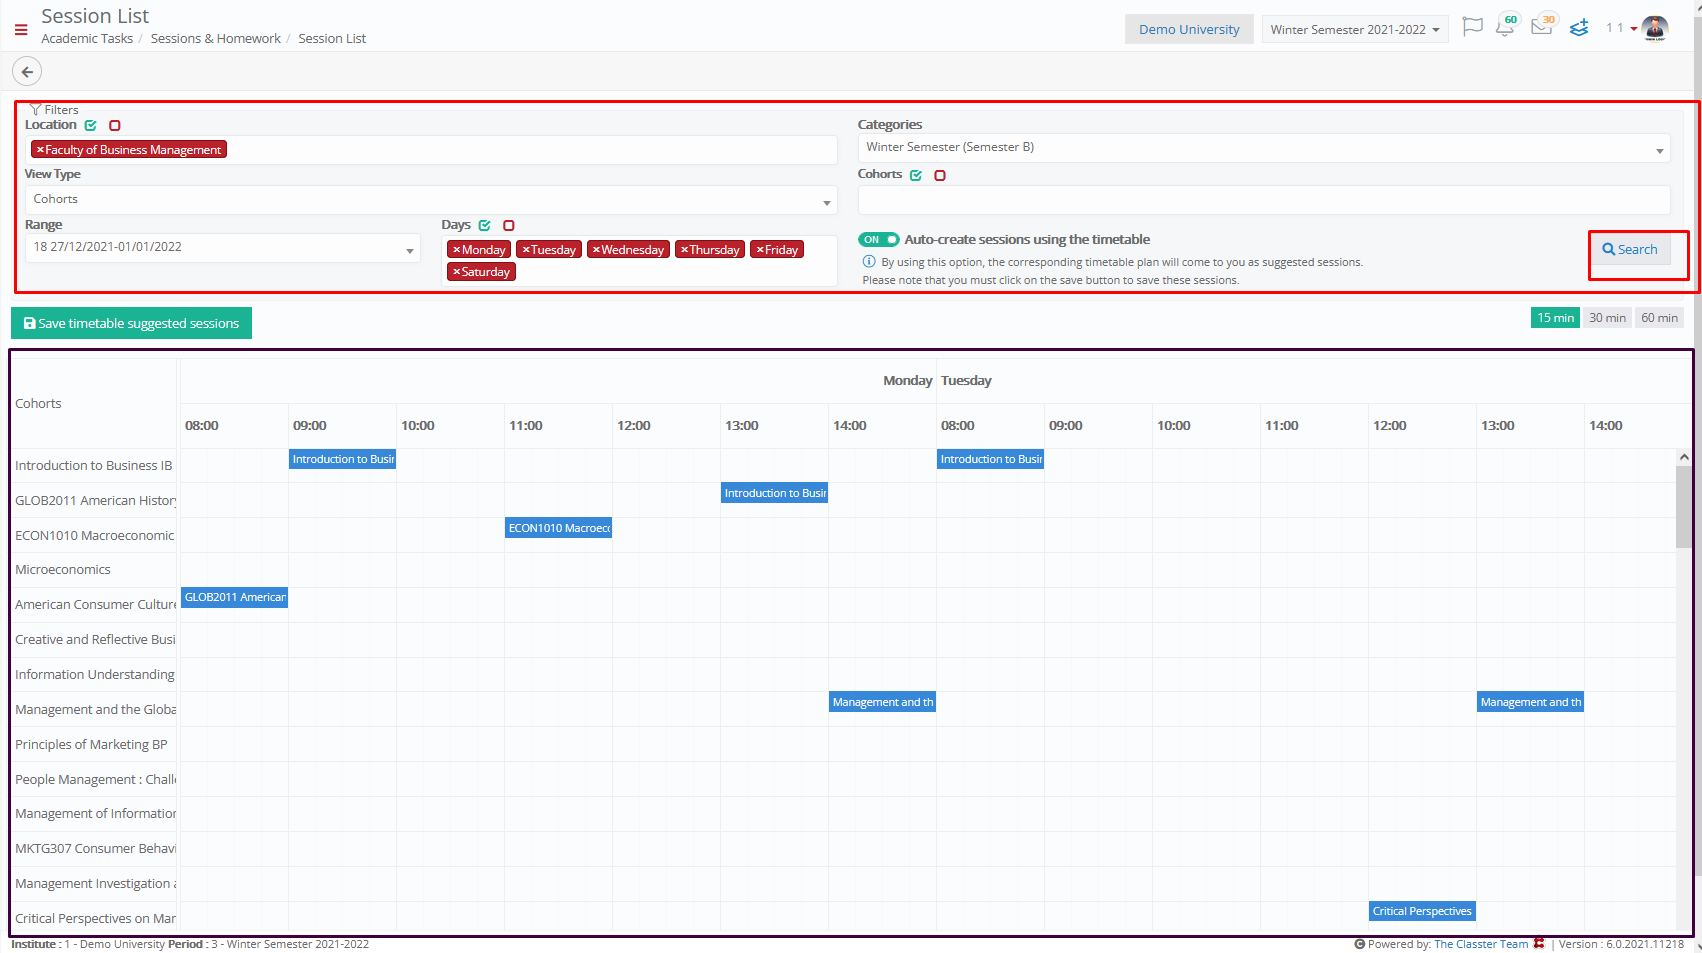
Figure 9
Auto-create sessions using the timetable (Figure 10):
- Use the filters to show the timetable for a specific timetable range e.g. 04/02/2019 – 08/02/2019.
- Activate the setting ‘Auto-create sessions using the timetable’ to show suggested sessions according to the corresponding timetable plan
- Click on the ‘Save timetable suggested sessions’ to save suggested sessions

Figure 10
Session’s Marking Analysis
- Use the group, subject and range filters to show sessions’ marking (Figure 12).
- You can see results in a graph, presenting a percentage of students that are excellent, very good, average or fail in the selected subject i.e. Very Good 61.1%. Next to the graph you can see the previous information in numbers i.e. 11 students are very good. Additionally, you can see the subject’s average i.e. 76.68.
- In the Marking List, you can see analytically the students’ marks at each session.
Note: You can use the columns to filter or classify the results. The number in brackets next to Essay, Classwork, Exams and Personal Assessment column names is the category weight (Figure 11).

Figure 11

 Figure 12
Homework
- Use the range, grade, group and subject filters to show the homework you are looking for (Figure 13).

Figure 13
- Use the ‘Manage Columns’ button to show/hide information.
- Use the buttons bar to select/deselect all, print or export homework.
- Click on ‘Actions’ menu to delete the selected homework.
CREATE HOMEWORK
PER CLASS
You can create Classwork, Assessment for Homework or Tests for Home, that will be assigned to the selected group (Figure 14).
- Select ‘Per Class’.
- Use teachers, groups, subjects and week dates filters to show the selected week.
- Click on the Question mark button to view info about this page
- At the preferred day, click on the add button of either Classwork, Assessment for Homework or Tests for Home.
Note: Once you add the homework, you can copy it to another group of the teacher.
- Select the Class from the drop-down list at the bottom of the page
- Click on copy
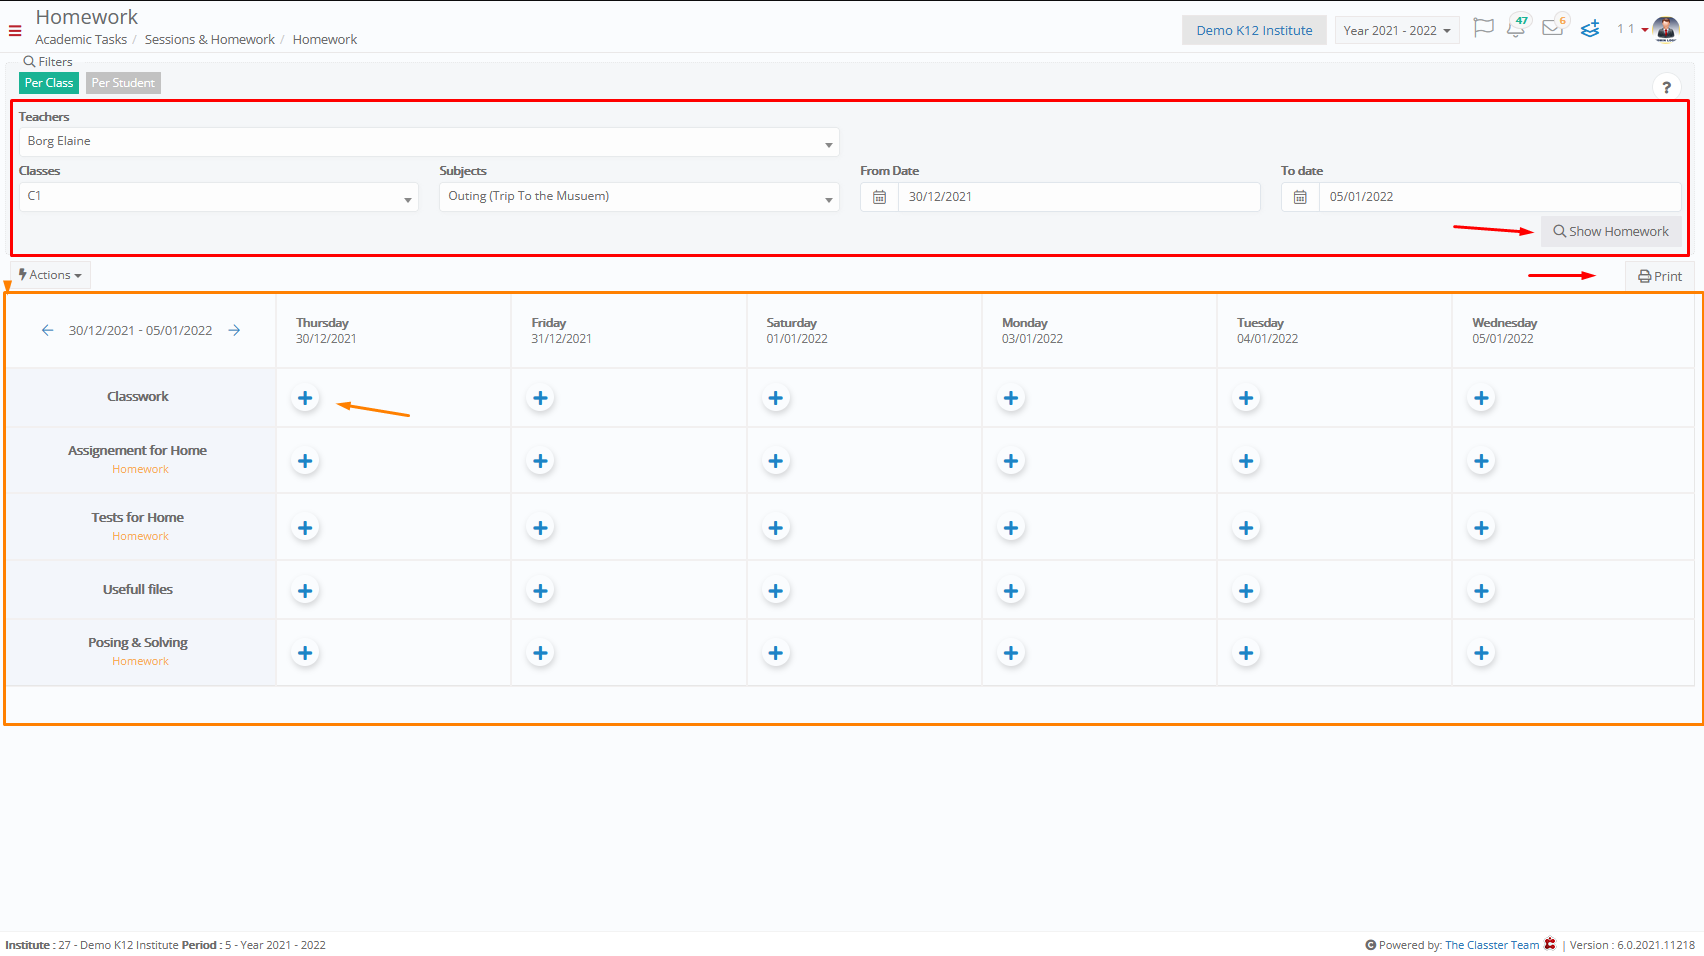
Figure 14
- In the pop-up window add the details of the Homework and click on save (Figure 15).
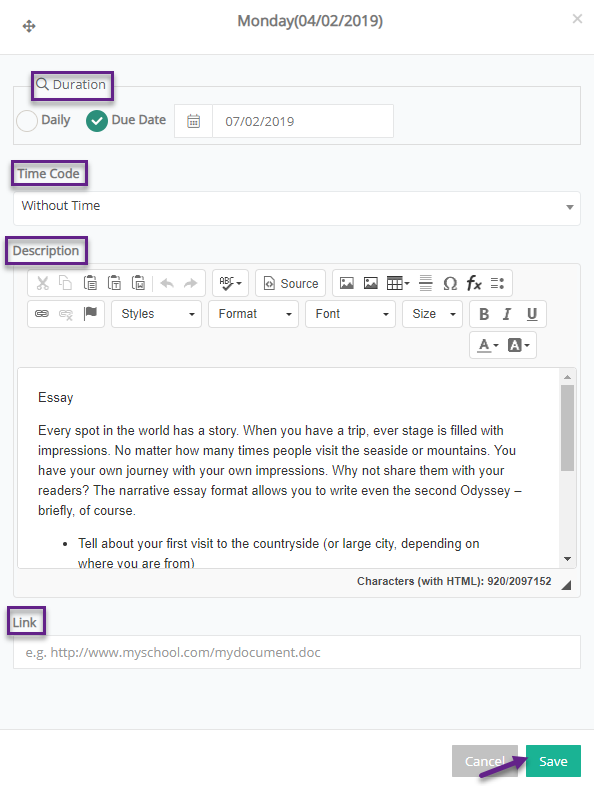
Figure 15
- The homework will be added (Figure 16).
- Click on relevant buttons to edit or delete it.
- Click on ‘Print’ button to print it.
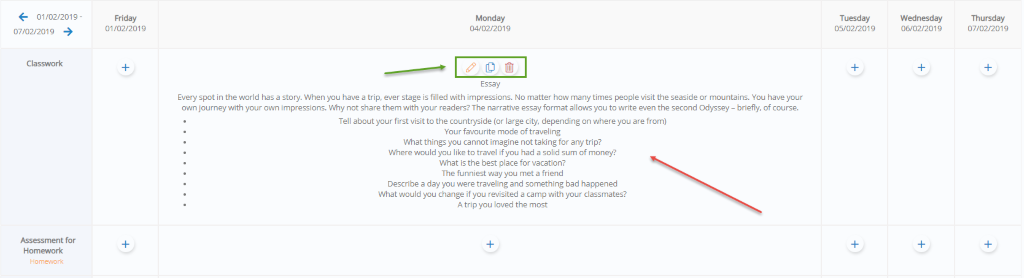
Figure 16
PER STUDENT
You can create Personal Work, that will be assigned to the selected student (Figure 17).
- Select ‘Per Student’.
- Use teachers, groups, subjects and week dates filters to show the selected week.
- Click on the Question mark button to view info about this page
- At the preferred student, click on the add button.
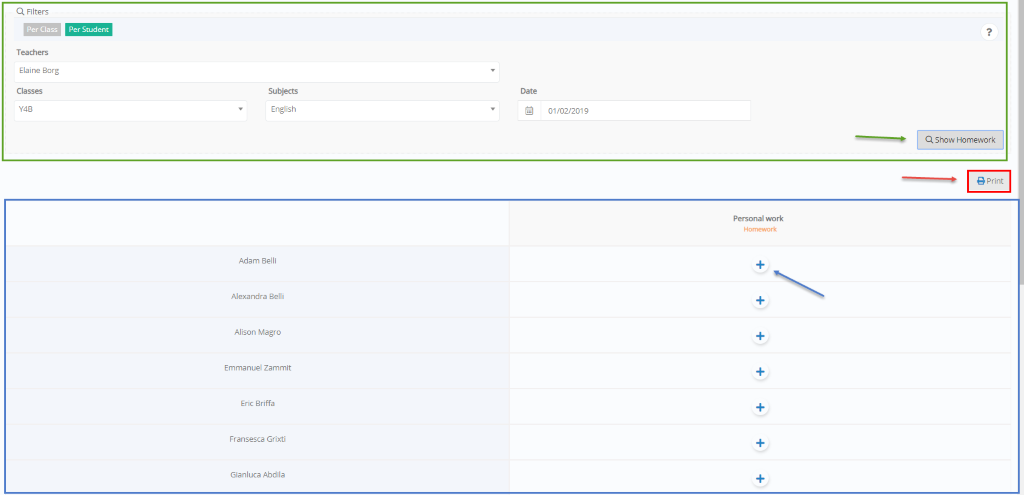
Figure 17
- In the pop-up window add the details of the Personal Work and click on save (Figure 18).
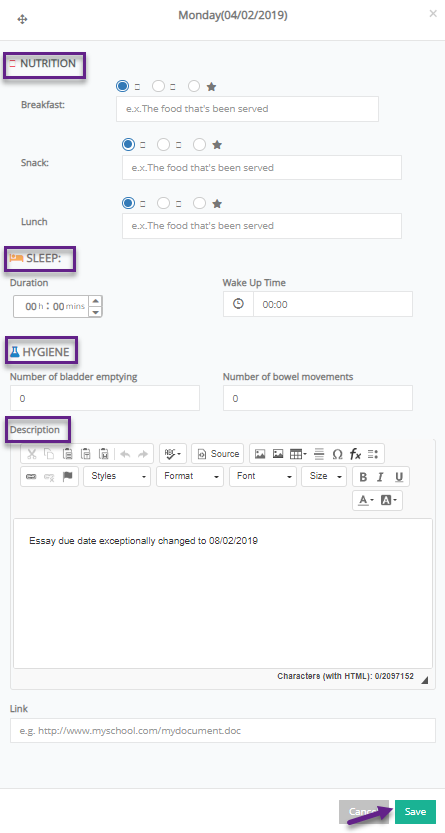
Figure 18
Note: Nutrition, Feed and Hygiene fields concern kindergarten students.
- Personal work will be added (Figure 19).
- Click on relevant buttons to edit or delete it.
- Click on the ‘Print’ button to print it.

Figure 19
General Note for Section: Terms may appear differently in each institution according to their academic terminology. For printing, you must have an operational printer set up (fully loaded with ink cartridges). For exporting you must have installed PDF readers and the MS Office suite.