

Select the Arrangements tab (Figure 115).
Click on the ‘Manage’ button, at the line of the arrangement.

Figure 115
Note: The pricing elements (e.g. grade, group, subject, activity etc.) are subject to the configuration made by the admin.
Manage
Click on the manage button to manage the arrangement details (Figure 116).
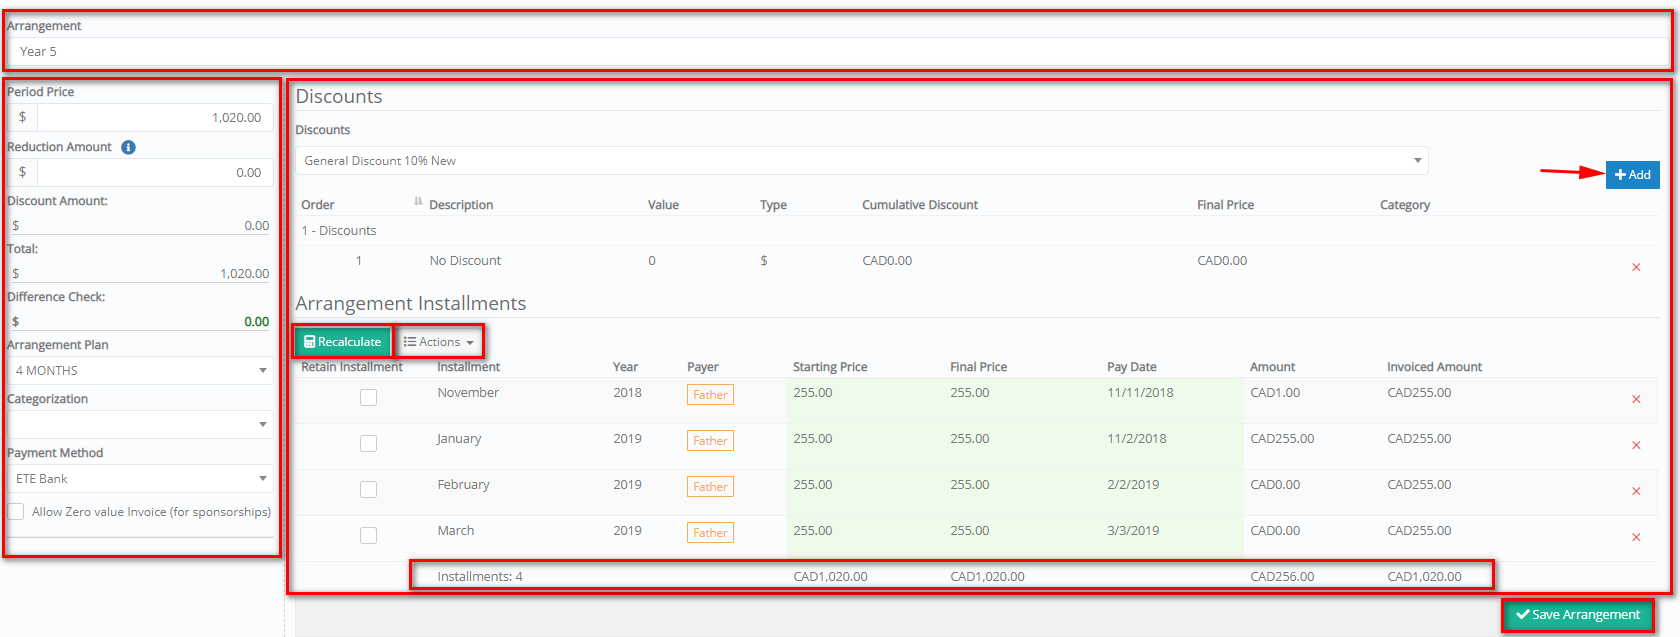
Figure 116
-
- Click on the ‘Period Price’ text box to change the element’s default price
- Use the ‘Reduction Amount’ text box to insert an amount by which the period price will be reduced e.g., in case of late registration
- Select the ‘Arrangement Plan’ e.g., 4 Months
Note: There is a default price set by the admin - Select a ‘Categorization’ e.g., Debtor (list options are set by the admin depending on how the categorization field is going to be used) e.g., Debtor, in case Categorization refers to payer’s reliability
- Select a ‘Payment Method’ e.g., Cash
- Check the ‘Insert a Prepayment’ check box if you want to insert a prepayment amount
- To add a discount, select the type of the discount from the drop-down list
Note: The Discount types available are set by the admin as well as any constraints, for example if you will be able to add more than one types of discount. - Click on the +Add button
- Click on the ‘Recalculate’ button to recalculate the amount of arrangement instalments of the discounted final price so that you do not have a Difference. In the example below, there is a difference between the total price and the final price of instalments due to a discount deletion. Thus, the instalments must be recalculated to agree with the Total (Figure 117).
Note: Use the ‘Recalculate’ button after any change that affects the total price.
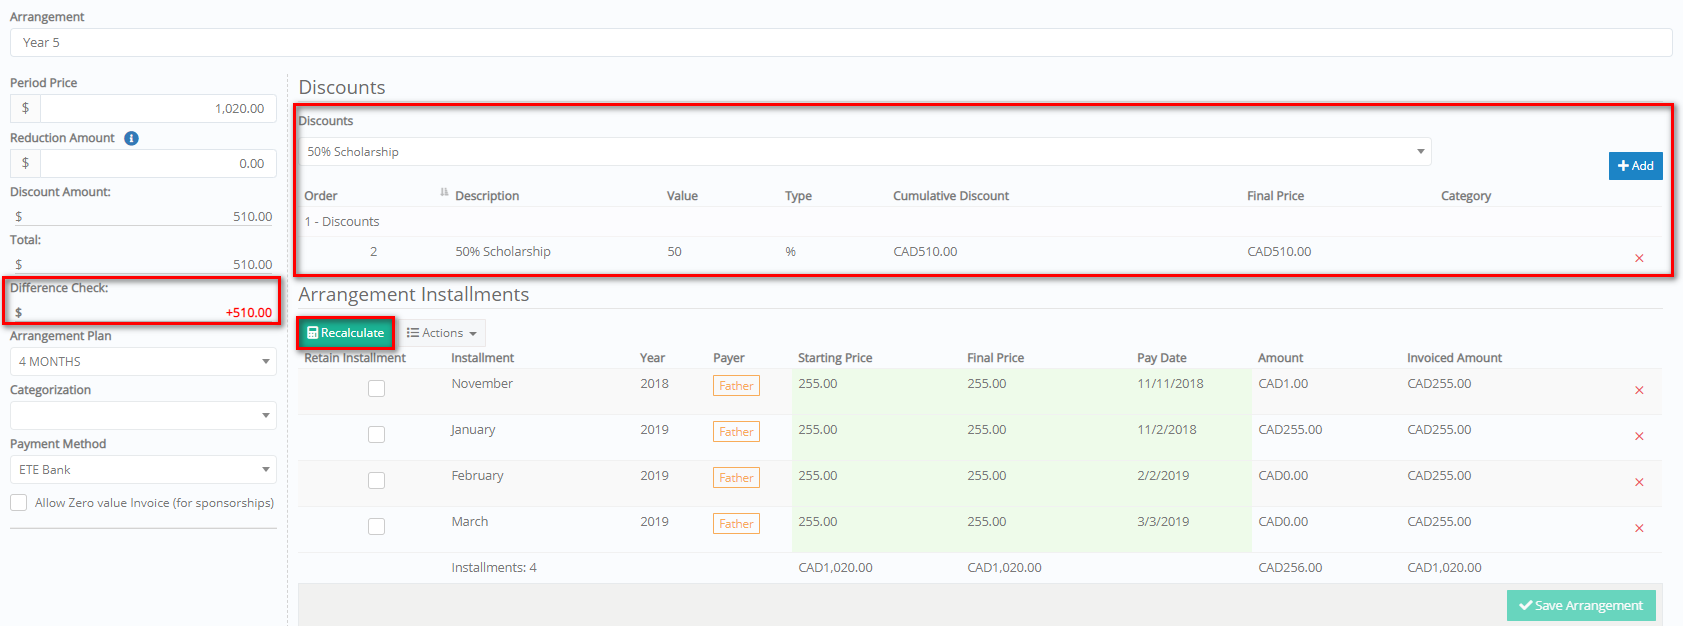 Figure 117
-
- Click on the ‘X’ button to delete an arrangement instalment or a discount
- Click on the ‘Save Arrangement’ button to save the arrangement
- Click on ‘Save’
- Click on the ‘bin’ button to delete the arrangement (Figure 118).
Note: In case you haven’t saved an arrangement, you can remove it if you delete the corresponding enrollment. - Click on the student icon to show/hide arrangement from the selected contact for financial issues (Figure 118).
- Click on the history icon to view the financial arrangement history.
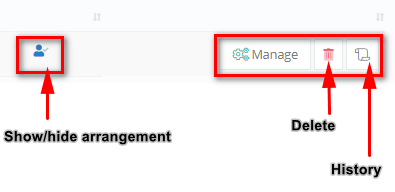
Figure 118
Note: After you have saved the arrangement, the financial overview is updated. You can see the agreed amount and the total payment, which result to the total balance. Additionally, you can see the current period outstanding and the total outstanding (from all periods) (Figure 119).

Figure 119