

Use mass billing to bill all selected balances up to a selected date (Figure 103).
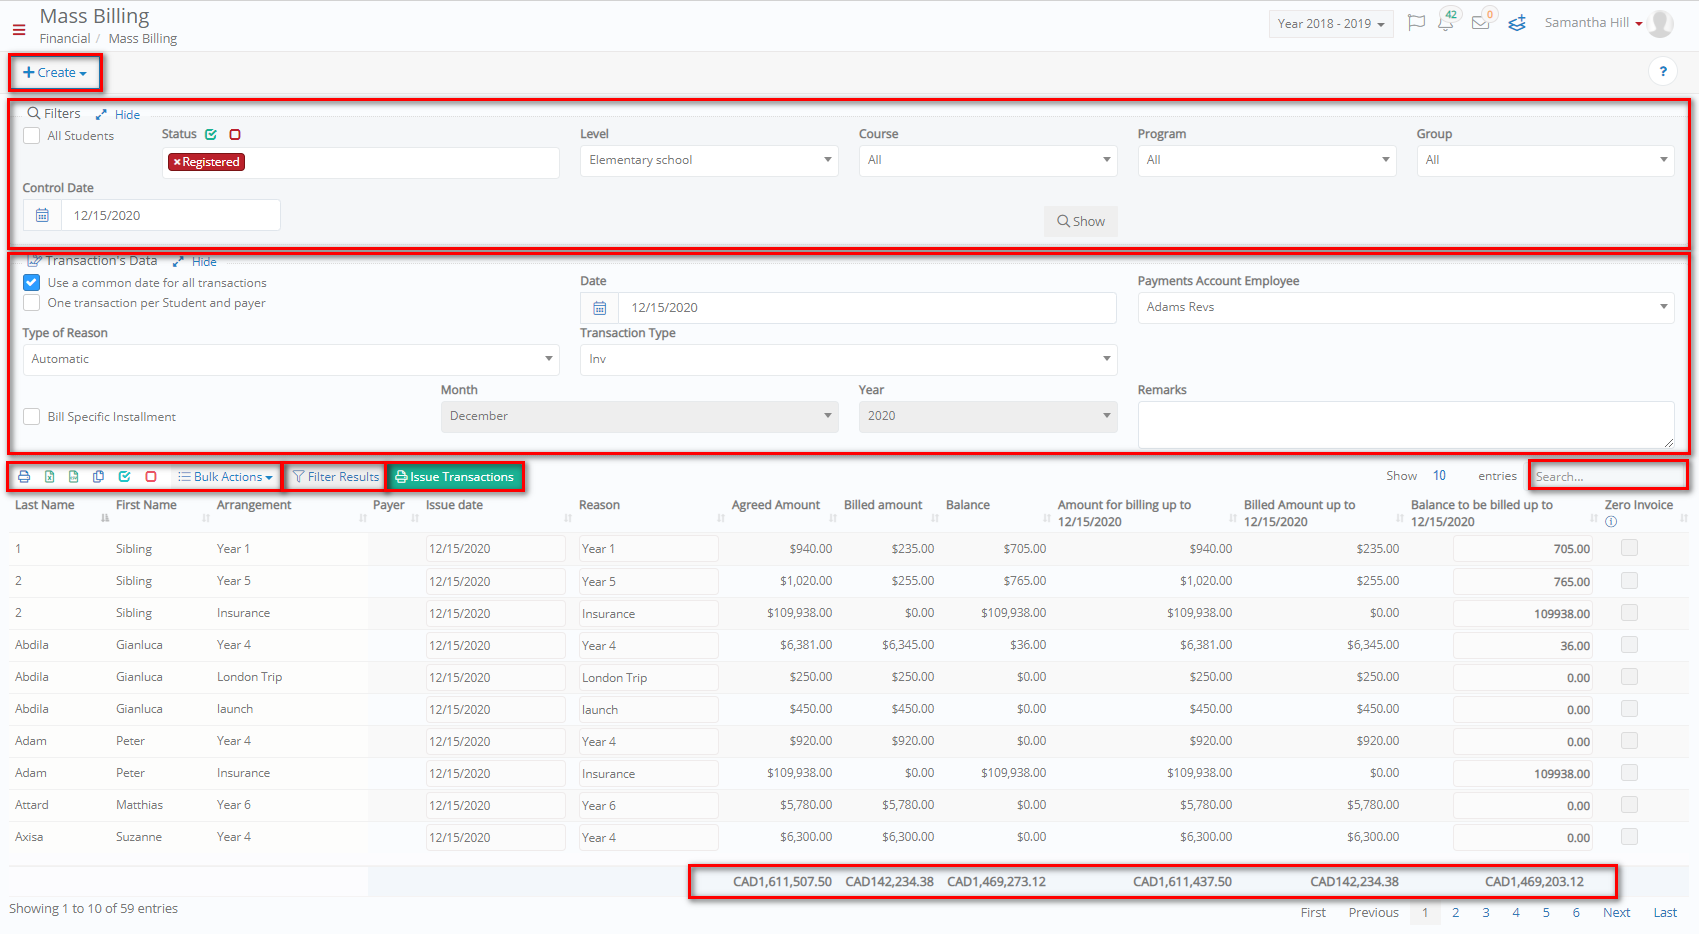 Figure 103
- Use the filters to show transactions corresponding to the selected criteria.
-
- Select ‘All Students’ to show balances of all students.
- Deselect ‘All Students’ to make a specific selection according to status, level, course, program, group and date.
- Click on the ‘Show’ button to show results.
- Use the ‘Transaction’s Data’ area options to specify the transactions’ details.
-
- Enable the ‘Use a common date for all transactions’ option, to set a common date for all billing actions. Alternatively, you can enter a specific date on the ‘Issue Date’ column of the selected entry.
- Select the ‘Payments Account Employee’ e.g. Adams Revs
- Select the ‘Type of Reason’ e.g. Automatic (Check the New Transaction to see the type of reason options in detail)
- Select the ‘Transaction Type’ e.g. Cinv
- Use the ‘Remarks’ field to add comments
- Enable the ‘Bill Specific Instalment’ option, if you want to bill only a specific month instalment. Select the month and the year.
- Use the ‘Filter Results’ button to filter results according to the selected arrangement and/or constraints (Figure 104).
-
- Select the arrangement e.g. Year 4
- Select the type e.g. Amount for billing up to 26/03/2019
- Select the operator and amount to set the constraint e.g. > 6000€
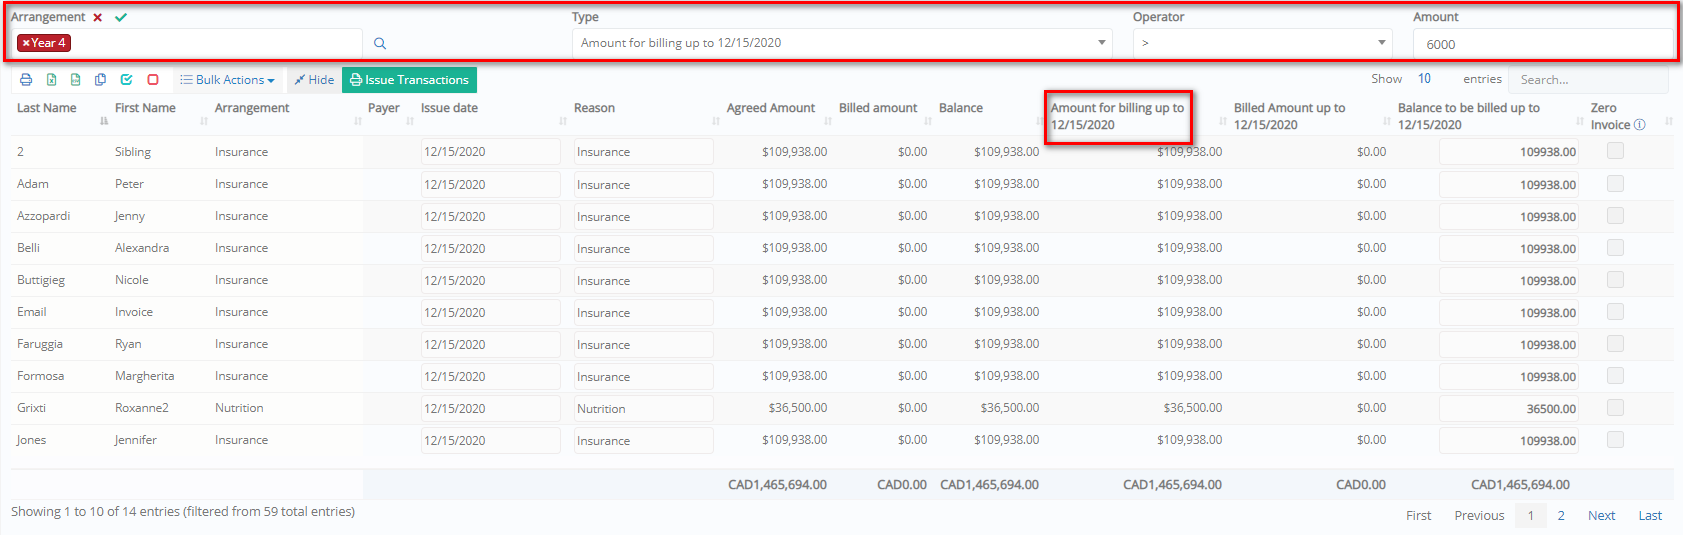
Figure 104
- At the results you can change the date, reason, or balance to be billed.
Note: If you want to change all balances to be billed, you can set them all to zero using the bulk actions button. You can also transfer general ledger credit balance. Additionally, you can set to zero only the selected ones or reset the value to the initial one (Figure 105).

Figure 105
- Select the entries you want to issue transactions for (or use the select all button, if you want to select all)
-
- Click in the ‘Issue Transactions’ button to issue invoices for the transaction.
Create New
You can create SEPA (Single Euro Payments Area) transactions.
- Click on the ‘Create’ button (Figure 106).
- Select ‘SEPA Transactions’.
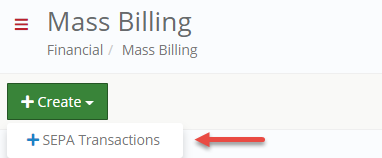
Figure 106
At the SEPA Transactions creation page, use the filters to create and save a SEPA transaction (Figure 107).
 Figure 107i