

The Marking Periods section allows you to define your Institution’s Marking periods, e.g, Winter Semester, Spring Semester, Final Examination, etc. Setting these periods is essential as they can be assigned to _Subjects_ for academic structuring and grading.
To access this page, follow the path: Dashboard > Configuration > Academic Settings > Marking Settings > Marking Periods.
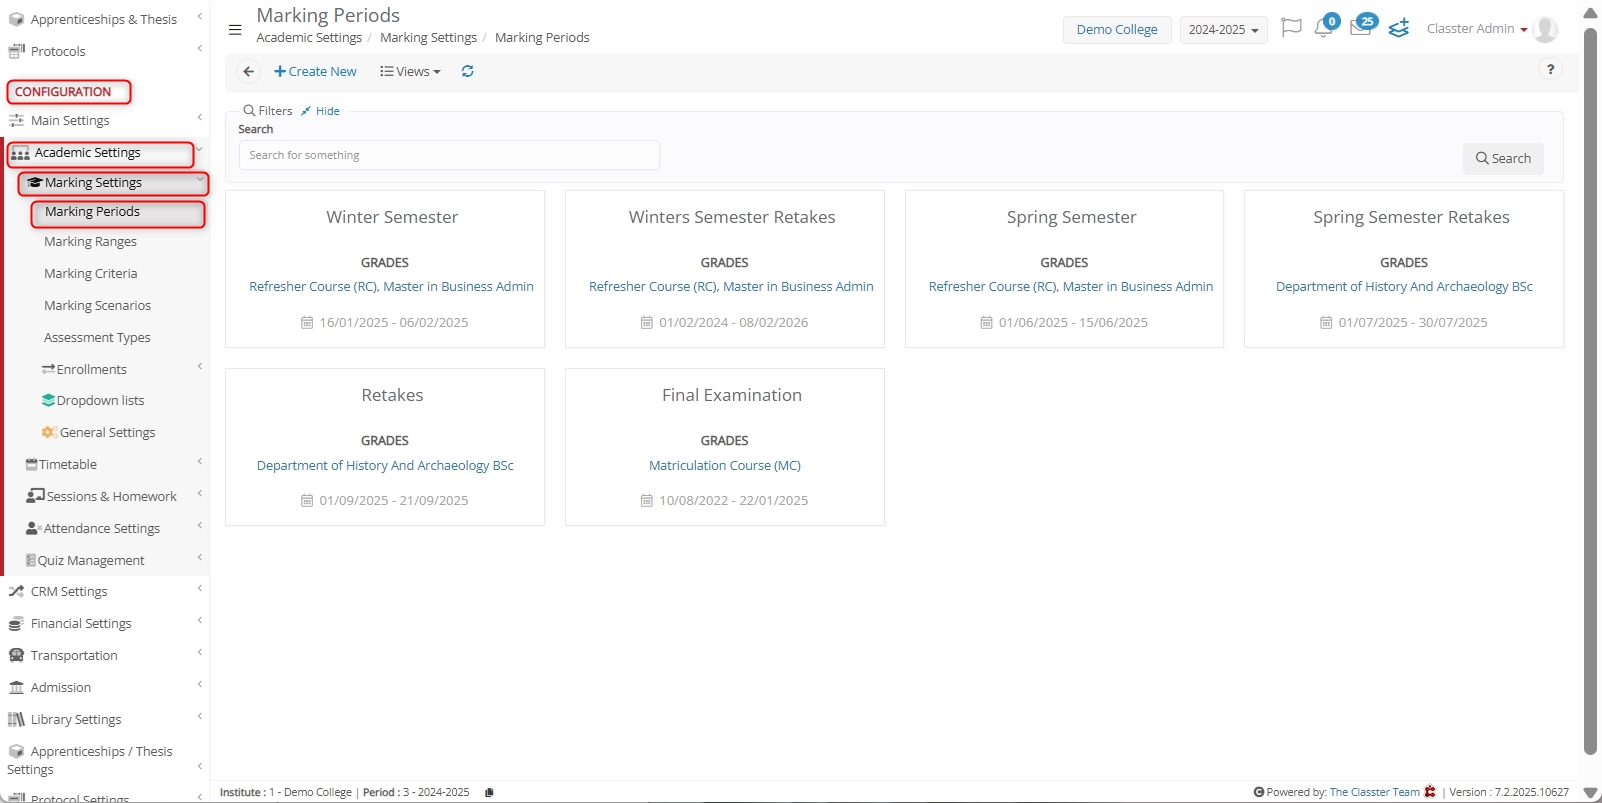
Main Page Features
- Use the Views dropdown to switch between Grid or Card view.
- Click the ? button on the top left to access help information.
- Use the Search field to find a specific Marking Period.
- Click on an existing Marking Period to edit it.
- Click the + Create New button to create a new Marking Period.
Create New Marking Period
Clicking on + Create New redirects you to the new Marking Period creation form.
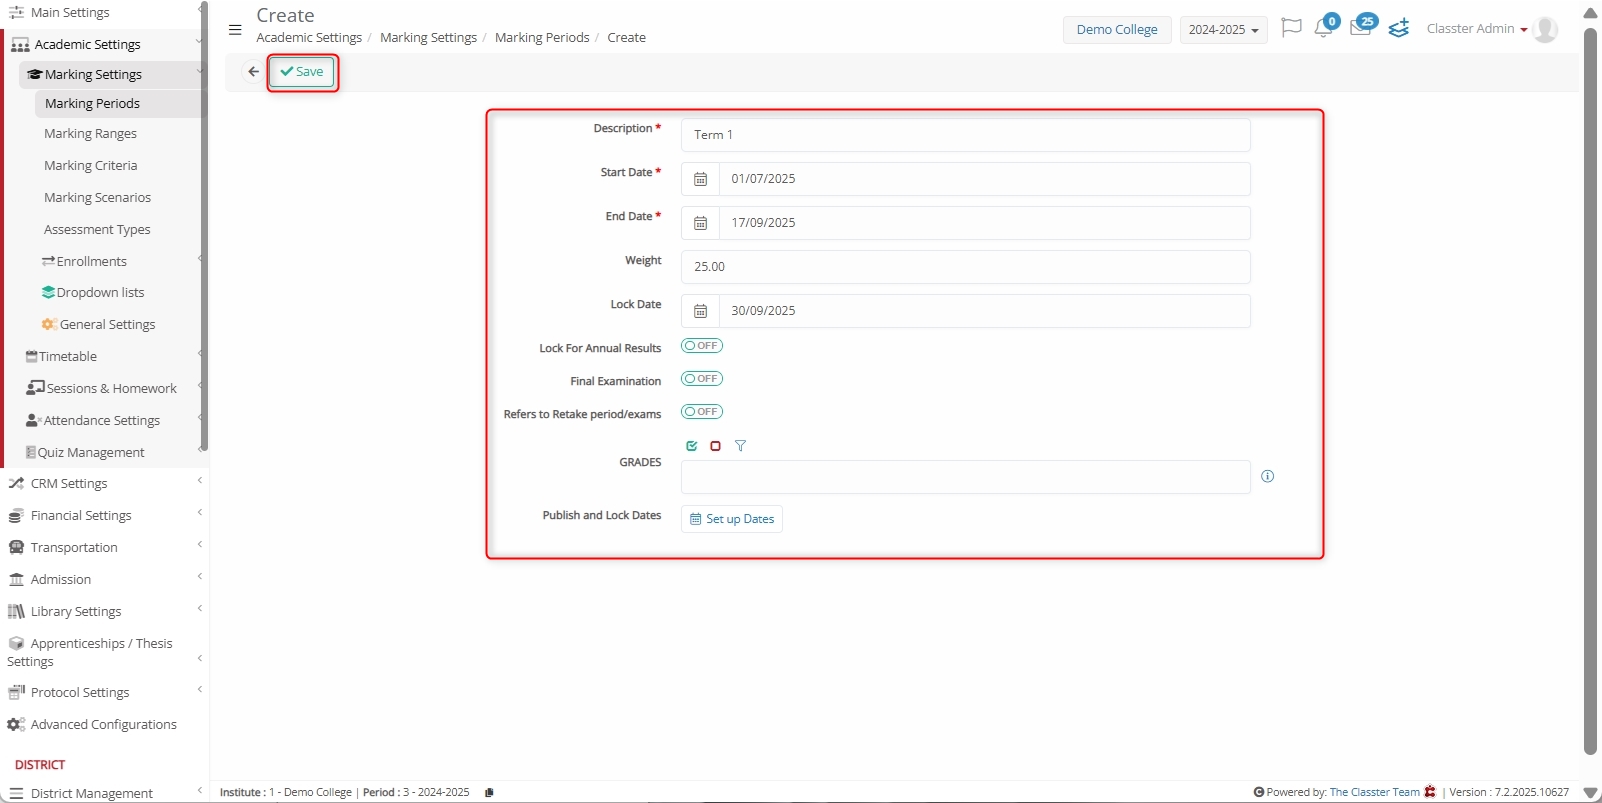
Now, fill out these fields carefully:
- Description: Enter a name or short label for the Marking Period (e.g., Term 1).
- Start Date: Define the starting date of the Marking Period (e.g., 01/07/2025).
- End Date: Define the ending date of the Marking Period (e.g., 17/09/2025).
- Weight: Set the percentage weight this Marking Period carries in the calculation of final marks (e.g., 25.00).
- Lock Date: Select the date after which no further changes are allowed in this Marking Period (e.g., 30/09/2025).
- Lock for Annual Result: Enable this switch to restrict the inclusion of this period in the annual result calculation after the Lock Date.
- Final Examination: Enable this switch to mark the period as a Final Exam timeframe.
- Refers to Retake periods/exams: Enable this switch to allow retake exams during this period. Ensure that the following toggle is enabled first:
Academic Settings > Marking Settings > General Settings > Marking > Synoptics / Retakes > Enable Synoptics / Retakes, and select “Retake Periods” from the dropdown.

- _Grades_: Select the _Grades_ associated with this Marking Period. This includes all _Subjects_ assigned to the selected _Classes_.
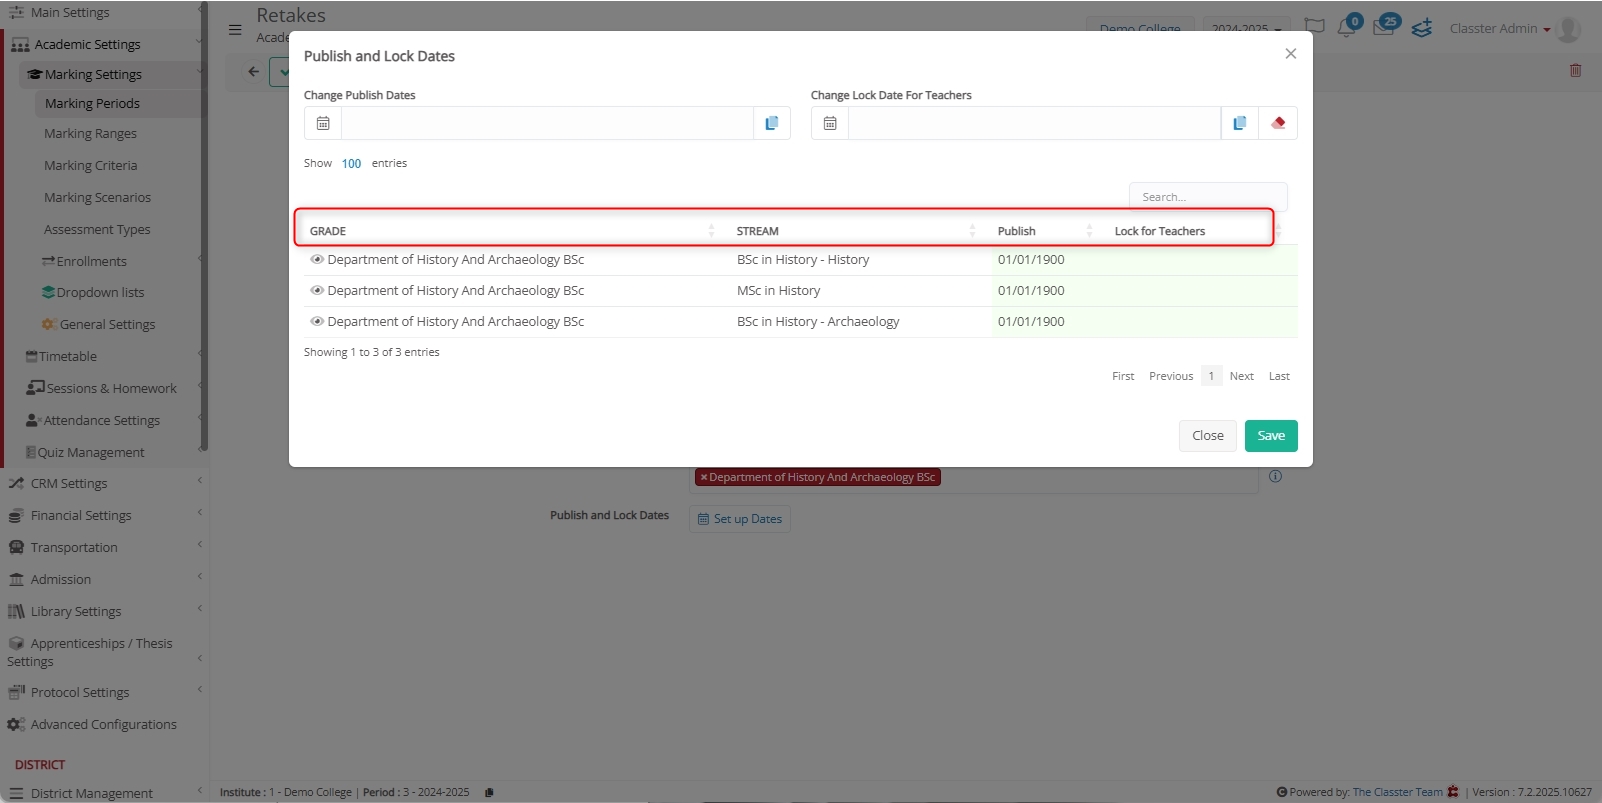
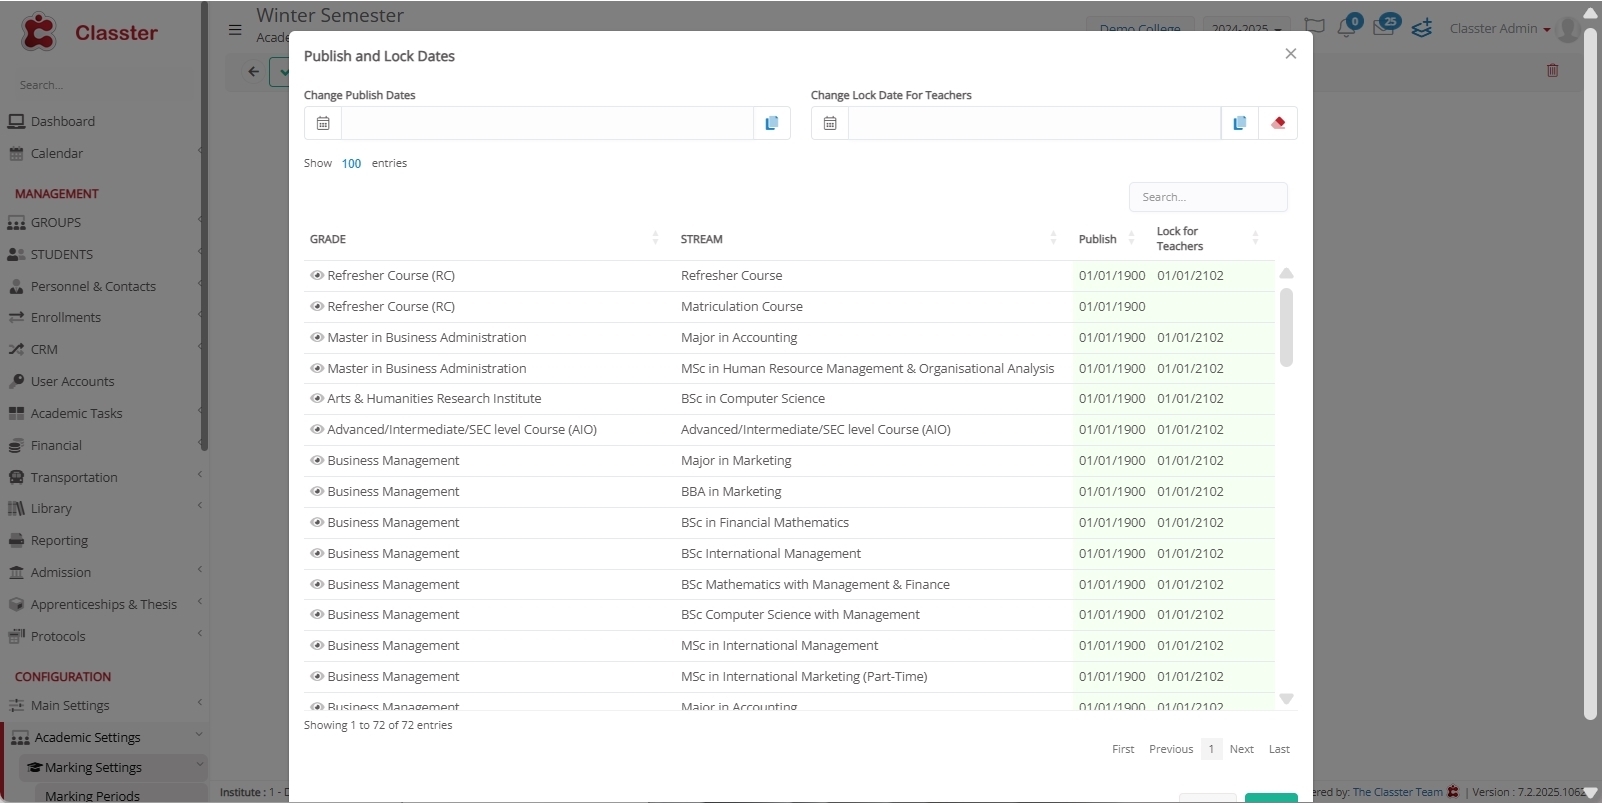
- Publish and Lock Dates: Set two key dates:
- Lock Date: Prevents _Teachers_ from modifying _Grades_ beyond this point.
- Publish Date: Determines when marks are made visible to _Students_ and _Parents_.
Lastly, click Save to create the new Marking Period.
Edit a Marking Period
Clicking on an existing Marking Period opens the edit form, where you can update its settings.
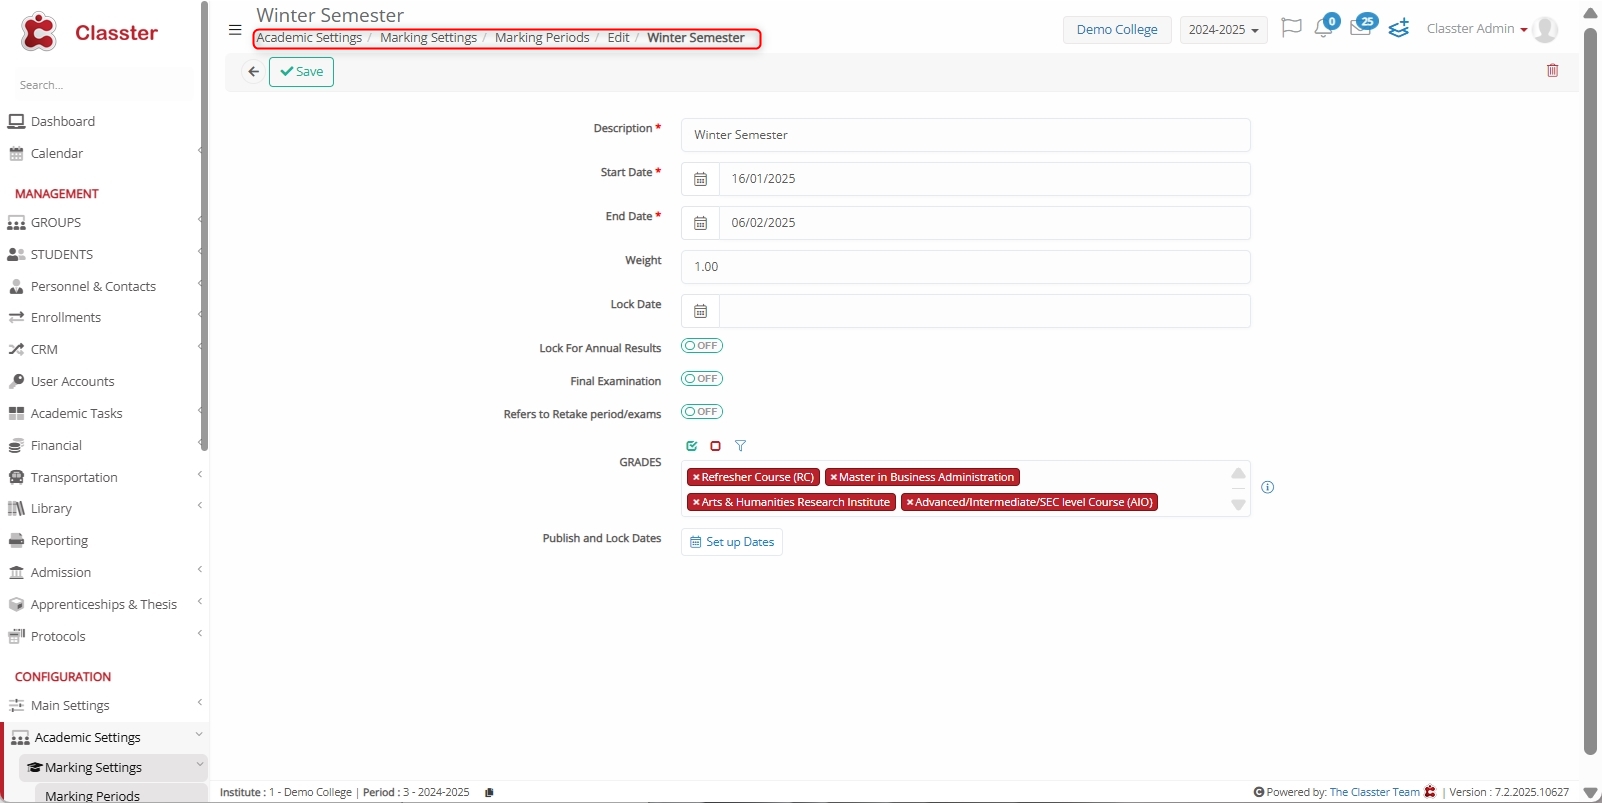
Where:
- Description: Changes the name or label of the Marking Period to reflect a new term or corrected title.
- Start Date: Modifies the starting date to adjust when the Marking Period begins.
- End Date: Changes the ending date if the period has been extended or shortened.
- Weight: Updates the percentage weight this Marking Period contributes toward the final _Grade_ calculation.
- Lock Date: Modifies the deadline after which no further grading changes are allowed.
- Lock for Annual Result: Updates whether this period contributes to the annual result after the Lock Date.
- Final Examination: Enable or disable this switch to update the status of the period as a Final Exam timeframe.
- Refers to Retake periods/exams: Update this option to allow or restrict retake exams during the period.
- _Grades_: Change the selection of _Grades_ and associated _Subjects_ to include or exclude specific _Classes_ from this Marking Period.
- Publish and Lock Dates:
- Lock Date: Update this to change when Teachers can no longer edit marks.
- Publish Date: Modify this to change when Grades become visible to Students and Parents.
Summary
With the help of Marking Periods, Classter users can create or edit marking periods by configuring key attributes like Start and End dates, Weight, Grade visibility, and Exam settings. These periods help structure Subject grading and ensure accurate academic reporting across the platform.