

At the arrangements list, you can see all the arrangements, or you can use the filters to see specific ones for example activities arrangements only (Figure 69).
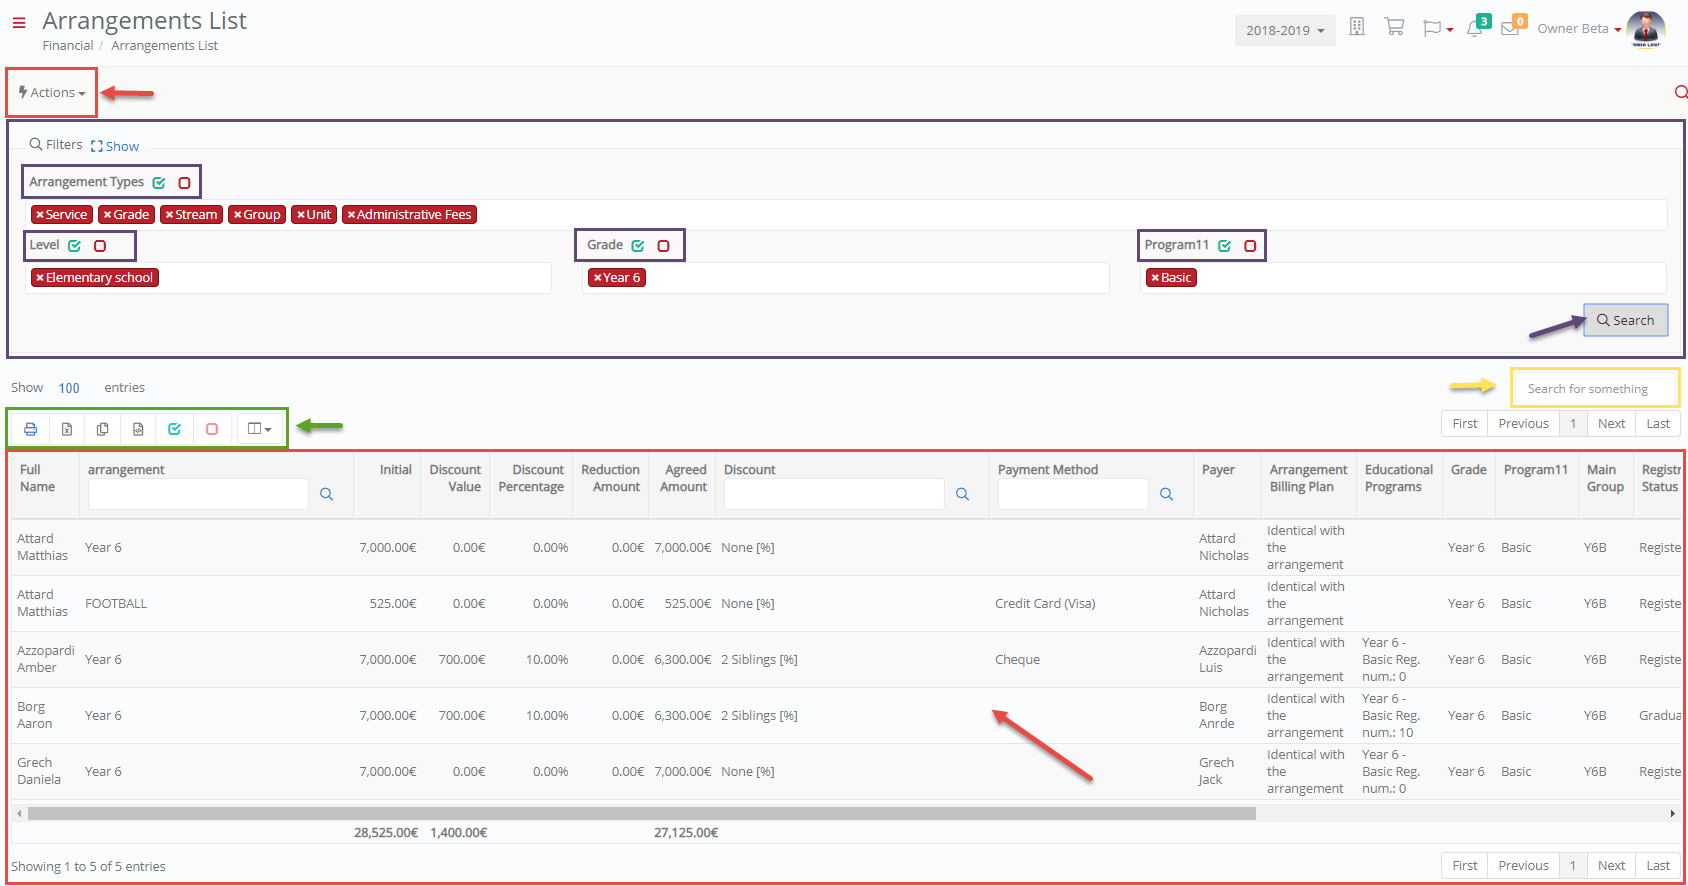
Figure 69
- Select Arrangement Type(s) e.g. Services
- Select Level(s) e.g. Elementary school
- Select Grade(s) e.g. Year 4 (it filters from Level)
- Select Program e.g. Basic (it filters from Grade)
- Click on the ‘Search’ button
- Use the buttons above the results area to print, export and select/deselect results. You can also use the ‘Manage Columns’ button to show/hide information you do not want (Figure 70).
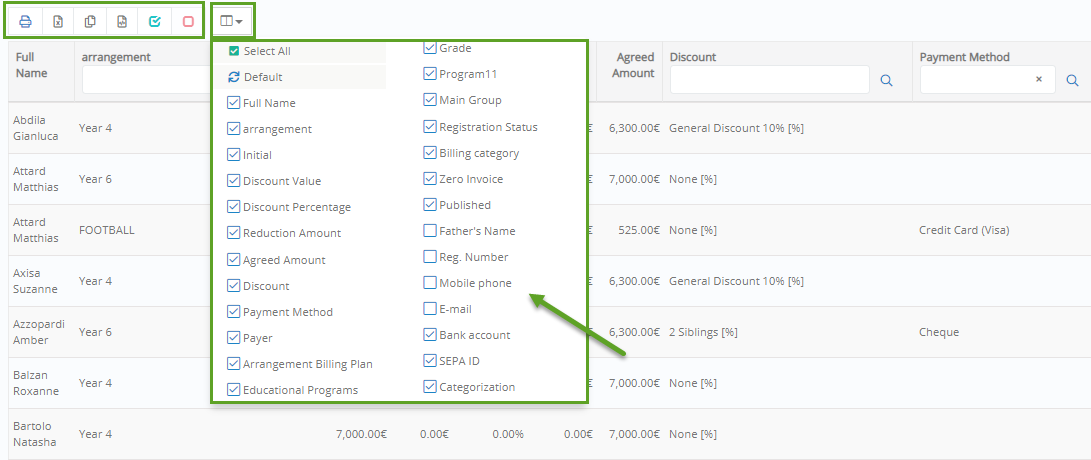
Figure 70
- Use the column fields to filter results e.g. show arrangements whose payment method is Cash (Figure 71).

Figure 71
- Use the ‘Actions’ menu to create new arrangements and manage the existing ones (Figure 72).
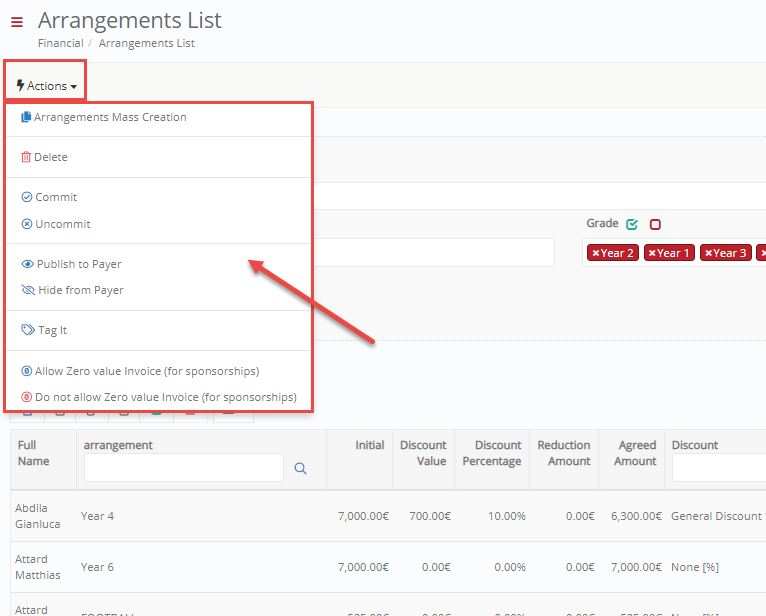
Figure 72
- Select ‘Arrangements Mass Creation’ to create an arrangement for several selected students (Figure 73).

Figure 73
- Use the status, level, grade and program filters to search for the students you want to make an arrangement. Click on the ‘Search’ button
- Select the ‘Students’ you want
- Select arrangement ‘Type’ e.g. Service, ‘Service’ e.g. Basketball, ‘Plan’ e.g. without a plan, ‘Billing Plan’ e.g. identical with arrangement plan
- Enable the ‘Title’ option if you want to add an arrangement title
- Enable the ‘Show to Payers/Parents’ option to show the arrangement to Payers/Parents portal
- Enable the ‘Use same price’ option to change the suggested period price
- Use the ‘Reduction Price’ option if you want to add a reduction
- Select a discount from the drop-down list discounts e.g. General Discounts 10%
Note: In case you want to add multiple discounts, select the ‘Discount Mode’ (Figure 74).
-
- Price first: the discount you add will be added to the initial price
- Percentage first: it will calculate the discounts in percentage first
- View order: it will calculate discounts in the order they were added

Figure 74
- Select a ‘Rounding option’ e.g. 1€ (Euro)
- Click on the ‘Add’ button to add the discount
- Click on the ‘Create’ button to create the arrangements
- Select ‘Delete’ to delete the selected arrangements from the list.
- Select ‘Commit’ so that the arrangement cannot be deleted (select uncommit to cancel commit).
- Select ‘Publish to Payer’ to show the selected arrangement(s) to the payer’s portal.
- Select ‘Hide from Payer’ to hide the selected arrangement(s) to the payer’s portal.
- Use the ‘Tag it’ option in order to select a categorization for the selected arrangement(s) e.g. Reliable (Figure 75).

Figure 75
- Select ‘Allow Zero-value invoice (for sponsorships) to enable zero value invoices issuing. This option can be used for sponsorships or any other case that the student will not have to pay.
- Select ‘Do not allow Zero-value invoice (for sponsorships) to disable zero value invoices issuing.