

Dropdown lists – Calendar Categories
Here you can manage the dropdown lists associated with the various CRM module functions. The first thing you will see when landing on the dropdown list page is the Calendar Category dropdown list which is used to create Calendar Categories for planning activities or events from the events management part of the Classter Portal.
Follow the path: Dashboard > Configuration > CRM Settings > Dropdown lists (Figure 24).

Figure 24
On this page we can see (Figure 24):
- From the dropdown list option, you can choose which dropdown list you wish to view. In this case Calendar Categories dropdown list.
- You can use the search field to locate a specific calendar category.
- You can print, copy or export the list of calendar categories.
- You can click on the copy, delete or edit button next to each category on the list to copy, delete or edit that category.
- Click on the ‘+Add New’ button to add a new calendar category.
Add New Calendar Category
Once you click on the +Add New button you will see a popup window in which you will be able to create a new calendar category (Figure 25).
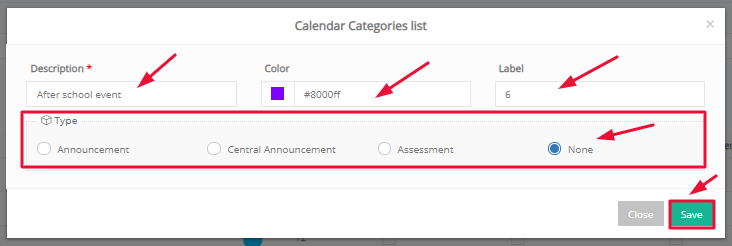
Figure 25
On this popup window you can see (Figure 25):
- Description field: enter the description for this new calendar category e.g afterschool event.
- Color option: choose a color for this calendar category. The color will distinguish this category when creating events in the Calendar.
- Label field: this will work as a numbering system for calendar categories.
- Type option: click on the type of calendar category you want. If this concerns announcements, then click on announcements type. If as in this case there is no specific type for After School Events, select None.
- Internal Message Category field: select here the Internal Message Category to be used when a Message is sent by an event of this Category. (Internal Message Categories are created/edited in Main Settings > Dropdown lists > System > Internal Messaging Categories)
- Notification Template field: select here a Public Events Notification Template to be used when a Notification is sent by an event of this Category. (Public Events Templates are created/edited in Advanced Configurations > Templates Editing > CRM)
- Public Available Switch: when turned on, other Employees and Admins will be able to see the Events of this Category in their Calendars, by using the Show public Events filter.
- Once you are done, click on the ‘Save’ button to save this new calendar category.
If you click on the edit button (Figure 24) you will see the edit popup window. Follow the same steps as in creation (Figure 25).
Example of the affected area in Classter Portal (Figure 26)
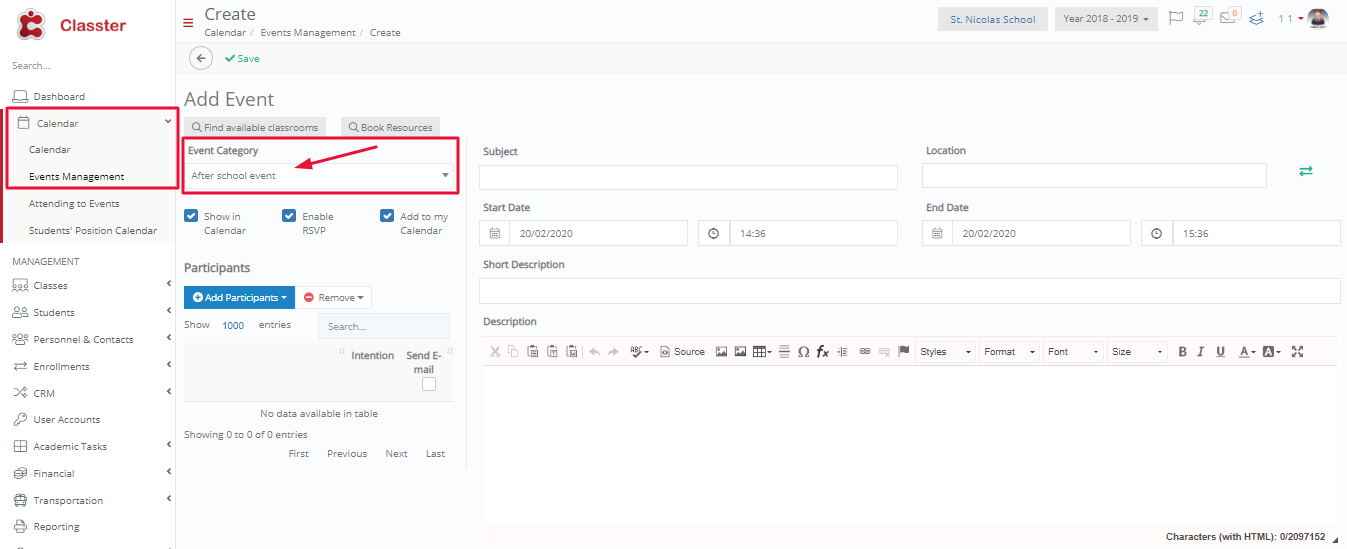
Figure 26
Dropdown lists – CRM Completion Results
On this dropdown list you are able to add statuses regarding the result of CRM remarks, actions, incidents, feedback and meetings.
To reach this page follow the path: Dashboard > Configuration > CRM Settings > Dropdown lists > Dropdown List option/CRM Completion Results (Figure 27).
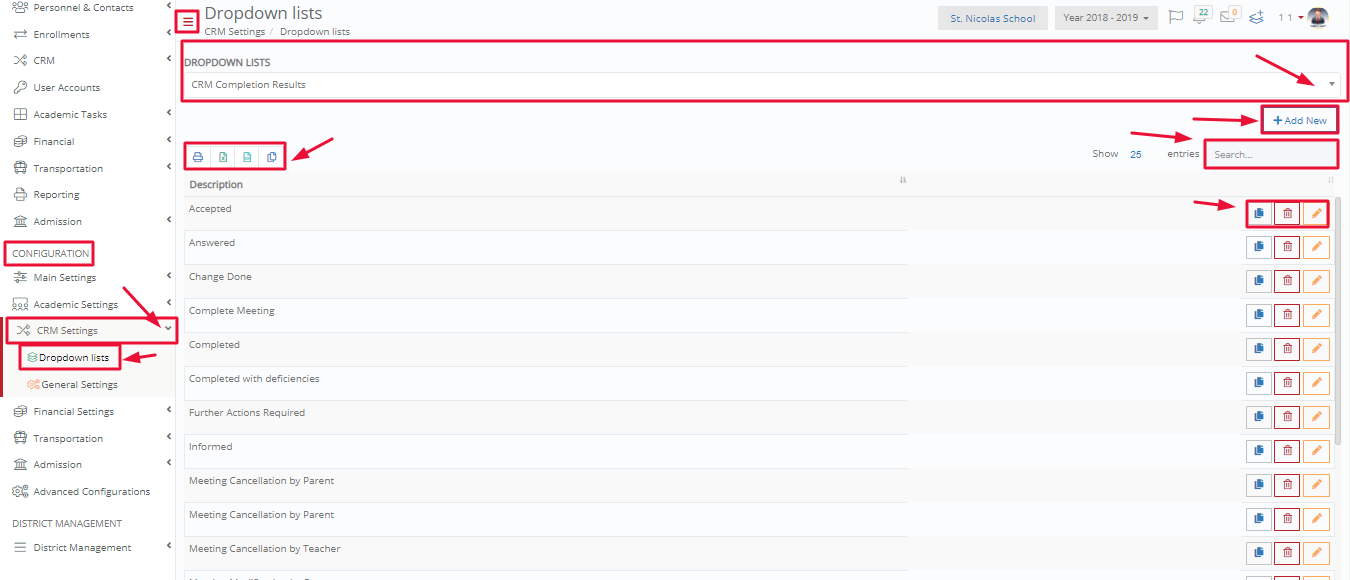
Figure 27
On this page we can see (Figure 27):
- From the dropdown list option, you can choose which dropdown list you wish to view. In this case, CRM Completion Results in dropdown list.
- You can use the search field to locate a specific completion result.
- You can print, copy or export the list of CRM completion results.
- You can click on the copy, delete or edit button next to each completion result on the list to copy, delete or edit that completion result.
- Click on the ‘+Add New’ button to add a new CRM completion result.