


Introduction
Before you import a timetable, you must be sure that you have setup all the necessary data entities (Subjects/Classrooms/Days/Teachers/Hours/Classes etc.) on Classter. After that you must do all the necessary enrollments and connections between those data categories (entities).
From the left menu, you can go to Configuration > Advanced Configuration > Mass Import > Import Timetable (Figure 1 & 2).
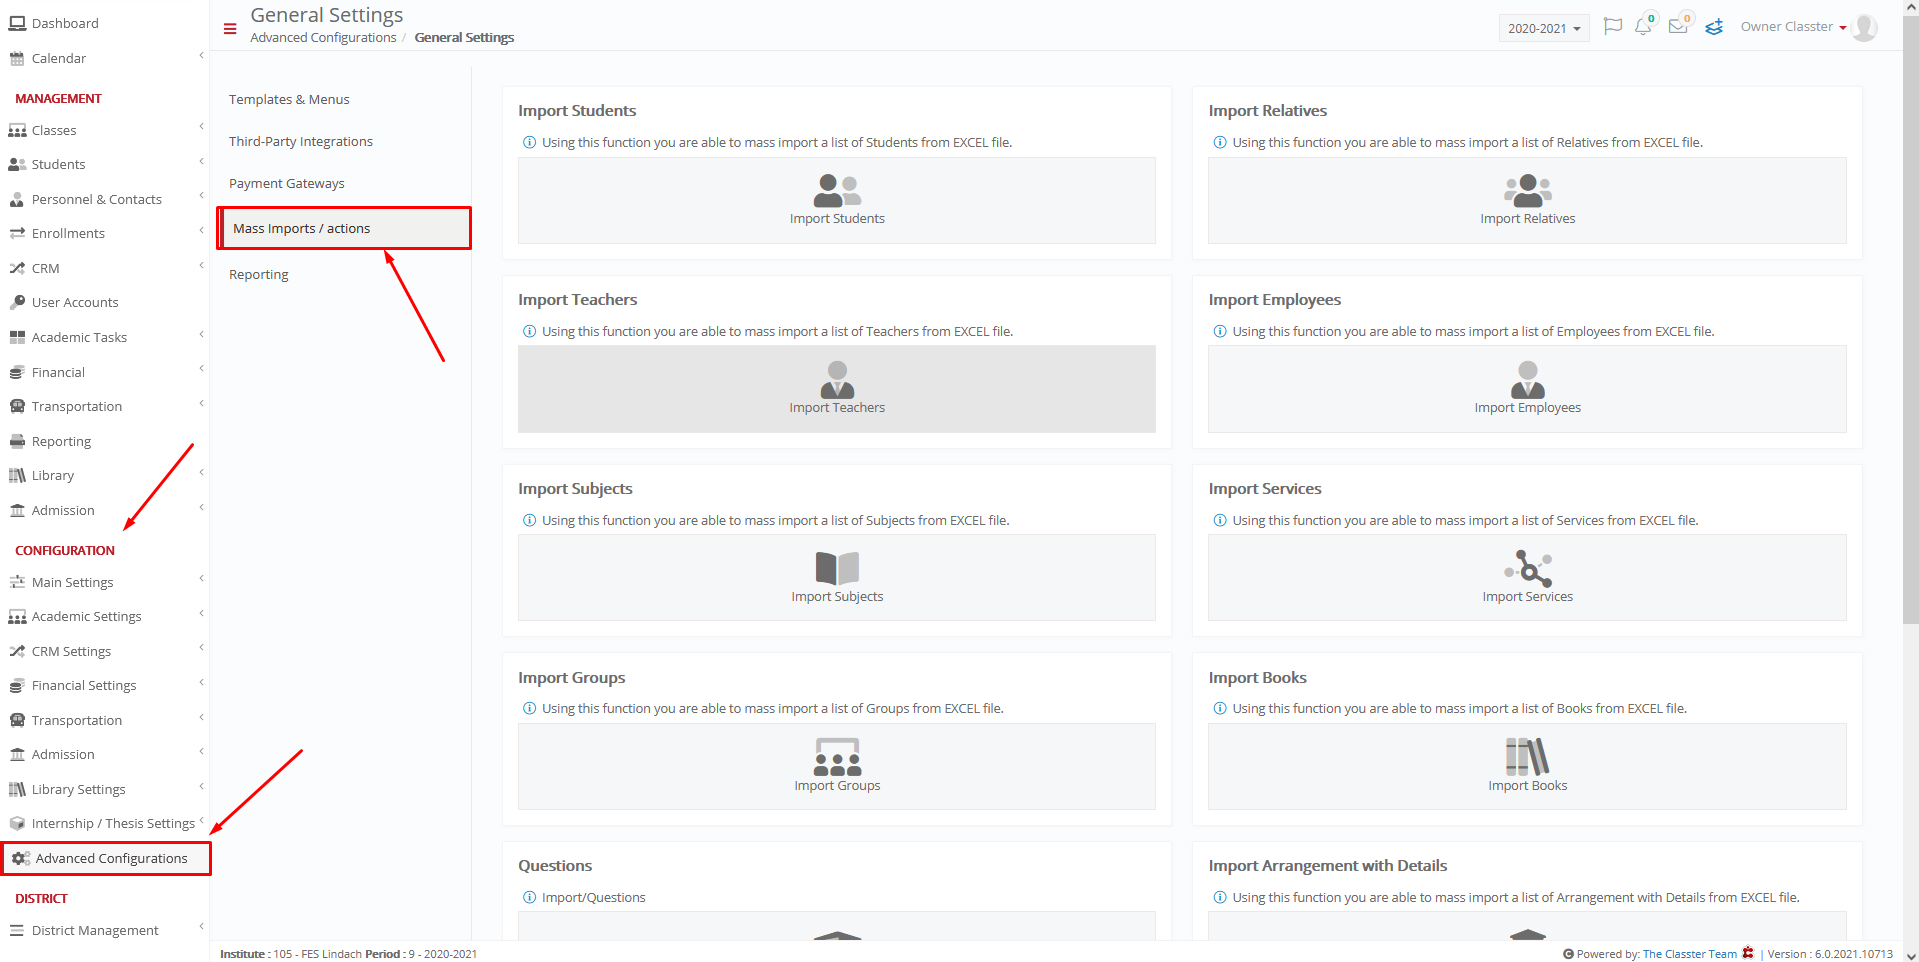
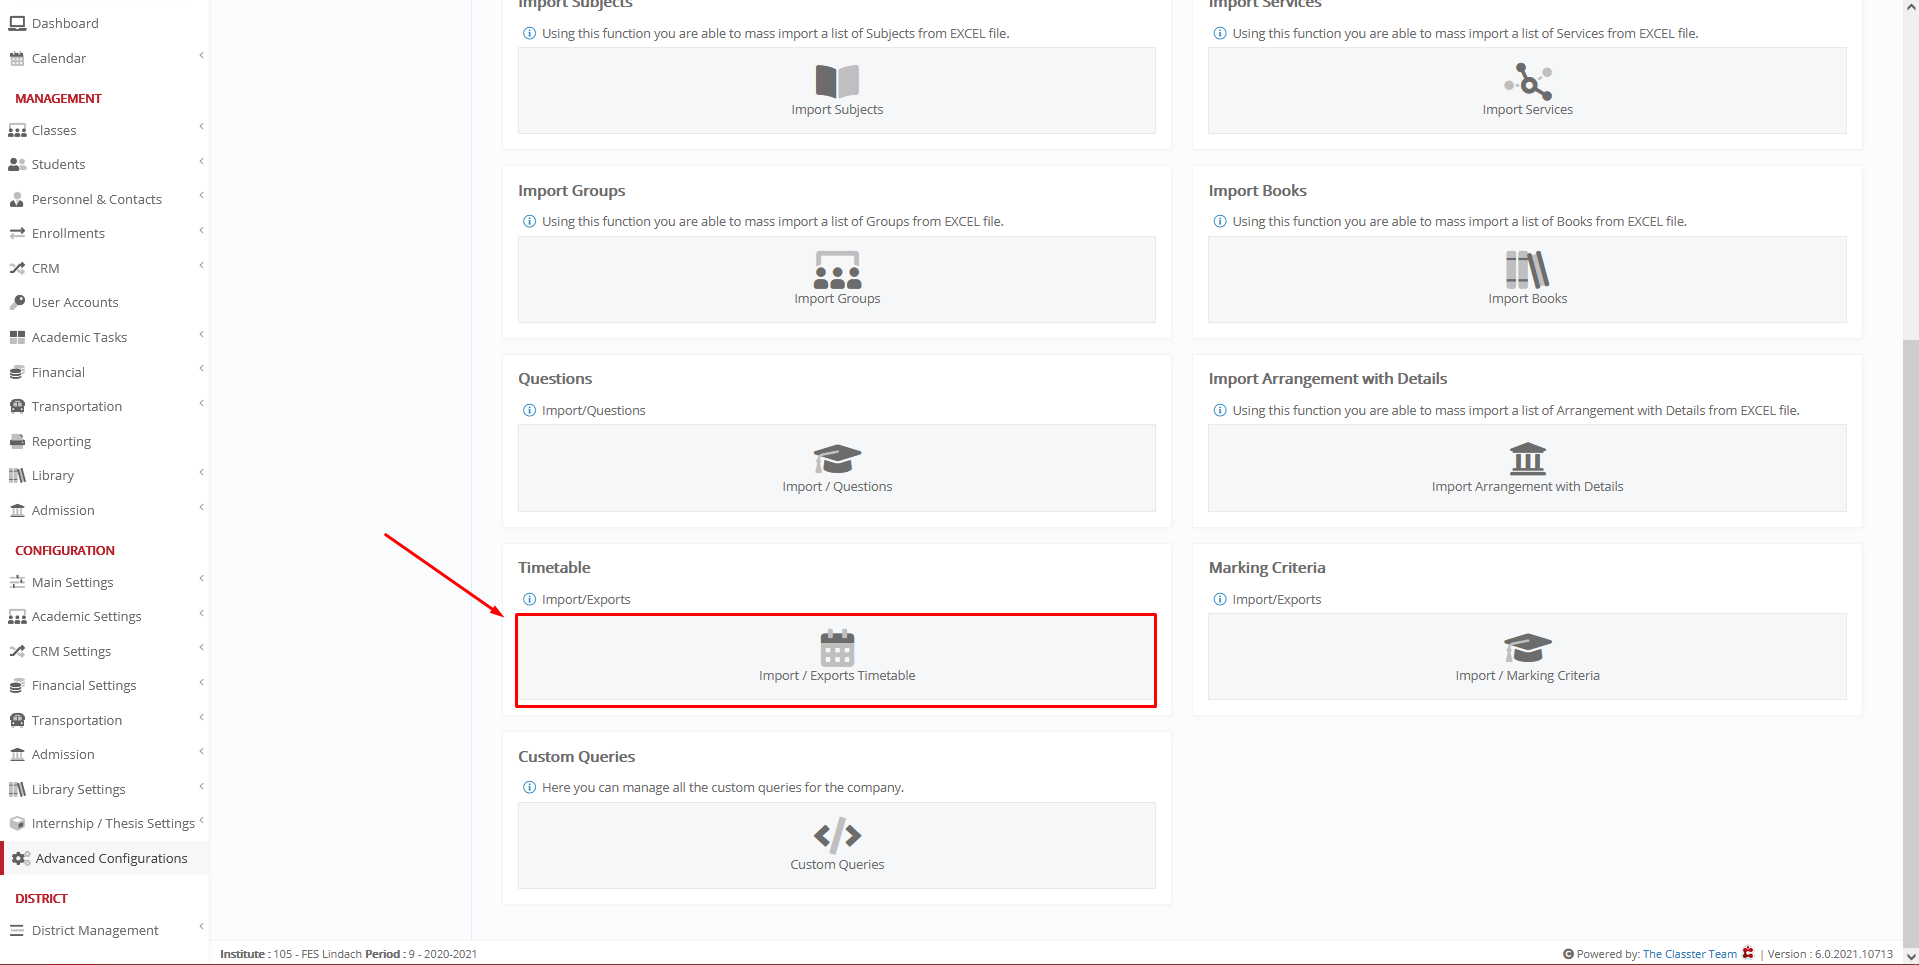
Figure1 & 2
Step 1 of Untis Timetable Import
In the popup window that appears, you will find 4 steps to follow in order to import your Untis Timetable Data. In the Step 1 you must select the timetable import category. The right option for you is Untis XML (Figure 3).
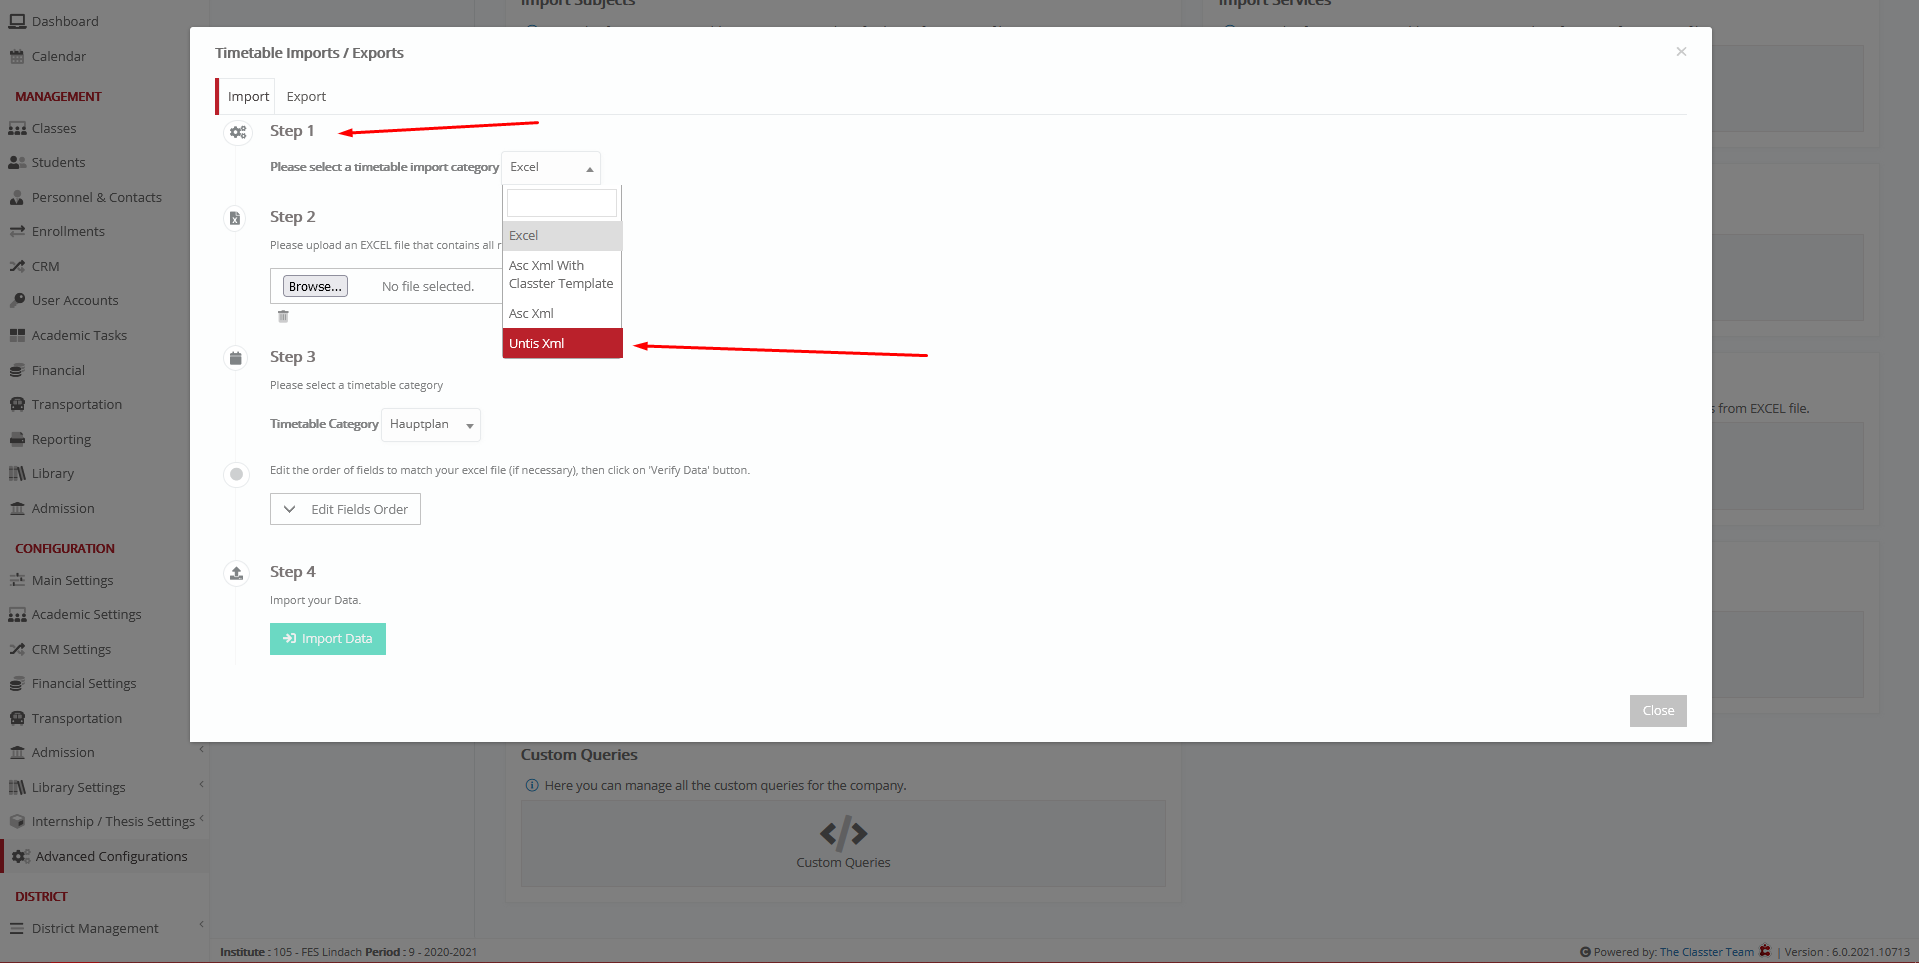
Figure 3
Step 2 of Untis Timetable Import
In Step 2 you must choose your XML file, and then you will integrate your data with Classter from the green buttons for each category (Hours/ Days/ Classrooms/ Teacher/ Classes/ Subjects/Holidays). If you do not have data in the Untis XML file for someone of these categories, can just ignore those buttons (Figure 4).
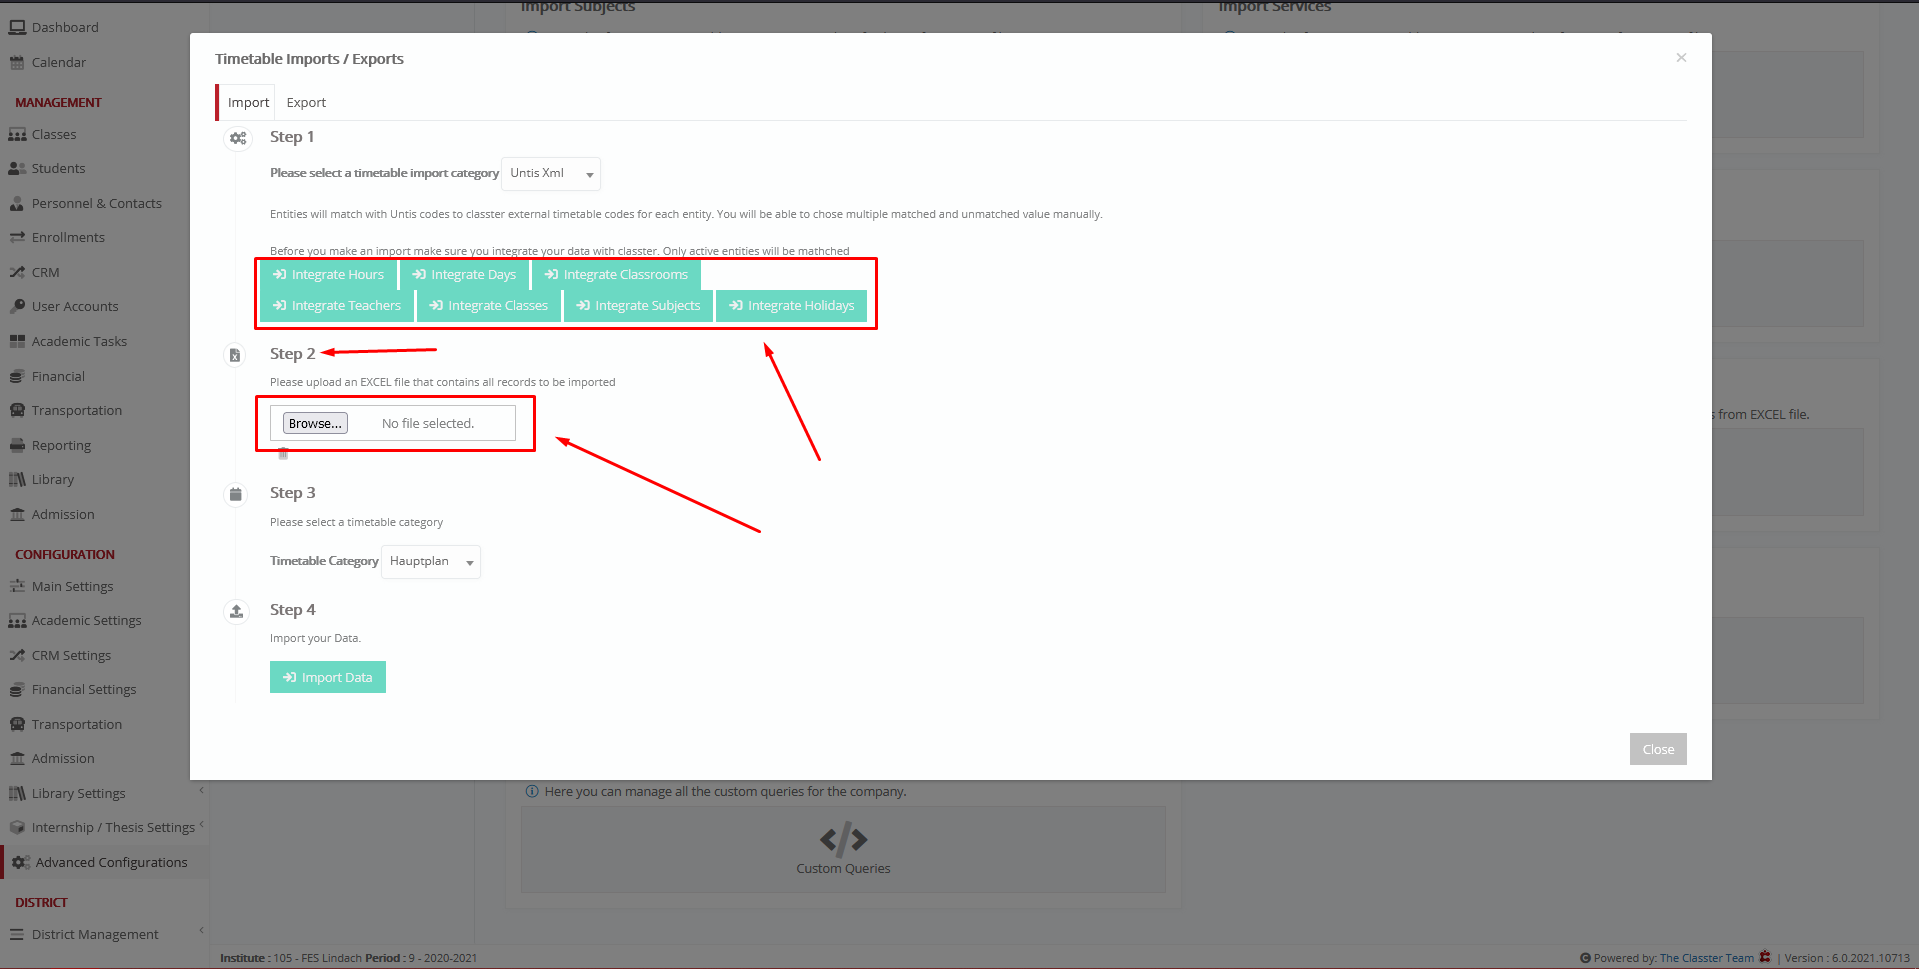
Figure 4
At the integrate buttons, you will see the matching between Untis and Classter’s data.
In some cases, Classter does not match all the data with Untis, so you must match the data manually by selecting the right data in the match field. To save your changes, don’t forget to press “Confirm” (Figure 5).
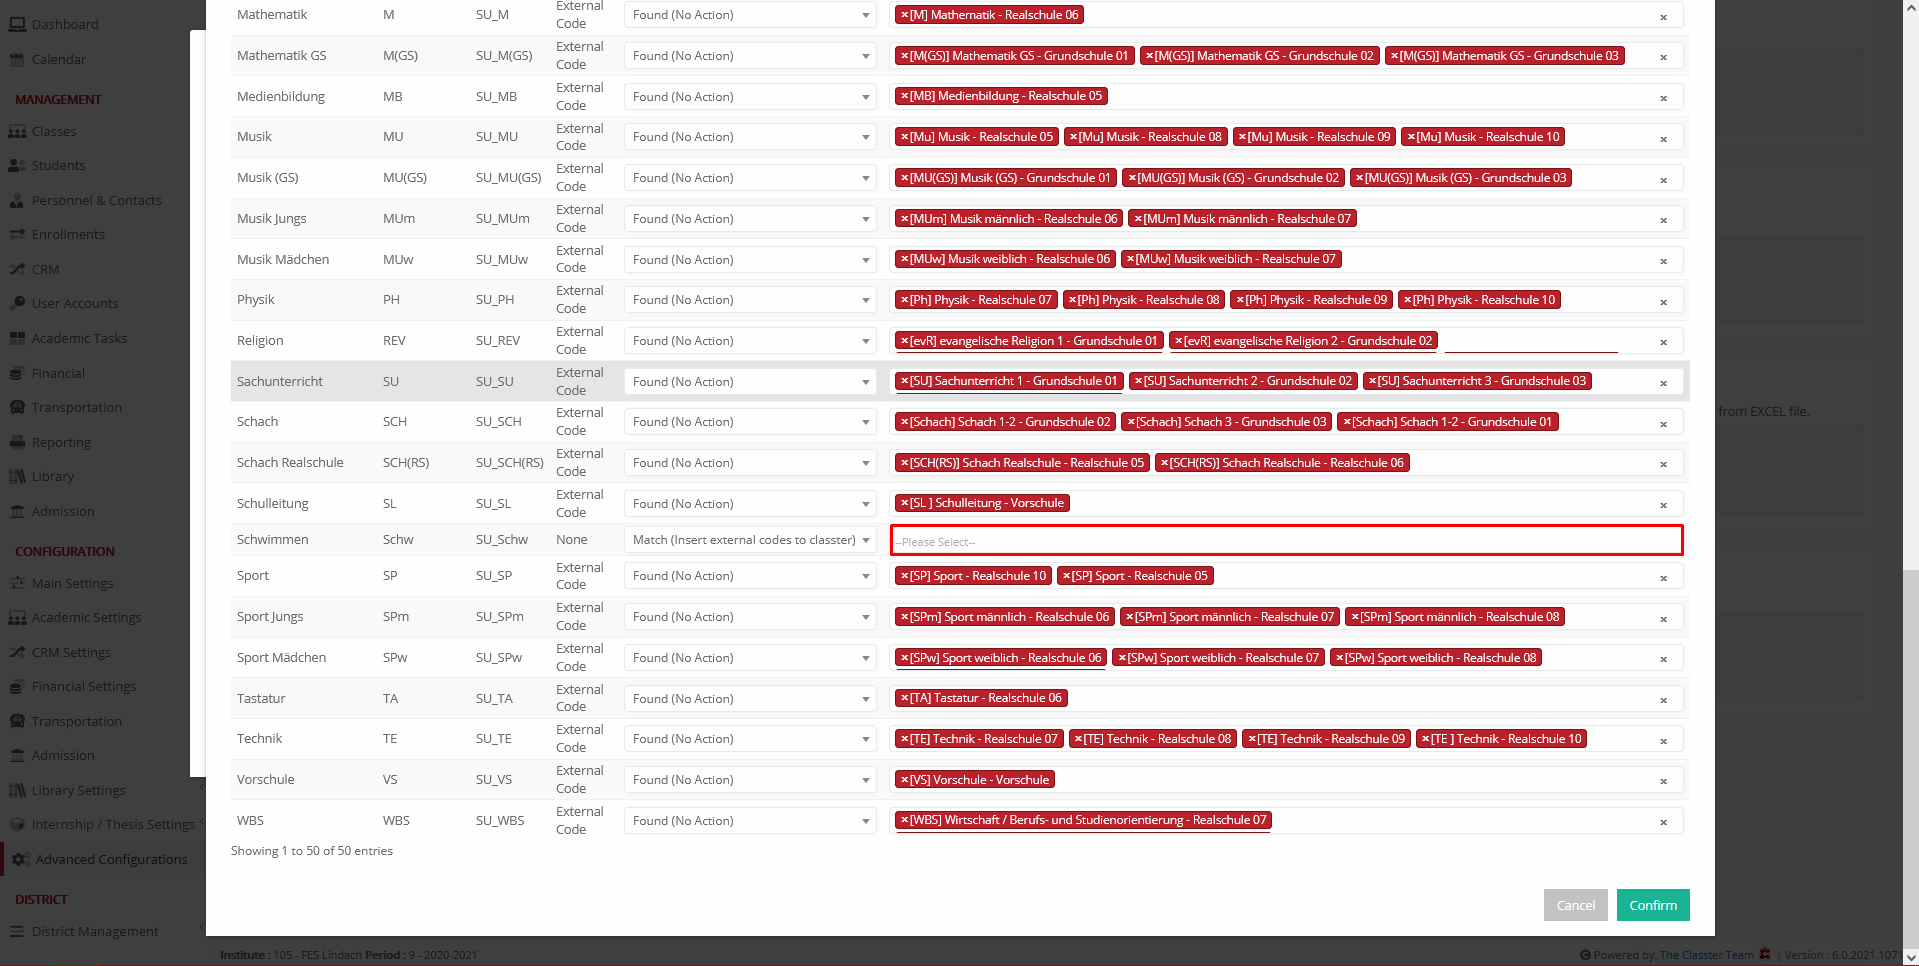
Figure 5
Step 3 of Untis Timetable Import
After you finish with the integration, go to Step 3 where you can select one of the available timetable categories that you created in Classter (Figure 6).
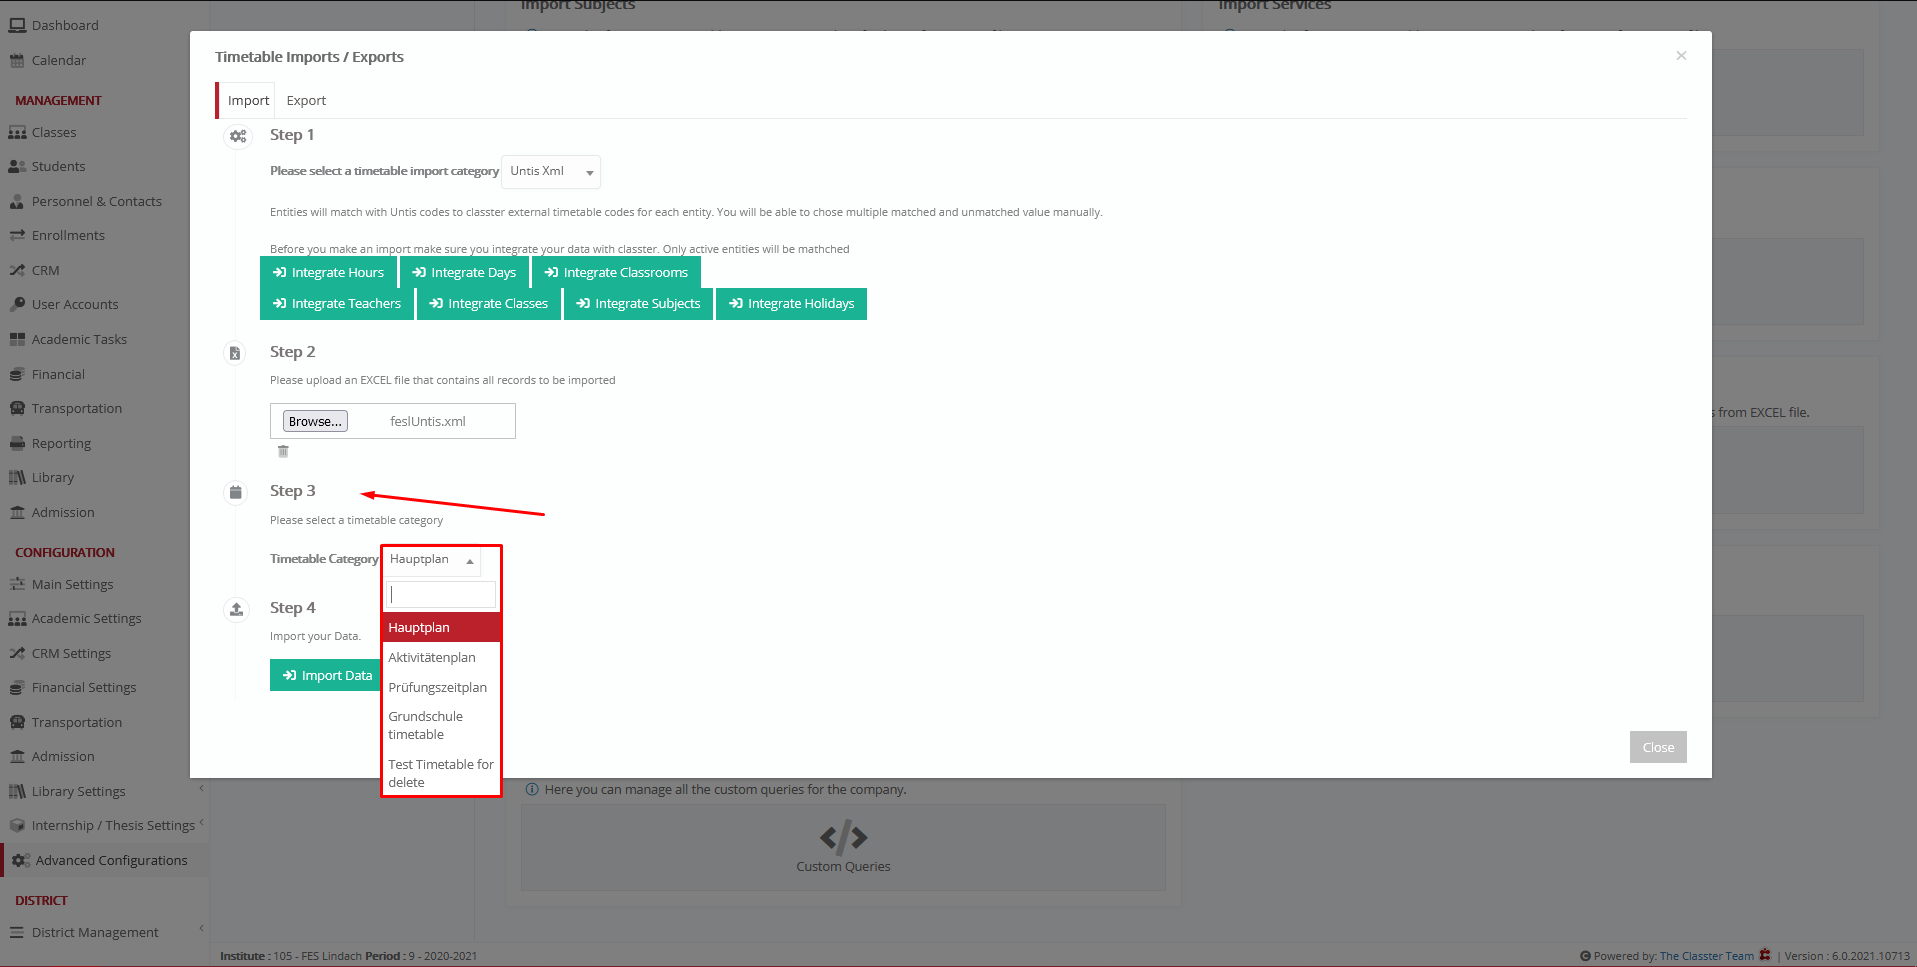
Figure 6
Step 4 of Untis Timetable Import
In the last step, by clicking on Important Data, the system will do a last check before importing the data from the Untis XML file (Figure 7).
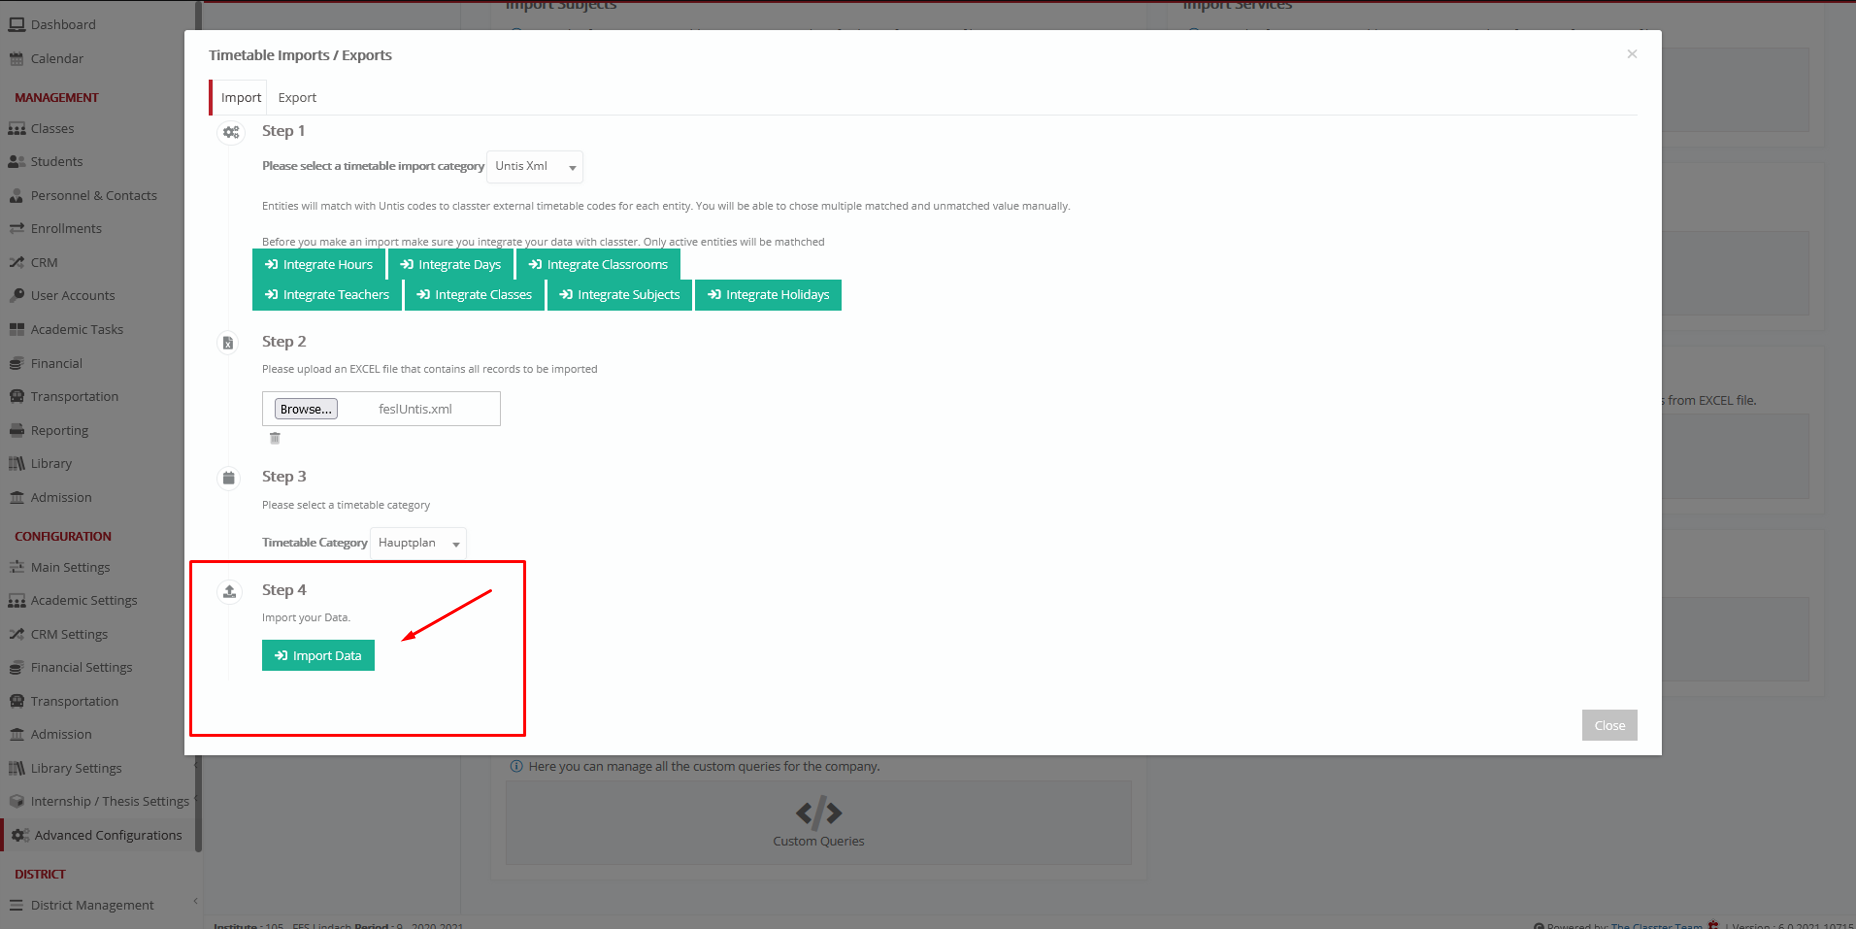
Figure 7