

In this section you can schedule and manage your timetable, activate special constraints, and you can also produce printable timetable reports (Figure 24).
Management > Academic Tasks > Timetable
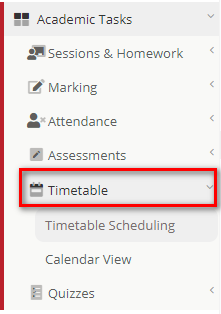
Figure 24
The following are prerequisites for setting up the timetable:
- Lecturers
- Classes or Groups
- Units
- Classrooms
Timetable Scheduling
In this section, you can schedule and manage the timetable, activate constraints and produce printable timetable reports (Figure 25).
Management > Academic Tasks > Timetable > Timetable Scheduling

Figure 25
- Use the available filters to display timetable structure (Figure 26):
 Figure 26
-
- Select the timetable Category e.g. Main
- Select the Division/Department, etc.
- Select the Grade/Course e.g. Form 4
- Select the Program/Year e.g. Basic
- Select the View Type e.g. Classes, Teachers, Classrooms
- Select the Group/Class e.g. F4G
- Select the Days
- Click on Search
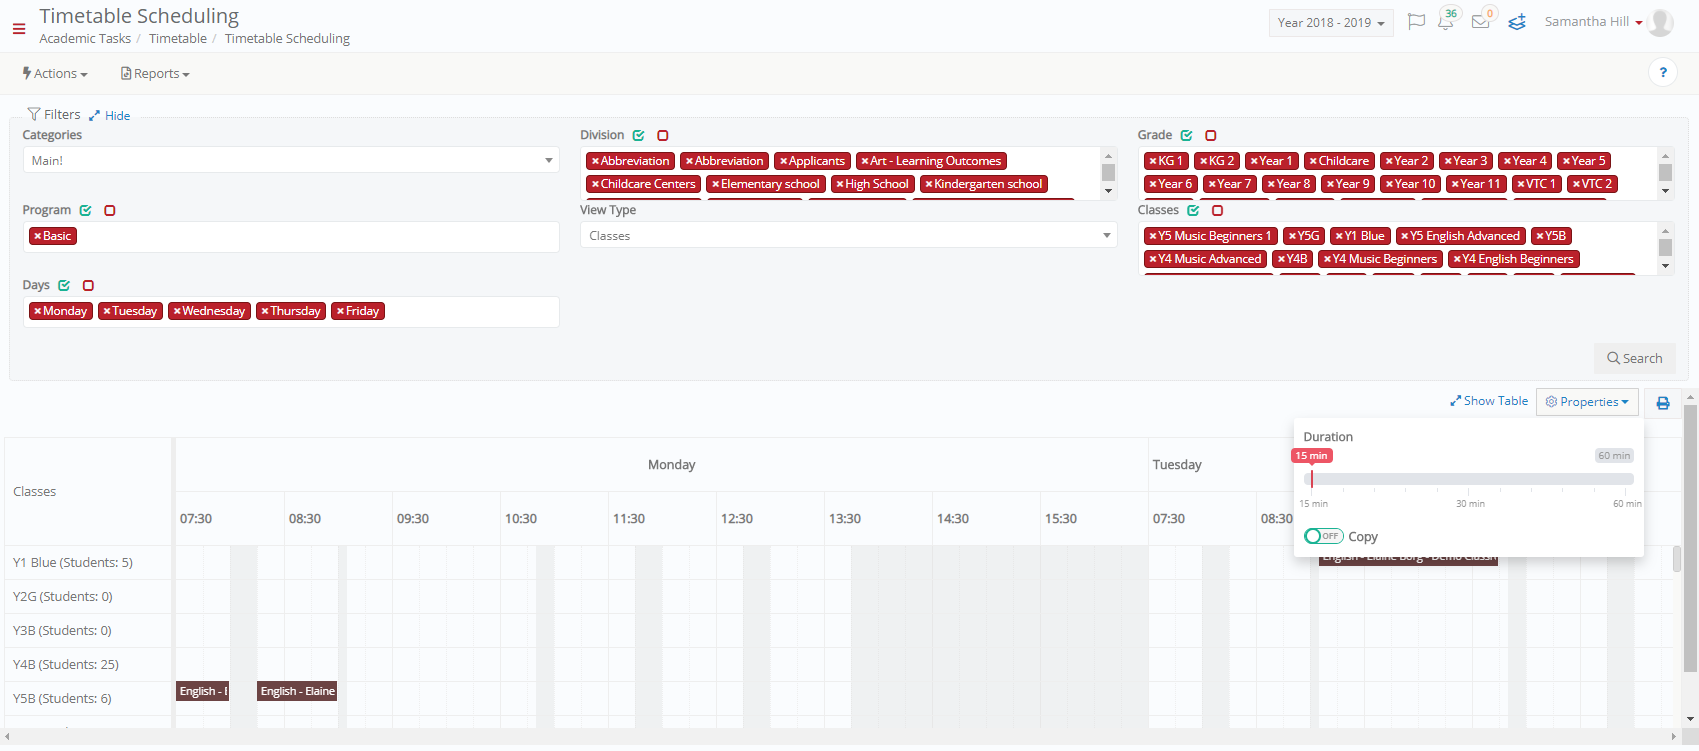 Figure 27
Properties – Right Pane
- Click on the ‘Properties’ button to set the display duration on the timetable (Figure 28).
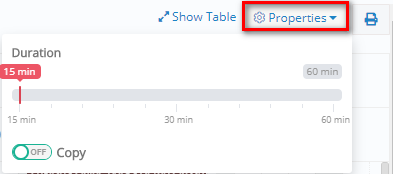
Figure 28
Show Table – Right Pane
- Click on the ‘Show Table’ option to view the timetable as 2 side-by-side grids; one grid showing the resources to be used in the timetable and the other the timetable slots to be filled (Figure 29).
![]()
Figure 29
- On the left pane, we have the resources: teachers, classes, subjects, classrooms, min-max min and hour per week to be used in the timetable (Figure 30).
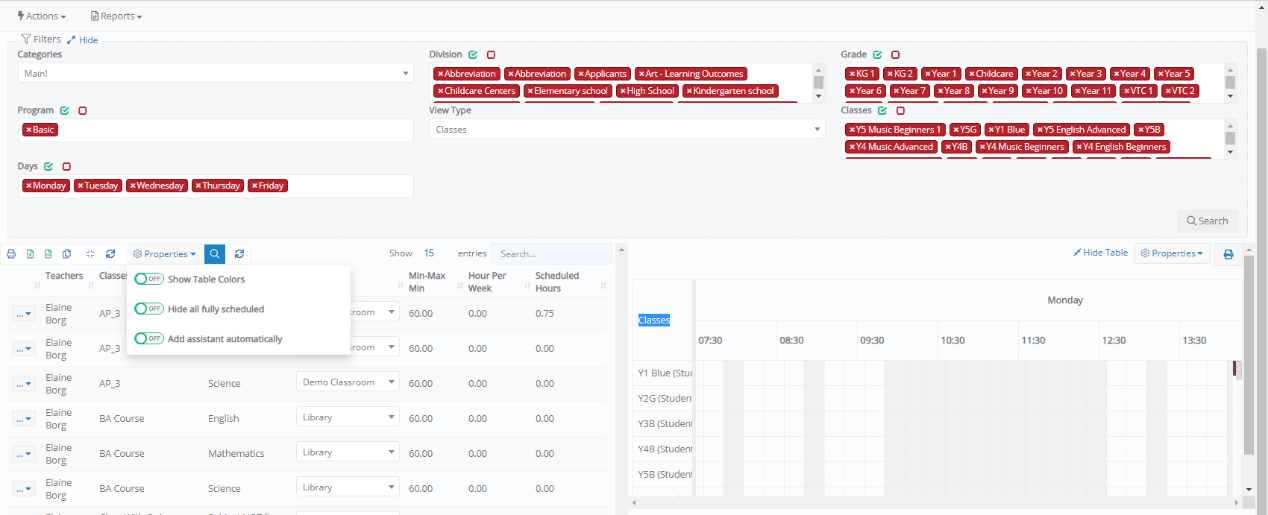 Figure 30
Properties – Left Pane
- Use the properties function to show table colors, hide all fully scheduled timetable entries or add assistant automatically (Figure 31).
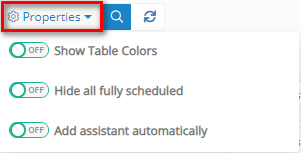
Figure 31
Search – Left Pane
- Click on the search icon to display the search options and filter by classes, teachers, subjects or classrooms (Figure 32).

Figure 32
Timetable Resources
- Drag and drop resources from the left pane to the right pane to populate the timetable.
- Clicking on the dropdown beside each resource, we can use any of the options below to give us a breakdown of total hours used by each resource (Figure 33). It is also possible to erase the timetable for the selected resource from here.
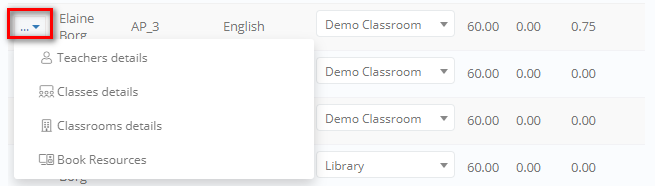
Figure 33
- Teachers details: gives the teacher’s total hours and a breakdown of these hours (Figure 34).
 Figure 34
- Classes details: gives the total hours enrolled for each class on the timetable and the students hours (Figure 35).

Figure 35
- Classrooms details: gives you details of the hours used by the classrooms.
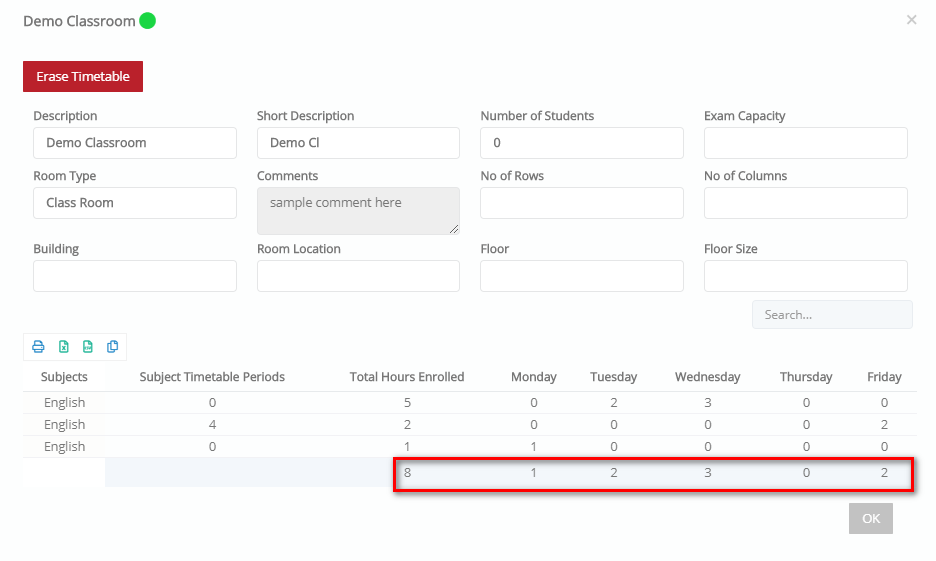
Figure 36
- Book resources: use this to find available resources and add this to the timetable period (Figure 37).
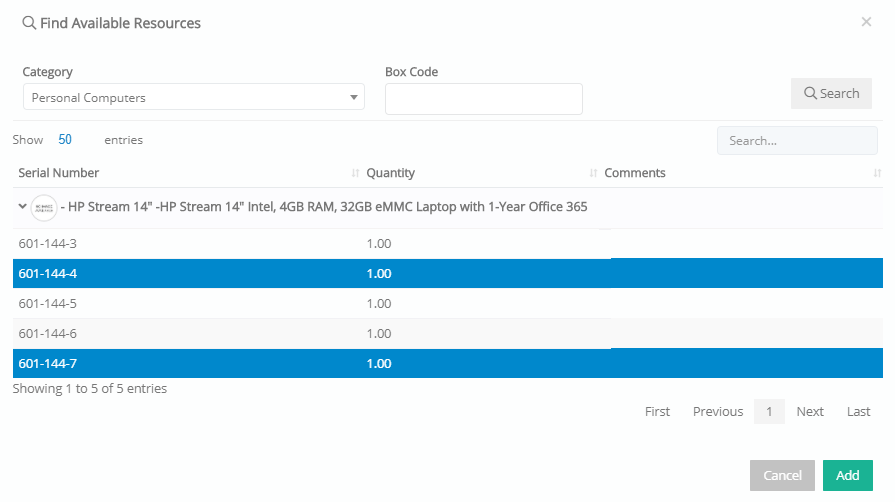
Figure 37
Add Timetable Entry
- To add a new entry in the timetable, hover over an empty space and click on the empty slot.
- At the pop-up that will appear, select the Teacher, the Subject, the Classes and the Classroom (Figure 38).

Figure 38
- Activate/Deactivate the filters ‘Filter Classes using existing enrollments’, ‘Filter Teachers using existing enrollments’ and ‘Filter subjects using existing enrollments’:
- If you have enrolled subjects to groups and groups to teachers prior to timetable scheduling, you can activate the filters so that the Teachers/Subjects drop-down lists are updated with the ones assigned to the group you are making the timetable entry for.
- If you deactivate the filters you will be able to select any Teacher/Subject.Note: In this case, after having completed the timetable schedule, you can select the enrollments to be done automatically according to the timetable (‘Actions’ menu > Actions > Actions tab).
- Click on ‘Save’.
Note: When you make a timetable entry, a check is automatically made whether there is another session at the same class and/or by the same teacher and/or the same subject. In this case, you can either change the entry details e.g. select another class/teacher/subject or accept it in order to have a coteaching (Figure 39).

Figure 39
Copy Timetable Entry
- Enable the copy switch to copy an existing timetable entry to a new timetable slot. To disable, turn the switch button to OFF.
Note: If there is another session entry at the same class or by the same teacher, you will have to cancel paste or accept coteaching. Additionally, if there is no connection between the selected subject and the group you want it pasted at, you will have to select if you want to proceed or not (Figure 40).

Figure 40
Calendar View
The calendar view offers an alternative way of creating and managing timetables. It is used to view Teachers, Classes and Classroom availability and helps you add sessions.
Management > Academic Tasks > Timetable > Calendar view
Note: To use the Calendar View, Timetable Periods, Timetable Categories and Class assignments must be completed.
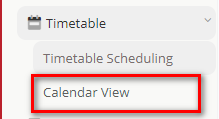
Figure 41
- Use the filters, Categories, Department, Course and Year to display the timetable structure.
- Once you have filled in the filters you must click on the ‘Search’ button to display the resources and timetable slots.
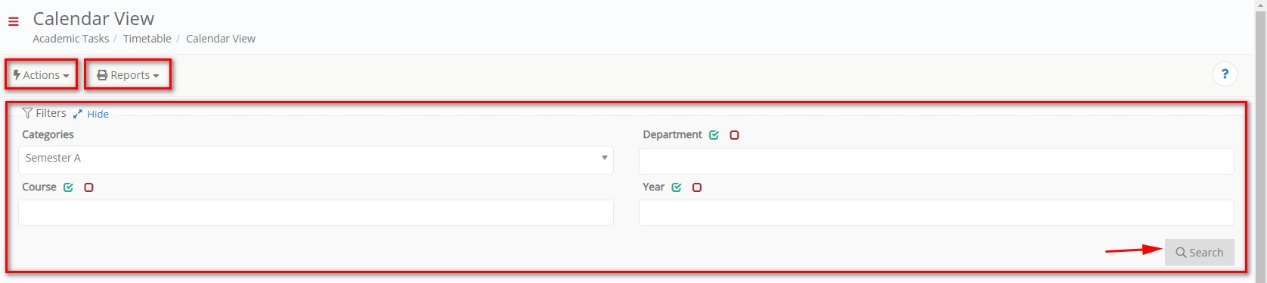 Figure 42
- The resulting Calendar View workspace is divided into two panes (Figure 43).
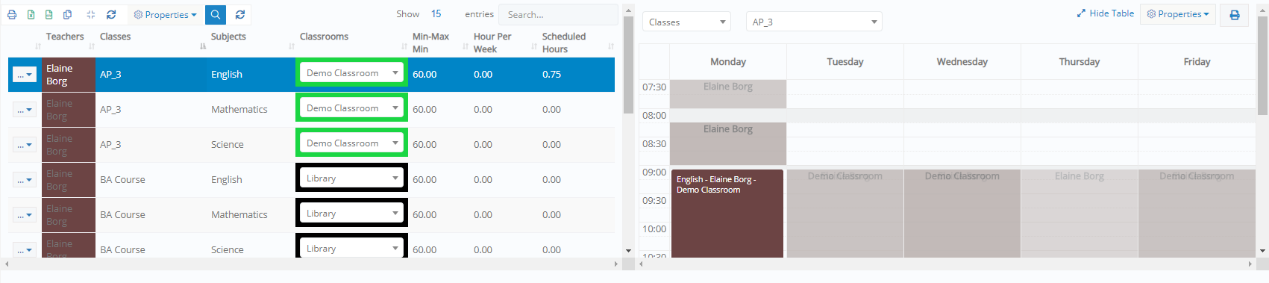 Figure 43
Left Pane
The table on the left pane displays the resources to be used in the timetable setup. The following columns: Teachers, Classes, Subjects (the subjects/units enrolled to the classes), Classrooms, Course Hours (Min -Max Min), Hours Per Week (lecturers’ hours per week) and Scheduled Hours, are available (Figure 44).
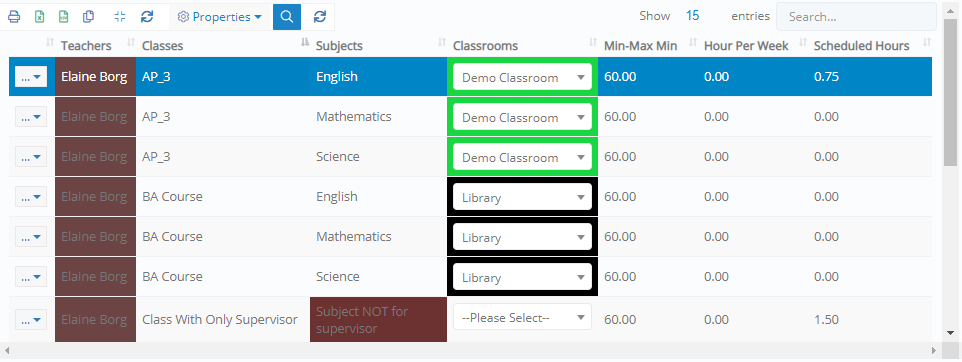
Figure 44
Properties – Left Pane
- Use the properties function to show table colors, hide all fully scheduled timetable entries or add assistant automatically (Figure 45).
- The ‘Show Table Colors’ switch is used to display the unique colors configured for the lecturers, classes, units, and classrooms.
- The ‘Hide All Fully Scheduled’ switch is used to hide any subject taught by a teacher who has completed his maximum hours of teaching or if the subject has reached its max hours per week and would display only those that are yet to be scheduled.

Figure 45
Search – Left Pane
- Click on the search icon to display the search options and filter by classes, teachers, subjects or classrooms (Figure 46).

Figure 46
Timetable Resources
- Drag and drop resources from the left pane to the right pane to populate the timetable.
- Clicking on the dropdown beside each resource, we can use any of the options below to give us a breakdown of total hours used by each resource (Figure 47). It is also possible to erase the timetable for the selected resource from here.

Figure 47
- Teachers details: gives the teacher’s total hours and a breakdown of these hours (Figure 48).
 Figure 48
- Classes details: gives the total hours enrolled for each class on the timetable and the students hours (Figure 49).
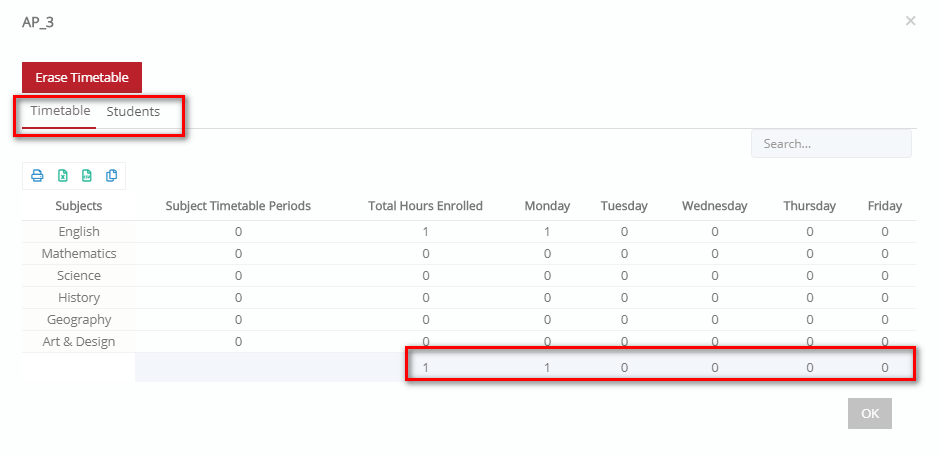
Figure 49
- Classrooms details: gives you details of the hours used by the classrooms.

Figure 50
- Book resources: use this to find available resources and add this to the timetable period (Figure 51).

Figure 51
Right Pane
To add timetable entries and setup the timetable, drag items from the left pane and drop them in the preferred time slot on the right pane. This pane shows the classes and subjects allocated on the timetable. The timetable can be setup using any of the following view types (Figure 52):
- Classes
- Teachers
- Classrooms

Figure 52
Properties – Right Pane
- From the ‘Properties’ menu (Figure 53), you can:
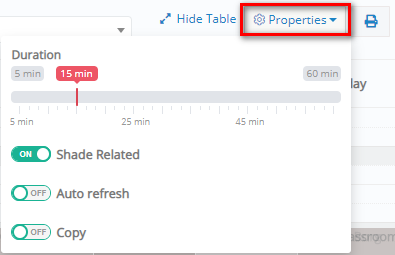
Figure 53
-
- Set the default duration to be used.
- Shade Related: this option when selected will shade (gray out) related timetable entries and show you on the timetable all the related sessions that are planned according to the View Type you have selected e.g. if you have selected the Teachers view type you will see all the blue slots regarding the teacher’s sessions and greyed out slots with related sessions based on the Group and Classroom.
- Auto refresh: this option when switched on sets a timer that refreshes the timetable every few seconds. You need to have chosen a Planned Session time slot. Disabling the auto refresh switch allows you to stop the timetable from refreshing while actively working.
- Copy: this option allows you to copy a planned session into an empty time slot. You need to turn the copy switch button on and select a planned session, then you just click on an empty time slot and the session you chose will be copied into the new time slot. Enable the copy switch to enable the duplication of an existing timetable entry.
Also, you can drag and drop entries already on the right pane to move timetable entries from one slot to another (Figure 52).
Note: Once a resource is dragged from the left pane to the right pane, the timetable is saved automatically.
Timetable View Types
On the right pane, you can view the timetable using the filters: Classes, Teachers, and Classrooms (Figure 54).
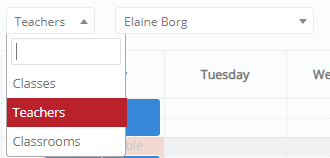
Figure 54
- If you use the Classes view type and select a specific class e.g. Y4B, then you will view the timetable for the entire Class (Figure 55).

Figure 55
- If you choose the view type ‘Teachers’, you will be able to see the schedule for a specific teacher (Figure 56).
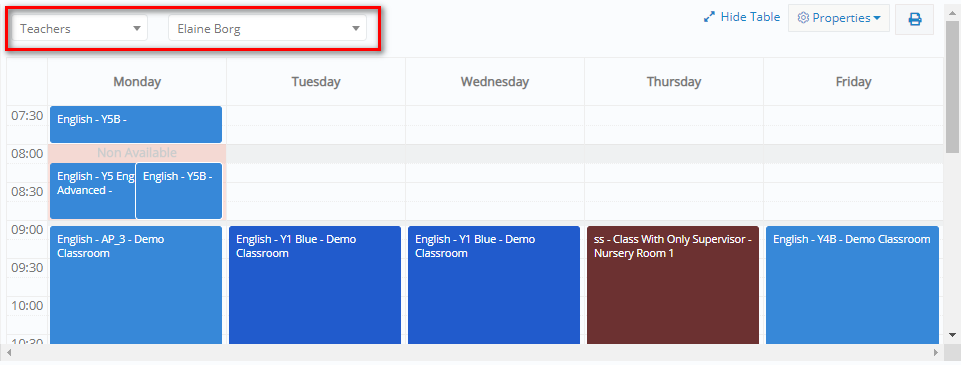
Figure 56
- You can also view the timetable by Classroom by choosing Classroom in the View Type dropdown list (Figure 57).

Figure 57
Create New Timetable Entry
We have already mentioned how we can drag and drop specific subject along with the class and teacher into the timetable slot. Now we will be looking at how we can directly create a new timetable entry.
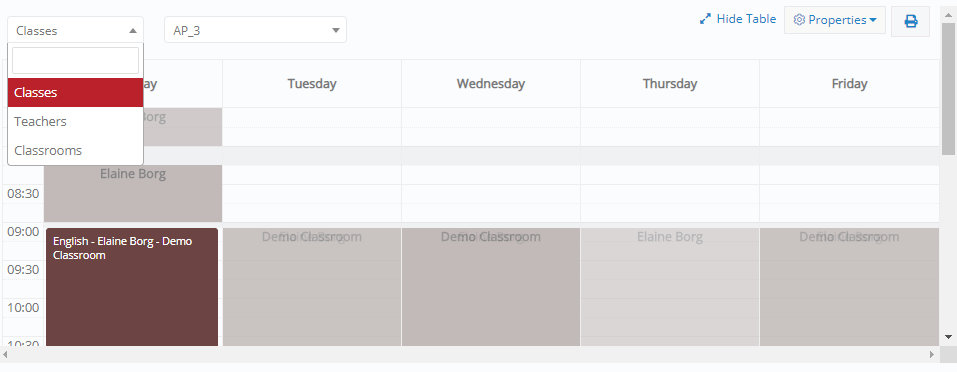
Figure 58
- On the right pane, to create a new session, click on a free/available time slot. A popup window will appear (Figure 59).
Note:
-
- Areas marked with a light gray color are set up as break periods. No sessions can take place at these times.
- A blue area signifies that this time slot is occupied by a planned session. You will be able to edit the session once you click on the slot.
- In the popup window:
- The option ‘Filter Teachers using existing enrollments’ is used to sort out which teachers you would be able to view.
- If you leave it switched off, you will see all teachers regardless of their enrollment status. This gives you the capability of manually creating the connection on the timetable.
- If switched on, you will only be able to assign teachers to sessions regarding subjects that they are enrolled in.
- The option ‘Filter Subjects using existing enrollments’ if disabled, will show all teachers regardless of their enrollment to a subject. This gives you the capability of manually creating the connection on the timetable. If enabled, you will only be able to assign teachers to sessions regarding subjects that they are enrolled in.
- Timetable Periods: The timetable period is automatically populated based on the selected slot, but you can add additional Timetable Periods here.
- Classes: From the ‘classes’ dropdown, you can choose the class you want to create a session for.
- Teachers: Select one or more teachers from this dropdown list. Note: If it is a co-teaching subject you can enter multiple teachers.
- Subjects: from this dropdown list, you can select the subject being taught in this session. Available subjects are dependent on the previous choices i.e. Classes, Teachers.
- Classroom: from this dropdown list you can view all the classrooms both cross-institutional and local and select it to be used for this session.
- Resources: Add resources to be used for the period e.g. a projector.
- Comments: by clicking on the comments button, you can fill in comments regarding this session.
Finally, you must click on the ‘Save’ button to save this new session to the timetable.
Note: Options with red asterisks next to them are mandatory and if you do not fill them in you will not be able to save changes. If the options filter teachers and subjects by existing enrollments are turned on the system may warn you of conflicts regarding a subject or teacher. Overlapping sessions are not allowed by default but can be configured.

Figure 59
Edit Timetable Entry
- Click on a timetable entry (a blue slot) to edit the session details. This opens the window in Figure 60:
- Activate/Deactivate the filters ‘Filter Classes using existing enrollments’, ‘Filter Teachers using existing enrollments’ and ‘Filter Subjects using existing enrollments’:
- If you have enrolled subjects to classes and classes to teachers prior to scheduling the timetable, you can activate the filters so that the Lecturers/Units drop-down lists are updated with the ones assigned to the class you are making the timetable entry for.
- If you deactivate the filters you will be able to select any teacher/subject.
Note: In this case, after having completed the timetable schedule, you can select the enrollments to be done automatically according to the timetable (‘Actions’ menu > Actions > Actions tab).
- You can click on the delete button to remove the timetable entry.
- Click on ‘Save’.
Note: When you add a timetable entry, a check is done automatically to verify if there is another session at the same class and/or by the same teacher and/or the same subject. In this case, you can either change the entry details e.g. select another class/lecturer/unit or accept it to have a coteaching session.
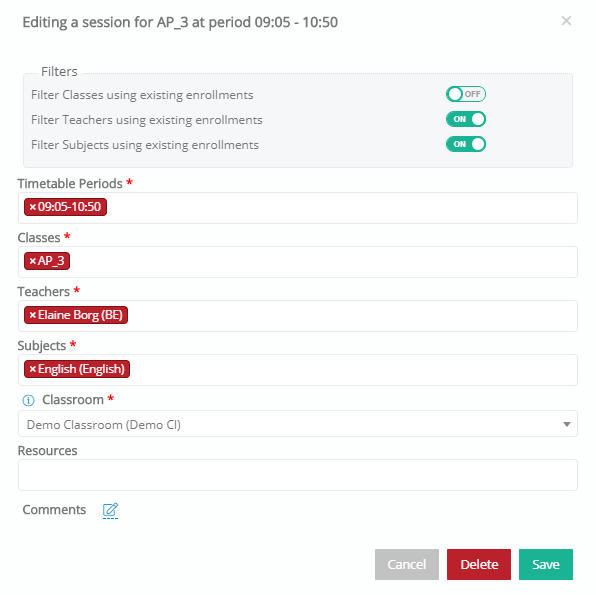
Figure 60