

The Admissions process includes actions on behalf of the school/ university Administrator as well as from the prospective student. The goal here is for the Administrator to set up the process and other requirements the Student needs to successfully register to the Institution. Instructions for student registration will follow in a separate Manual.
Under the Configuration section, you will find the Admissions menu tab (Figure 2). Here you can select either the Drop-down lists or the Admission Settings option.
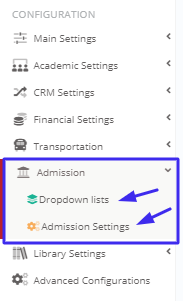
Figure 2
Admission Settings
The first view you will have is of the General Admissions Settings. This is the main page of the Admission Settings section (Figure 3).
 Figure 3
General Admissions Settings
The settings offered here will determine the amount of information the Registration process will require for the Student or Parent to complete their registration to the institution(s).
Once you have chosen the fields that will be available to the Student/ Parent you will be able to choose which of the fields will be mandatory1 for the completion of the Registration process.
Note: The information or required field may vary from Institution to Institution.
Below you will see all the options you have to choose from to set up the Registration process. The General Settings tab is split into 3 sections – Basic Settings (Figure 4, 3b), Hidden Tabs (Figure 6) and Info Messages (Figure 9, 5b).
1 Mandatory fields will be indicated by a red asterisk.
Basic Settings
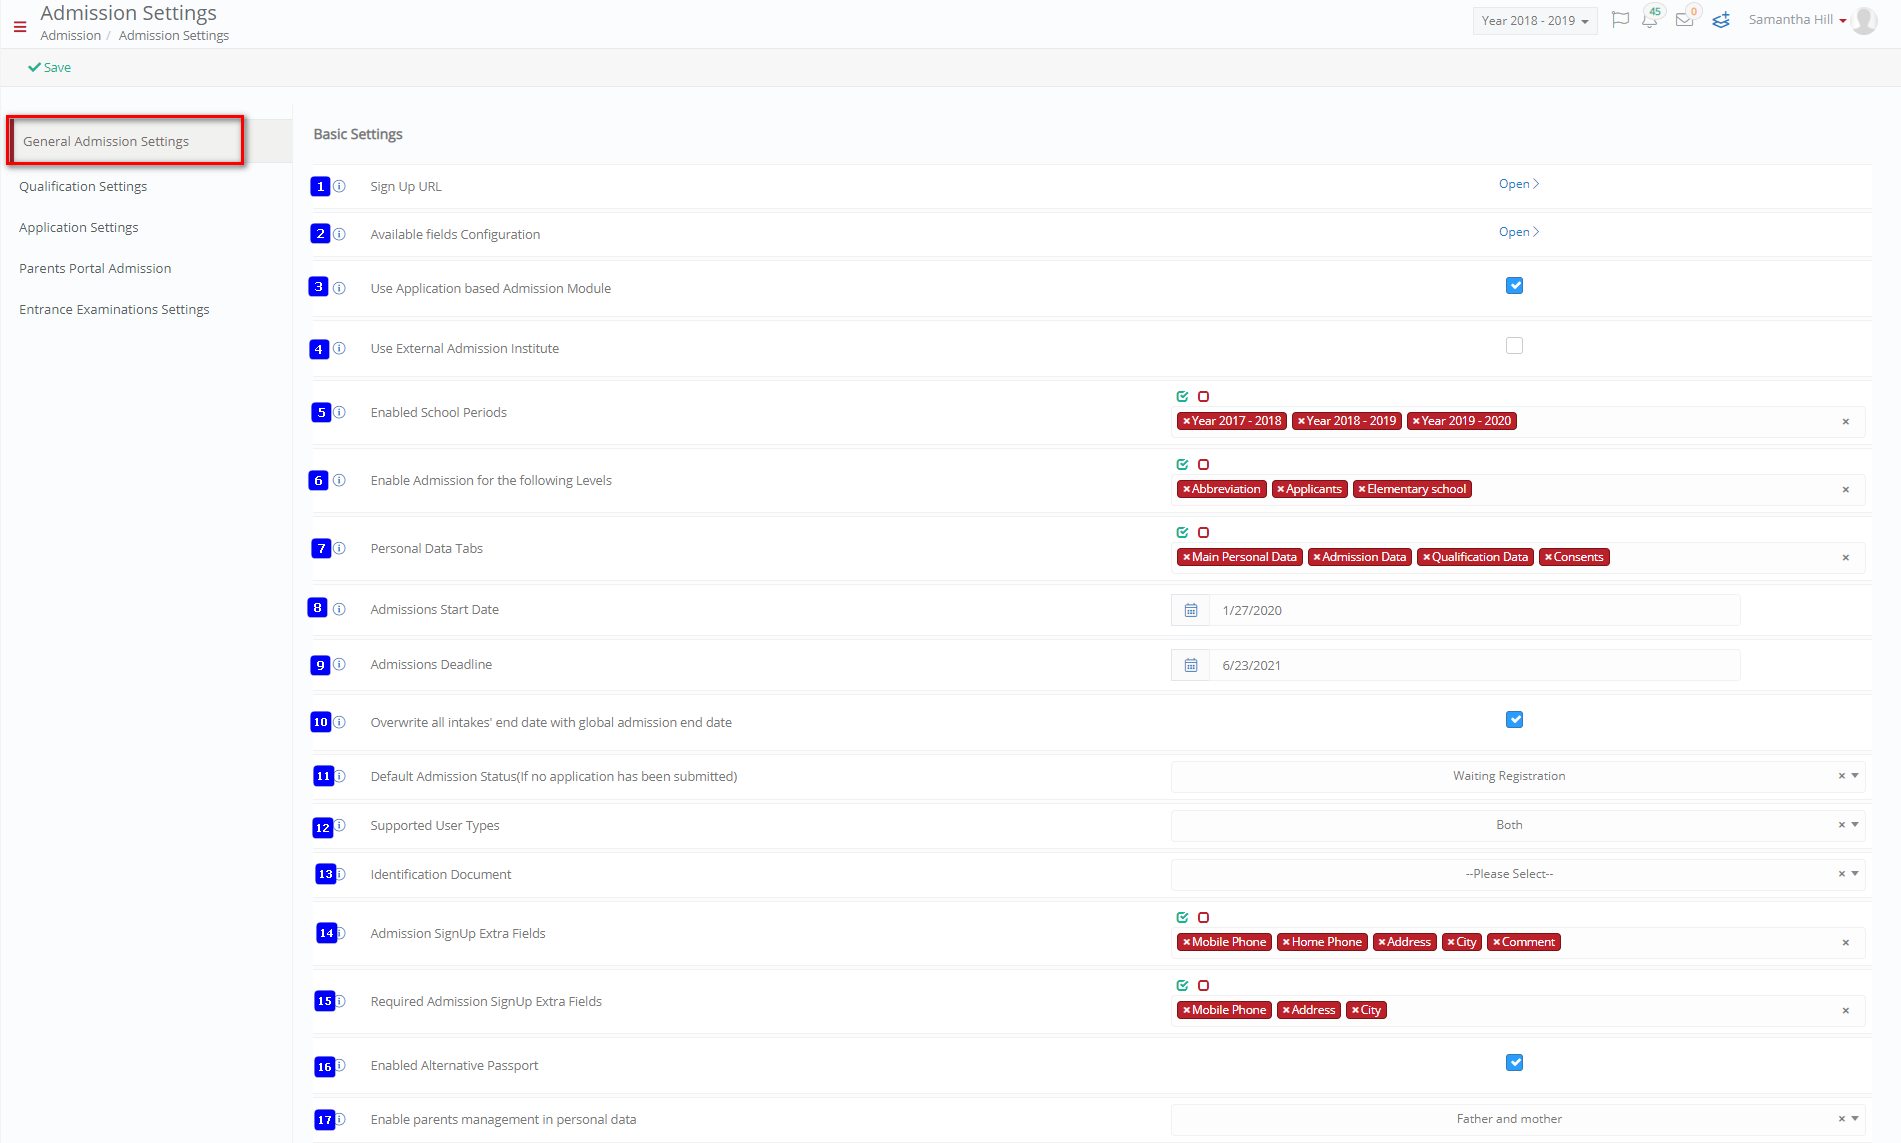 Figure 4
- The ‘Sign up url’ redirects you to the admission portal and allows you to verify what has been configured on the front page.
- The ‘Available fields configuration’ option allows you to define the fields available to an applicant regarding personal information e.g. full name, passport number, email, etc. This will be explained further in the Personal Data Configuration section below.
- The ‘Use Application based Admission Module’ box is ticked by default as the application process now uses the two-step system for student application (i.e. It creates one or more student applications). If box is un-ticked the application will use the Legacy module which is a one-step process.
- The ‘Use External Admission Institute’ setting enables an architecture where an Institution is set as an Admission Institution where all applicants are initially stored and then sent to multiple institutions. If each institution has its own admission process and there is no central institution to handle admission, this should be unchecked.
- The ‘Enabled School Periods’ defines the periods (Academic Years) in which the applicant can register to e.g. 2019-2020.
- The ‘Enable Admission for the following Schools’ allows you to select which schools/faculties will use the admission process in a multi institute setup.
- The ‘Personal Data Tabs’ option allows you to select predefined tabs that the applicant will need to fill before proceeding to the Application Management menu e.g. Main Personal Data, Admission Data, Qualification Data and Consents.
- The ‘Admissions Start Date’ option defines the day/month/year the application process is open to accept applications e.g. 13/7/2019.
- The ‘Admissions Deadline’ option sets the date the admission process for a specific intake ends e.g. 14/9/2019.
- The ‘Overwrite all intakes’ end date with global admission end date’ will ensure that the admission process will end at the same time for all active admission intakes.
- The ‘Default admission status (If no application has been submitted)’ will be assigned to any application that has been saved as draft.
- The ‘Supported User Types’ option is used to define who can apply e.g. Students, Parents or Both. The parent option is currently unavailable but will be in future implementation.
- The ‘Identification Document’ option is there for us to set a required valid identification method for the applicant in the sign up screen. For example, a National ID Number, Tax ID or Social Security Number. Note: The system will check if the identification entered already exists in the system.
- The ‘Admission Sign Up Extra Fields’ option allows you to setup extra fields, e.g. mobile phone, that will be used in the admission process.
- The ‘Required Admission Sign Up Extra Fields’ option indicates which of the fields selected are mandatory.
- The ‘Enabled Alternative Passport’ option allows the applicant to enter a Passport Number as an alternative identification number. If the option is un-ticked, then the applicant must fill in the identification number requested in the sign up screen.
- The ‘Enable parents management in personal data’ option is there to request more information from the applicant regarding their Parents/ Father/ Mother/ Guardian e.g. emergency contact. If the option is selected the information will be required regardless of students’ age. You can choose ‘None’.
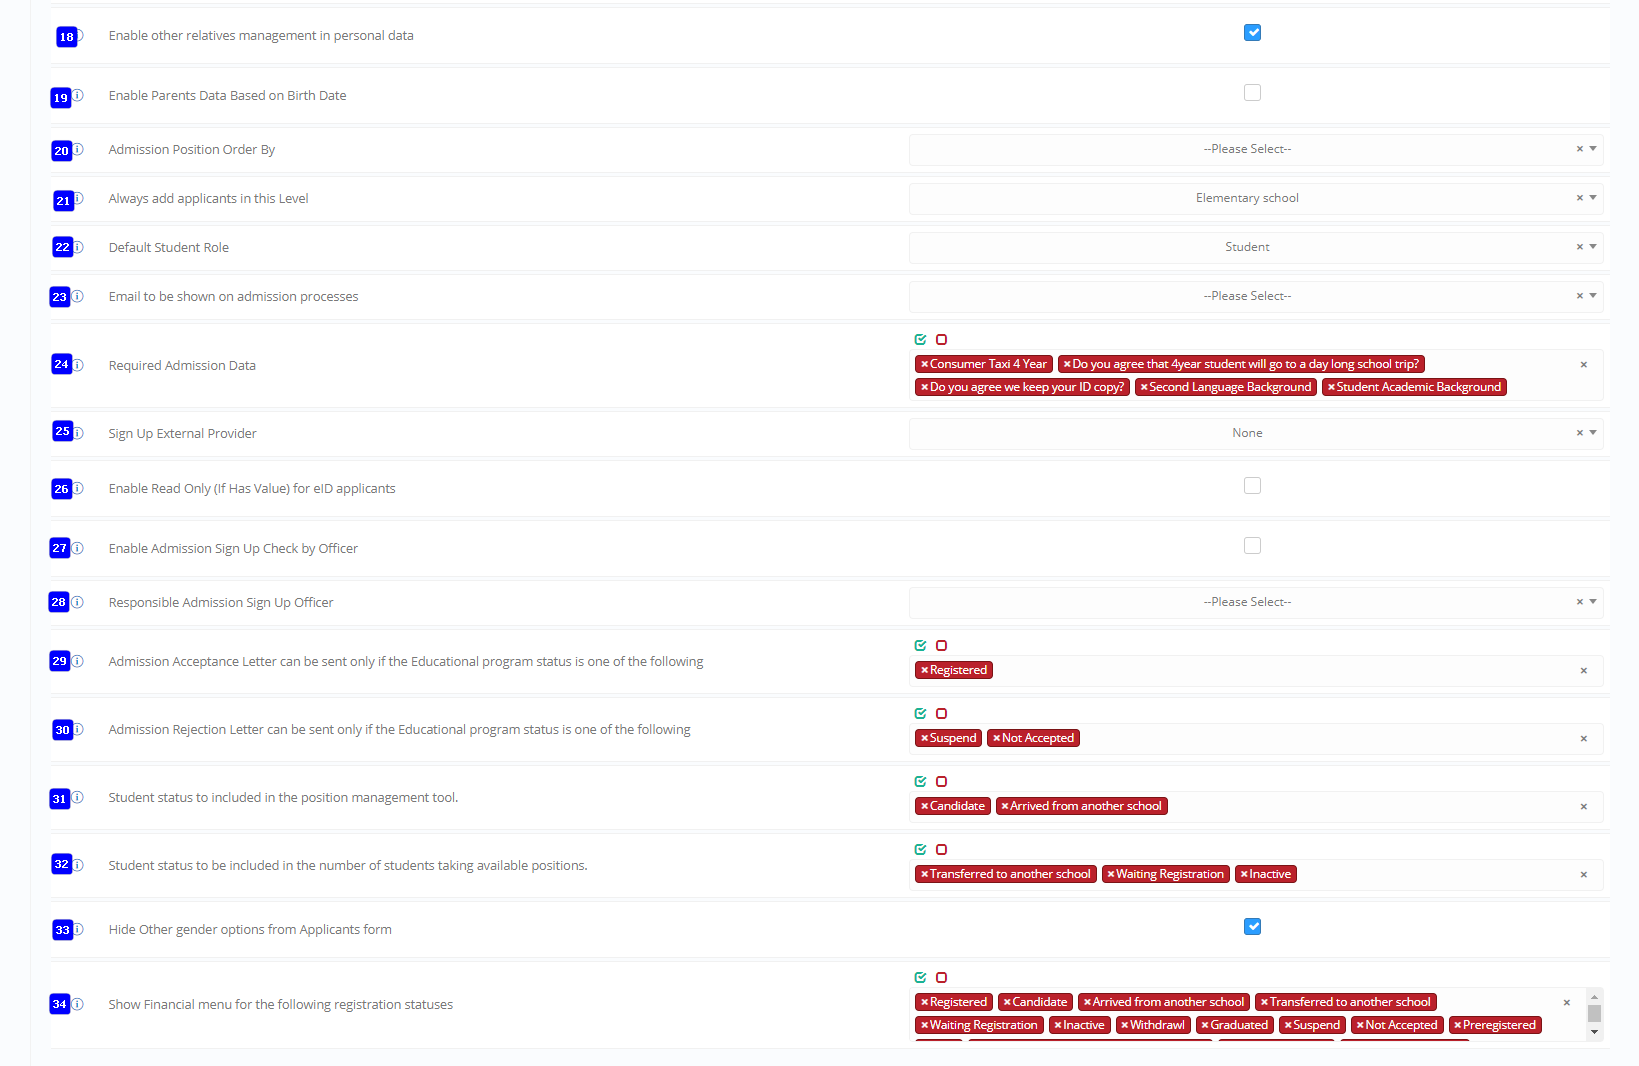 Figure 5
- The ‘Enable other relatives management in personal data’ option is used if you would like to request this information from other responsible relatives for the student e.g. emergency contact.
- The ‘Enable Parents Data Based on Birth Date’ is an option that when ticked indicates to the admissions module that it should request Parents data if the students age indicates he is a minor (under 18 or any age set by the Admin in the option Configuration/Main Settings/General Settings-Students Registration TAB/Coming of Age). If the student is not a minor the module will not request Parents data. If option is not ticked, then the module will follow settings set in previous step (10).
- The ‘Admission Position Order by’ setting defines if this ordering is done per Year or per Educational Program (i.e. Per Year, Stream or Semester etc.). For example, if you have 20 students, 15 applying to Course A, Year 1 and 5 applying to Course A / Year 2 then: If the setting is by Course, all students are placed in a common list. If the setting is per Educational Program, then 15 students are placed in a list for Year 1 and 5 students placed in a list for Year 2.
- The ‘Always add applicants in this Department[1]’ option allows you to set the default education Level or Location you will enter when applying to the specific institution e.g., Elementary School.
- The ‘Default Student Role’ will define the user rights the applicant will have once he/she has applied and has been successfully registered to an institution e.g., he will be able to see student options in his portal dashboard.
- Email to be shown on admission processes option defines the default applicant email which will be used in the application process e.g Student Email (entered in personal data) or User Email (the email used to signup)
- The ‘Required Admission Data’ option allows you to set the required fields under the admission data section e.g., applicants must upload his Transcripts to move from the Admissions Data tab to the Consent tab.
- The ‘Sign up External Provider’ option allows the system to pull information about the applicant from an external provider e.g. the IRS (Internal Revenue Service) or any governmental electronic ID service, for the purpose of signing up.
- The ‘Enable Read Only (If Has Value) only for eID applicants’ option works together with the “Read Only (If has Value)” option defined within the Personal Configuration, this will be applied only to applicants that have used the external provider (eID) to fetch their personal data.
- The ‘Enable Admission Sign Up Check by Officer’ option allows the responsible admission officer to verify an applicant’s sign up before sending them the verification email.
- The ‘Responsible Admission Sign Up Officer’ field allows you to select the personnel who will receive notifications for all new applicant sign up and will be responsible for managing new applicants.
- The ‘Admission Acceptance Letter can be sent only if the Educational program status is one of the following’ option allows admissions officers to send acceptance letters only to applicants with a specific status e.g. Registered.
- The ‘Admission Rejection Letter can be sent only if the Educational program status is one of the following’ option allows admissions officers to send rejection letters to applicants with a specific status e.g. Suspended, Not Accepted.
- The ‘Student status to include in Position Management tool’ option allows the admissions system to add all students with a specific application status to occupy positions in the chosen course e.g., candidates.
- The ‘Student status to be included in the number of students taking available positions’ option sets the system to fill in as many positions as are available for a course from applicants with a specific status e.g., Preregistered.
- The ‘Hide Other gender options from Applicants form’ option removes the Other option from the Gender list. Instead of having e.g. Male, Female, Other you will have just Male and Female. This affects the personal data section of the applicant’s portal (specifically the Gender field).
- The ‘Show financial menu for the following registration statuses’ option is used to display the financial menu to students/ applicants who have any of the selected statuses.
Hidden Tabs
The options under the Hidden Tabs sub-section allows the administrator to hide specific tabs from the applicants or students, based on their status.
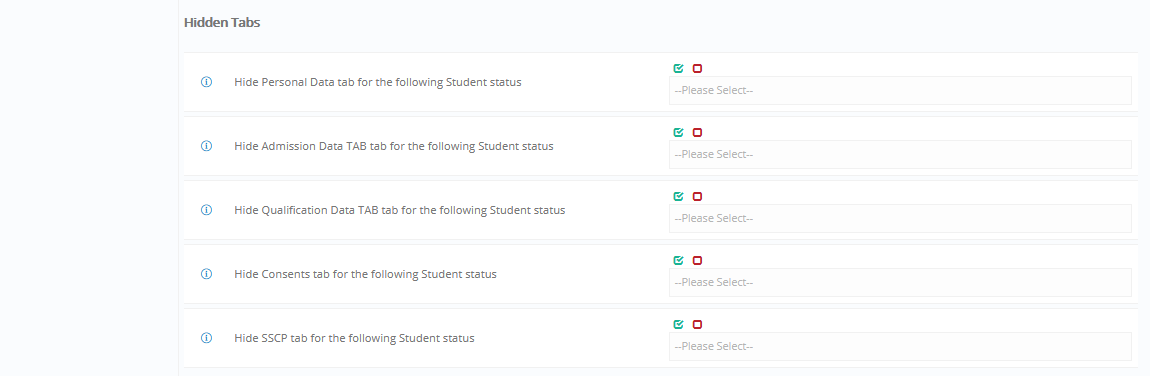 Figure 6
- The ‘Hide Personal Data tab for the following Student status’ option can define the student statuses that are not allowed to see the Personal Data section e.g Suspended Students.
- The ‘Hide Admission Data tab for the following Student status’ option can define the student statuses that are not allowed to see the Admission Data section e.g Suspended Students.
- The ‘Hide Qualifications tab for the following Student status’ option can define the student statuses that are not allowed to see the Qualifications tab/section e.g Suspended Students.
- The ‘Hide Consents tab for the following Student status’ option can define the student statuses that are not allowed to see the Consents tab/section e.g Suspended Students.
- The ‘Hide Certification tab for the following Student status’ option can define the student statuses that are not allowed to see the Certification tab/section e.g Suspended Students.
Never forget to click on the ‘Save’ button once you have added any changes to configuration.
Scrolling further down on the General Admissions Settings page you will find the Info Messages section.
Info Messages
The Info Messages section, contains the following text boxes:
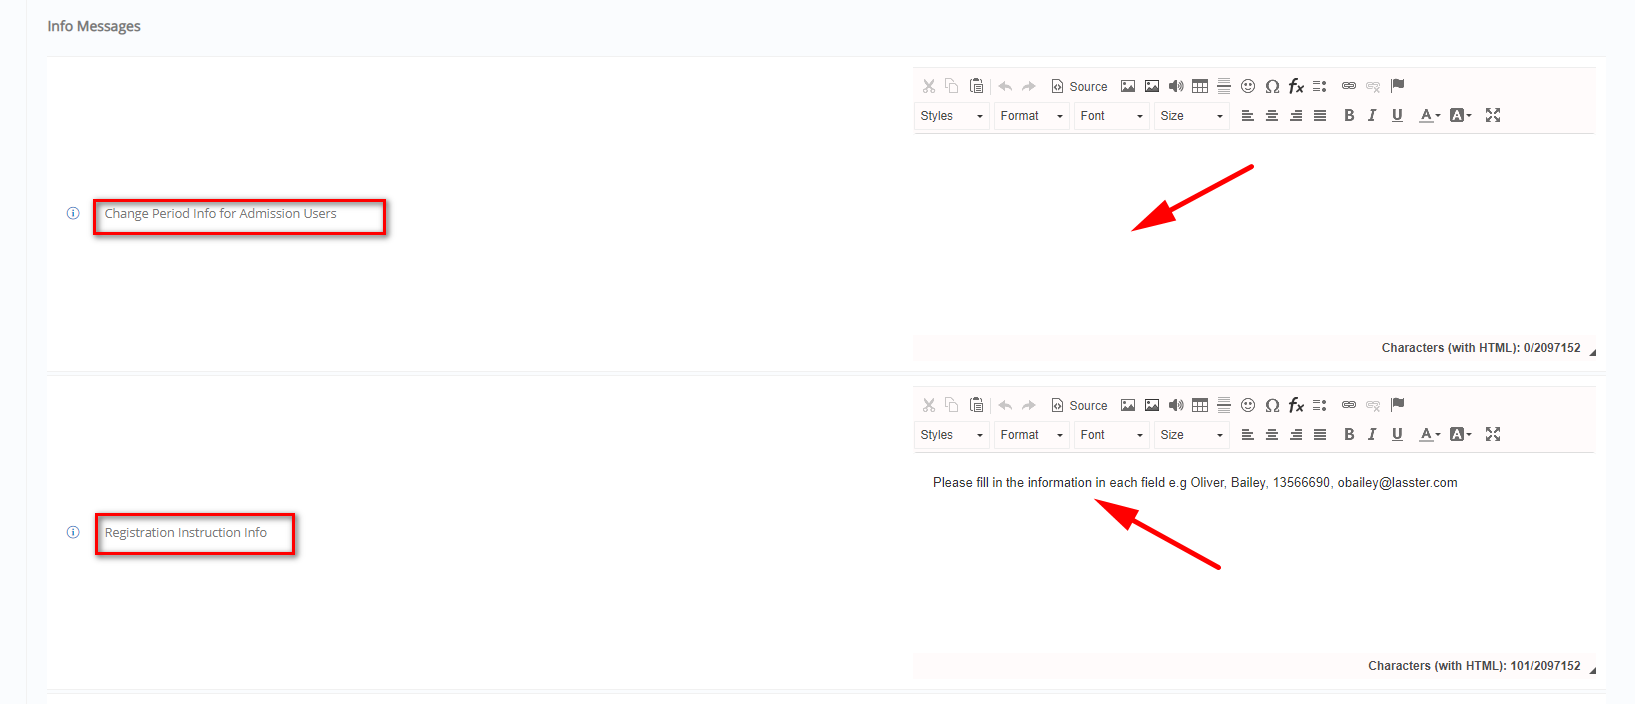
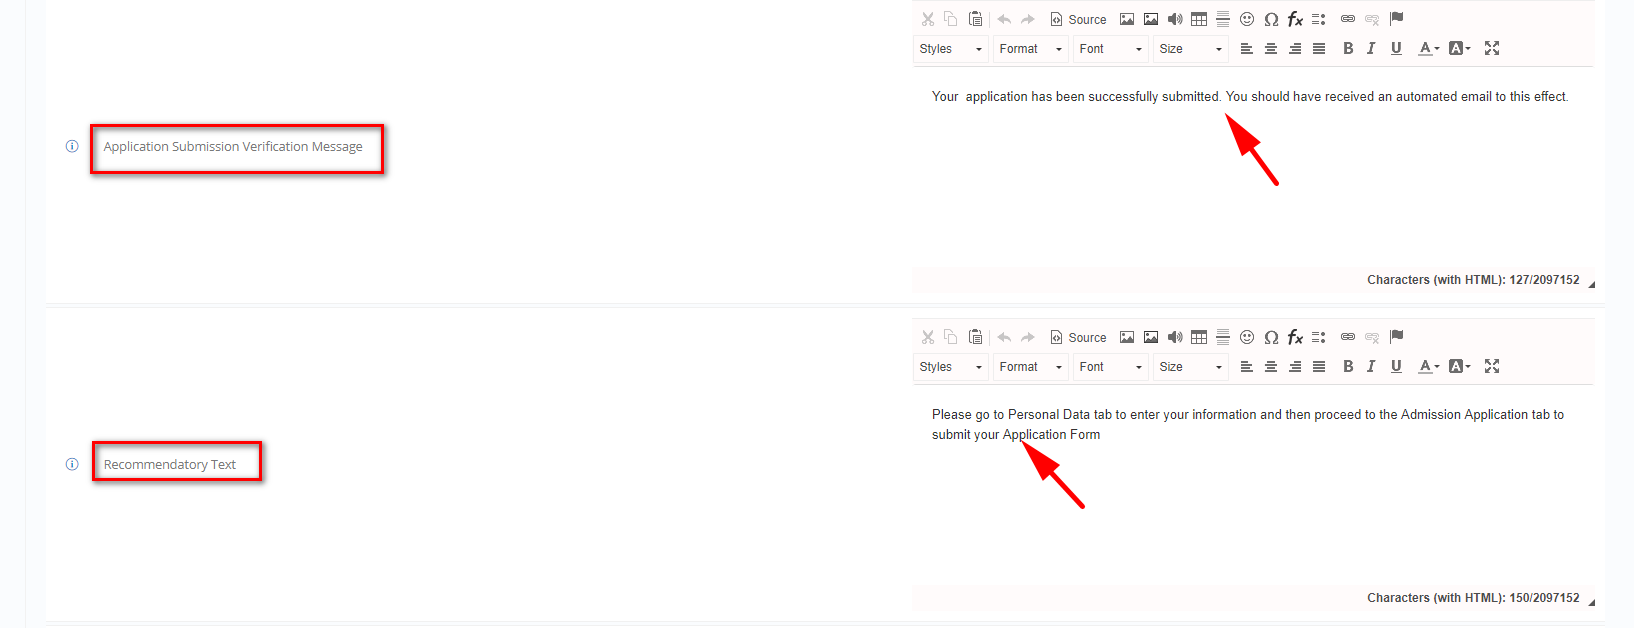 Figure 7
 Figure 8

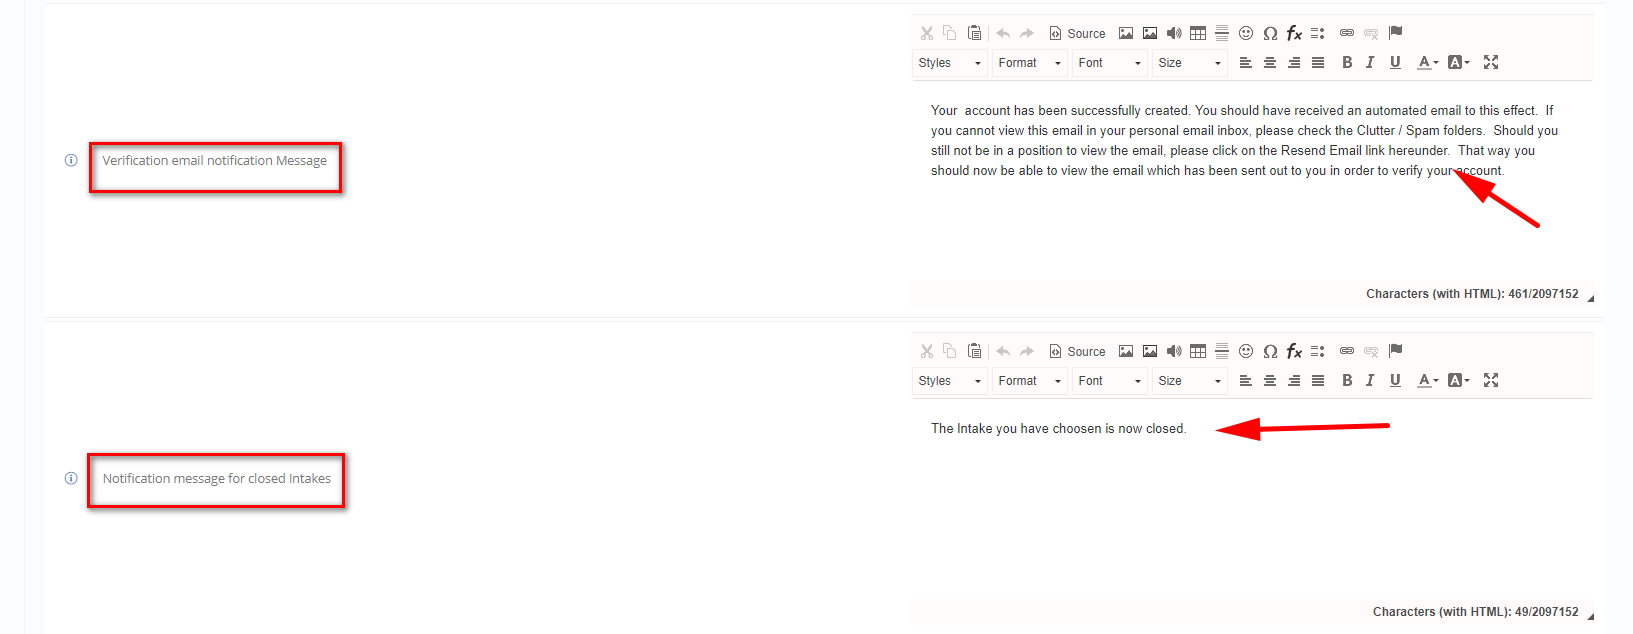 Figure 9
In this section you can create custom messages that appear throughout the admissions process giving directions to help an applicant complete his application.
Note: If text boxes are left empty there is always a default instruction used by the system to compensate. The default message can be altered in the Main Settings.
- Clicking on the ‘i’ you will see the tooltip which presents the name of the option and below a description of what this option does.
- Click on to save your changes.


Some options may have buttons that take you to further configuration pages. An example is the ‘Available Fields Configuration’ option in the General Admission Settings. Click on the ‘Open’ button to view the page and configure Personal Data (Figure 10).
![]()
Figure 10
Available Fields (Personal Data) Configuration
In this section, you can configure the personal information details you would like to collect from the applicants. Below is a view of the Available Fields Configuration (Personal Data Configuration) menu (Figure 11).
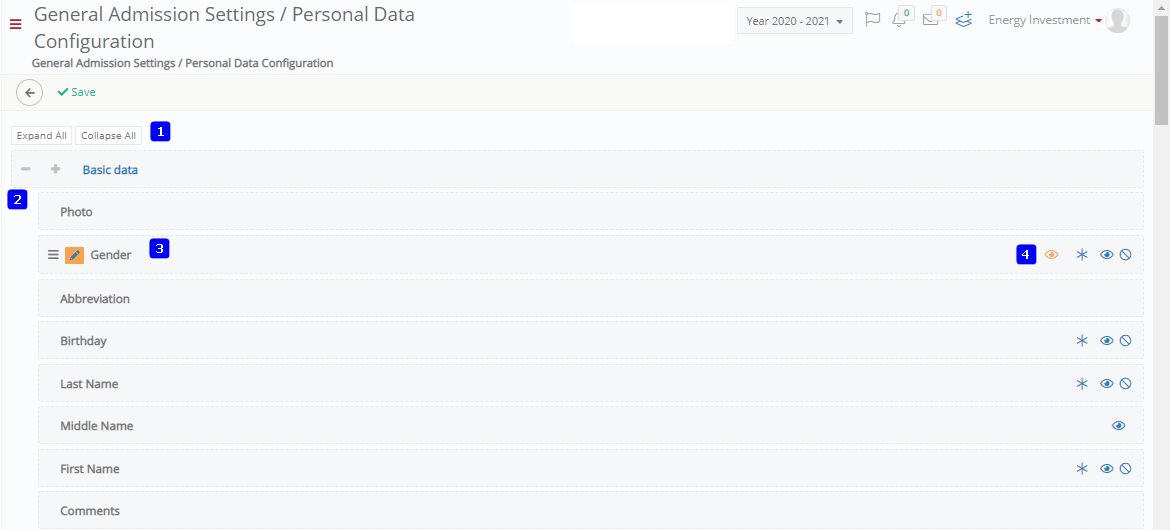 Figure 11
Note: Not all information may be relevant, required, or appropriate for every Institution.
- Click on the expand all button to see all subcategories under each category or collapse all button to see only the categories (Figure 11).
- Click on the + sign to expand a category to see all subcategories (Figure 11).
Click on the – sign to collapse a category to hide all subcategories.
- By clicking on the
 button and dragging it up or down you can change the position order for this option (Figure 11), e.g. by pulling First Name above Last Name you will place the add First Name option first. Click on the edit button (Figure 11) to edit options, giving it a preferred name, adding additional information, make the option required, etc.
 - On the right side of every category and subcategory you can see symbols that indicate that the specific category or subcategory is required, visible or Read Only (Figure 11).
Edit
Once you have chosen the information you want to edit e.g., ‘Birthday’ you will see a pop-up window with options regarding Birthday information (Figure 12).

Figure 12
- In the ‘Literal’ field, enter a subcategory name. This name will appear in all languages the portal currently has.
- In the ‘Literal (English) field, enter a subcategory name which will appear only if the applicant has set his portal language to English.
- In the ‘Info’ text box you can write some instructions about filling in the Birthday field e.g. Please enter birthdate in a DD/MM/YEAR format. This information will appear in a tooltip info box next to the Birthday field (denoted with an ‘i’ button (Figure 12b).
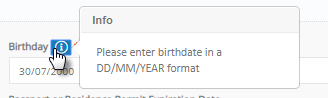
Figure 12b
- Check the box next to *Required to make this a required field for the applicant to fill (Figure 12).
- Check the box next to ‘Visible’ to make the Birthday information field Visible to the applicant (Figure 12).
- Check the Read Only box to make the field un-editable and only available for viewing (Figure 12).
- Check the Read Only (If Has Value) box to make sure fields that have been retrieved/filled in from the electronic ID portal cannot be edited by the applicant. Fields marked as Read Only (If Has Value) can only be updated if no data exists in the field.
- You can apply the same restrictions/settings to the Re registration/ Parent’s dashboard entries by checking the same options as you did in the previous steps (Figure 12).
Never forget to click on the ‘Save’ button once you have added any changes to configuration.
- This can be Department, Institute, Location or Level, depending on the configured terminology.