

The Classter admissions module provides all the tools an institution needs in order to transfer the application process from a physical setting to a digital setting. Classter Admissions module has the functionality to upload admissions documents and ad them to the final submission of an application.
Tip: Find out how you can manage admission applications in our Knowledge Base.
Logged in as an Admin, from the configuration menu go to Main SettingsConsents & Admission Data. (Figure 1)
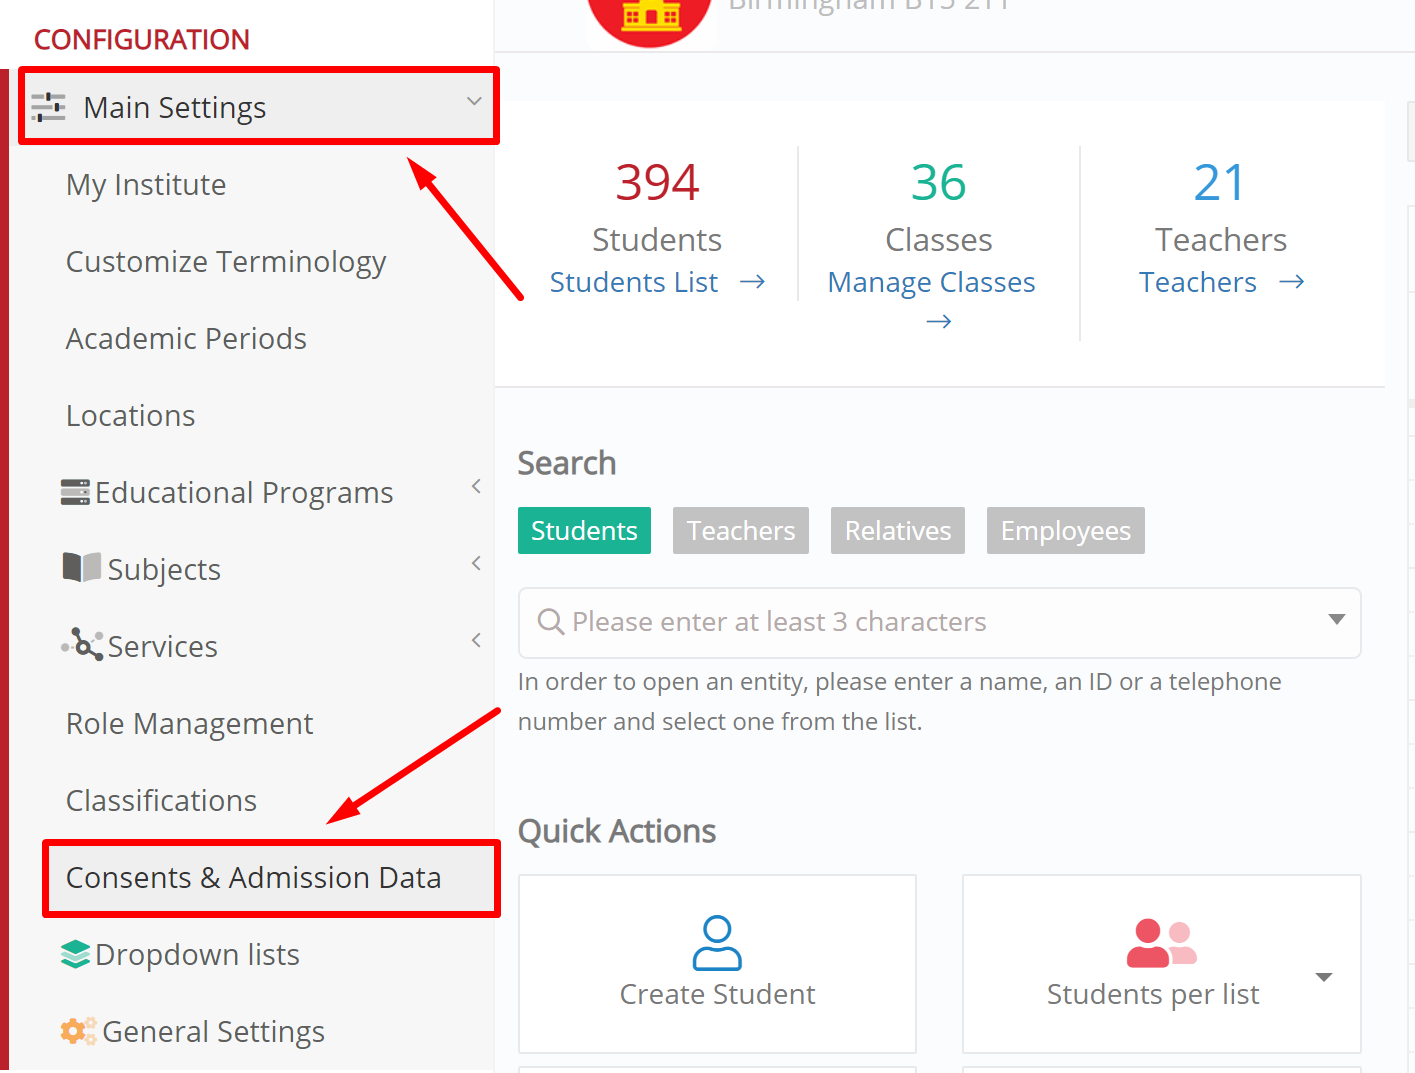
Figure 1
In the next window, click on the button “+Create New Admission Data”. (Figure 2)
 Figure 2
Here you may define certain types of data that need to be entered and uploaded in a digital form to your educational institution. Under the Main Data section, enable the “Is Active” and “Submission Status” buttons. Type in the Description of the document (e.g. ID Card). From the Type dropdown menu, select the “Student Registration (institute only)” option. Click on “Save & Close” to save your changes and close this window, or “Save and Retain” to save your changes and remain in this window. (Figure 3)
 Figure 3
Admissions Data you add will be visible in the Admissions Data tab in the personal data section of the Admissions Portal. They will be available in all locations of the platform where you refer to a student’s application and admissions data e.g Re-registration etc.
Extra Tip: Do not forget to take a look at our Admission Module Configuration Manual to take advantage of all its capabilities.
Find more or post your questions on our Facebook Community Page. Also, watch our how-to videos on our Youtube channel.