

In this section we will look at the settings governing the CRM module in the Classter Portal.
We will see CRM Settings for Events , Announcement , Student / Parents Meetings and Student Position Calendar.
The first page of the General Settings you will land on the CRM Settings tab. Please follow the path : Dashboard > Configuration > CRM Settings > General Settings > CRM Settings (Figure 35).
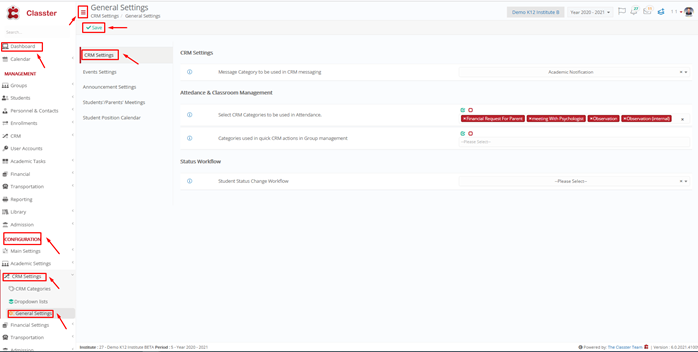 Figure 35
CRM Settings
CRM Settings
- Message Category to be used in CRM messaging: the available options are Push notification , Academic Notification and Homework Notify.
Attendance & Classroom Management
- Select CRM Categories to be used in Attendance : Define the CRM Categories that will be used from the attendance taking form. (i.e. Subject Absences form). These categories will be visible, when a new CRM action entry form opens from the list of Students in the Subjects’ absences form.
- Categories used in quick CRM actions in Group management
Transporation Daily Routes Check In/Out
- Categories used in quick CRM actions in Bus Check In/Out (Daily Routes): Here you define categories used in quick CRM actions in Bus Check In/Out (Daily Routes).
Status Workflow
- Student Status Change Workflow: Here you select the flow that will follow one status to the other.
Example, if the student can change from Candidate to Registered or if other statuses have to be mediated to reach the final status.
Once you have set up the CRM Settings you want, click on the ‘Save’ button to save changes.
Events Settings
Please follow the path: Dashboard > Configuration > CRM Settings > General Settings > Events settings (Figure 36).
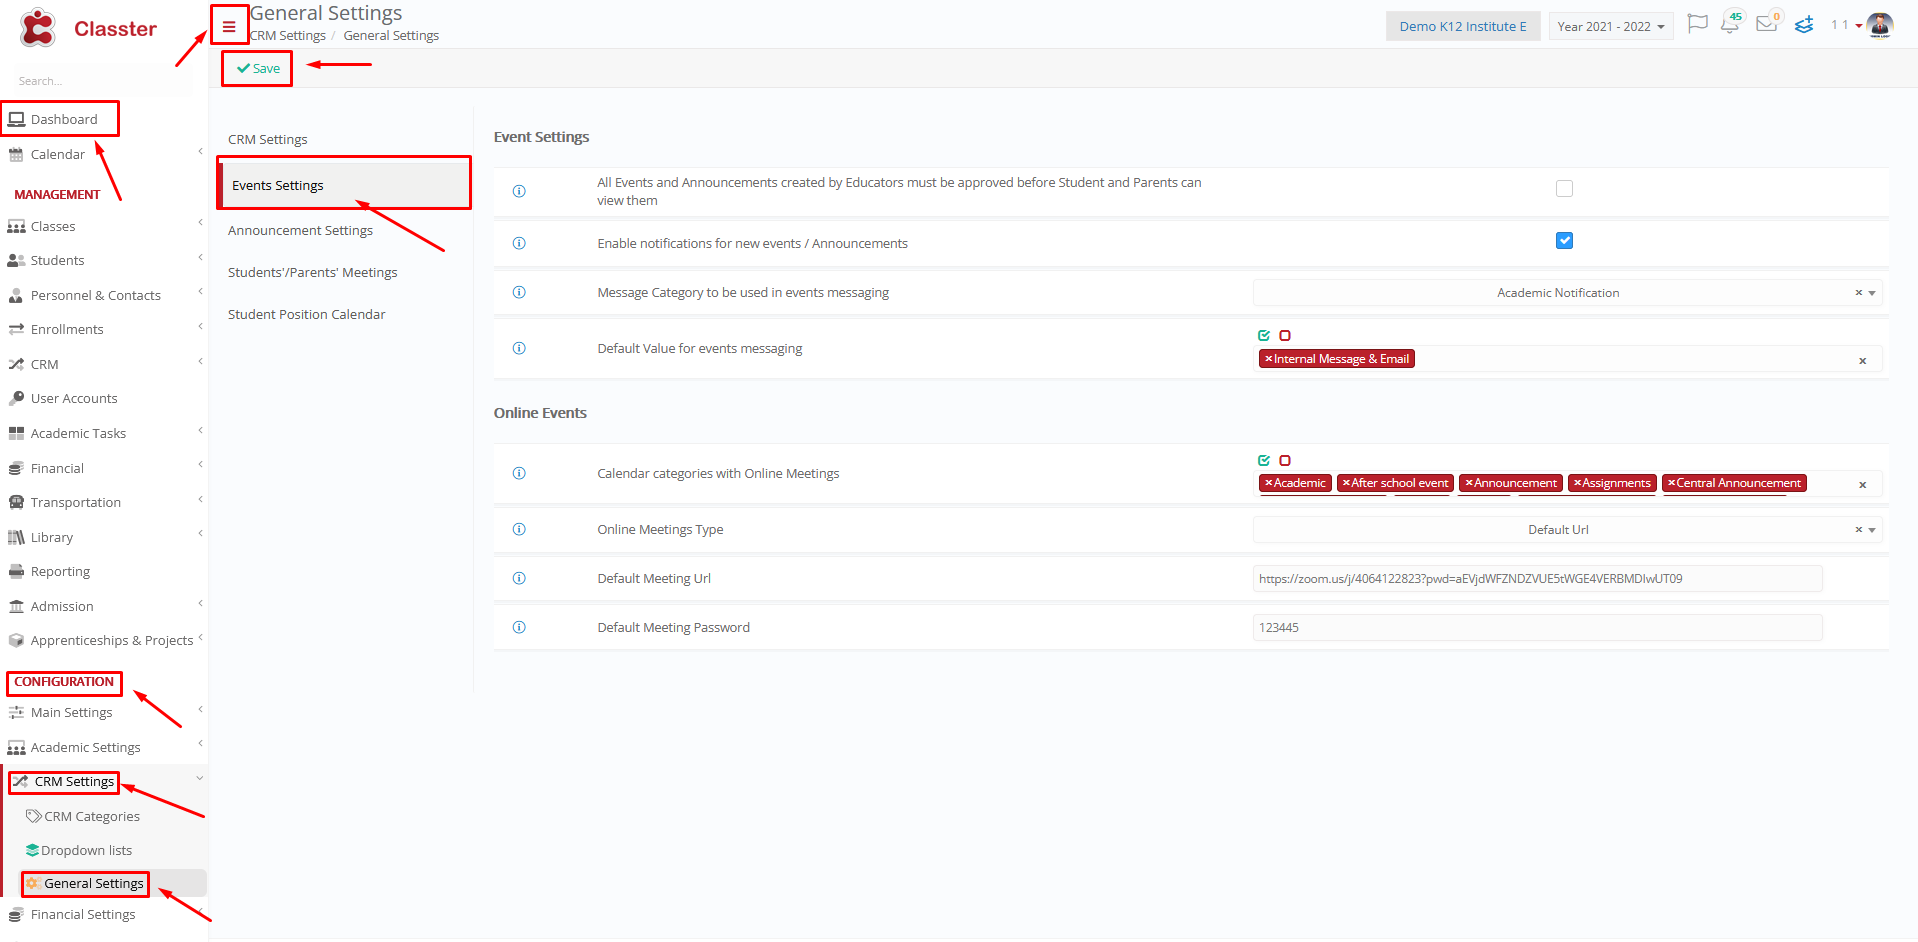 Figure 36
Events Settings
- All Events and Announcements created by Teachers must be approved before Student and Parents can view them : This means that an employee or back office employee needs to approve all events or announcements created by Teachers before those events or announcements are presented to parents or Students.
- Enable notifications for new events / Announcements: Here you can set whether you will be notified for each new event / announcement.
- Message Category to be used in events messaging : the available options are as follows Push Notification , Academic Notification and Homework Notify
- Default Value for events messaging : the available options are as follows , Don’t Send , Internal Message and Internal Message & Email.
Online Events
- Calendar categories with Online Meetings: Here you choose for which category the online meetings will be available
- Online Meetings Type : the available options are as follows , Default Url , Zoom Interconnection and WebEx Interconnection
- Default Meeting Url: Here you can enter the URL you want, it works in combination with “Online Meetings Type” when the Default URL option is selected
- Default Meeting Password : here we can set the password of our choice.
Once you have set up the Events Settings you want, click on the ‘Save’ button to save changes.
Announcement Settings
Please follow the path: Dashboard > Configuration > CRM Settings > General Settings > Announcement Settings (Figure 37).
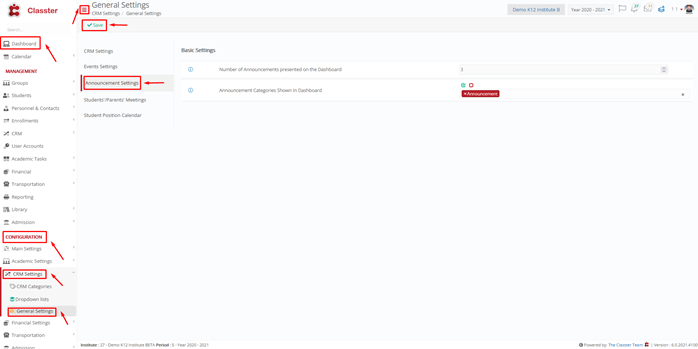
Figure 37
Basic Settings
- Number of Announcements presented on the Dashboard: Here you define how many new announcements will be presented in the announcements lists that are visible in the dashboard.
- Announcement Categories Shown In Dashboard: Here you select one or more announcement categories. Announcements of these categories will be displayed on the user dashboard page.
Once you have set up the Announcement Settings you want, click on the ‘Save’ button to save changes.
Students / Parents Meetings
Please follow the path: Dashboard > Configuration > CRM Settings > General Settings > Students / Parents Meetings (Figure 38).
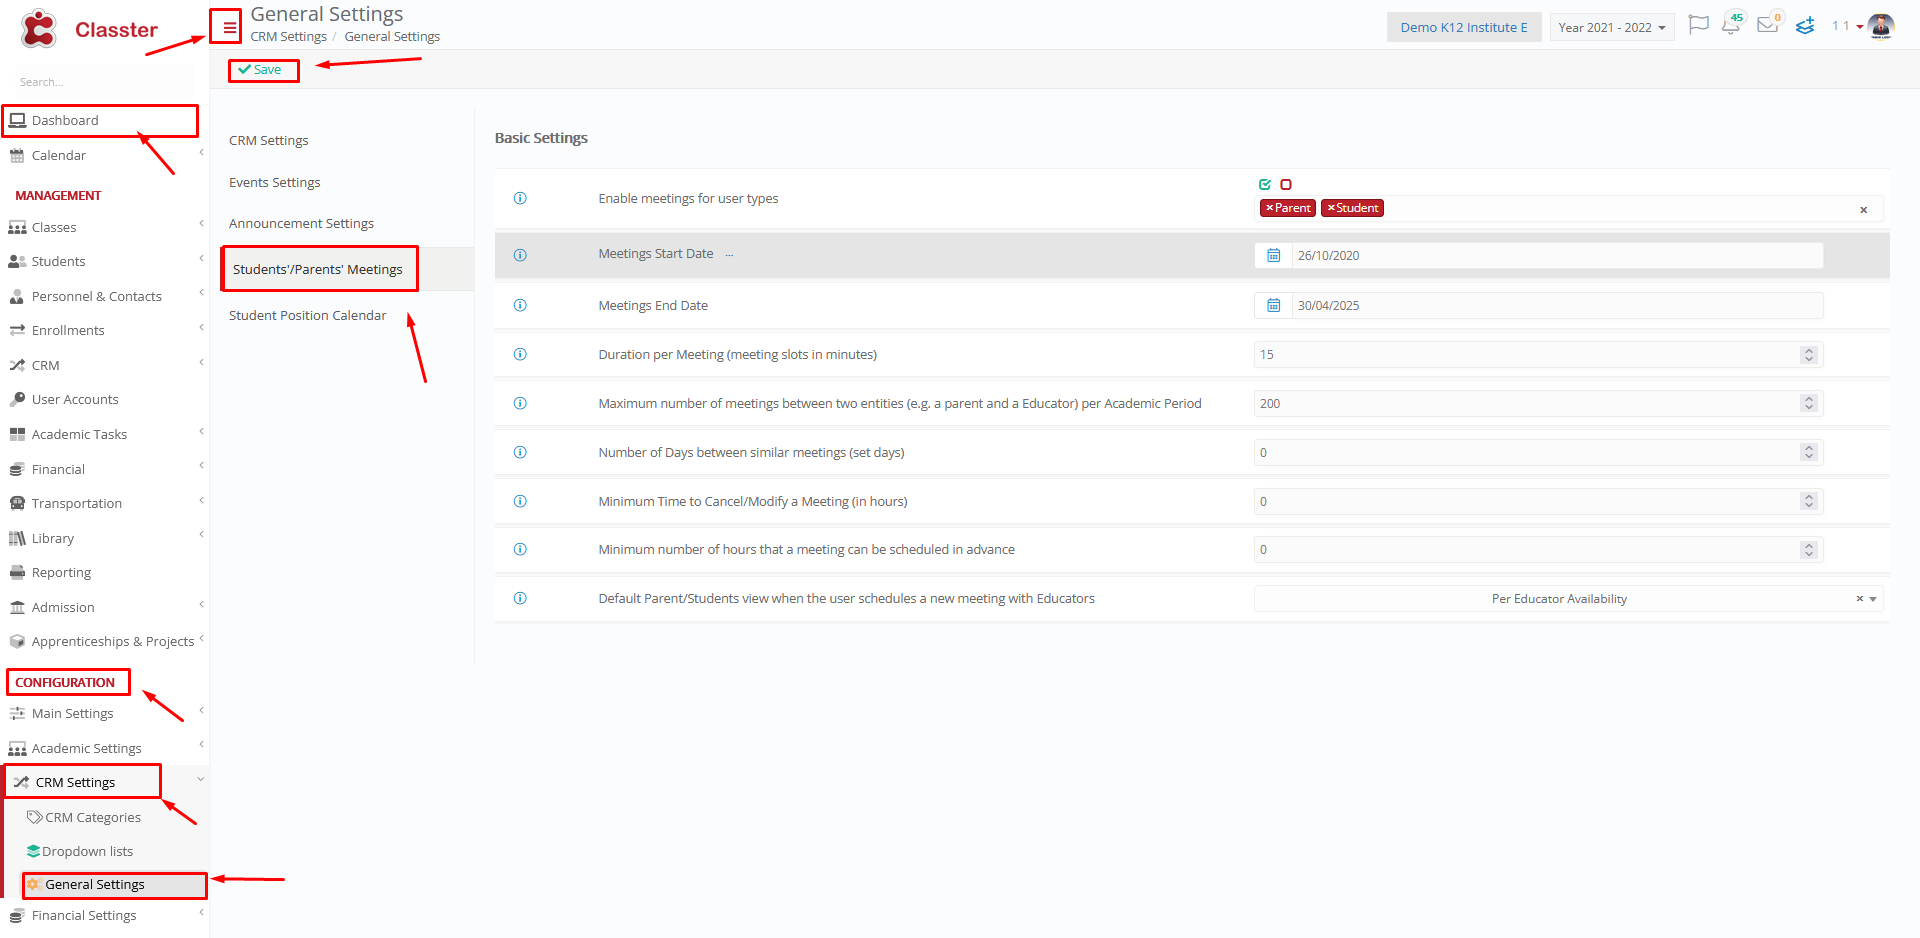 Figure 38
Basic Settings
- Enable meetings for user types : the available options are parent and student.
- Meetings Start Date : Here you define the starting date after which, parents can book meetings with Teachers
- Meetings End Date : Here you can define the latest date after which parents cannot book meetings with Teachers
- Duration per Meeting (meeting slots in minutes) : Duration per Meeting (Minutes). e.g. if you set up 10 minutes then automatically 10 minutes slots will be created based on Teachers’ availability.
- Maximum number of meetings between two entities (e.g. a parent and a Teacher) per Academic Period : Here you can define the maximum number of meetings that can be booked between two persons during the academic period. (e.g. if you define 4, then a parent may book up to 4 meetings with a Teacher during an academic year).
- Number of Days between similar meetings (set days) : Here we can define the minimum number of days for two consequent meetings between the same persons (e.g. between the same parent and Teacher). For example if you set 4 in this setting, then a parent can set up a new meeting with the same Teacher only if the date of the new meeting is at least 4 days after the first meeting. Note that if you set 0 here, there is no control
- Minimum Time to Cancel/Modify a Meeting (in hours) : Here you define the minimum number of hours before a user can cancel or modify an already scheduled appointment. E.g. if you set here the number 8 , then a parent can cancel or modify a scheduled appointment with a Teacher only until 8 hours before the scheduled meeting time.
- Minimum number of hours that a meeting can be scheduled in advance : Here you can define the minimum amount of hours required between the time of scheduling and the start time of meeting. If you set here for example 24, then when a user schedules a new meeting, the time of the meeting should be at least 24 hours in advance. (in the future)
- Default Parent/Pupils view when the user schedules a new meeting with Lecturers: Here you define the default view for availability. If you do not select one of the two options, the default is View per my availability.
Once you have set up the Students / Parents Meetings you want, click on the ‘Save’ button to save changes.
Student Position Calendar
Please follow the path: Dashboard > Configuration > CRM Settings > General Settings > Students / Parents Meetings (Figure 39).
 Figure 39
Basic Settings
- Copy comments from check-in entry to check-out entry: Here you set whether comments will be copied when the entry changes from check-in to check-out.
- Default position calendar for attendance: Here you define the default position calendar for attendance.
When the student has a presence, the position in the calendar is automatically updated and the student seems to have checked in at the location we have declared in the setting. - Default position calendar for routes: Here you select the default position calendar for routes.
For example, when the bus starts the start route, the student checks in. When the route is completed, it becomes a stop route and the student checks out. In student’s position calendar, shows the student’s route and the bus that checked in.
Connection with Attendance
- Attendance registration also updates the Students positioning calendar : if you enable this option, then Classter will automatically register a check in the Classroom position for all Students that are registered as present in the attendance form.
- Show position calendar status on attendance : If enabled, then the Subjects absences form will have an extra icon presenting the latest position where each Student was checked in. The position is provided by the position calendar feature and only if the Student had a check-in info for the date selected.
Special Settings
- Present Code Or Card Number In Position Calendar
Once you have set up the Student Position Calendar Settings you want, click on the ‘Save’ button to save changes.