

There are three levels of settings in Internship & Thesis configuration.
- Companies and Partners Dashboard Setting
- Internship and Thesis Setting
- General District Setting
Companies and Partners Dashboard Setting
The first level is the ability of partner companies to log on and add jobs.
From the configuration menu, go to Main Settings > General Settings > Security Settings. (Figure 1)
 Figure 1
Under the companies and partners dashboard section of the Security Settings, the following settings can be enabled.
- Allow login to companies and external partners: enable this setting if you like companies to have an external username and the ability to logon.
- Allow companies to register internships: enable this setting if you would like to allow companies to register internships.
- Allow External Partners and Companies to update contact data: enable this setting to allow companies and partners to update their contact information.
Internships and Thesis
The next setting is related to the Internship & Thesis module.
From the configuration menu, go to Main Settings > General Settings > Internship and Thesis. (Figure 2)
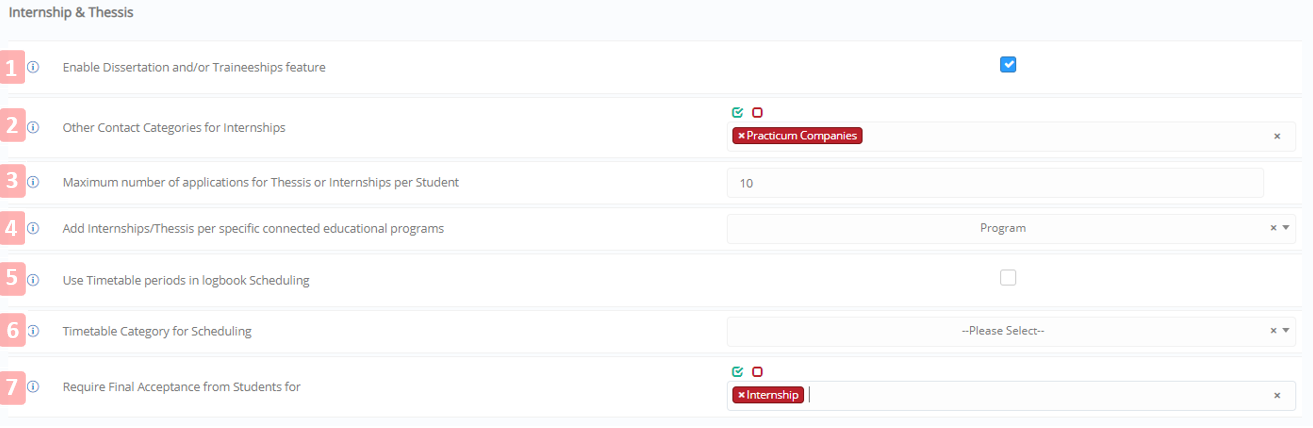
Figure 2
- Enable Thesis and/or Internship feature: Enable the internship module for all users.
- Other Contact Categories for Internships: Configure which other product categories would be able to logon to access internships.
- Maximum number of applications for Thesis or Internships per Student: Set up the maximum number of applications per student.
- Add Internships/Thesis per specific connected educational programs: Specify if the internship is to be linked by course, program, or year.
- Use Timetable periods in logbook Scheduling: Enable this setting to link the attendance in the logbook to the timetable calendar periods.
- Timetable Category for Scheduling: Select the timetable category to be used for scheduling.
- Require Final Acceptance from Students for: In cases where students have multiple internship job offers, this setting is used to ensure that the students make a final choice and select one job offer.
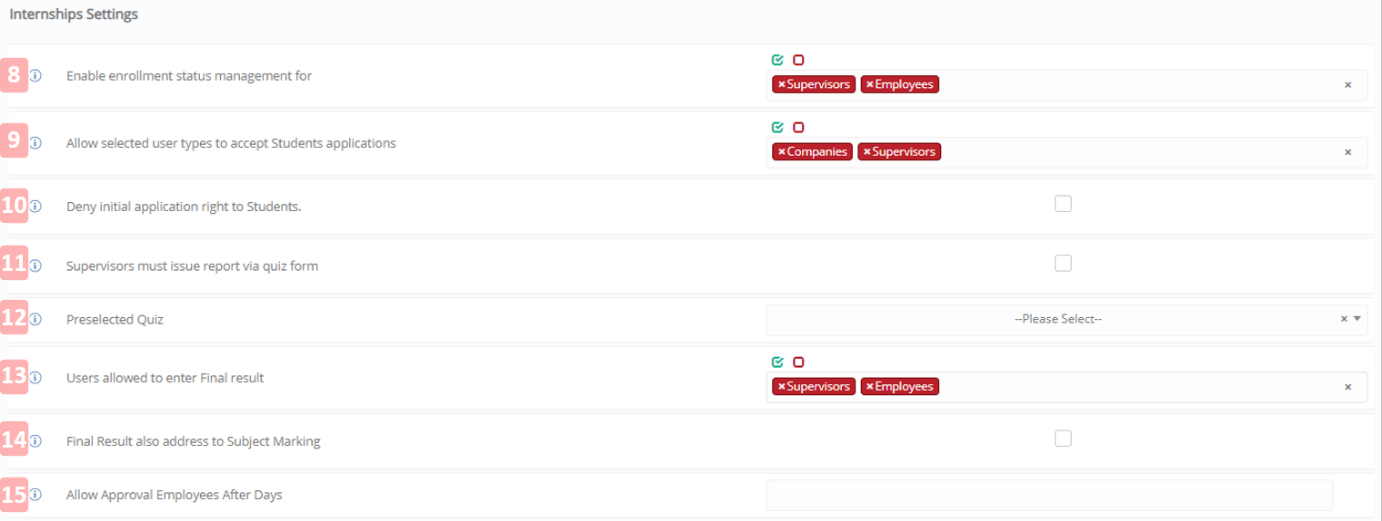
Figure 3
- Enable enrolment status management for: Use this setting to select which user groups can make changes/manage internship statuses e.g. supervisors, employees, etc.
- Allow selected user types to accept Students applications: Select the user groups allowed to accept student applications e.g. employers, supervisors, etc.
- Deny initial application right to Students: This is a special right used by the administrator to assign students to jobs instead of the students applying themselves.
- Supervisors must issue report via quiz form: The quiz module is used to create survey questions. Check this box if a supervisor must issue a report in a survey form. These can be used to evaluate the students or to evaluate the company.
- Preselected Quiz: Select which survey (quiz) will be presented to the supervisor.
- Users allowed to enter Final result: Select which user (supervisor, employees, and/or companies) can enter the final result for the students.
- Final Result also address to Subject Marking: Check this box if the final result can be marked directly from the internship and assigned as the final mark of the subject in the grade book.
- Allow Approval Employees After Days: Specify the number of days to wait before employees can approve attendance entries. E.g. if 10 is specified the employees would not have the function to approve the logbook or students’ entries until after 10 days. Only the employers (companies) would be able to approve in the first 10 days, and university/college employees would be able to approve after the 10 days have elapsed if not approved by the supervisor.
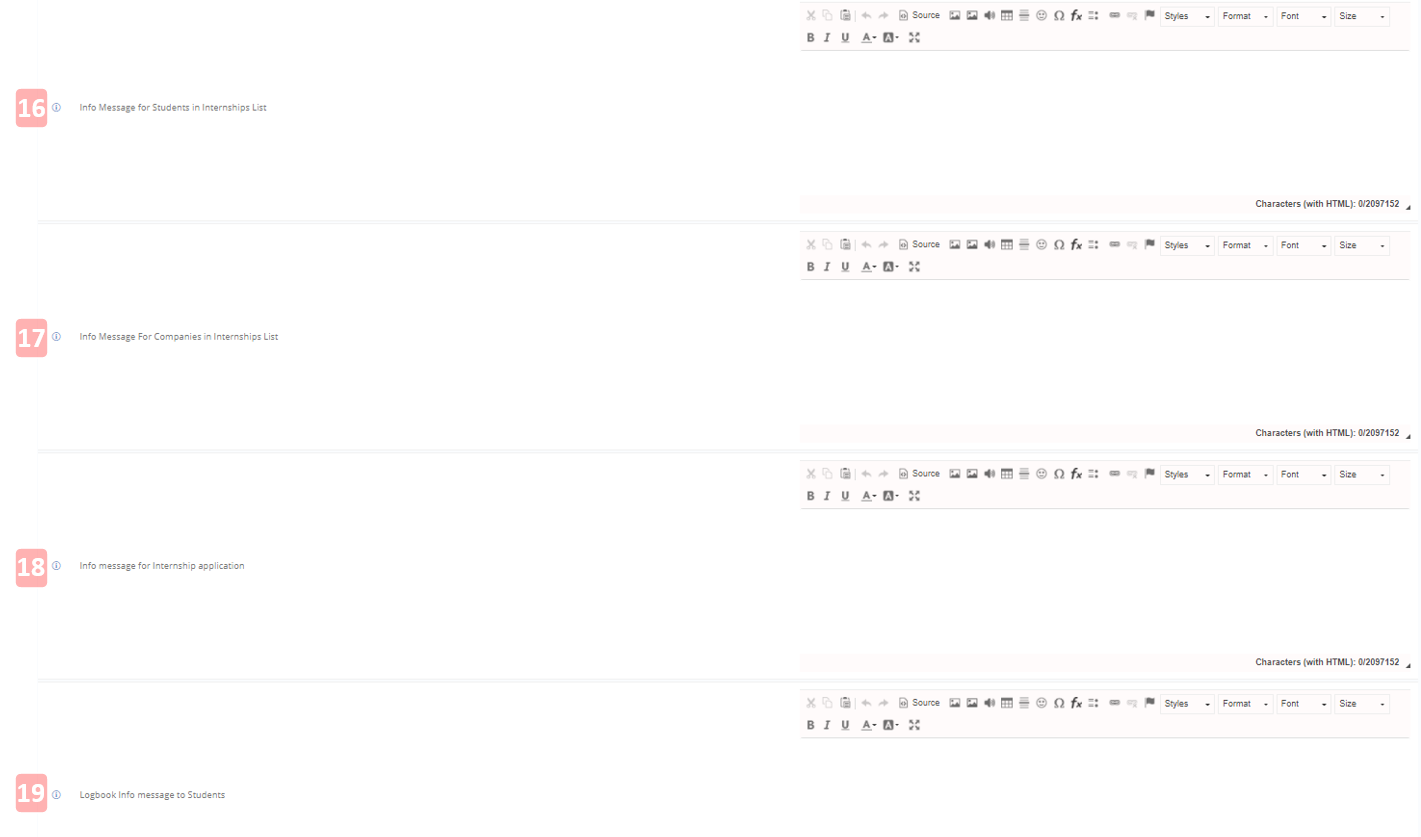 Figure 4
- Info Message for Students in Internship List: Used to display relevant information to students in the internship list.
- Info Message for Companies in Internship List: Used to display relevant information to companies (employers) offering internships.
- Info message for Internship application: Used to display relevant information to students during internship application.
- Logbook Info message to Students: Used to display relevant information to students during logbook submission.
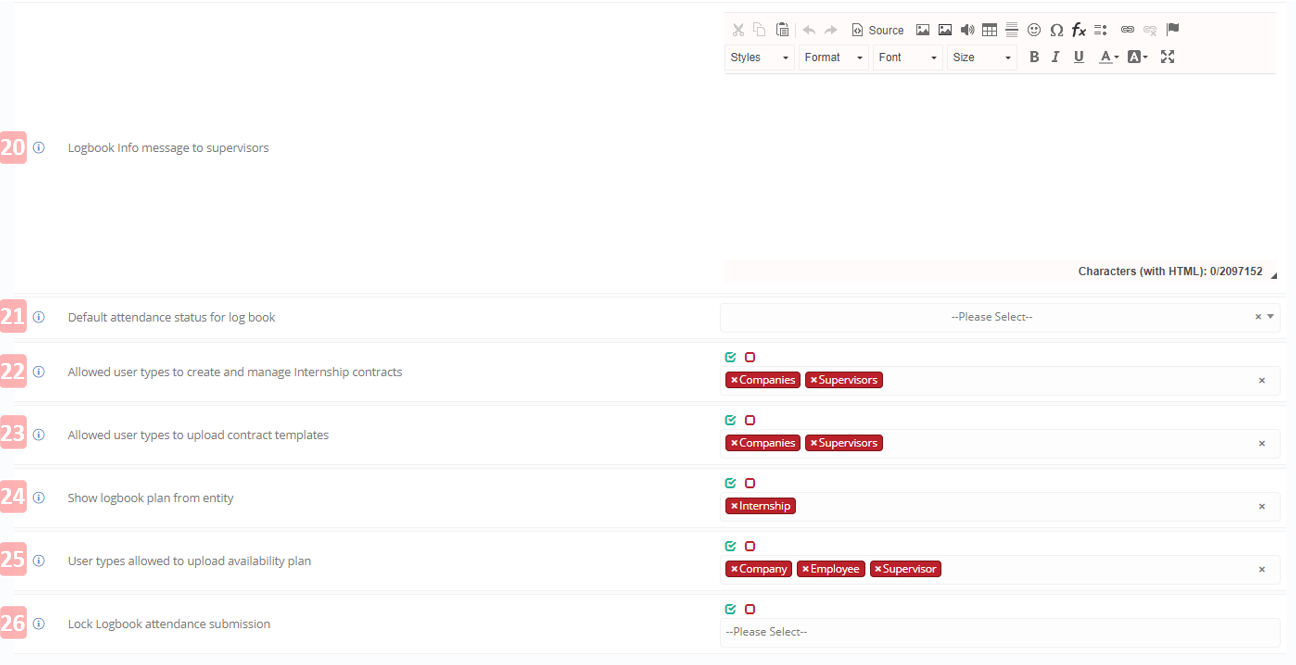
Figure 5
- Logbook Info message to supervisors: Used to display relevant information to supervisors during logbook reviews.
- Default attendance status for logbook: This is used to set the default attendance status in the logbook. E.g. Presence.
- Allowed user types to create and manage Internship contracts: Set which type of users can create and manage contract.
- Allowed user types to upload contract templates: Set which user type can upload contract templates.
- Show logbook plan from entity: This allows you to set which timetable plan to use for the logbook entries.
- User types allowed to upload availability plan: These are the user types allowed to upload an availability plan during creation of the internship.
- Lock Logbook attendance submission: This locks attendance submission for selected users. E.g. Employees, Employer, Supervisor, or Student.
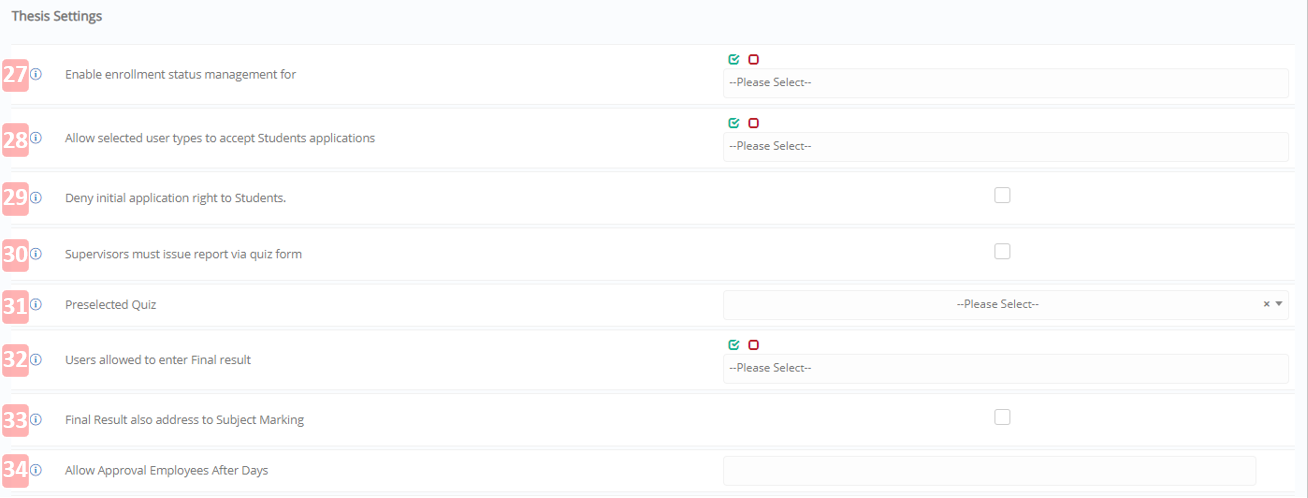
Figure 6
- Enable enrollment status management for: Users from the selected user group will be able to set the enrollment status for thesis.
- Allow selected user types to accept Students applications: This allows only the selected user group, e.g. supervisors, to accept student applications.
- Deny initial application right to Students: This option if checked will not allow students to apply for internships.
- Supervisors must issue report via quiz form: Enabling this setting allows the supervisor to issue reports related to the thesis form.
- Preselected Quiz: Select the default quiz to be used in thesis surveys.
- Users allowed to enter Final result: Select the users allowed to enter the final result the student obtained in the thesis.
- Final Result also address to Subject Marking: This option if checked will connect the final result of the internship with a subject and make it available for marking.
- Allow Approval Employees After Days: Allows employees to approve attendance entries not approved by the employers after X days.
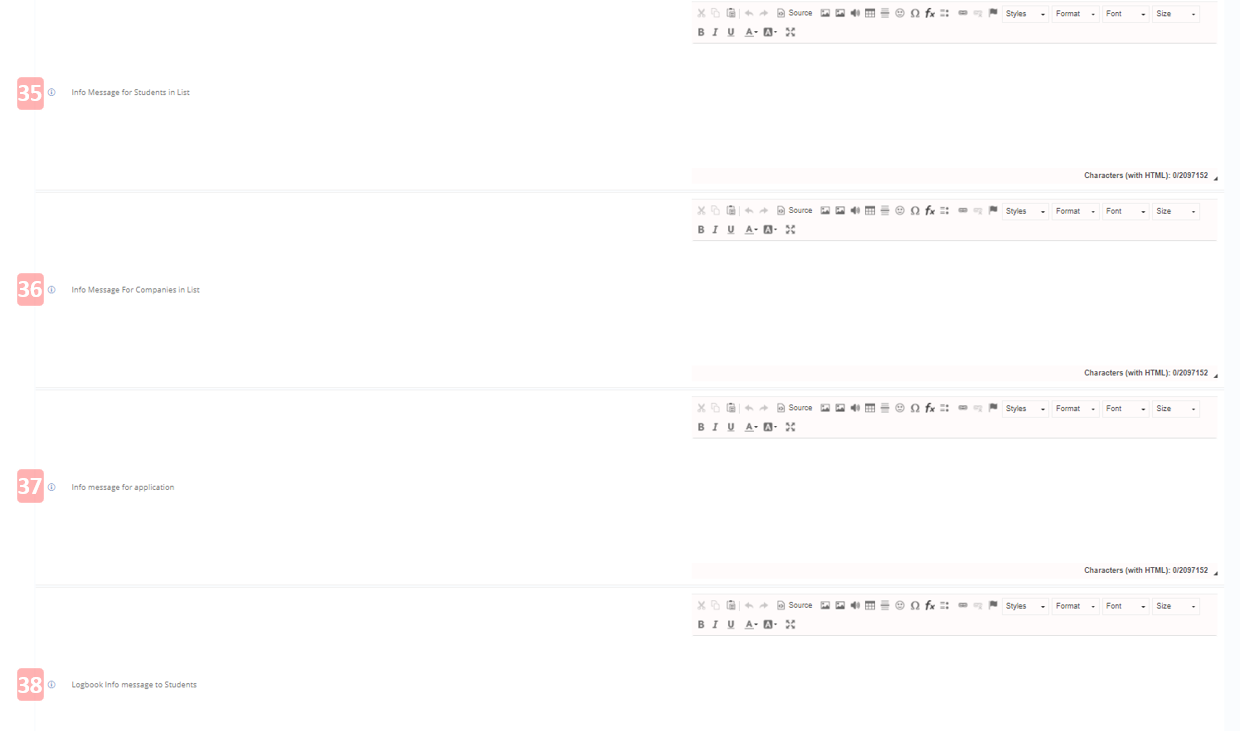
Figure 7
- Info Message for Students in List: Informational messages for students.
- Info Message for Companies in List: Informational messages for employers.
- Info message for application: Informational message to be displayed during the application process.
- Logbook Info message to Students: Informational message to be displayed to students when accessing the logbook.
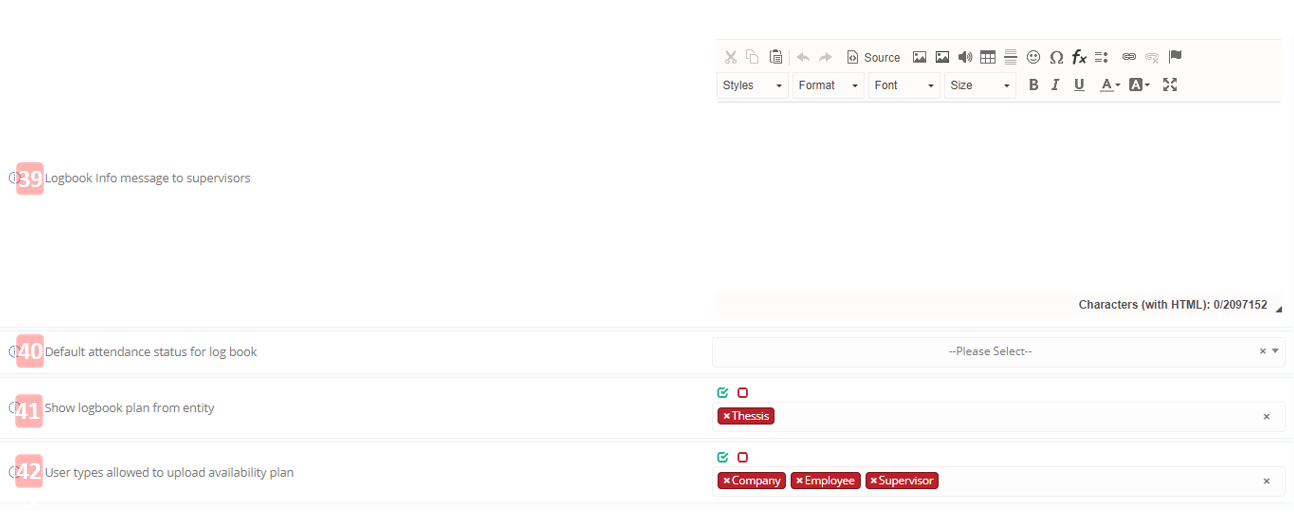
Figure 8
- Logbook Info message to supervisors: Informational message to be displayed to the university/college supervisors when accessing the logbook.
- Default attendance status for logbook: default attendance status for students when they submit an attendance entry in the logbook.
- Show logbook plan from entity: In this option, you can choose to enable the logbook function for Thesis or Internships.
- User types allowed to upload availability plan: Defines which types of users, e.g., Companies to upload their availability plan for Internships or Thesis.
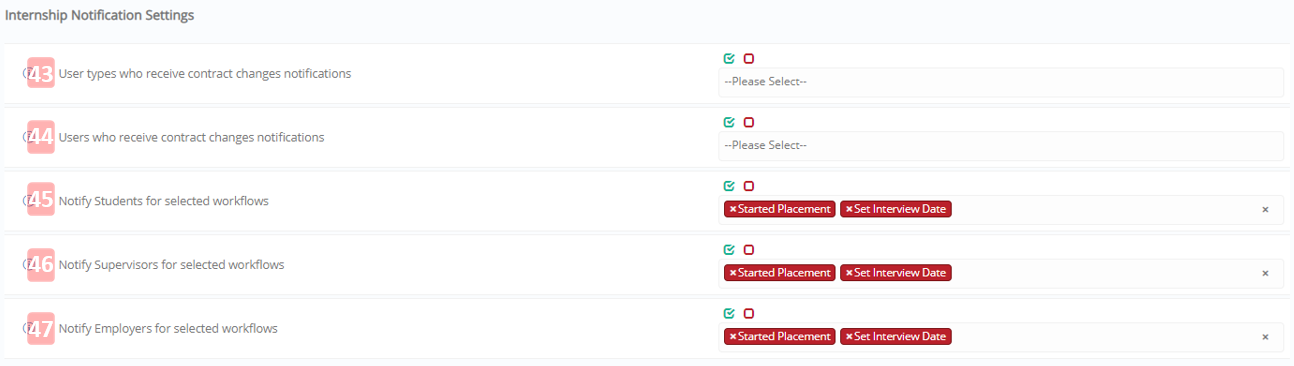
Figure 9
- User types who receive contract changes notifications: These are the user groups who receive notifications once there is an update to the contract.
- Users who receive contract changes notifications: These are the specific users who receive notifications once there is an update to the contract.
- Notify Students for selected workflows: Notifies students if the job/ internship goes through any of the selected workflows. E.g. Started Placement, Set Interview Date.
- Notify Supervisors for selected workflows: Notifies supervisors if the job/internship goes through any of the selected workflows. E.g. Started Placement, Set Interview Date.
- Notify Employers for selected workflows: Notifies employers if the job/internship goes through any of the selected workflows. E.g. Started Placement, Set Interview Date.
General District setting
The third setting is to enable multi institute functionality. From the district menu, go to District Management > General Settings > Internship & Thesis
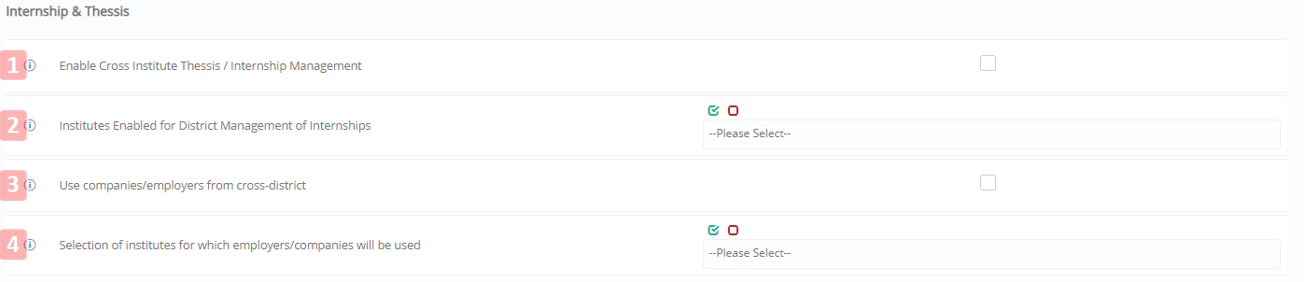
Figure 10
Under the Internship and Thesis section,
- Enable Cross Institute Thesis/Internship Management: Enable this setting to allow cross institute functionality.
- Institutes Enabled for District Management of Internships: With this setting, you can specify which institutes can send students for an internship.
- Use companies/employers from cross-district: Enables the use of companies or employees from other institutes.
- Selection of institutes for which employers/companies will be used: Once you have enabled the previous option, you will now be able to select which companies or employees you wish to use in the internships & thesis module. Select Company/Employee from the dropdown list.