

To create a marking period, you must go to the marking period tab of Academic Settings. Please follow this path: Dashboard > Configuration > Academic Settings > Marking Settings > Marking Periods (Figure 1).
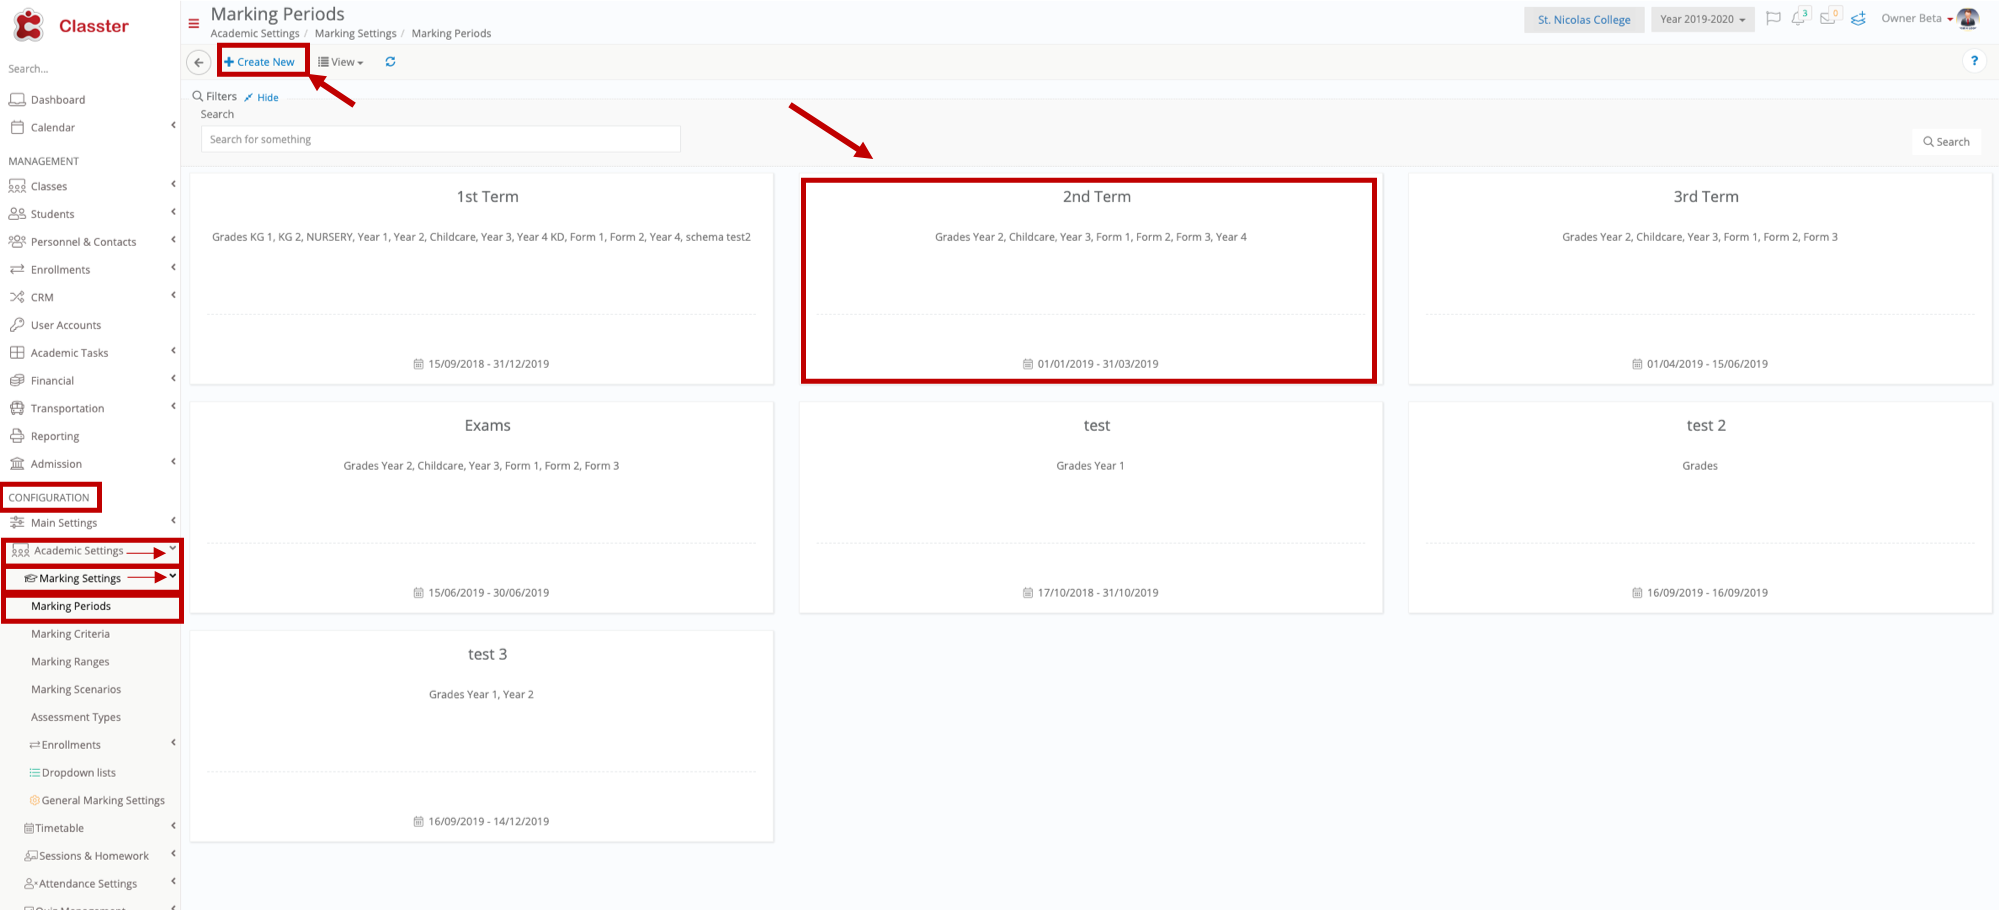 Figure 1
- Once you reach the Marking Periods page you will be able to view all Marking Periods (Figure 1).
- You can edit an existing Marking Period by clicking on it (Figure 1).
- You can create a new Marking Period by clicking on the +Create New button (Figure 1).
Create a New Period
Once you have clicked on the +Create New button you will be transferred to the create new marking period page (Figure 2).
 Figure 2
- Enter a description for this marking period e.g Term 1 (Figure 2).
- Enter a Start Date for this marking period e.g 04/12/2019 (Figure 2).
- Enter an End Date for this marking period e.g 04/03/2020 (Figure 2).
- What weight will this marking period have on the annual grade of students e.g 30% (Figure 2)?
- Enter a Lock Date to signify when this marking period will be closed to the grading or other changes (Read-Only) (Figure 2).
- Switch on the Final Examination option if you want this marking period to have a final exam period (Figure 2).
- Switch on the Resit examination option if you wish to have a Resit period in this marking period (Figure 2).
- Publish and Lock Dates option allows you to define the dates the marking period is made available to employees and when it is locked to employees based on Year and Stream (Figure 3).
 Figure 3
9. Add the years that this marking period will include e.g KG1, KG2, etc. (Figure 2).
10. Click on the Save button to save this Marking Period (Figure 2).
Edit Marking Period
 Figure 4
- Change the description for this marking period (Figure 4).
- Change the Start date for this marking period (Figure 4).
- Change the End Date for this marking period (Figure 4).
- Change or remove the weight this marking period will have on the annual grade of students (Figure 4).
- Change or Remove a Lock Date to signify when this marking period will be closed to the grading or other changes (Read-Only) (Figure 4).
- Switch on or off the Final Examination option if you want this marking period to have a final exam period or not (Figure 4).
- Switch on or off the Resit examination option if you wish to have a Resit period in this marking period or not (Figure 4).
- Publish and Lock Dates option allows you to define the dates the marking period is made available to employees and when it is locked to employees based on Year and Stream (Figure 5).
Figure 5
- Add the years that this marking period will include or remove the ones you don’t want to include (Figure 4).
- Click on the Save button to save the changes to this Marking Period (Figure 4).
- Click on the Delete button if you wish to delete this Marking Period (Figure 4), If you click on the delete button you will view a popup window (Figure 6).
 Figure 6