

Transportation
Use the Transportation menu to set student daily routes and exceptions, configure your transportation service and monitor buses real time (Figure 42).
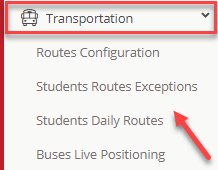
Figure 42
Routes Management
In this section, you can configure and manage your transportation service declaring which student will use which route(s).
Use the filters to show the map and the list of selected students (Figure 43)
On the left side you can see the filters for Students:
- Activate the ‘Filters for Students with no bus assigned’, to include students who have declare that they will use the transportation service (Student Profile > ‘Student Use Transportation’ is active) but they do not have recorded routes or intentions
- Activate the ‘Students with registered intentions only’, to return students intentions, via ‘Use Address Specified in Intentions’ tab.
- ‘Dynamically Select Address’ tab will choose the first route that has been defined during configuration. For example, students use their main address, but in some cases there are exceptions as to where their pick up point will be.
- ‘Use Specific Address Category’ tab returns routes based on the ‘Address Type’ dropdown list.
On the right side we have the filters for Routes:
- Direction Types, choose the direction of the route.
- Zones, choose the time zone.
- Use of Stops, choose between Addresses or Stops.
- Day, choose the day.
Both filter sections, either students or routes contain additional ‘Advanced Filters’.

Figure 43
On the route configuration screen, there is a map on the left side and the list of students, categorized by the registered routes, at the right side. (Figure 44)

Figure 44
On the map, you can see students who don’t have registered routes. Thus, you can place your cursor on the green spot icon and when it becomes a white cross you can drag and drop it to the route you want at the right side. (Figure 45)

Figure 45
Click on the ‘x’ button next to the student’s name, to unregister him/her from a route. The student’s name will appear on the map so that you can register him/her on a route again. (Figure 46)
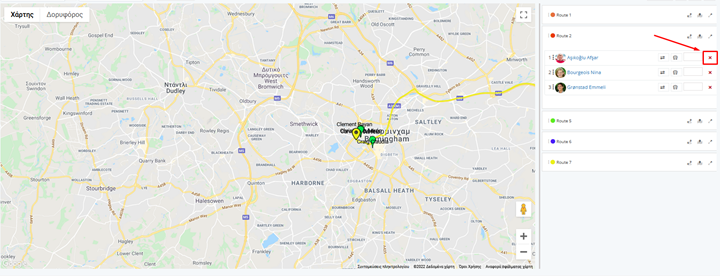
Figure 46
Note:
- If a student’s name at the right side appears in a red box, it means that you have not added the LAT/LON (Latitude/Longitude) of the student’s address. Thus, you will be asked to add it. In order to add LAT/LON to a student just click on the ‘aim’ icon. (Figure 47)
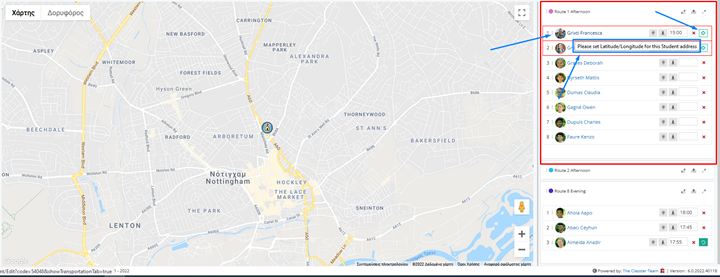
Figure 47
- If you click on the ‘map’ icon of the route, the route will appear on the map and the student’s name will appear on a red dotted box along with a warning message that the student is not participating in the route.
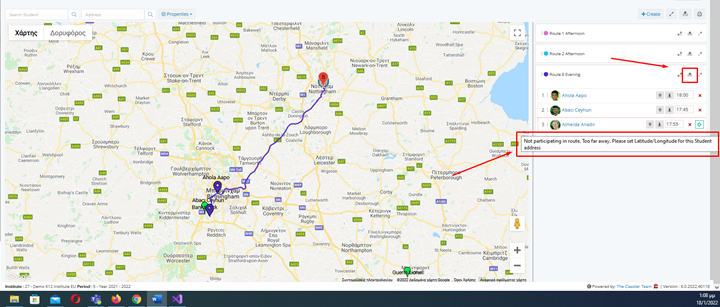
Figure 48
- Use the buttons above the student list area (Figure 49) to:
Figure 49
- Create a new route for the selected zone
- Show/Hide the list of students in all routes
Note: Use the Expand/Collapse button of the route to show/hide the list of students in each route - Display all the routes on the map
Note: Use the Map button of the route to display only the specific route on the map - Print the routes that have been created on the map.
Use the drag and drop function to change the student order. The students will be picked up/dropped off according to the list order. At the map you will be able to see the first Stop and the End of the route. (Figure 50)
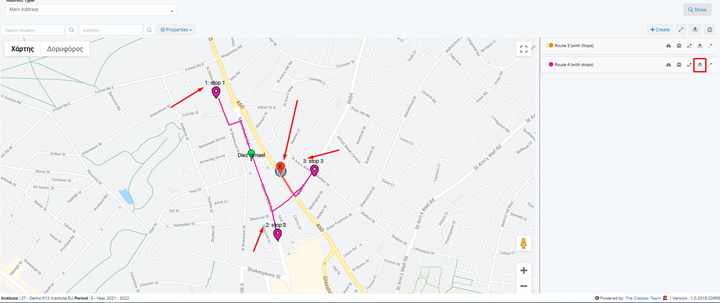
Figure 50
Click on ‘Save’
Use the ‘Actions’ menu to copy a route’s configuration to the selected days or reorder the students in routes based on agreed time. (Figure 51 & 52)
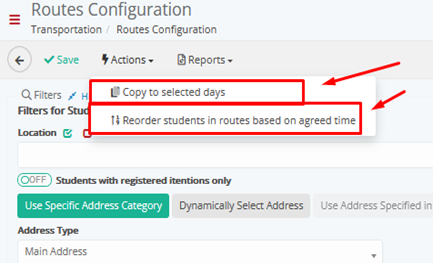
Figure 51
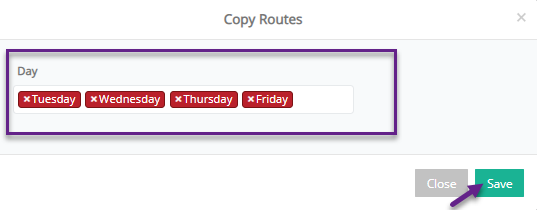
Figure 52
Use the ‘Reports’ menu to show, print or export transportation service detailed reports. (Figure 53)

Figure 53
- Select a report e.g. Drivers Schedule
- Use the report filters to select the data you want to show in the report. (Figure 54)

Figure 54
- Click on ‘Preview Report’ to view the report. (Figure 55)
- Use the navigation bar buttons to download, rotate or print the report
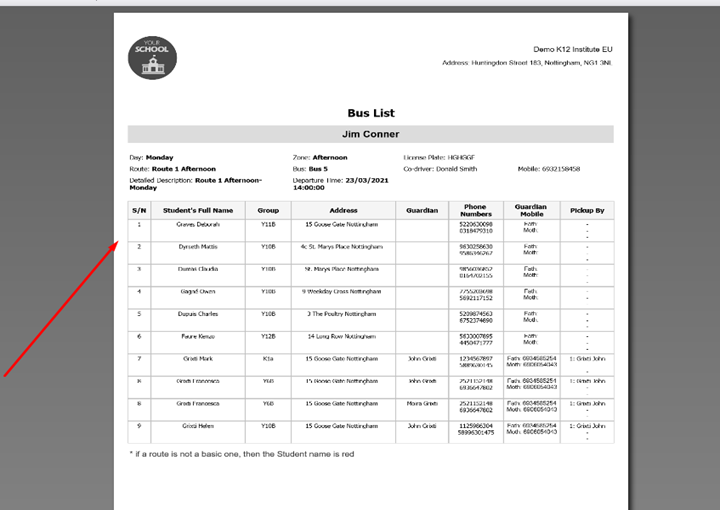
Figure 55
Students Routes Exceptions
You can create or check student route exceptions for a selected day.
Note: Used as ‘Student Route Exceptions’ at the student’s transportation tab.
Students Daily Routes
Used by drivers to manage check ins/outs, send messages to students and start route. (Figure 56)
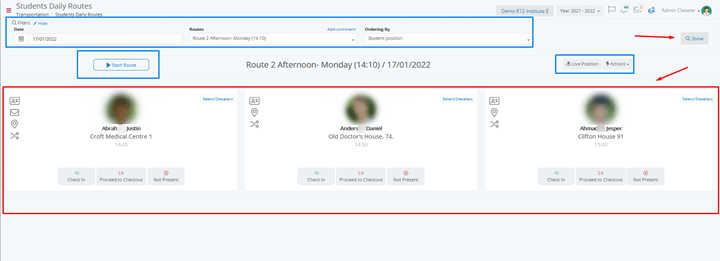
Figure 56
- Use the date and route filters to show students registered in the route.
- Click on the ‘Check IN/OUT’ button of each entry to declare accordingly.(Figure 57)
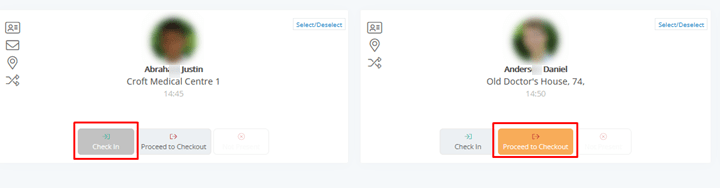
Figure 57
- Click on the ‘Message’ text box to send a message to the student concerning the route. (Figure 58)
Note: You can use the ‘Actions’ menu to check in/out or send message to all students e.g. Route delayed 10’
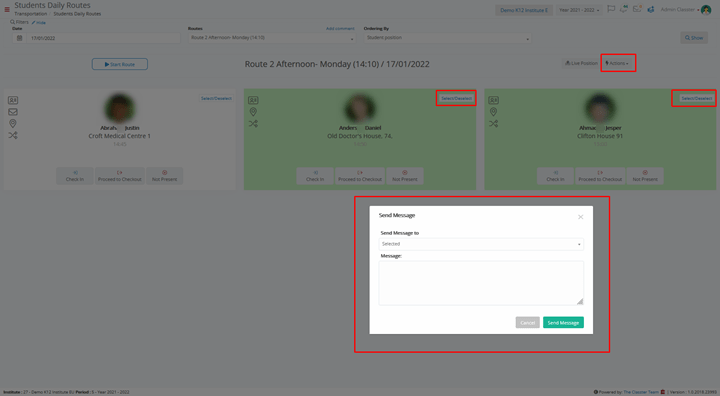
Figure 58
- Click on the map icon to show current location (live position) on the map. (Figure 59)
Note: You can click on the map icon of the student to check student’s current location on the map
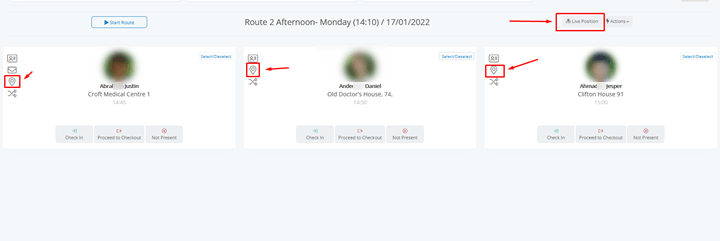
Figure 59
Add Remarks/Actions to students. (Figure 60)
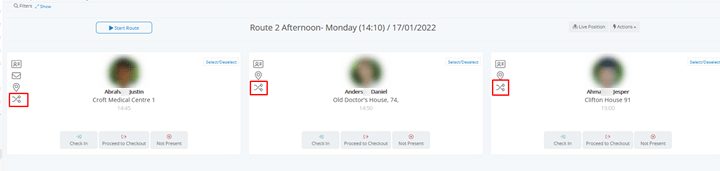
Figure 60
From the Actions menu you can (Figure 61):
- Check-In All students
- Check-Out All students
- Set all students as not present
- Send message to e.g. a parent
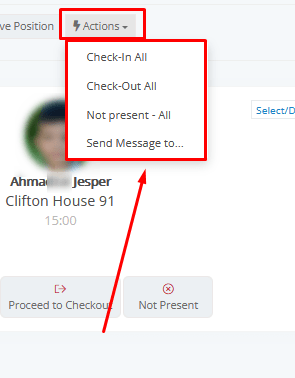
Figure 61
- Click on ‘Start Route’ button to state that the route is being executed.
Note: When you click on the start button, it becomes ‘Stop Route’ button so that you can state that the route has been executed.
Buses Live Positioning
Use to real time monitor the bus while the route is being executed. (Figure 62)
Note: Available only when the ‘Start Route’ button (Transportation > Student Daily Routes) is activated.
- Use the zone and route filters to show the bus’s current position on the map
- Click on the ‘Refresh’ button to refresh bus position on the map.
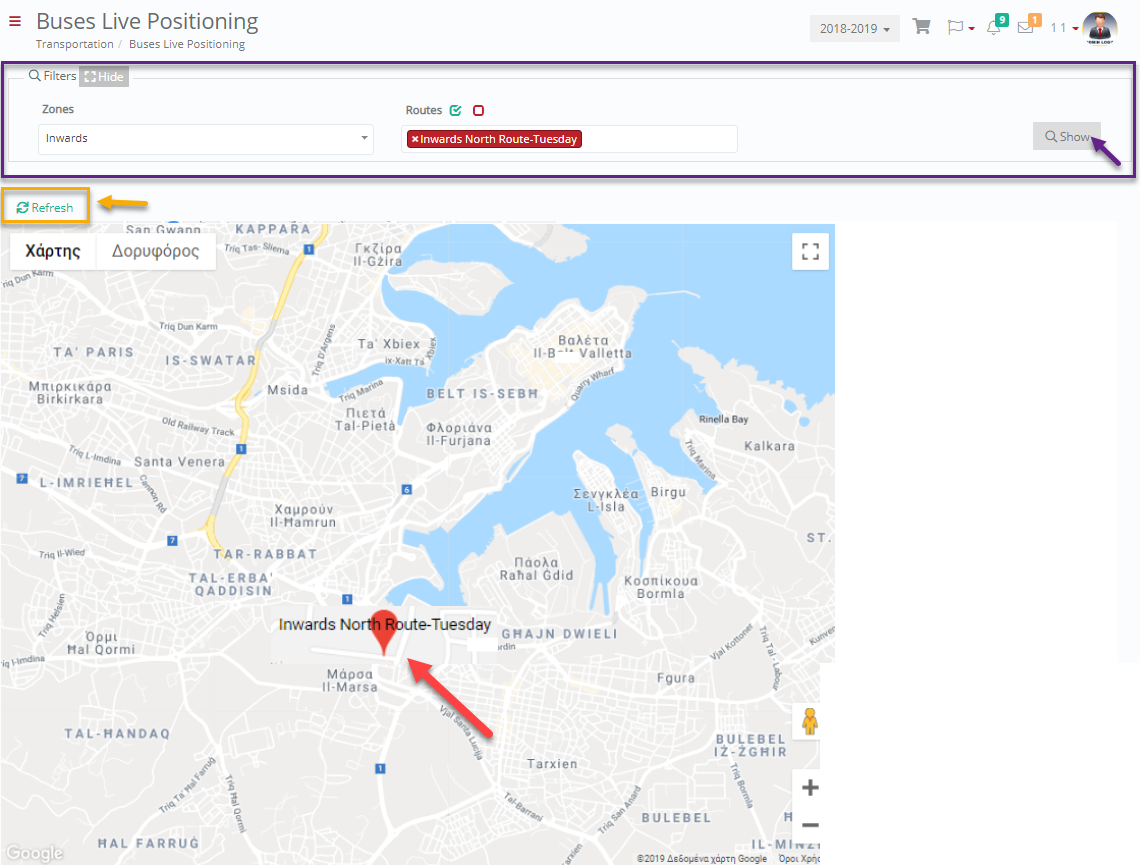
Figure 62