This manual provides a detailed guide to use the User Profile section and its relevant options in Classter. Specifically, we will discuss:
- My Profile
- Manuals & Videos
- Support
- Manage License
- Refer Classter & Get Benefits
- Sign out (Figure 1).
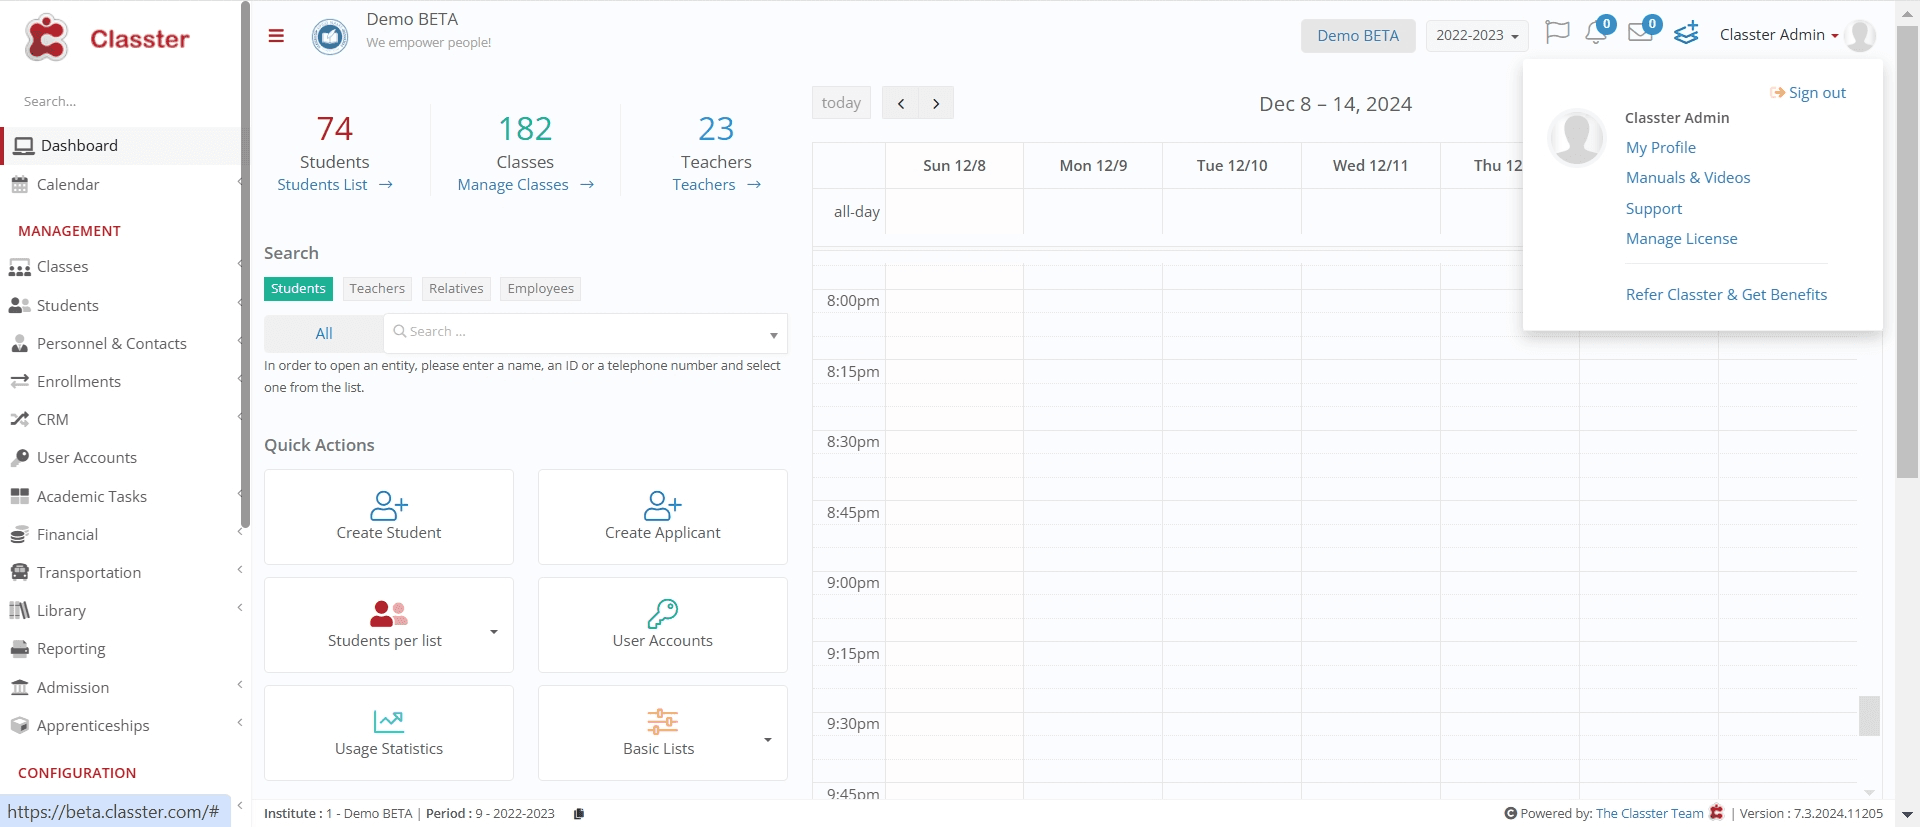 Figure 1
My Profile
The My Profile section enables you to view and edit your personal information, settings, and preferences.
To edit your profile, navigate to: User Actions > Name label > My Profile (Figure 2).
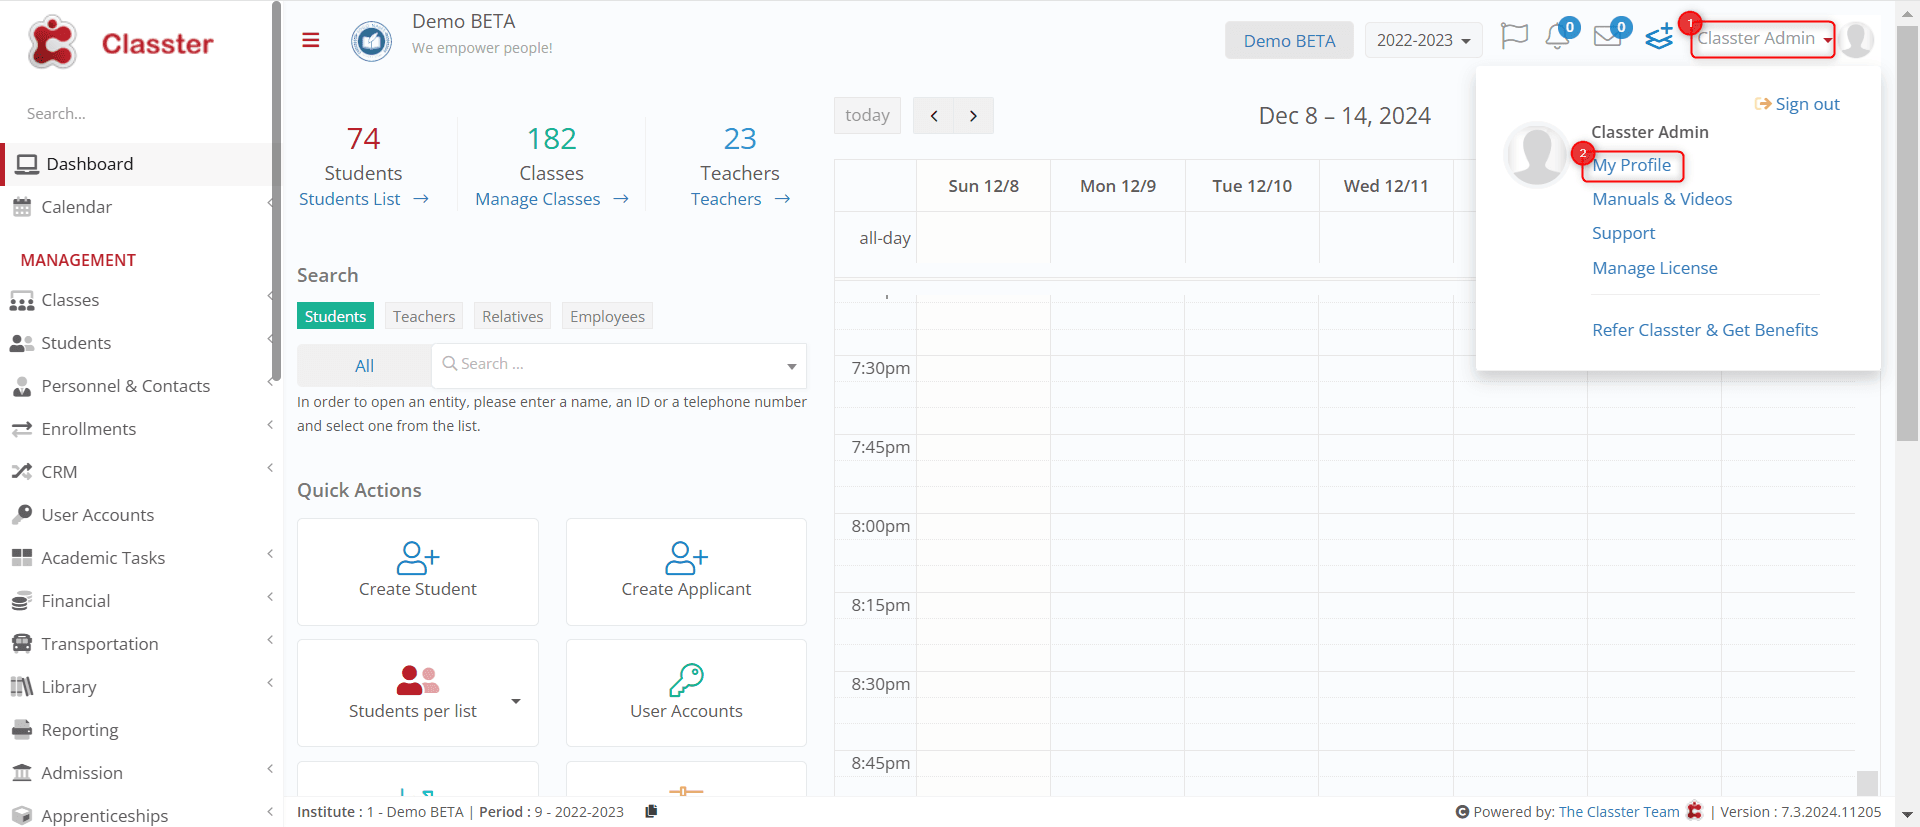 Figure 2
My Profile page includes the following sub-sections (Figure 3):
- Basic Data
- Security Preferences
- Themes
- Actions
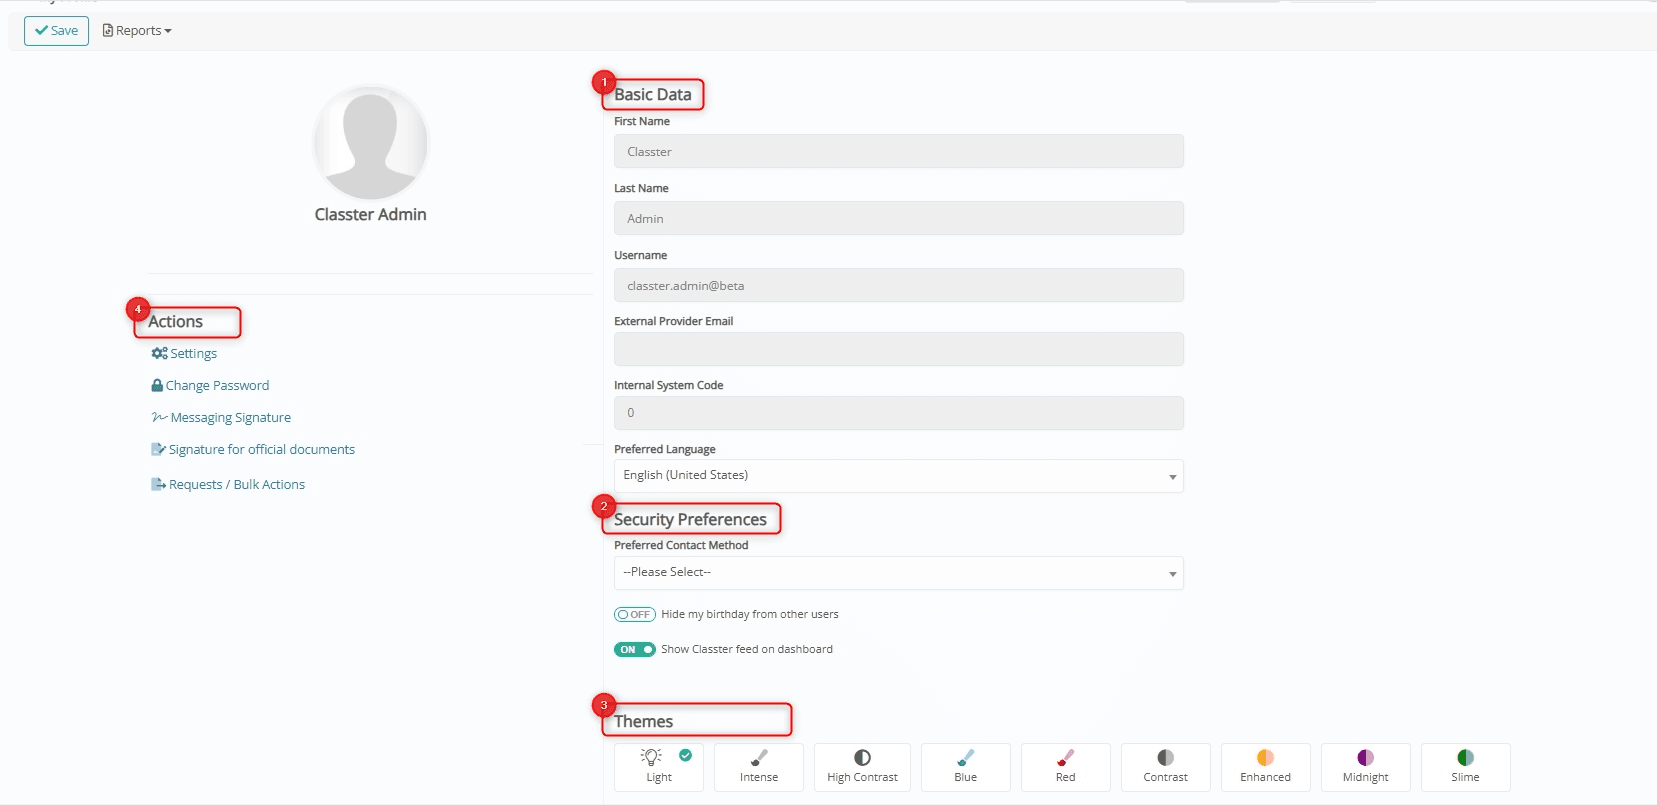 Figure 3
I. Basic Data
The Basic Data section contains your personal and institutional details (Figure 4):
- Profile Photo: Used to add or remove your profile photo.
- First Name: The user’s given name.
- Last Name: The user’s surname.
- Username: The login identifier assigned to the user.
- External Provider Email: Email associated with external authentication providers like Office 365 or Google.
- Internal System Code: A unique identifier user within Classter.
- Preferred Language: User’s preferred language for the interface.
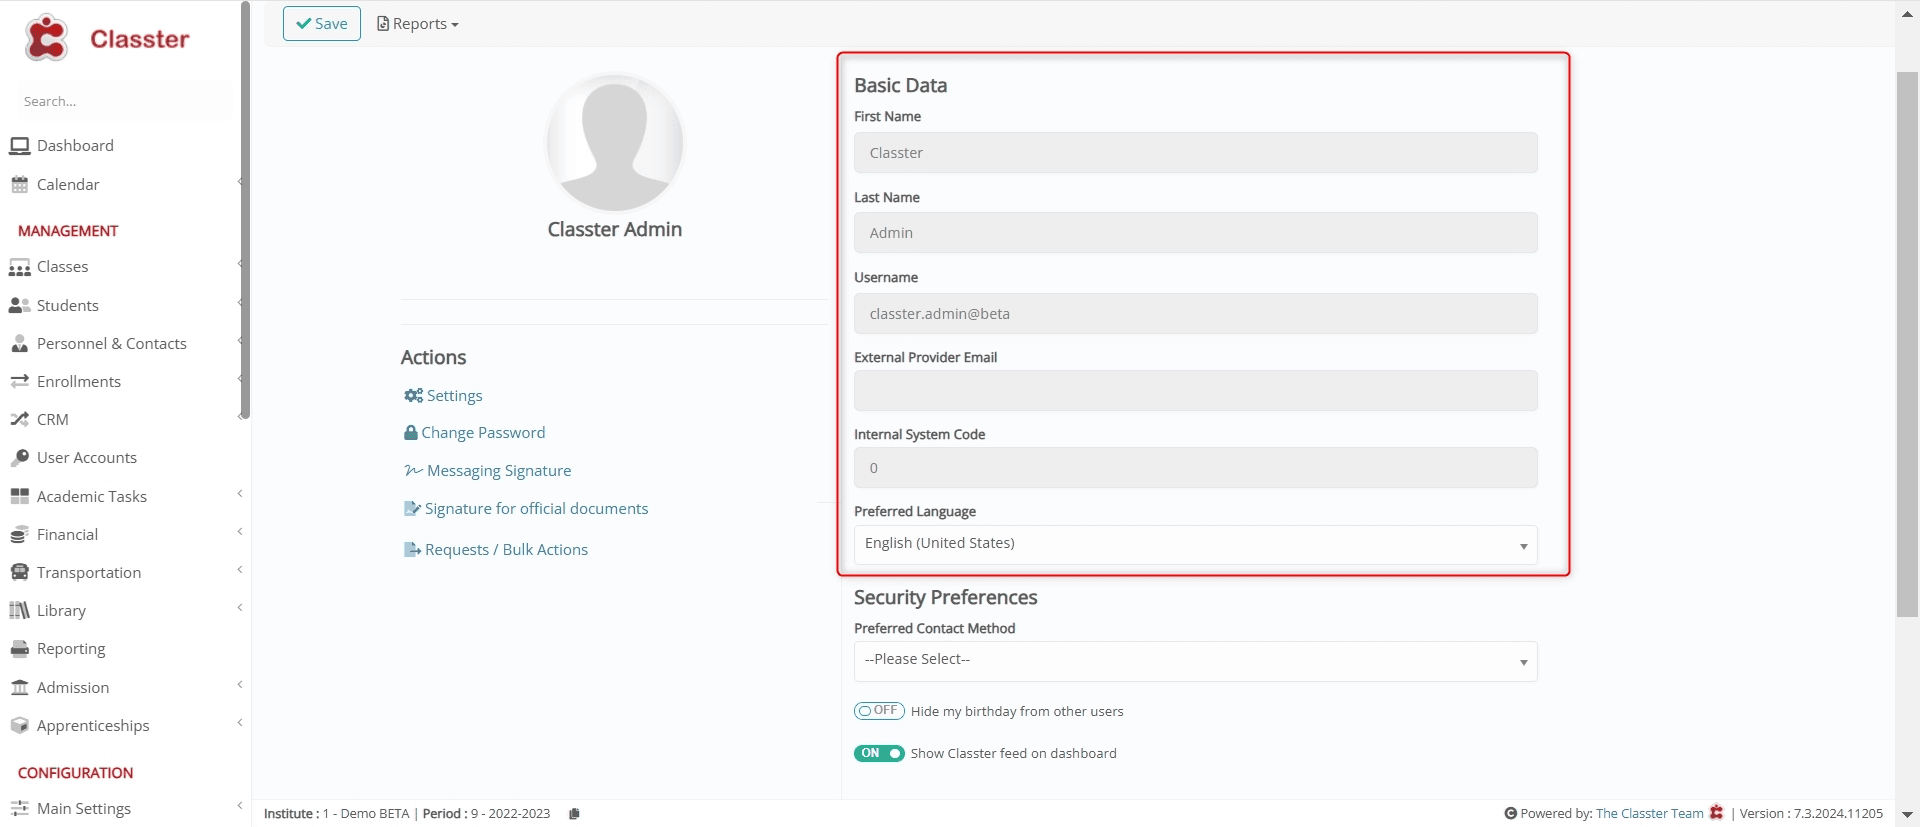 Figure 4
Note: Fields may be customized or restricted by the institution’s permission like settings them read only, etc.
II. Security Preferences
The Security Preferences section enables you specify security-related options and visibility settings (Figure 5).
- Preferred Contact Method: Select how you would like to receive notifications via Email, Internal Message, etc. (Admin has the privilege to set the contact method)
- Hide my birthday from other users: Enable or disable it to make your birthday visible or hidden to other users.
- Show Classter feed on dashboard: Enable or disable updates on your dashboard.
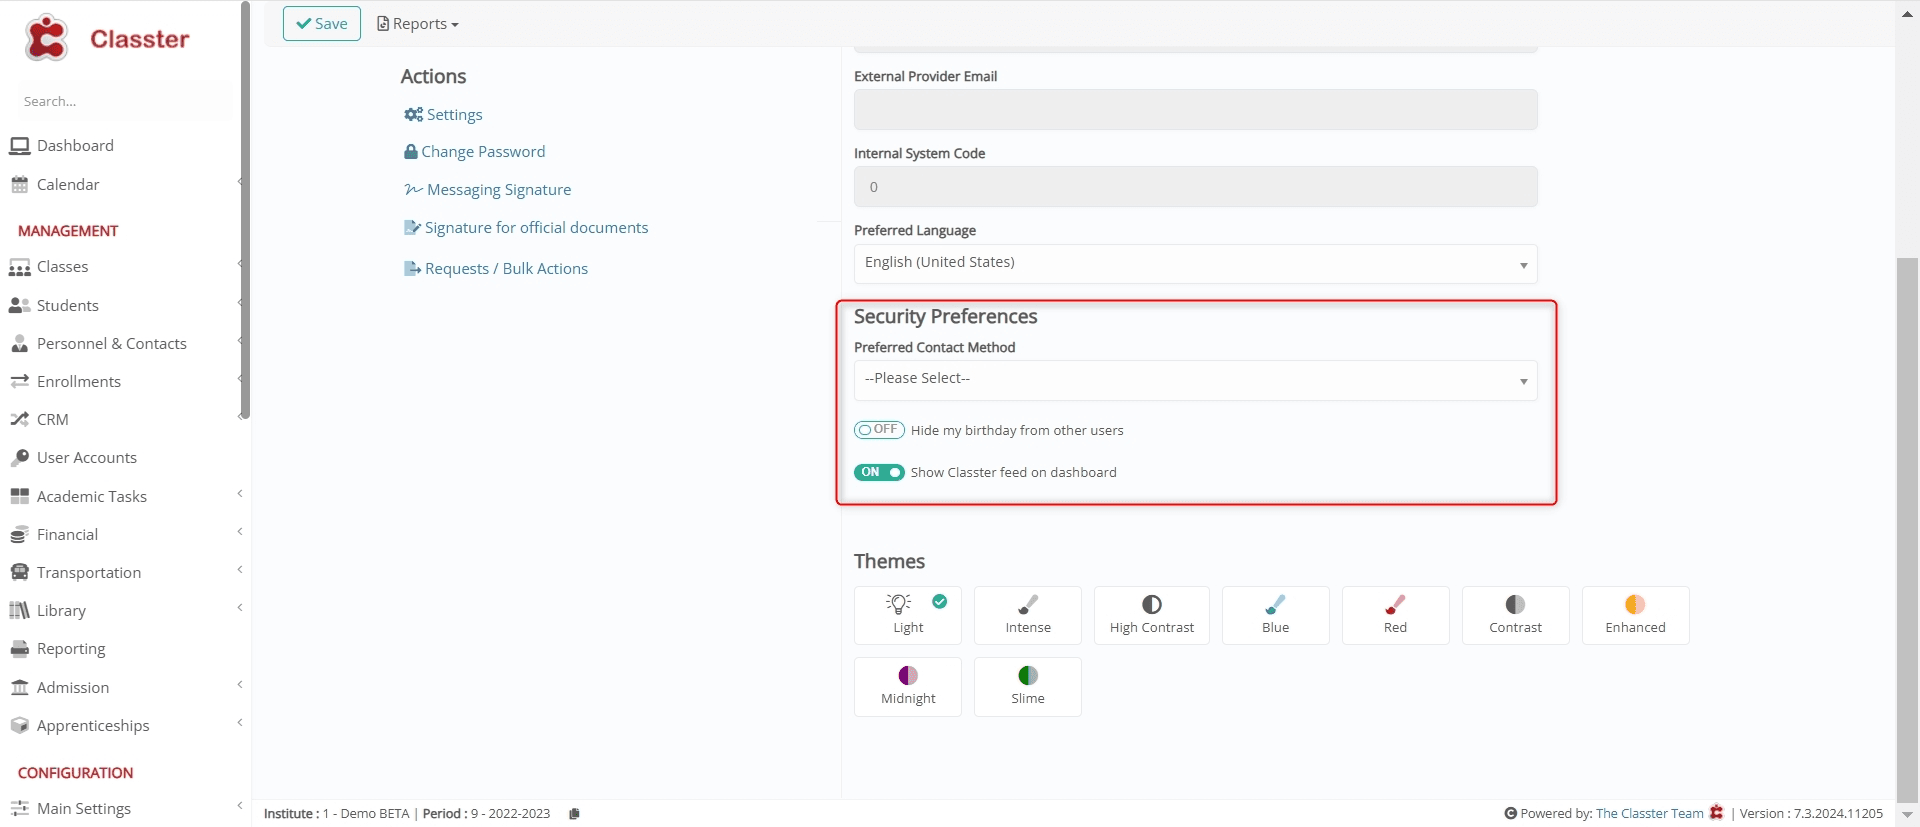 Figure 5
III. Themes
Choose from various interface themes to personalize the look and feel of Classter. This includes Light, Intense, High Contrast, Blue, Red, Contrast, Enhanced, Midnight, Slime, etc., (Figure 6).
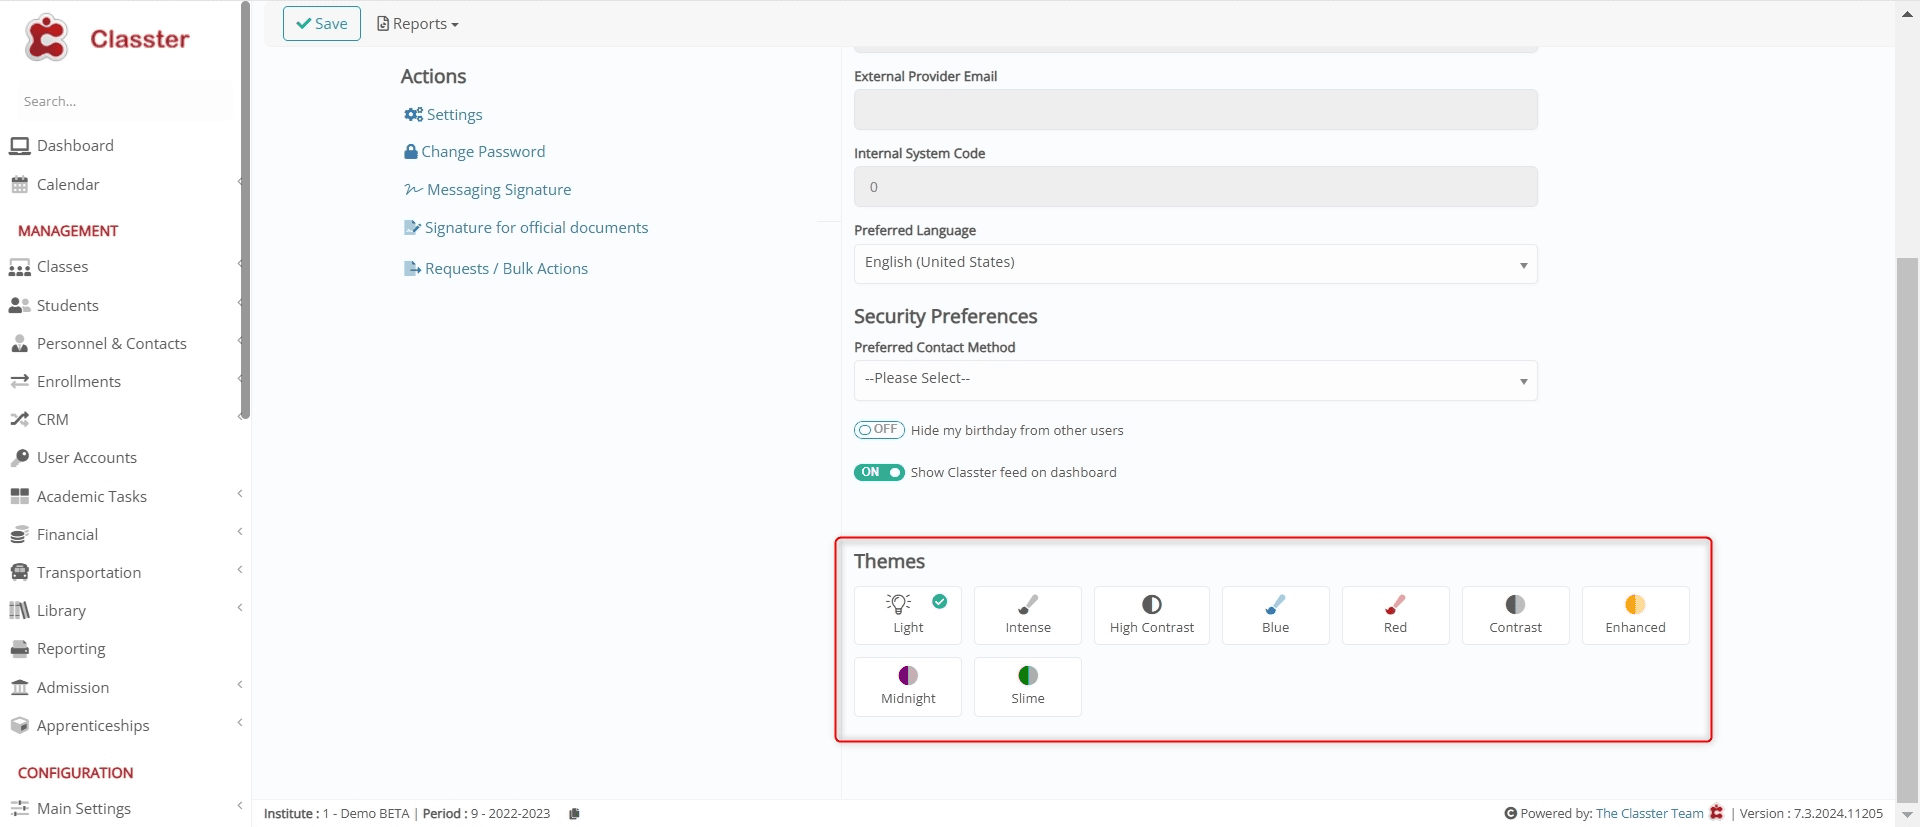 Figure 6
IV. Actions
The Actions menu is used to perform key account managements tasks. For instance:
- Settings
- Change Password
- Messaging Signature
- Signature for official documents
- Requests / Bulk Actions (Figure 7).
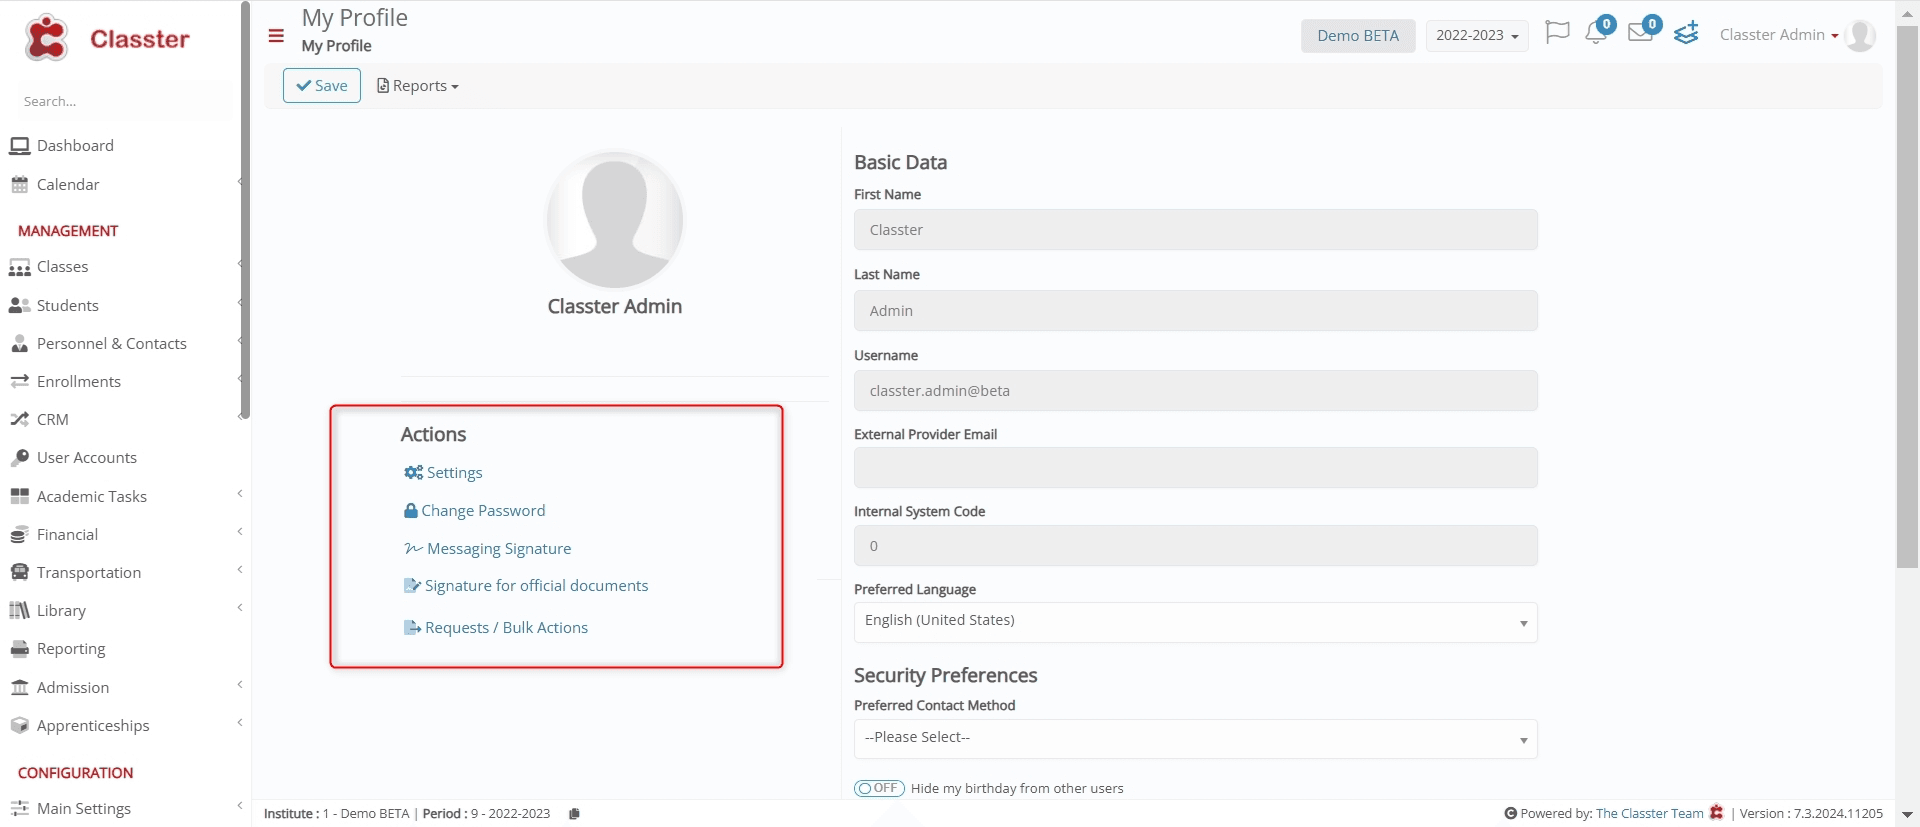 Figure 7
A. User Settings
User Settings pop-up window helps you to adjust various user-specific settings (Figure 8):
- FONT SIZE: Customize the text size in Classter.
- STUDENTS: Used to configure, Students’ Default View, Default Registration Status, Default value in the free text filter, Default value in student search filter, etc.
- CRM: User to set Default CRM Action Category.
- POSITION CALENDAR: Used to Position Calendar Default View.
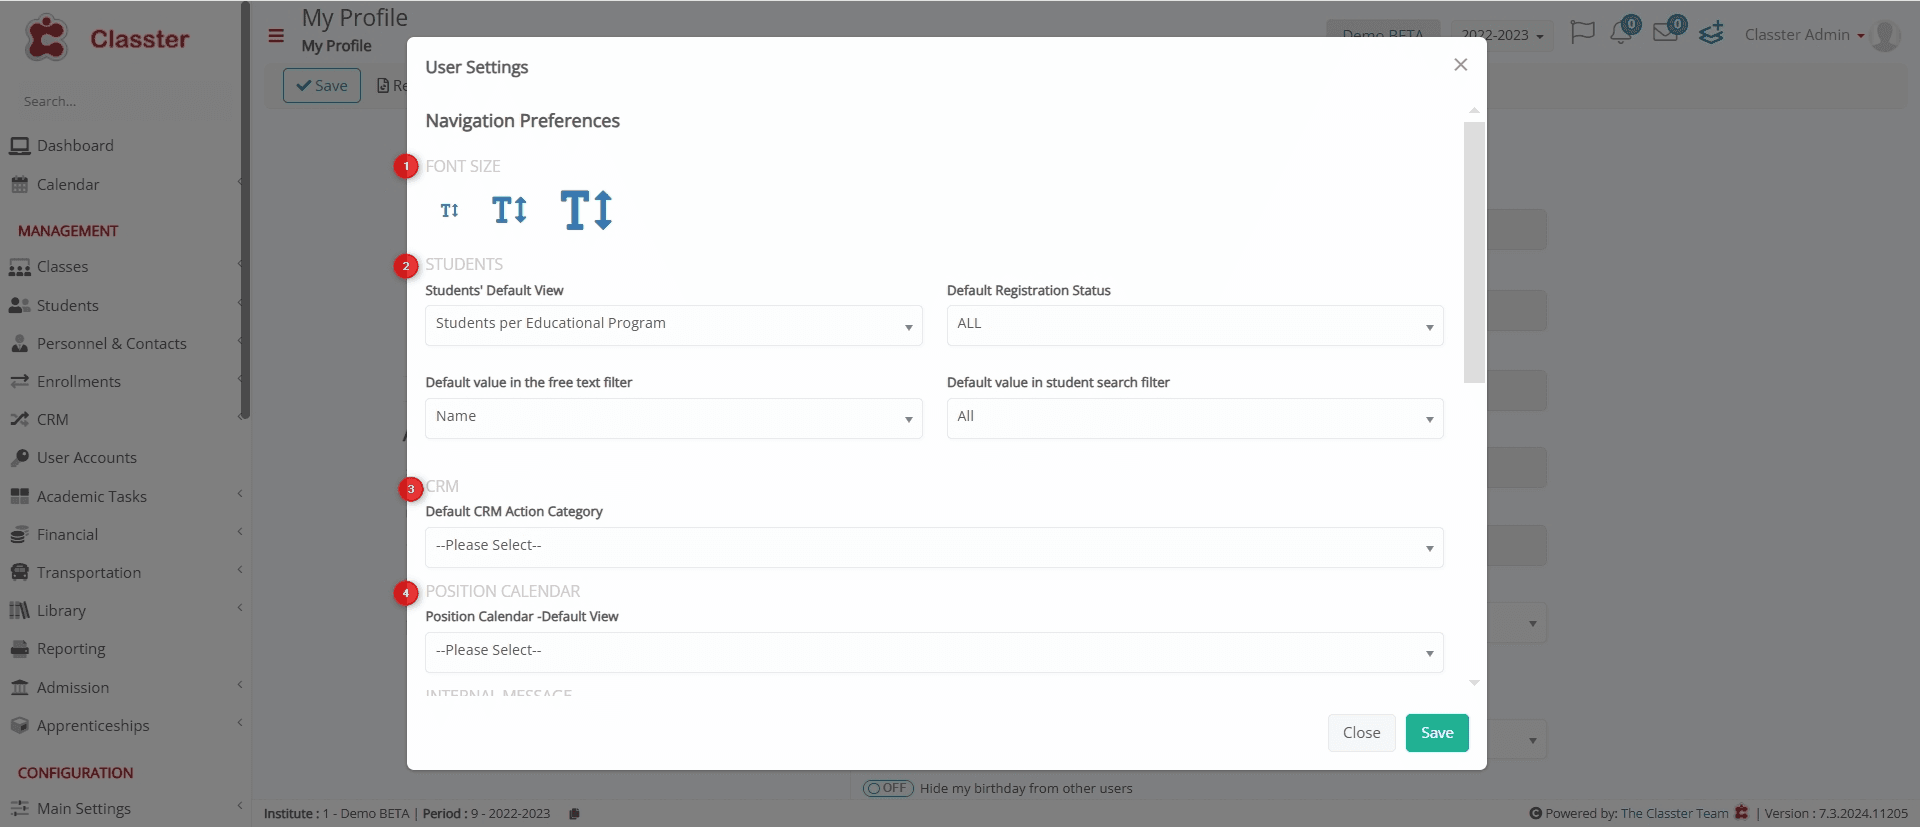 Figure 8
- INTERNAL MESSAGE: Used to assign Default Internal Message Category.
- CALENDAR: Used to set Default Calendar View.
- PRESELECTED FILTERS: Used to configure default filters for Nationality and Faculty.
- FAST ATTENDANCE: Configure preferred hours, attendance submission methods, and attendance categories as an Administrator. (Figure 9).
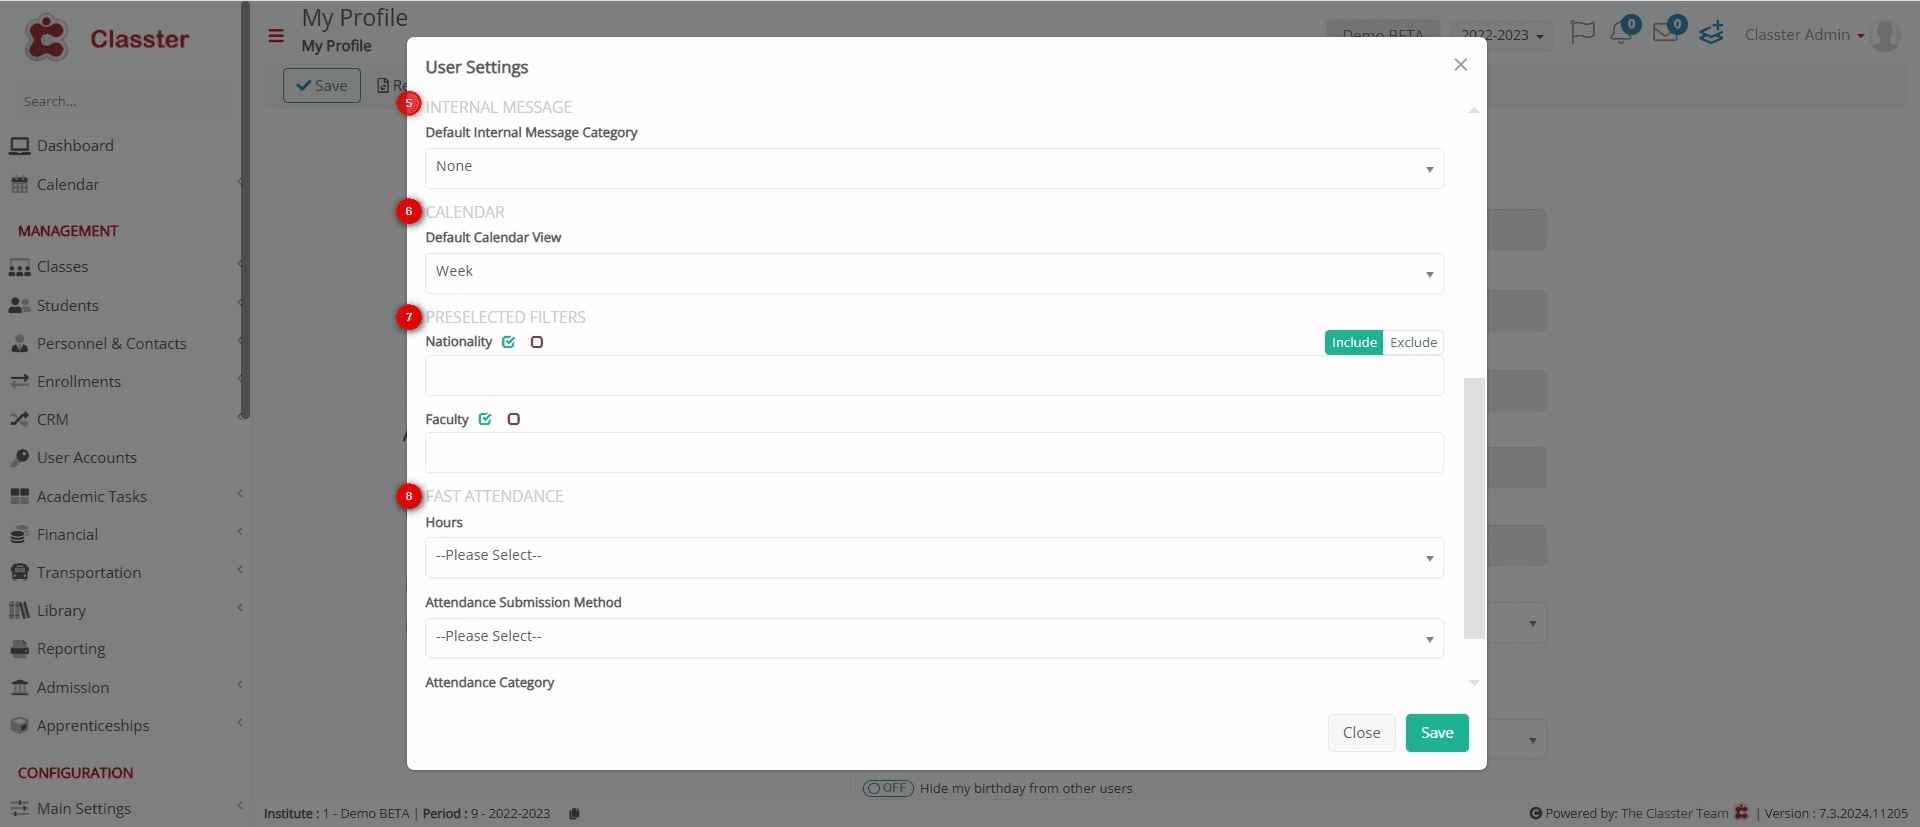 Figure 9
B. Change Password
To update your account password, click on Change Password > Enter Current Password > Enter the new Password > Change (Figure 10).
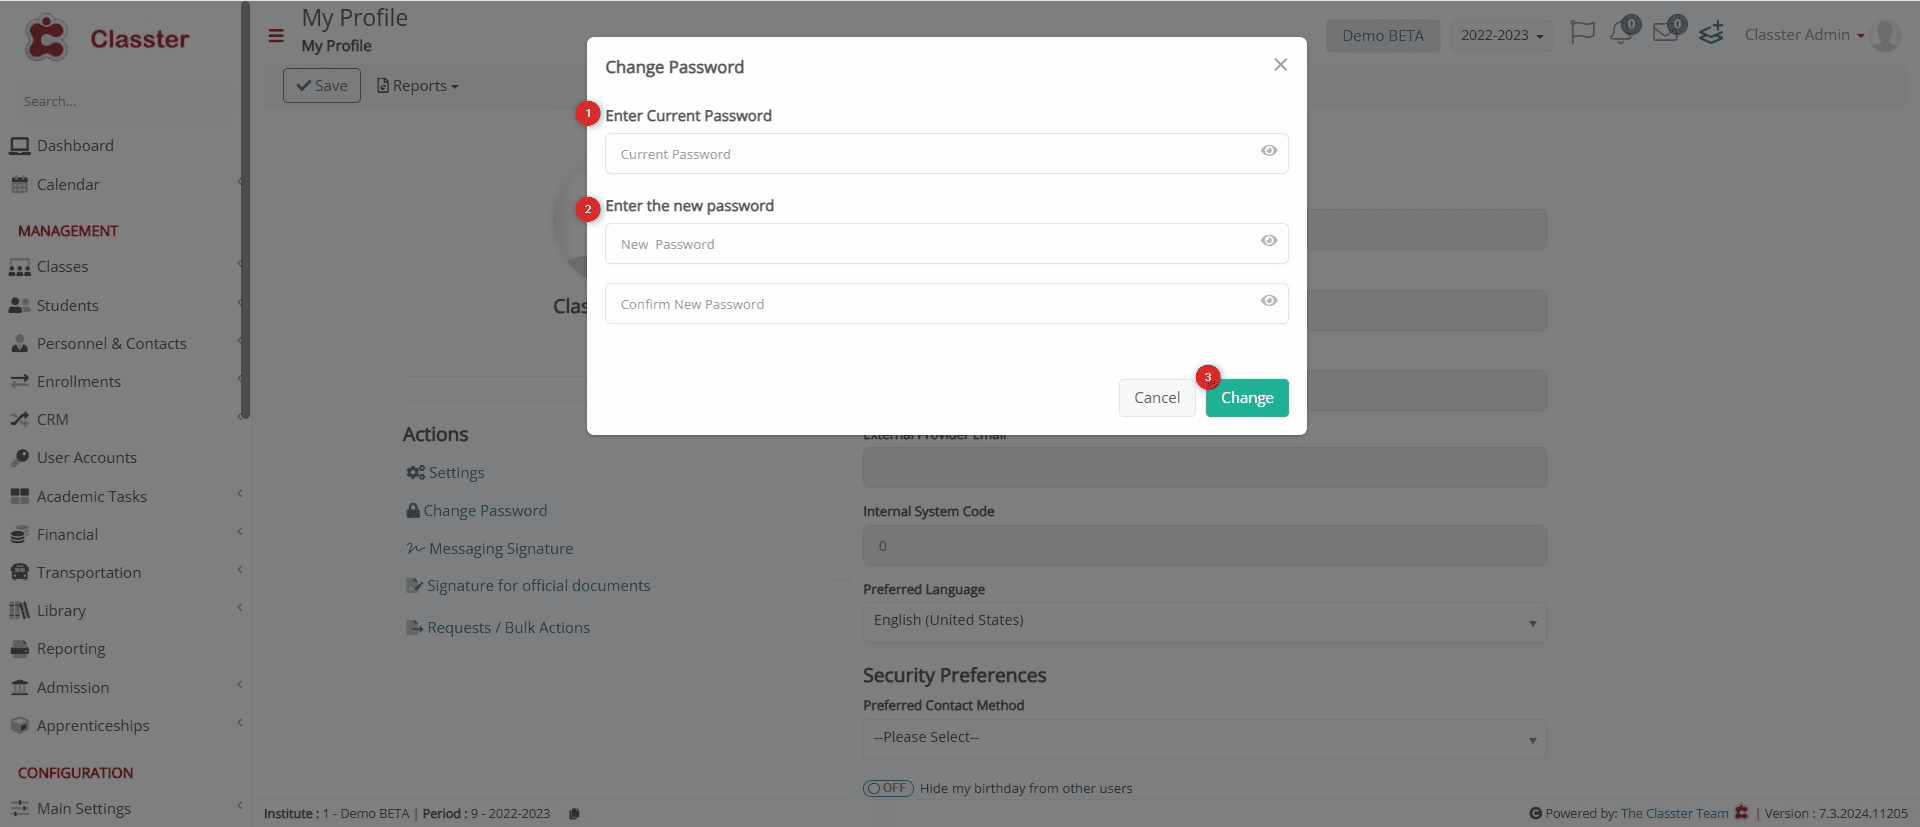 Figure 10
C. Messaging Signature
Create a default signature for use in internal communication within Classter, like sending messages from the portal (Figure 11).
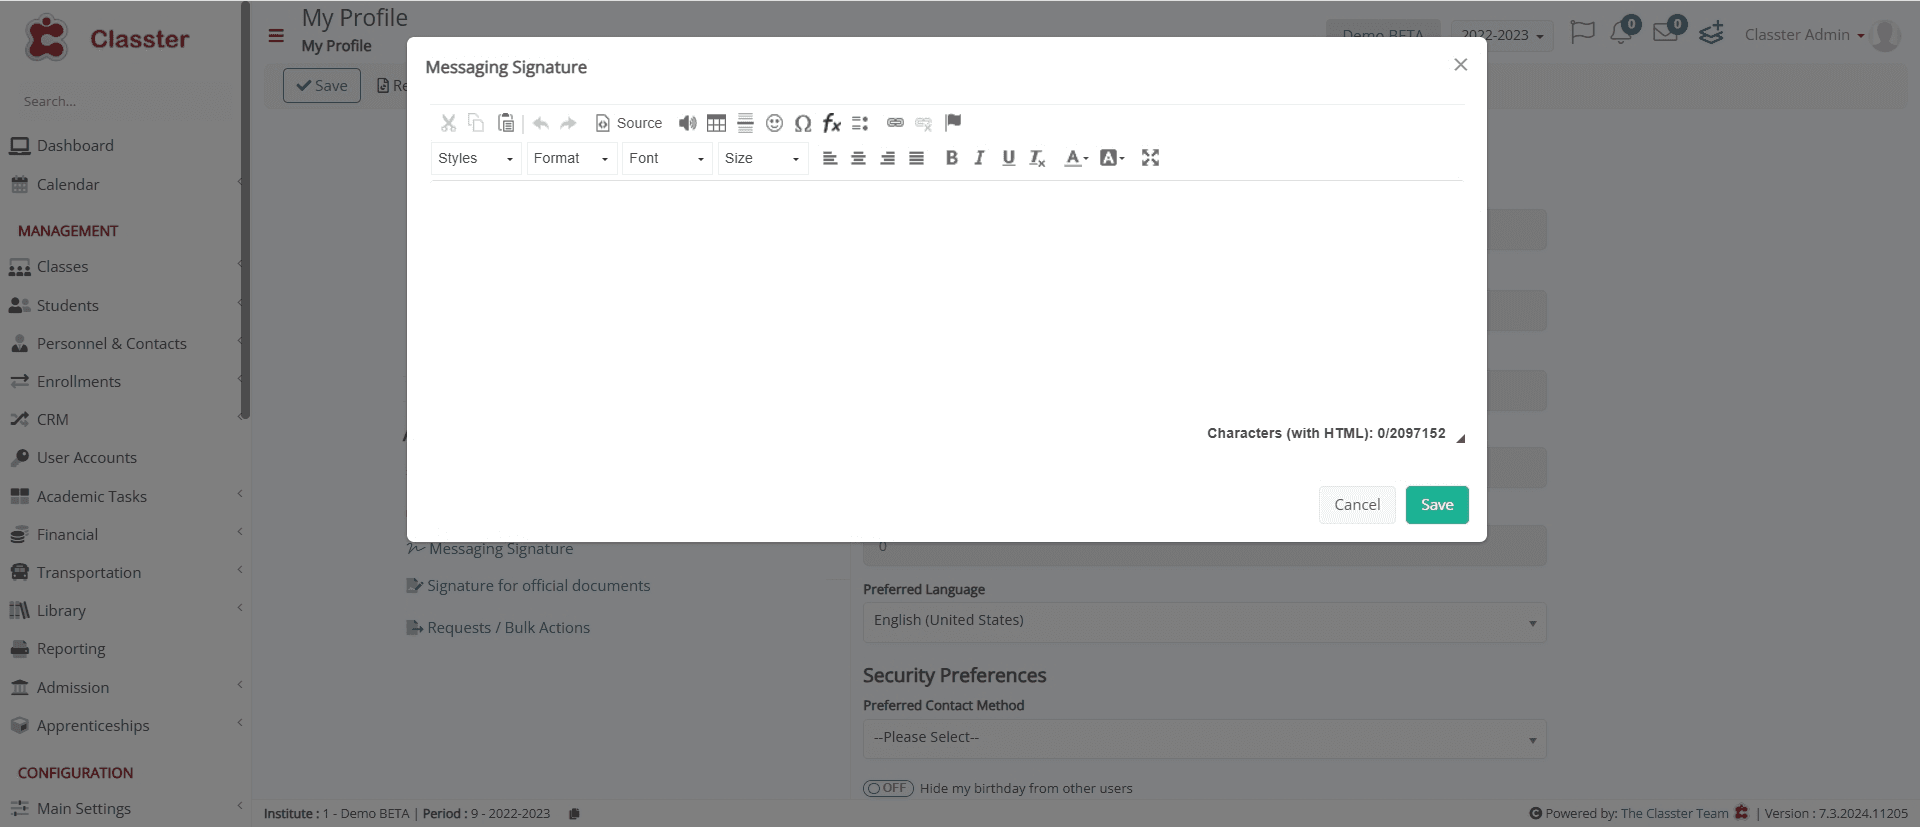 Figure 11
D. Signature for official documents
Upload a signature template for signing forms and consents (Figure 12).
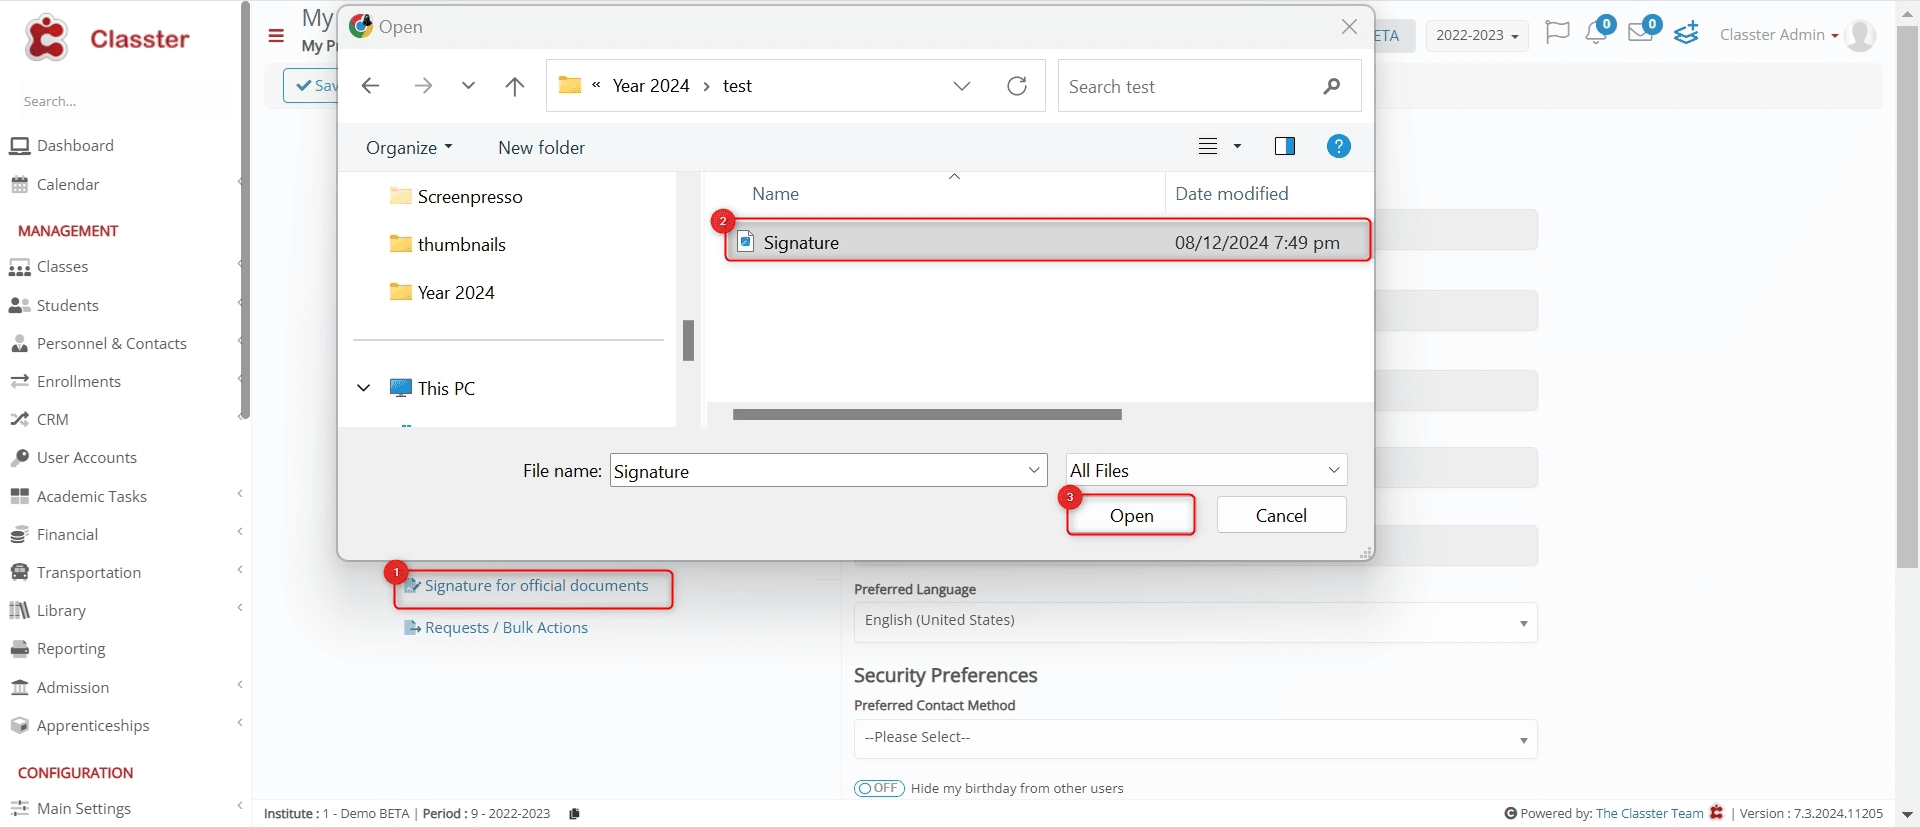 Figure 12
E. Requests / Bulk Actions
Request / Bulk Actions window is used to view and manage submitted requests or perform bulk actions. Its fields include (Figure 13):
- Date, action, status, and comments (10 entries per page).
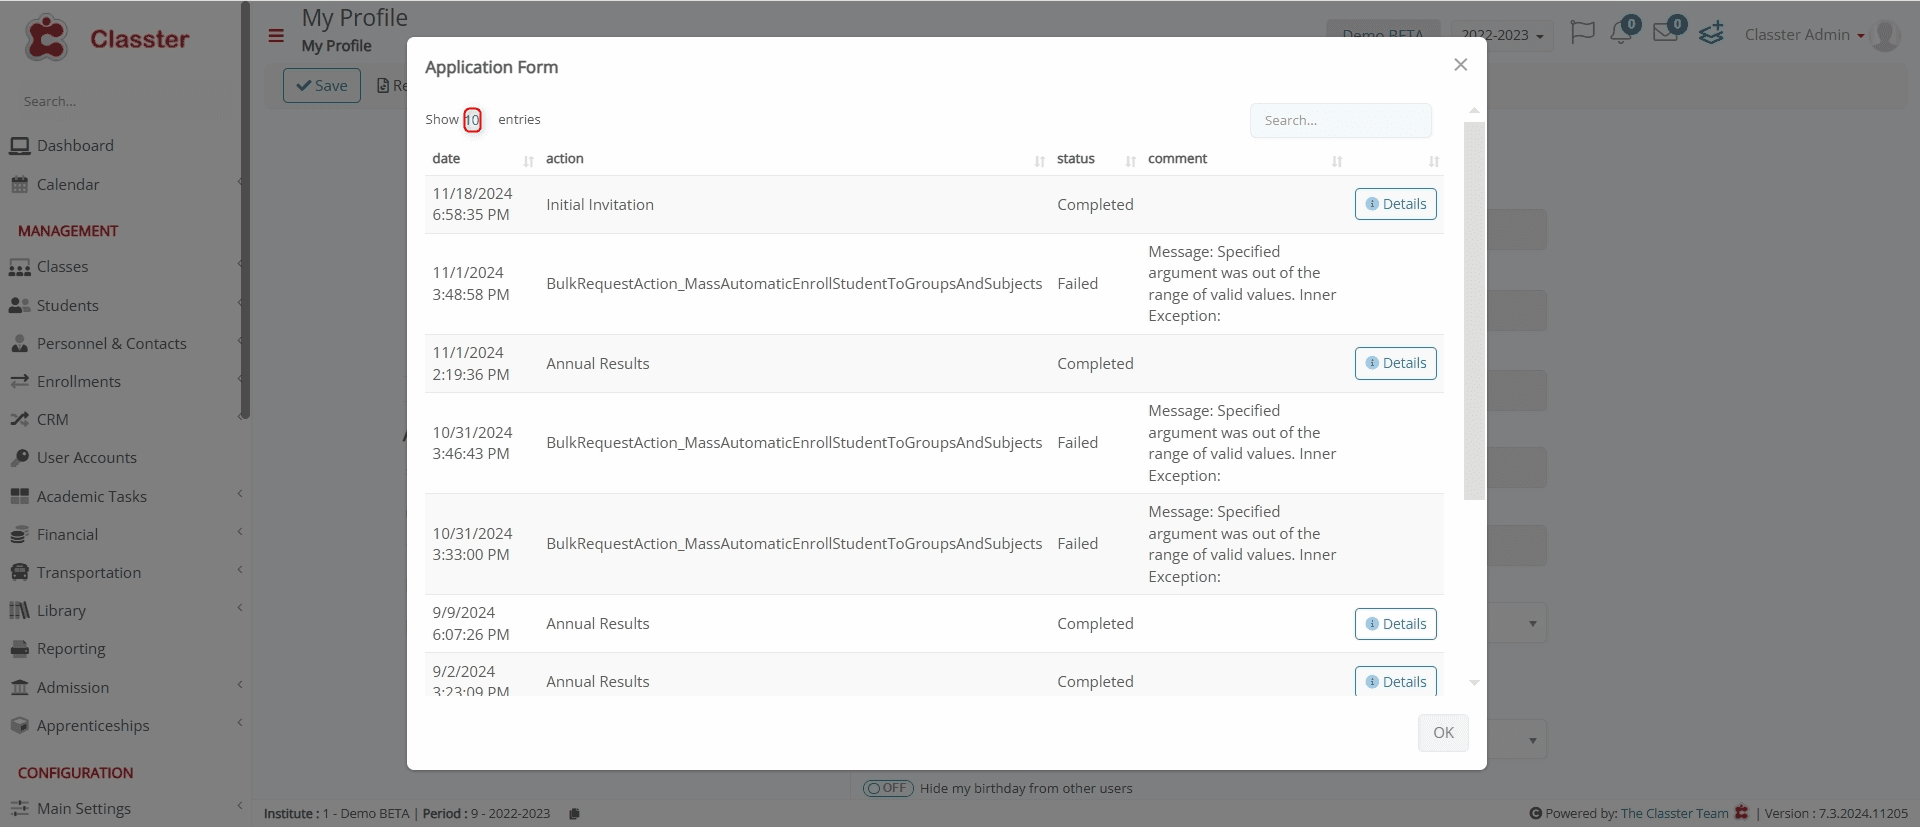 Figure 13
Reports (Core SIS)
The Reports (CORE SIS) section provides access to specific reports (Figure 14).
- Personal Data: Generate a report displaying all personal information held by your institution.
- Attendance Submission: Access and review attendance-related submissions for your profile.
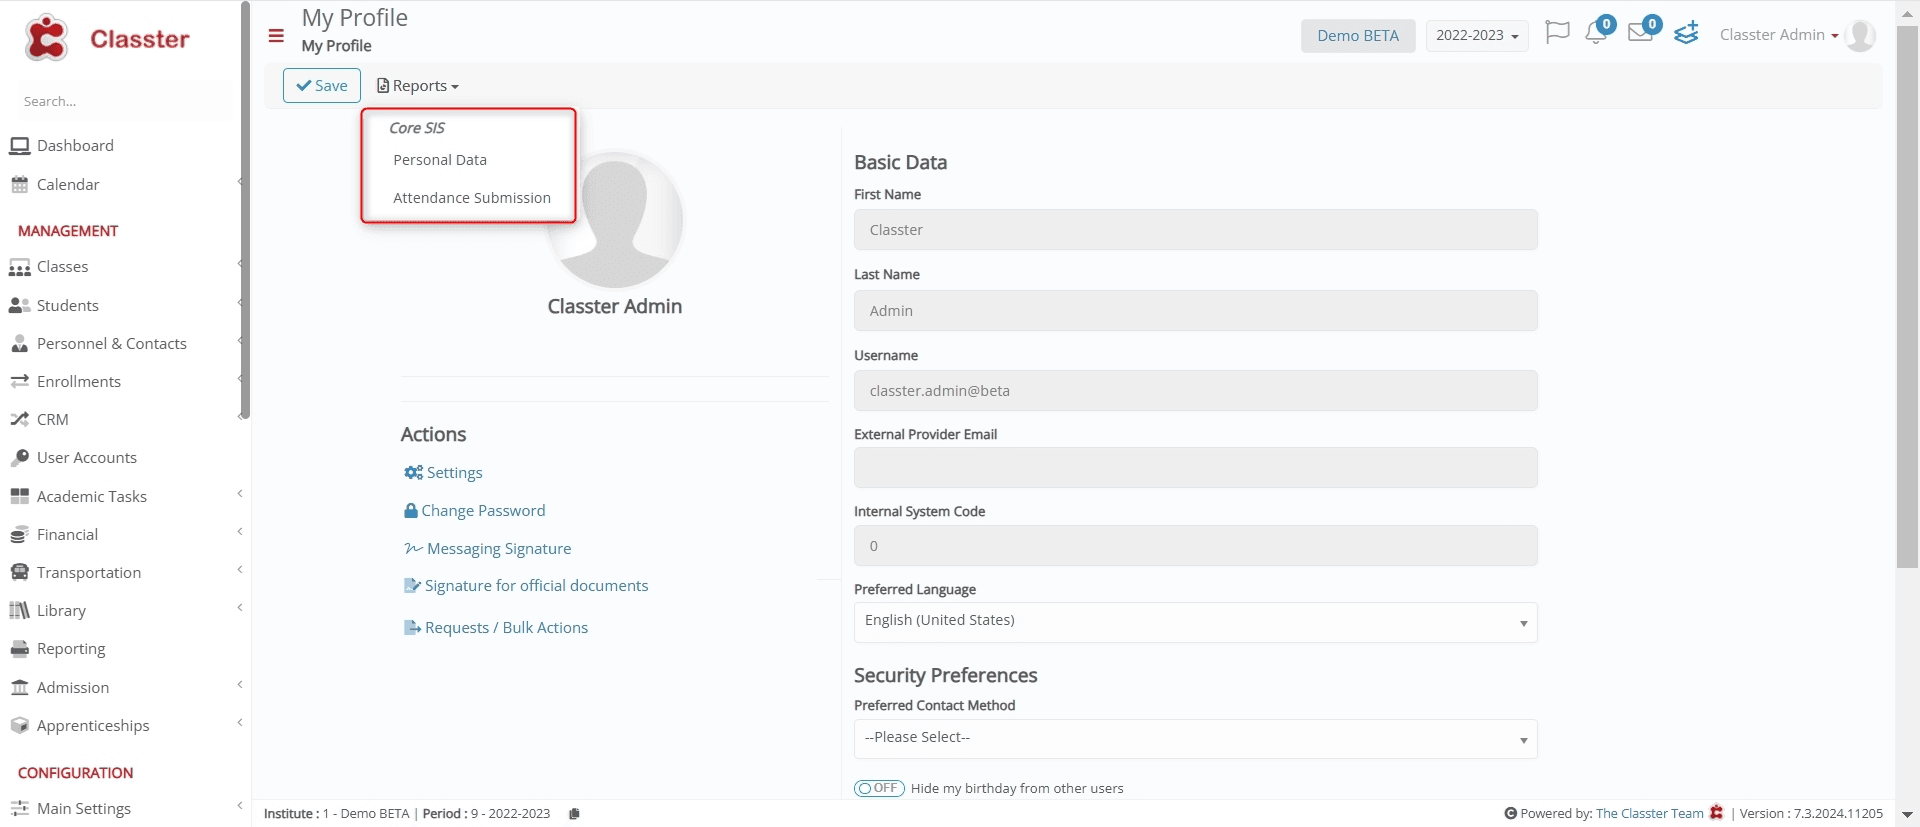 Figure 14
Manual & Videos
Click on Manual & Videos option to access helpful resources to maximize your Classter experience (Figure 15).
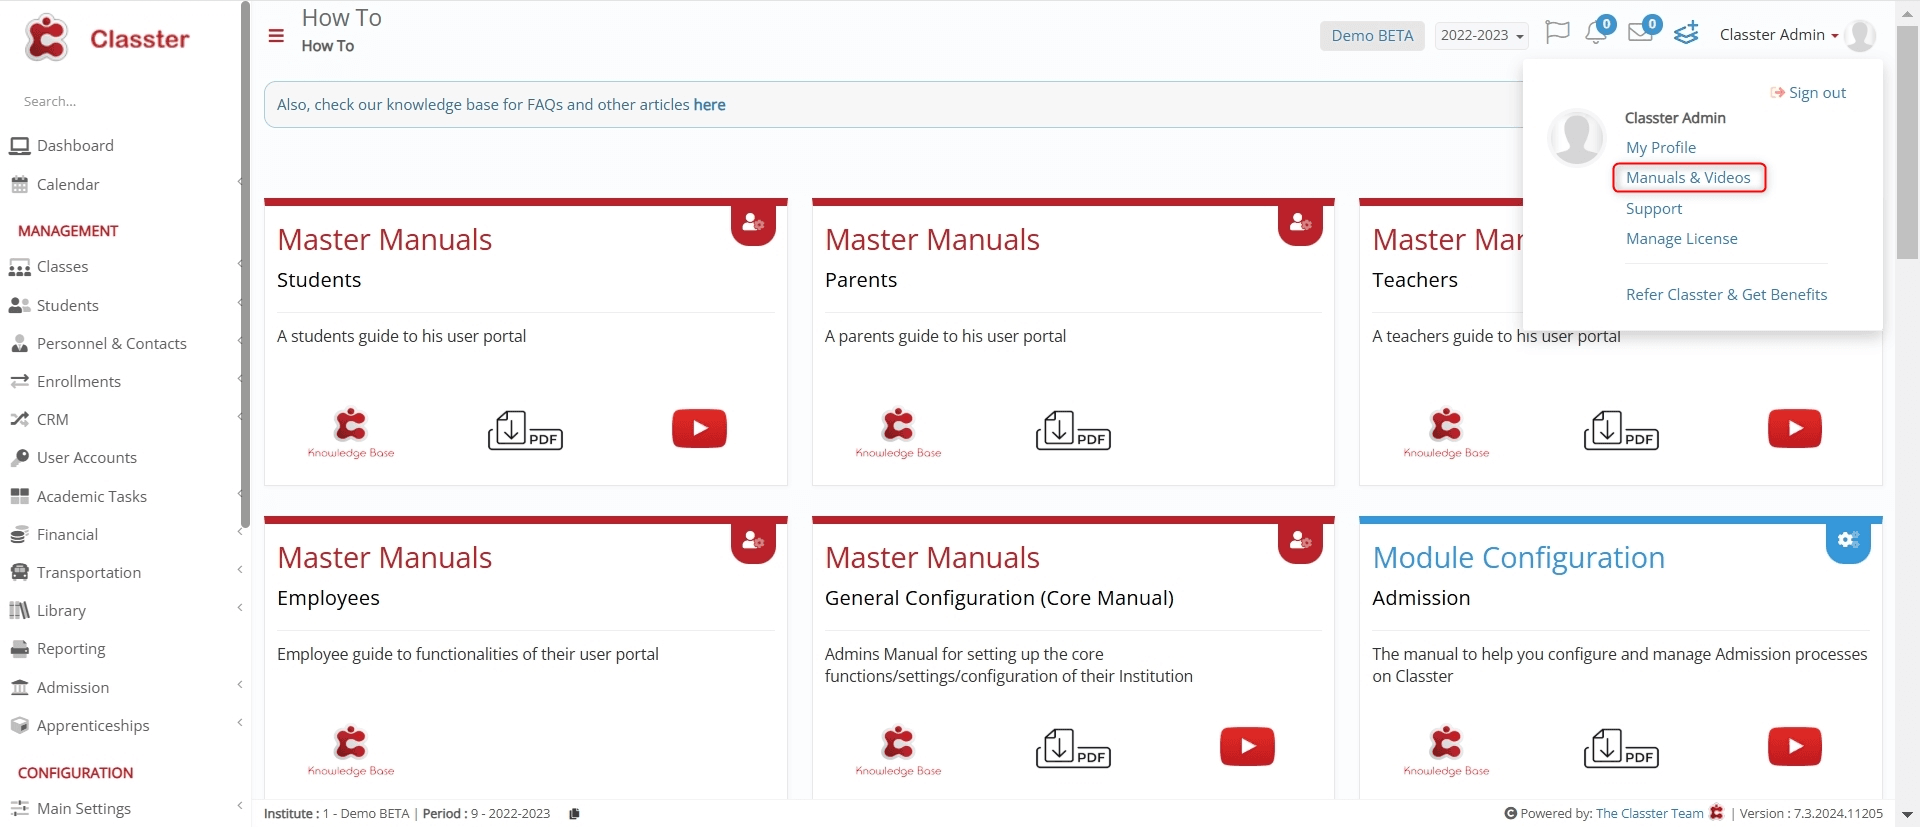 Figure 15
Knowledge Base: Find FAQs, user guides, app settings, and integration manuals (Figure 16).
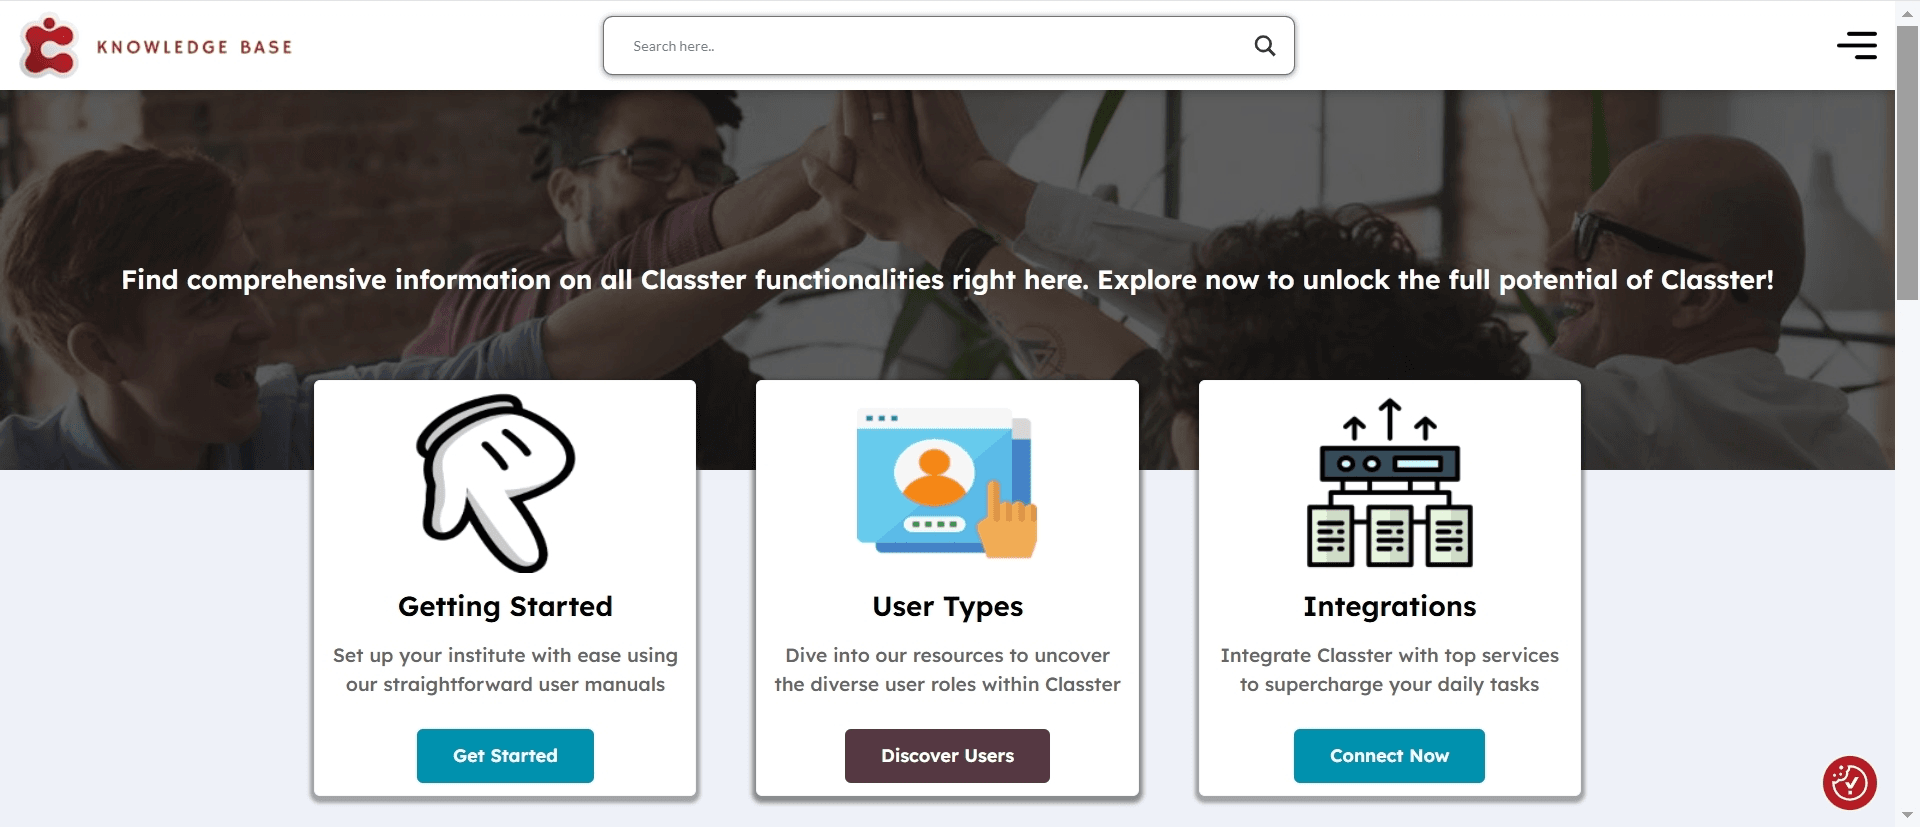 Figure 16
YouTube Channel: Watch tutorials, feature overviews, and webinars for guidance related to Classter usage (Figure 17).
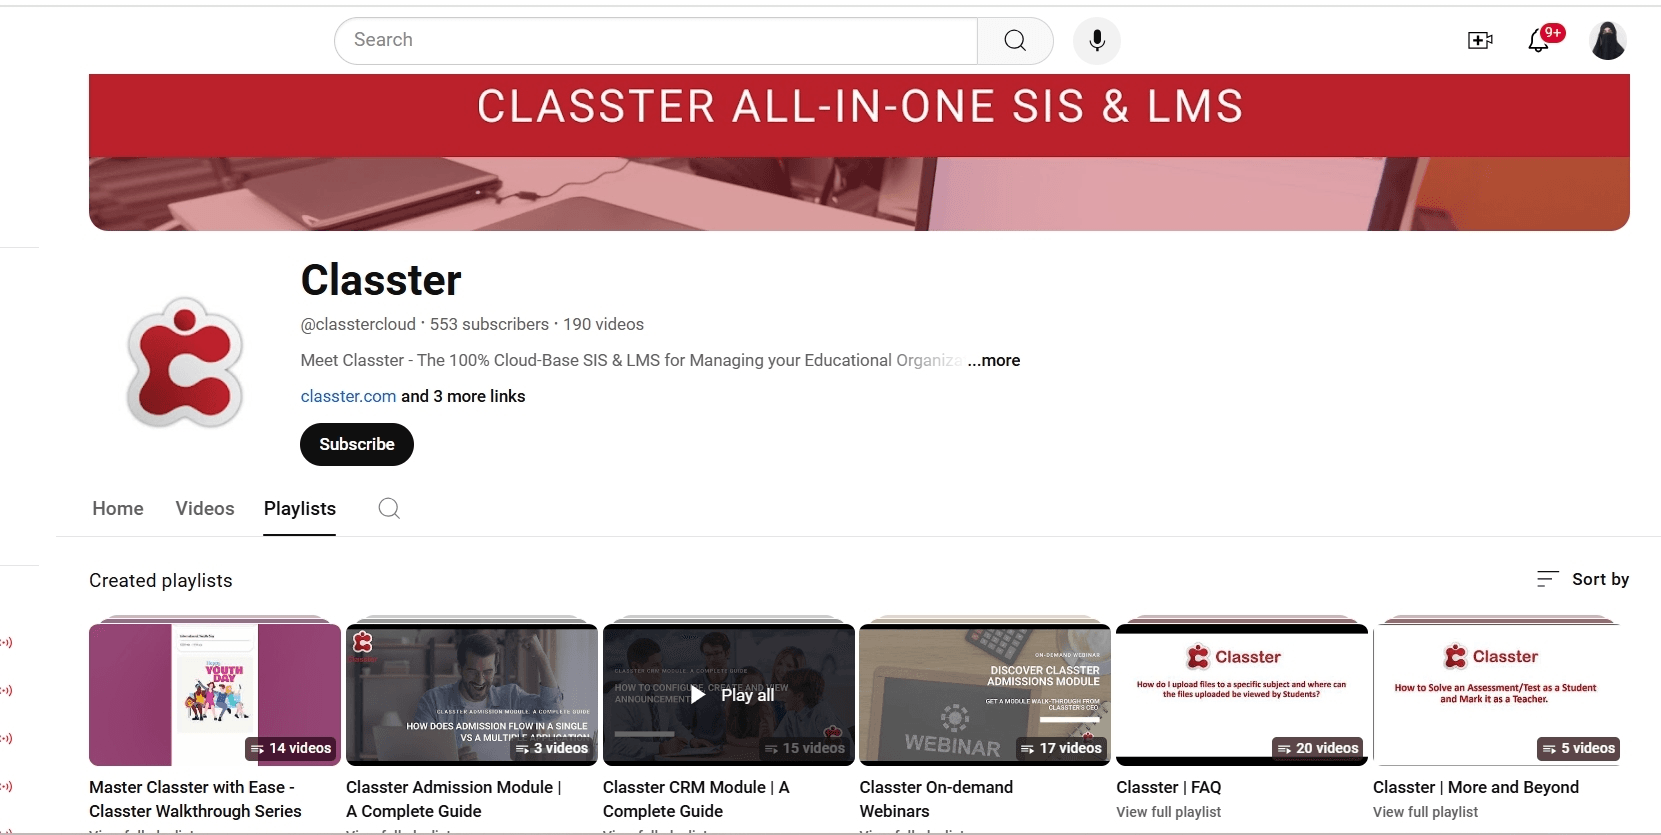 Figure 17
Support
Click on Support to get help or submit support tickets.
Freshdesk portal: Redirects you to Classter’s Support Portal for solutions to known issues, creating new support tickets, tracking the status of a submitted ticket, etc., (Figure 18).
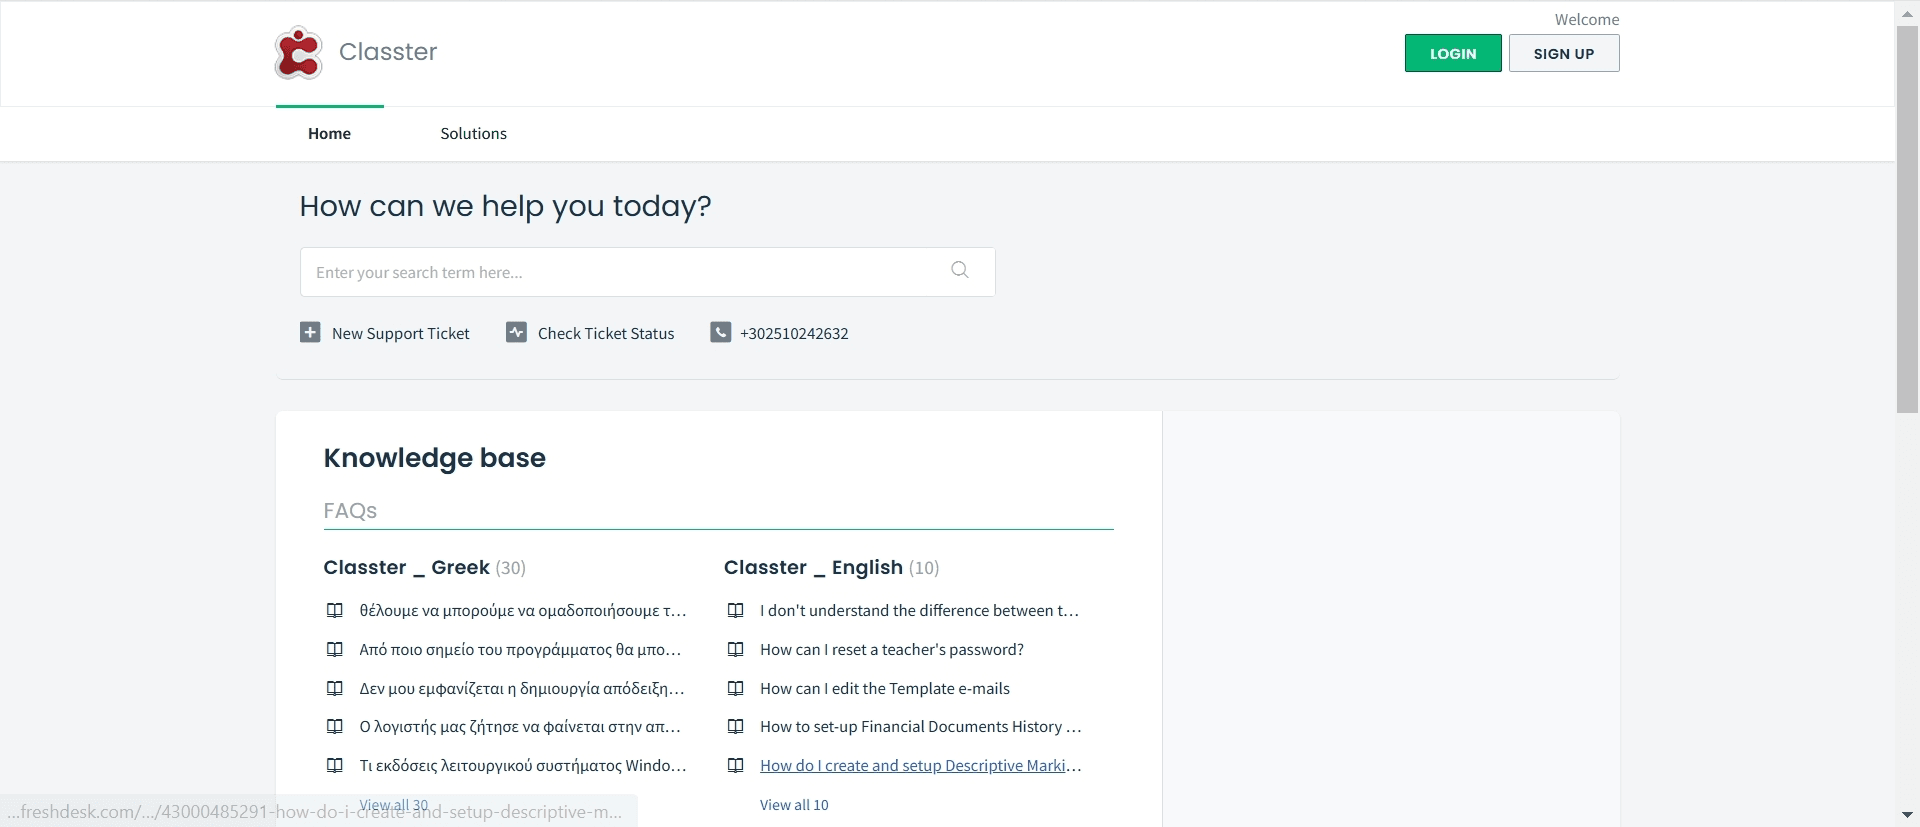 Figure 18
Manage License
View and manage active subscription information, including license details and usage (Figure 19).
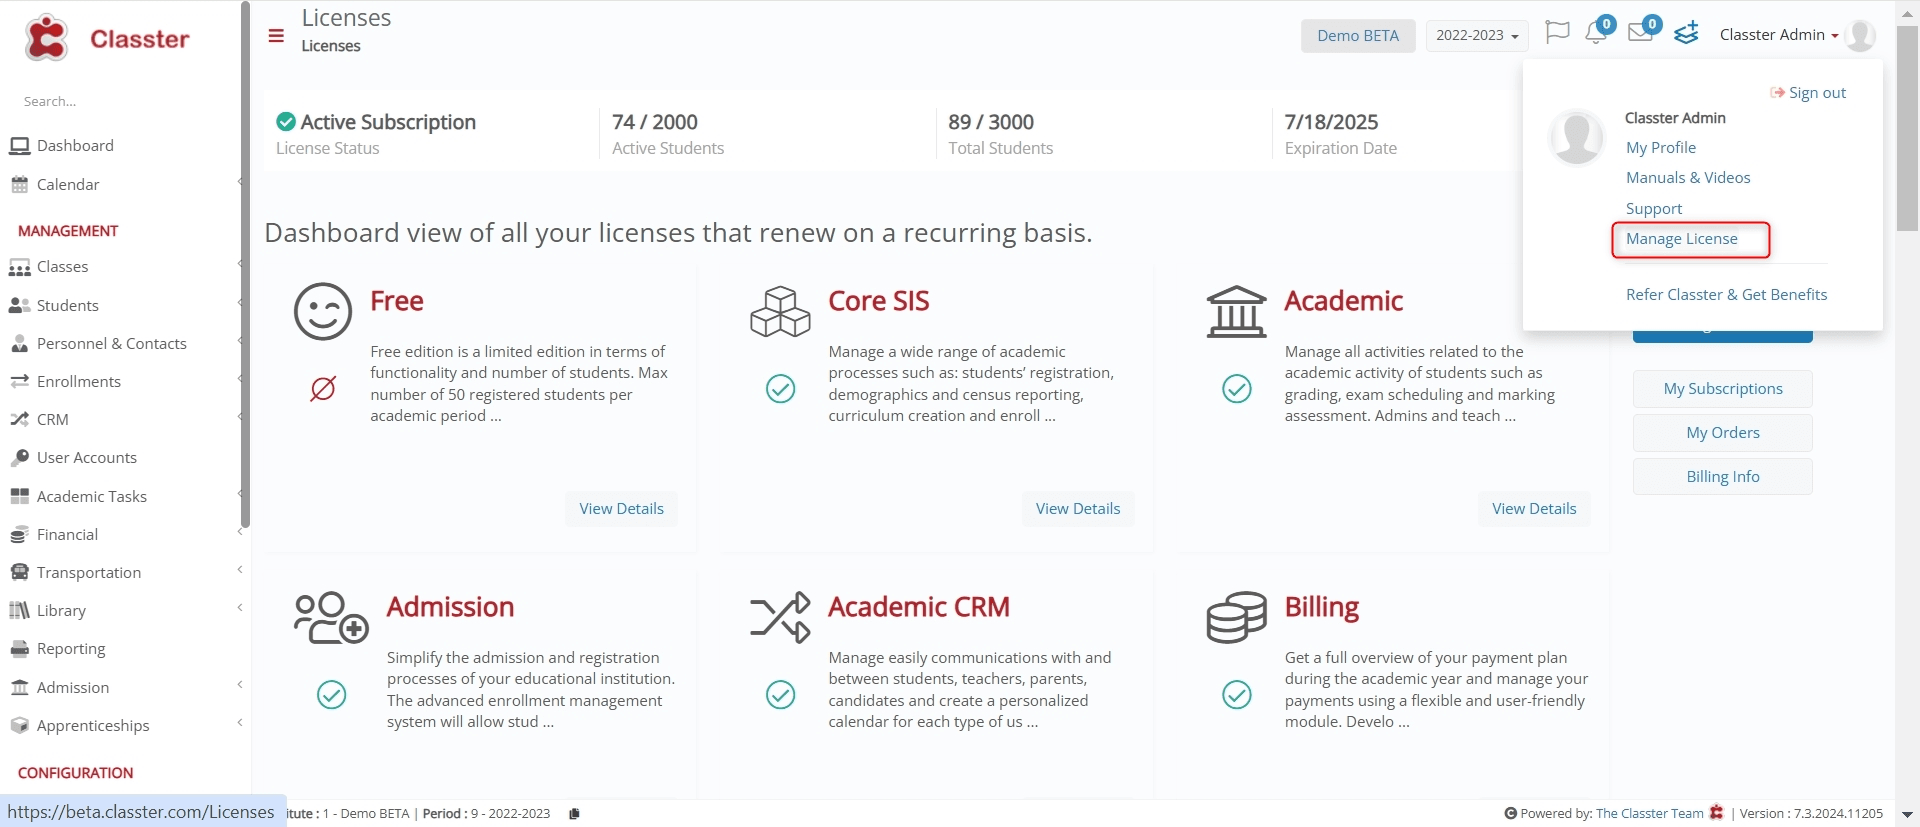 Figure 19
Refer Classter & Get Benefits
Earn rewards by referring Classter to others (Figure 20).
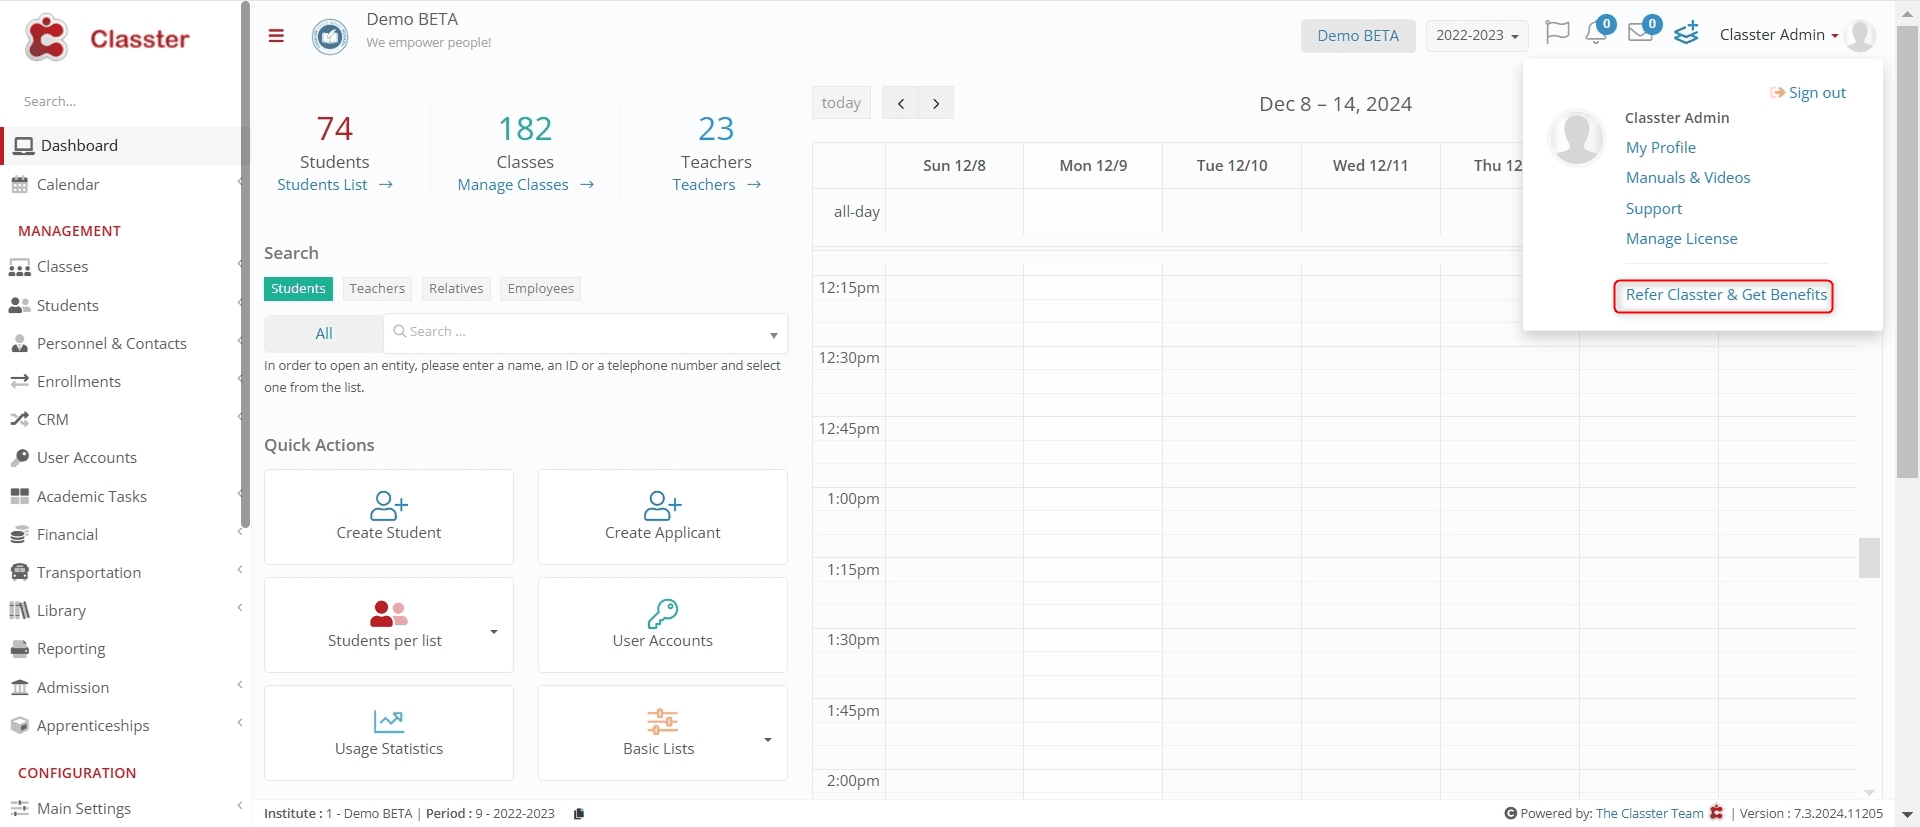 Figure 20
Sign out
To log out of Classter:
- Click on the name label and select Sign out.
- If logged in via Office 365 or Google, signing out will also log you out of those platforms (Figure 21).
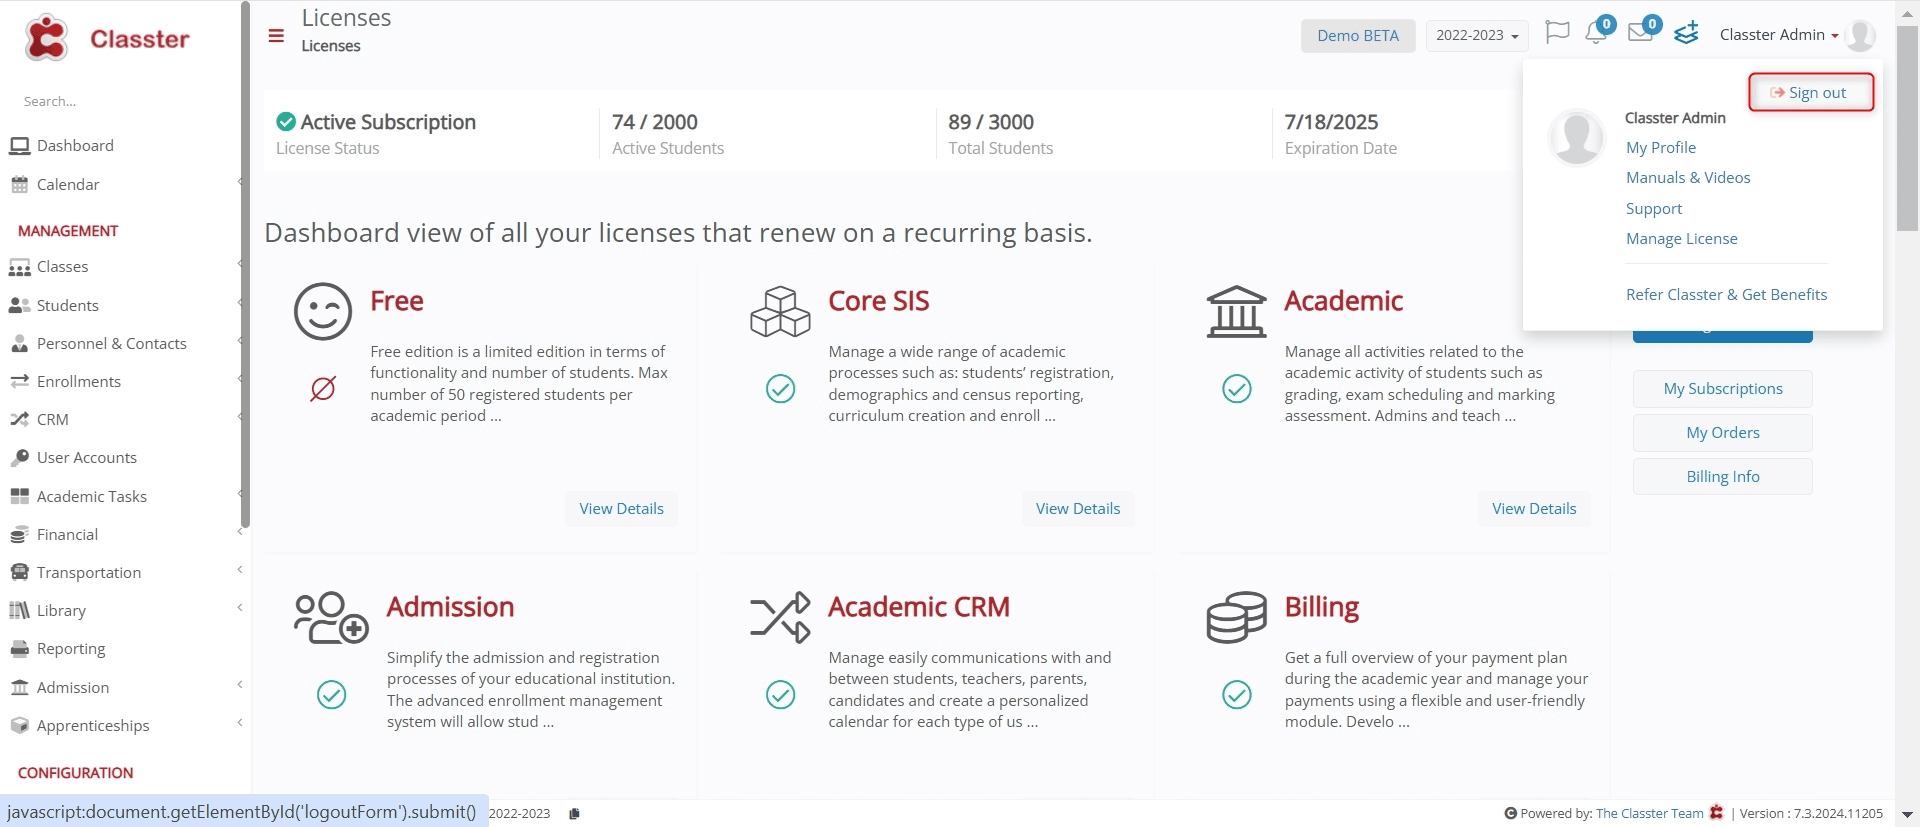 Figure 21


