

Creating a new Session
If you need to create Sessions/Lessons for your Subjects, this job can be done by both admins and teachers/educators.
We will be looking at this from an admin’s perspective (keep in mind it is similar for teachers/educators).
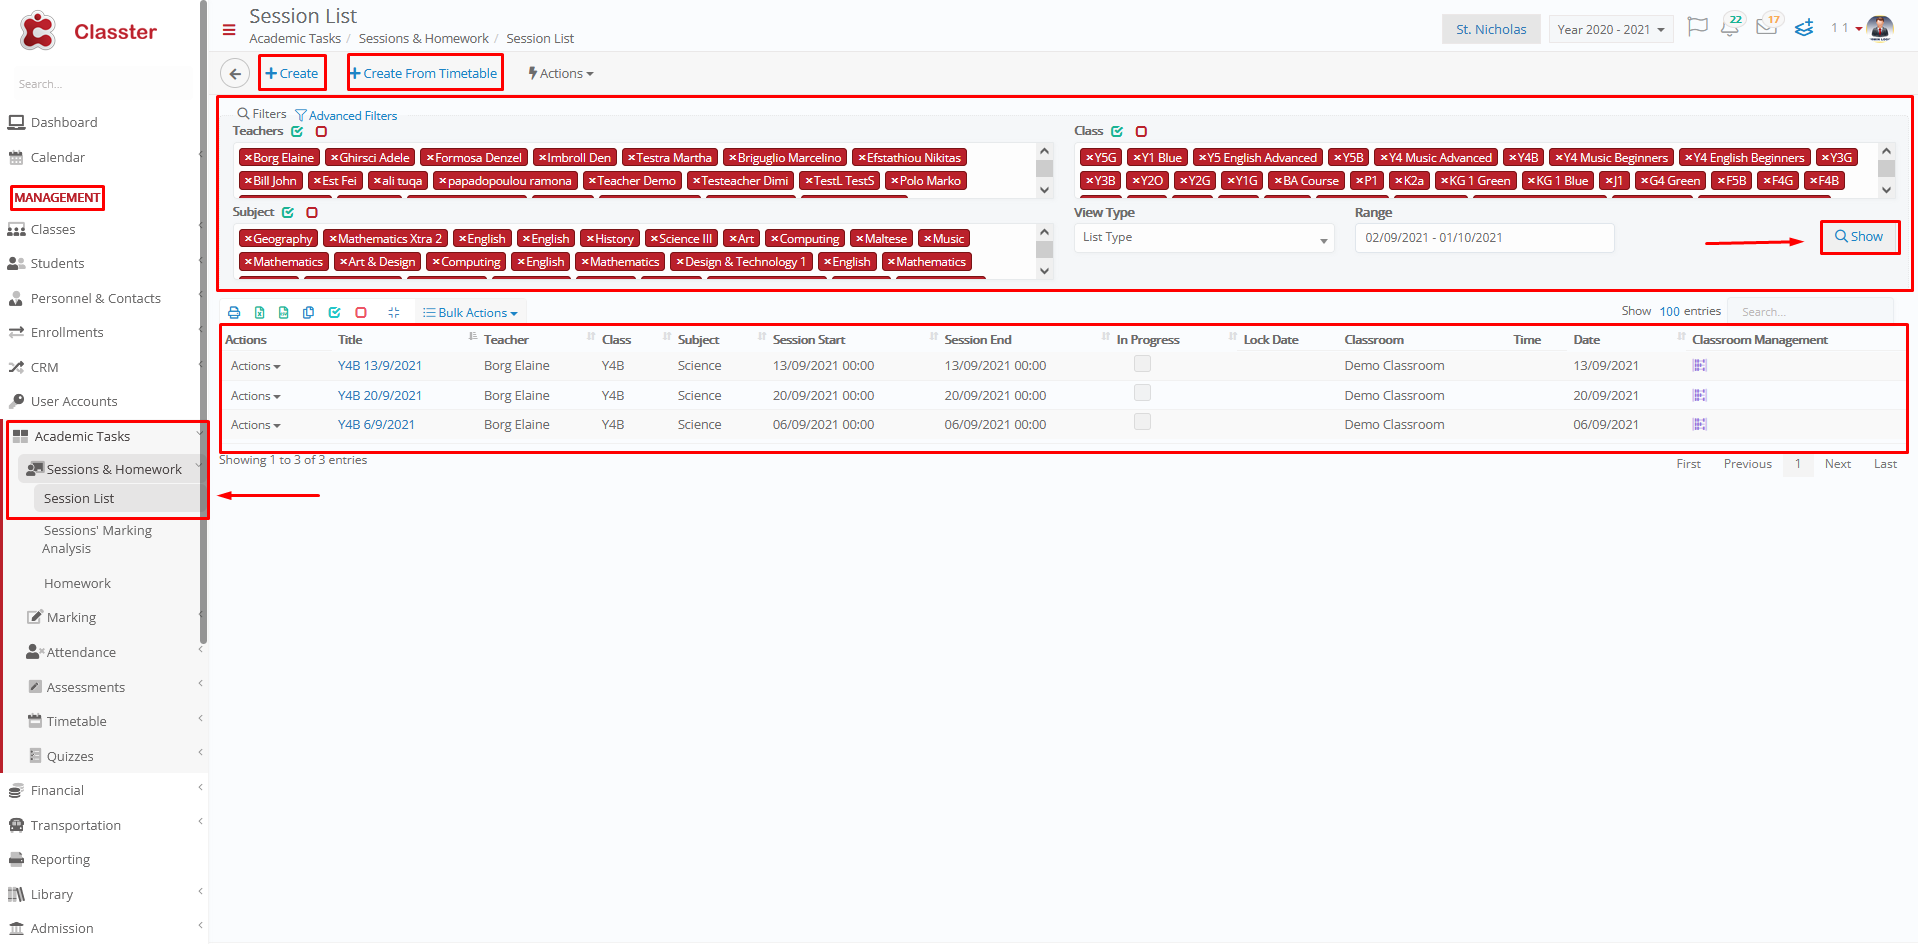
Figure 1
Follow the path:
Dashboard > Management > Academic Tasks > Sessions & Homework > Sessions List (Figure 1).
Select Teachers, Classes, Subjects, View Type and Range from the respective search filters. Click on the ‘Search’ button to view results.
You can see all the sessions that have been planned in the list below the filters.
Now, in order to create a session/lesson, you can click on the ‘+Create’ button. This will take you to the creation page for sessions/lessons (Figure 2).
You can also create a session/lesson based on your timetable by clicking on the ‘+Create From Timetable’ Button. If you click on this button you will be taken to the create from timetable page (Figure 3).
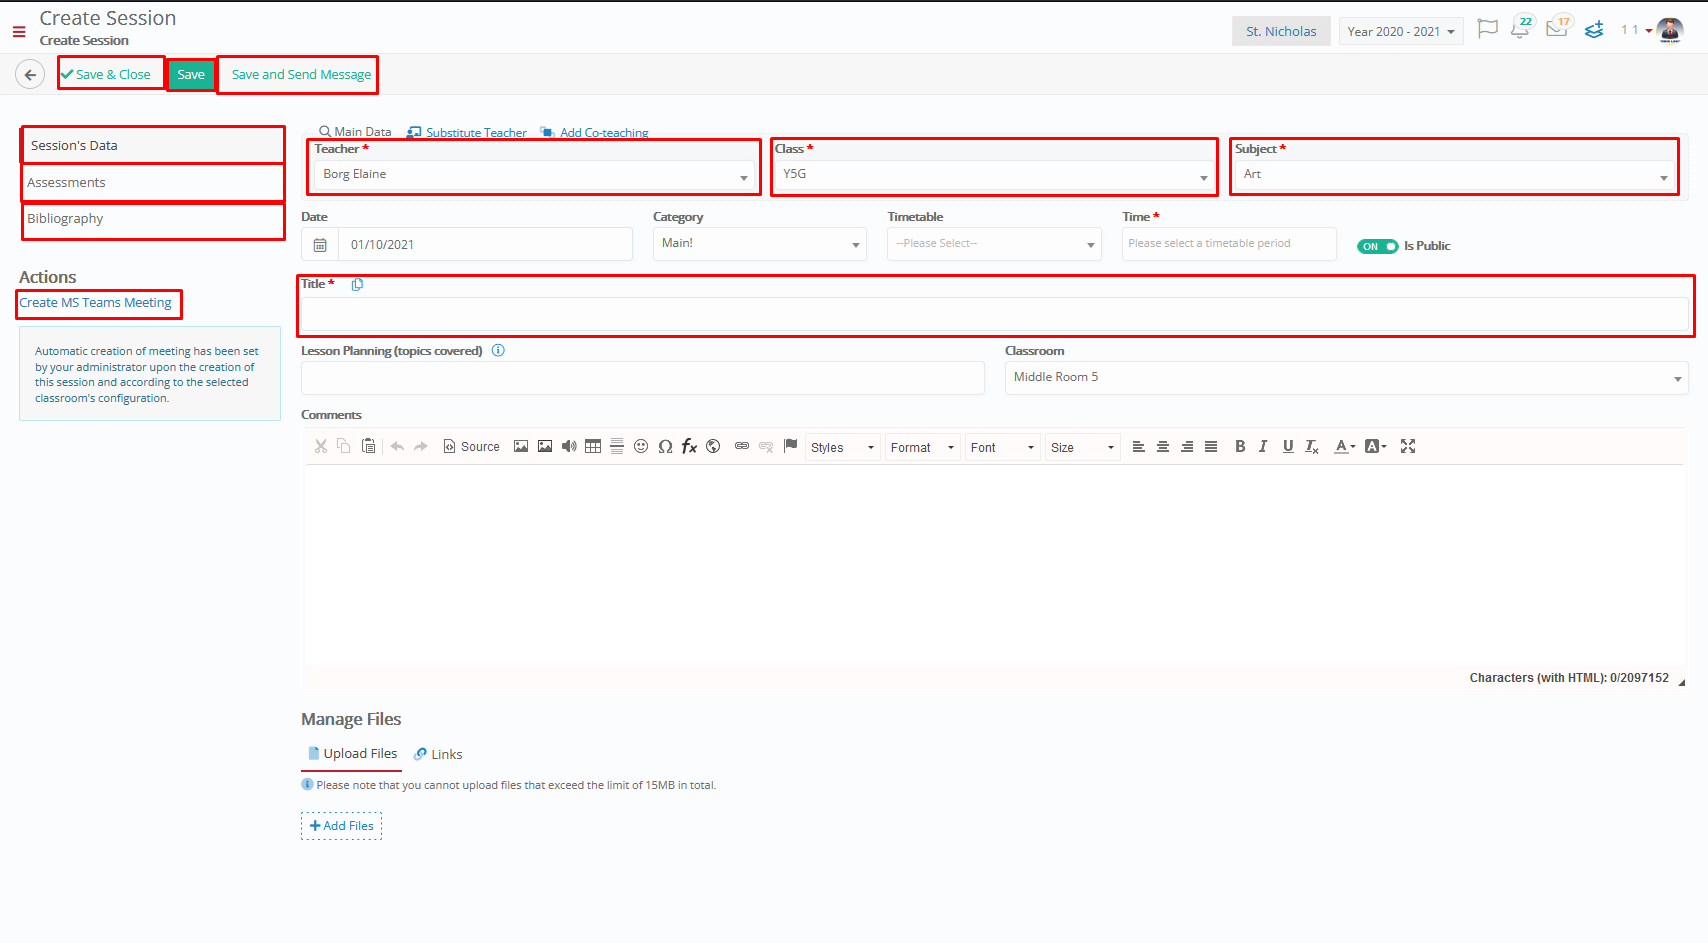
Figure 2
On the creation page, you will find the required fields that you need to fill. This includes the Teacher, Class, Subject, and Title.
You will also find optional fields that you can configure to your needs.
Turn the ‘is Public’ switch on to make this session visible to Students and Parents’ calendars and timetables.
If you have integrated Classter with MS Teams, then you will be able to see the ‘Create Teams Meeting’ button. You will be able to create this session in MS Teams.
Comments: in the comments text box you can write information regarding the session for your students or add links to virtual classrooms (Zoom).
Assessments: in the assessments section, you can add Assessments & Assignments to this session. By clicking on the button, you will be able to select assessments and assignments you created and add them to the session (Figure 2a).
Manage Files: in the manage section, you can click on the ‘Add Files’ button to upload any useful materials needed for students in the session (Figure 2b).
You can also add links to various sources that may come in handy to students for the session (Figure 2c).
Bibliography: in this section of the creation page, you can attach books that have been set as study material for this subject (Figure 2d).
You may also add books that are not part of the predefined bibliography (Figure 2e).
When you are done filling in the session data and assorted information, links, files, assignments and bibliography, click on the ‘Save’ button to save the session. You can choose to click on ‘Save & Close’ to save the session and close the creation page.
Lastly, you can click on the ‘Save and Send Message’ button to save the session and at the same time send a notification message to students and parents that a new session has been planned for them.
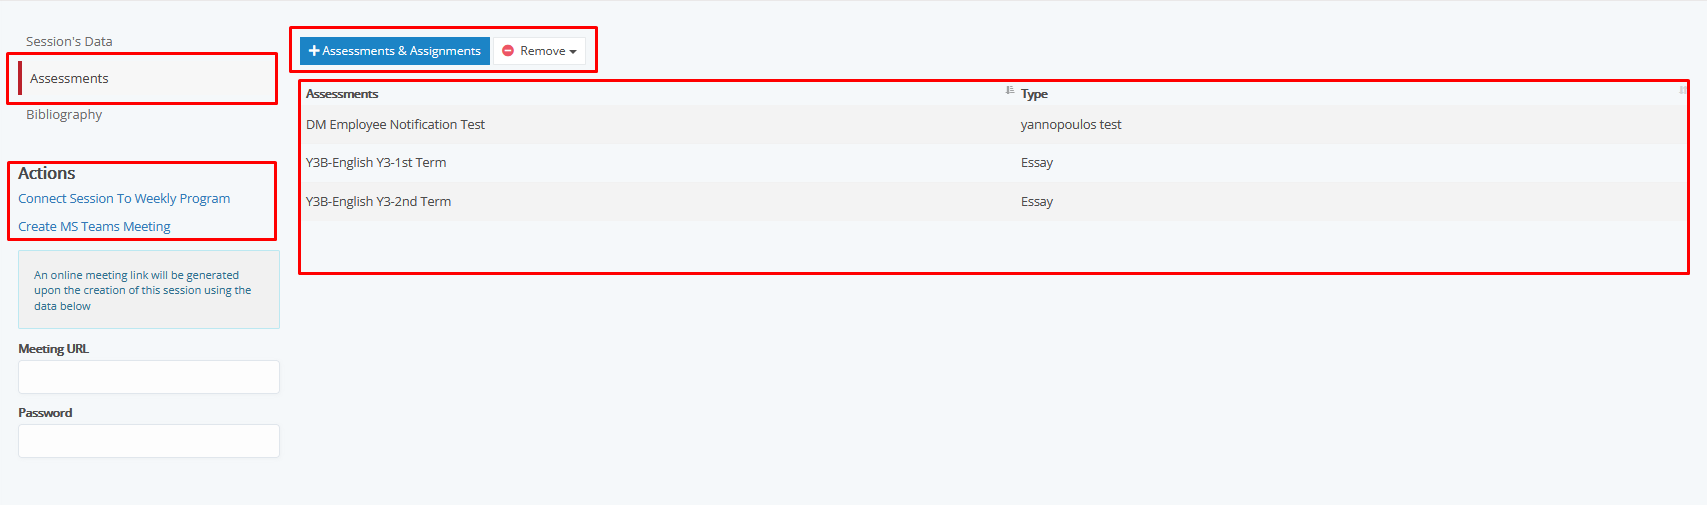 Figure 2a
 Figure 2b
 Figure 2c
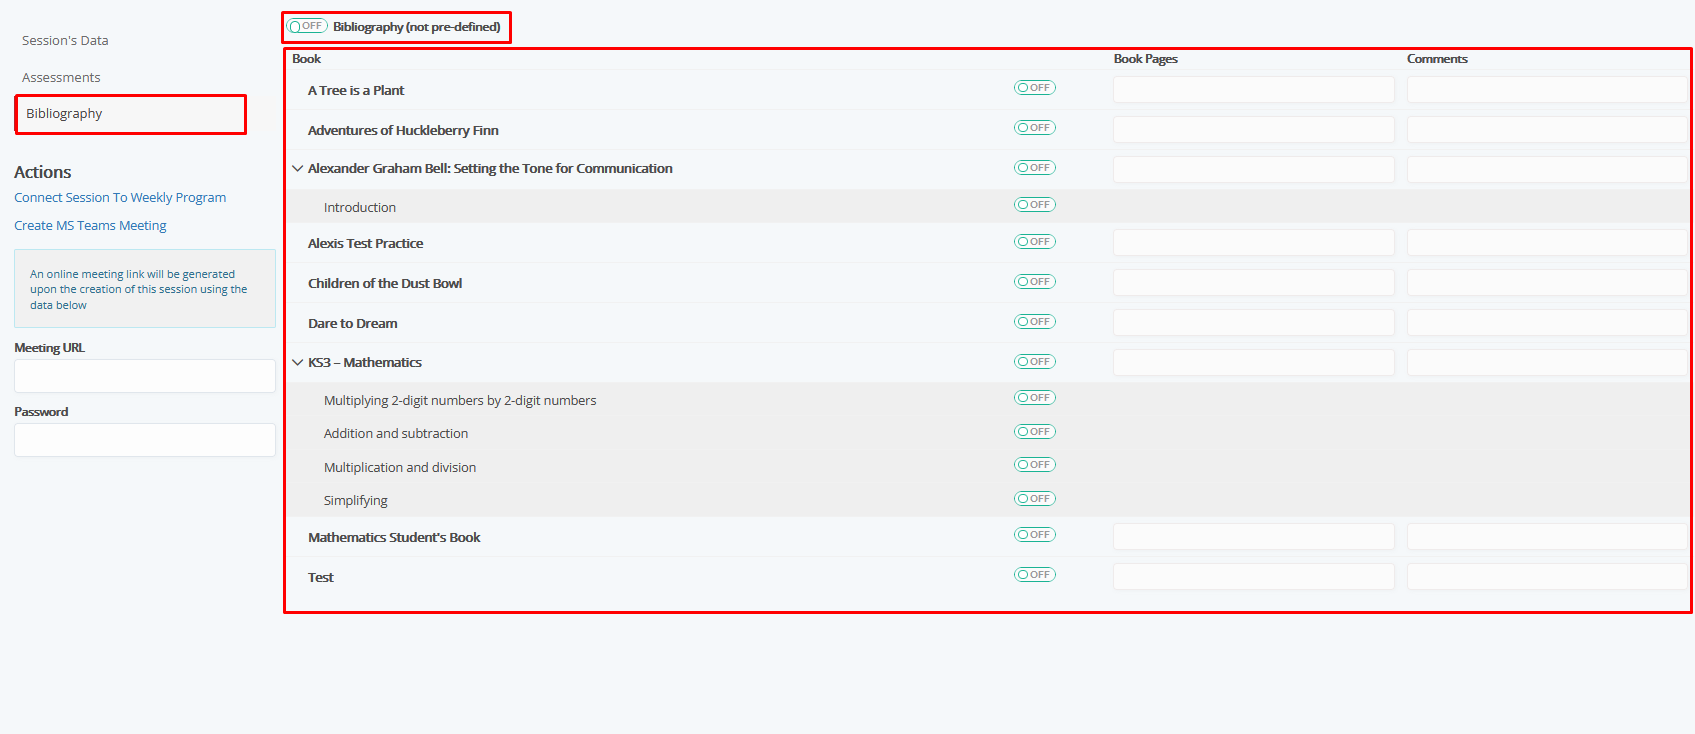 Figure 2d
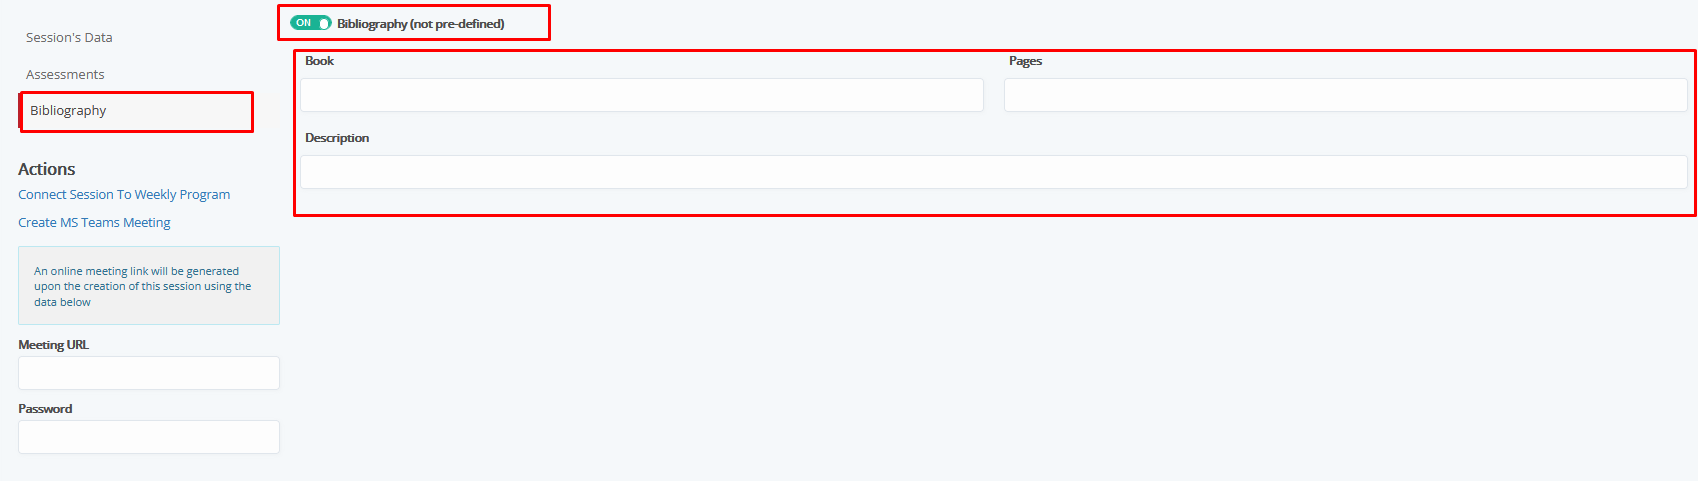 Figure 2e
Creating Sessions from the Timetable (Two ways)
There are two ways to create a Session for the Timetable. The first is from the sessions list page ’+Create from Timetable’ button (Figure 1)
Creating Sessions (First Way)
Click on the ‘+Create From Timetable’ button, once you do, you will be transferred to the following page (Figure 3).
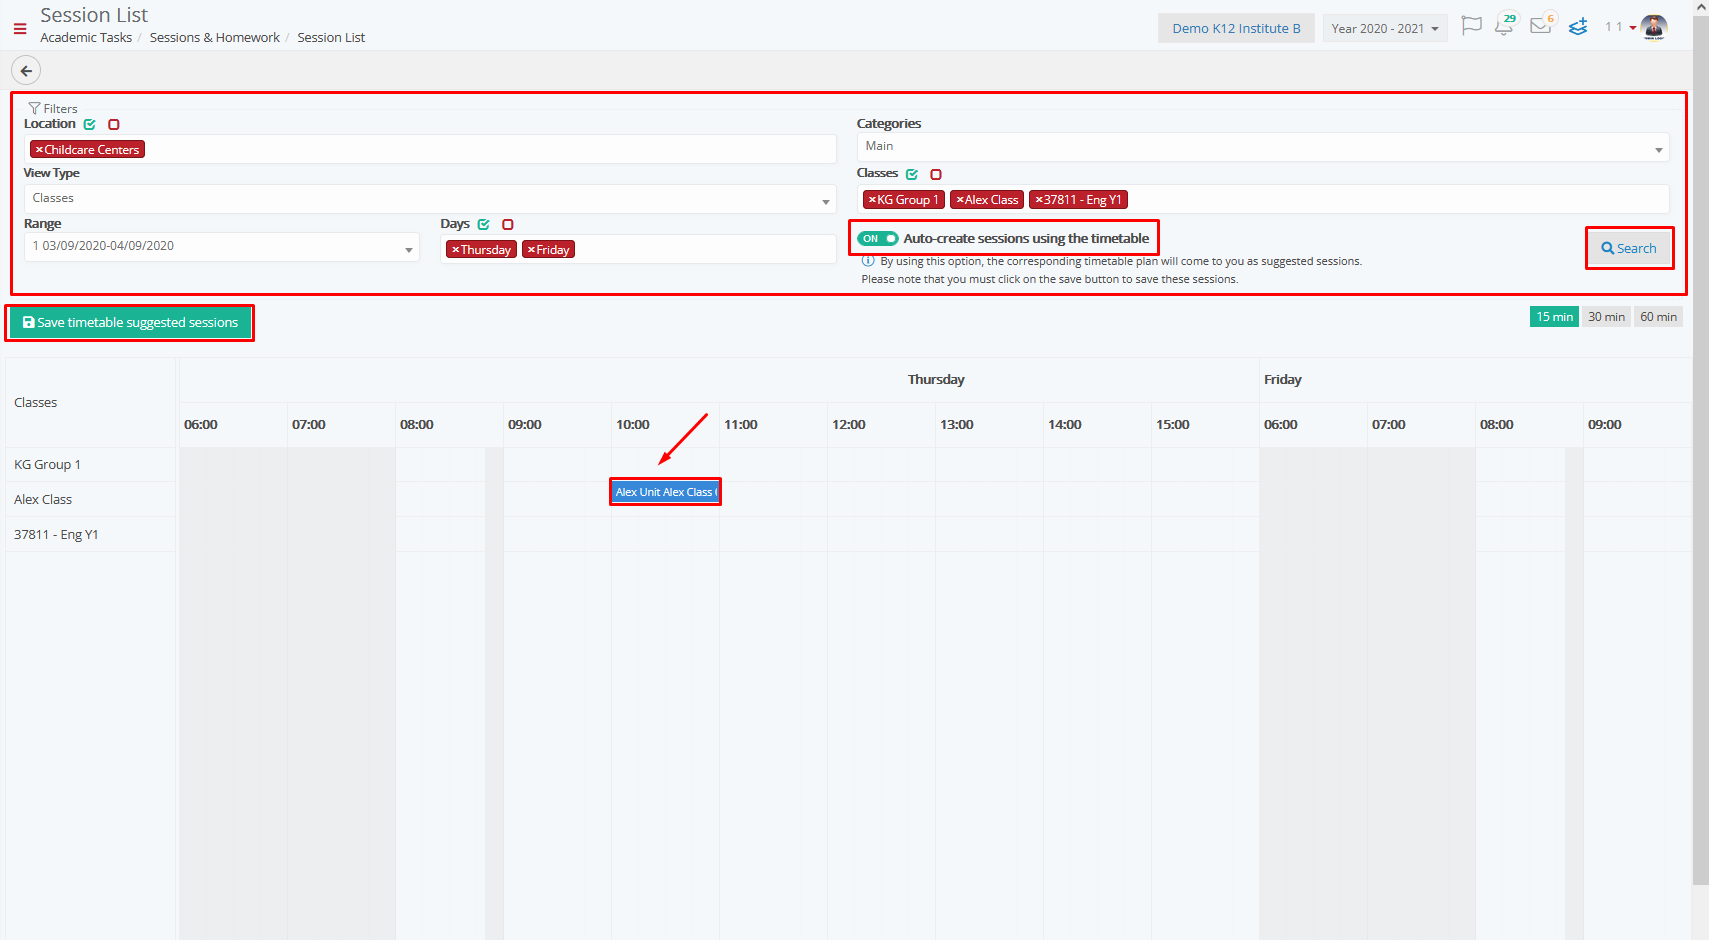
Figure 3
Fill in the search filters School/Location, Categories, View Type, Range, Days. Click on Search to view the timetable.
Once you click on Search you will see the timetable with the Classes on the one side and the days and periods on the other. Click on an empty cell to create a new Session or click an existing one to edit it. (Figure 3).
A new pop window will show if you click on the timetable with more fields to customize to your needs. (Figure 4).
If you turn on the ‘Auto-create sessions using the timetable’ option then when you click on Search you will see a timetable with suggested sessions (Figure 3)
If you want to save your Sessions click the Save timetable suggested sessions button.(Figure 3)
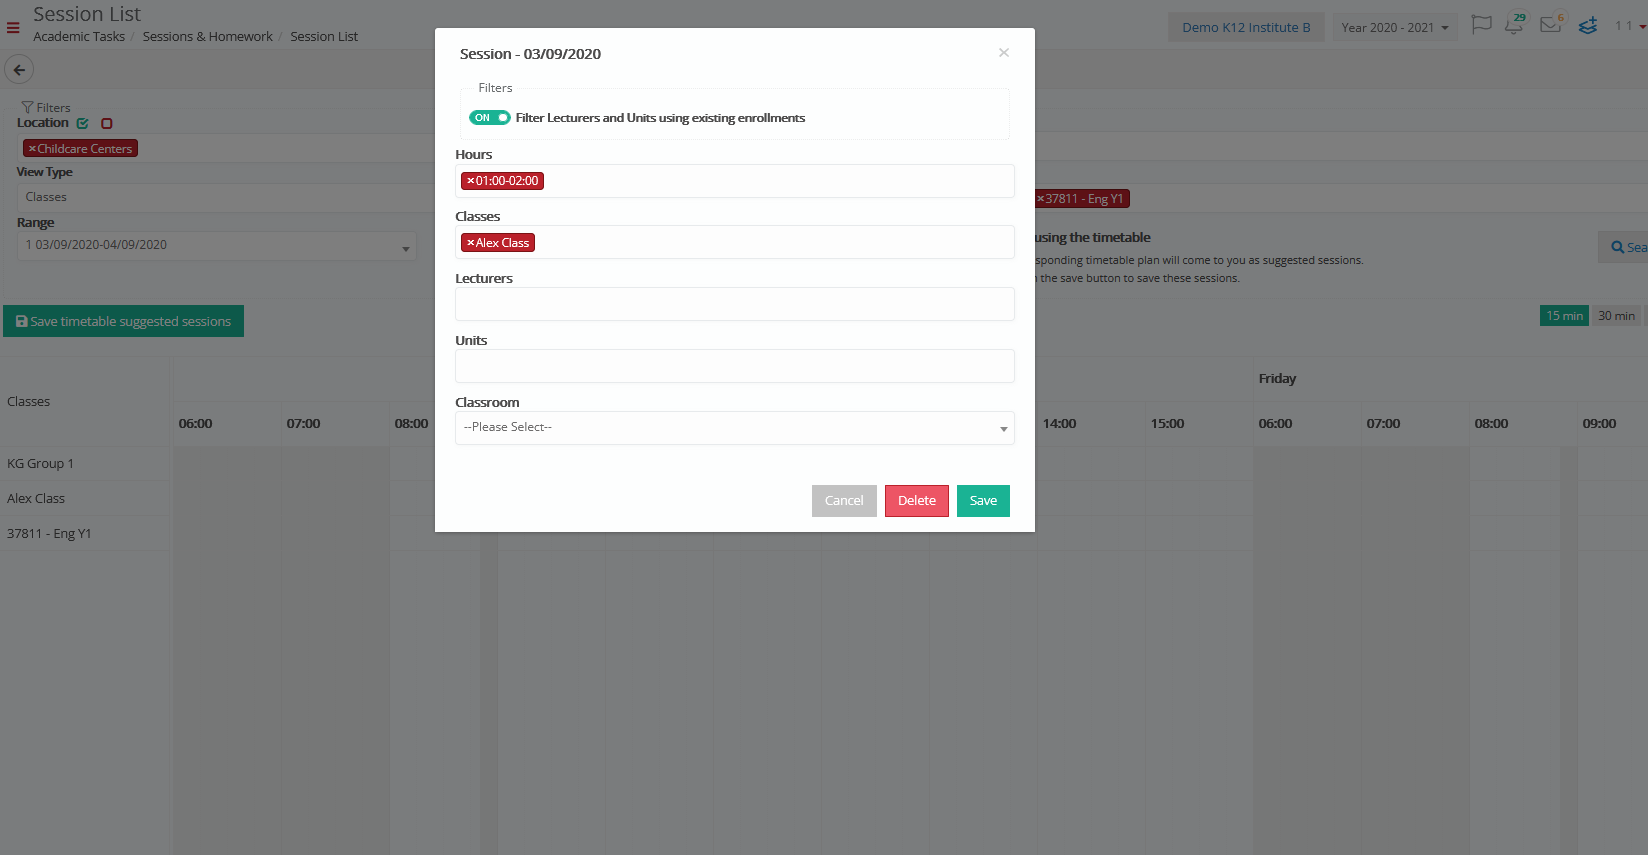
Figure 4
The second way to create sessions based on the timetable is to actually go to the Calendar View of the Timetable.
Follow the path:
Dashboard > Management > Academic tasks > Timetable > Calendar view (Figure 5).
Creating Sessions (Second Way)
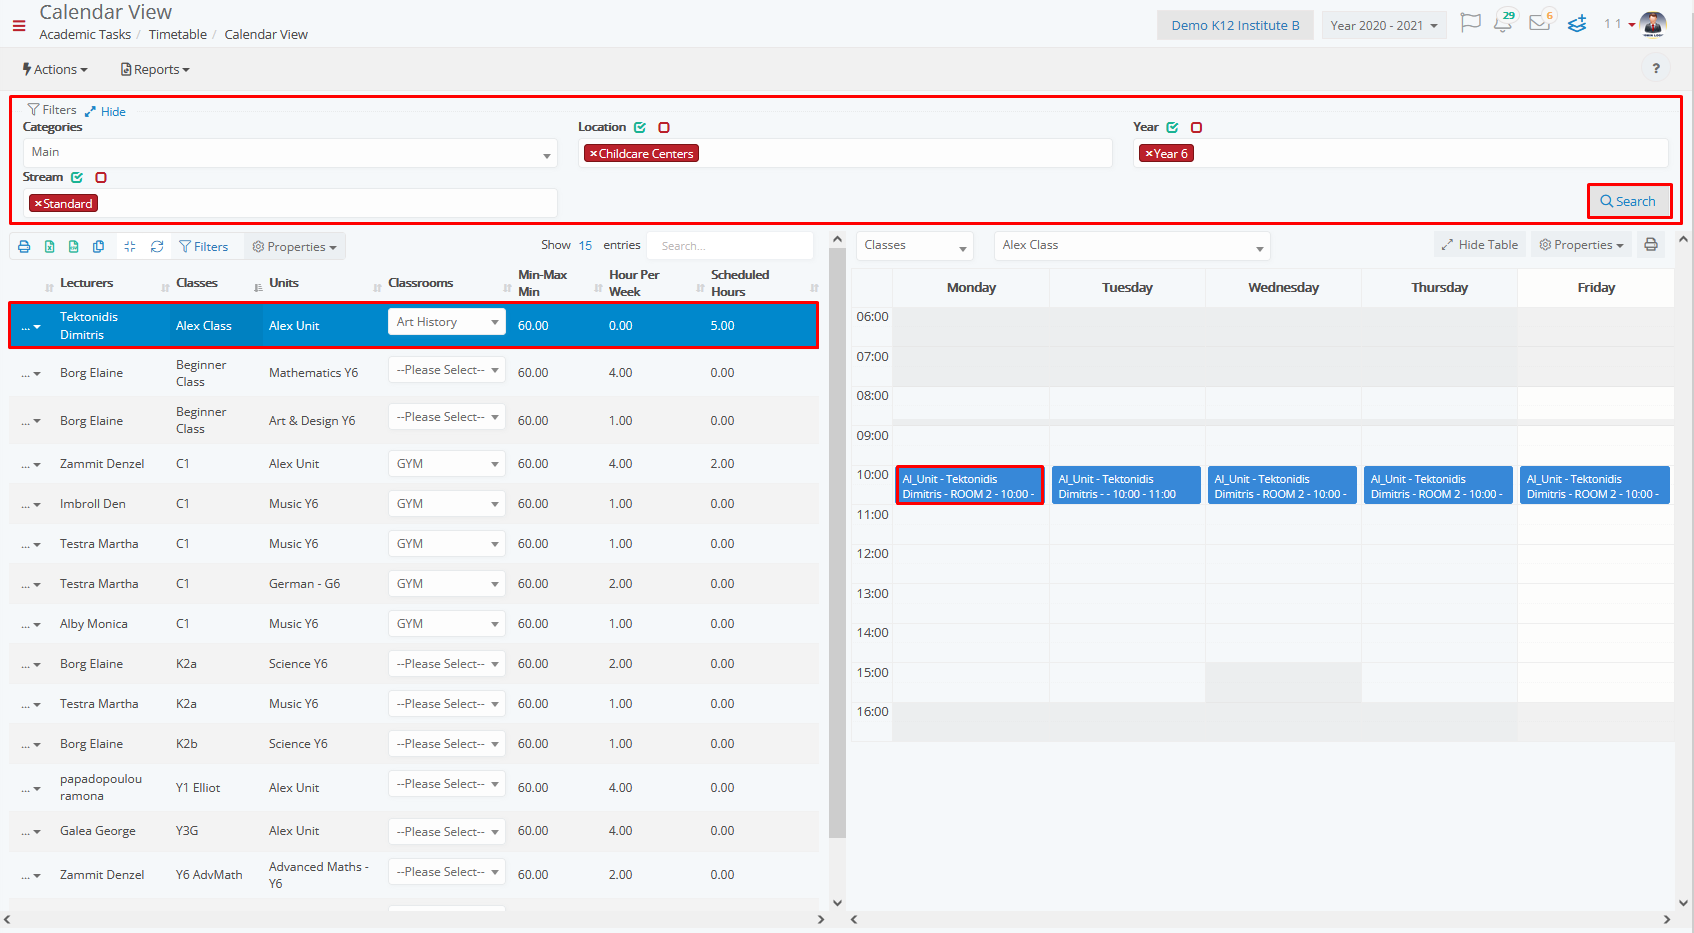
Figure 5
Fill in the search filters Categories, School/Location, Year, Stream. Click on Search to view the timetable on the right side and the list of Teacher/Class/Subject/Classroom combinations on the left.
Click on one of the combinations on the left side, you will see the timetable on the right changes to show the timetable of your selection.
Click on an empty cell if you want to plan your session and a popup window will appear, or click on an existing Session to edit it (Figure 6).
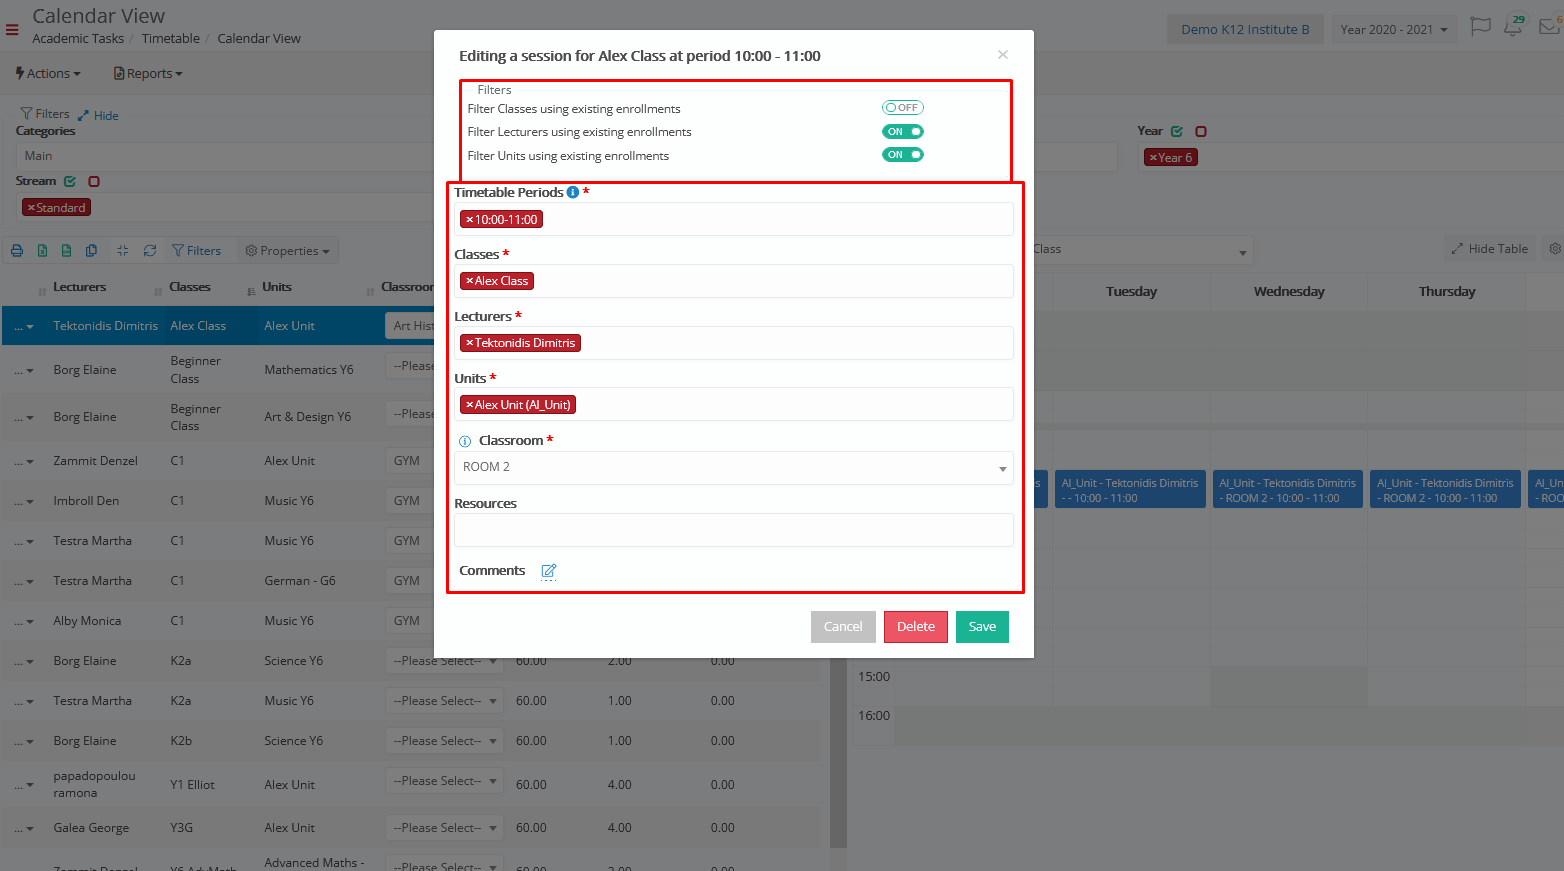
Figure 6
The ‘Filter Classes using existing enrollments’ option if turned on will allow you to create a session based on Classes that are currently enrolled. If this option is turned off, then you will be free to create sessions for any Class even if there is no enrollment.
The ‘Filter Teachers/Lecturers using existing enrollments’ option if turned on will allow you to create a session based on Teachers that are currently enrolled. If this option is turned off, then you will be free to create sessions for any Teacher even if there is no enrollment.
The ‘Filter Units/Subjects using existing enrollments’ option if turned on will allow you to create a session based on Subjects that are currently enrolled. If this option is turned off, then you will be free to create sessions for any Subject even if there is no enrollment.
Click on ‘Save’ to save your session, or Delete to remove it completely.
Note: If Classes, Teachers/Educators, Subjects, Classrooms or Resources you have selected have conflicts of availability you will be warned with yellow highlighted text stating the conflict (Figure 7).
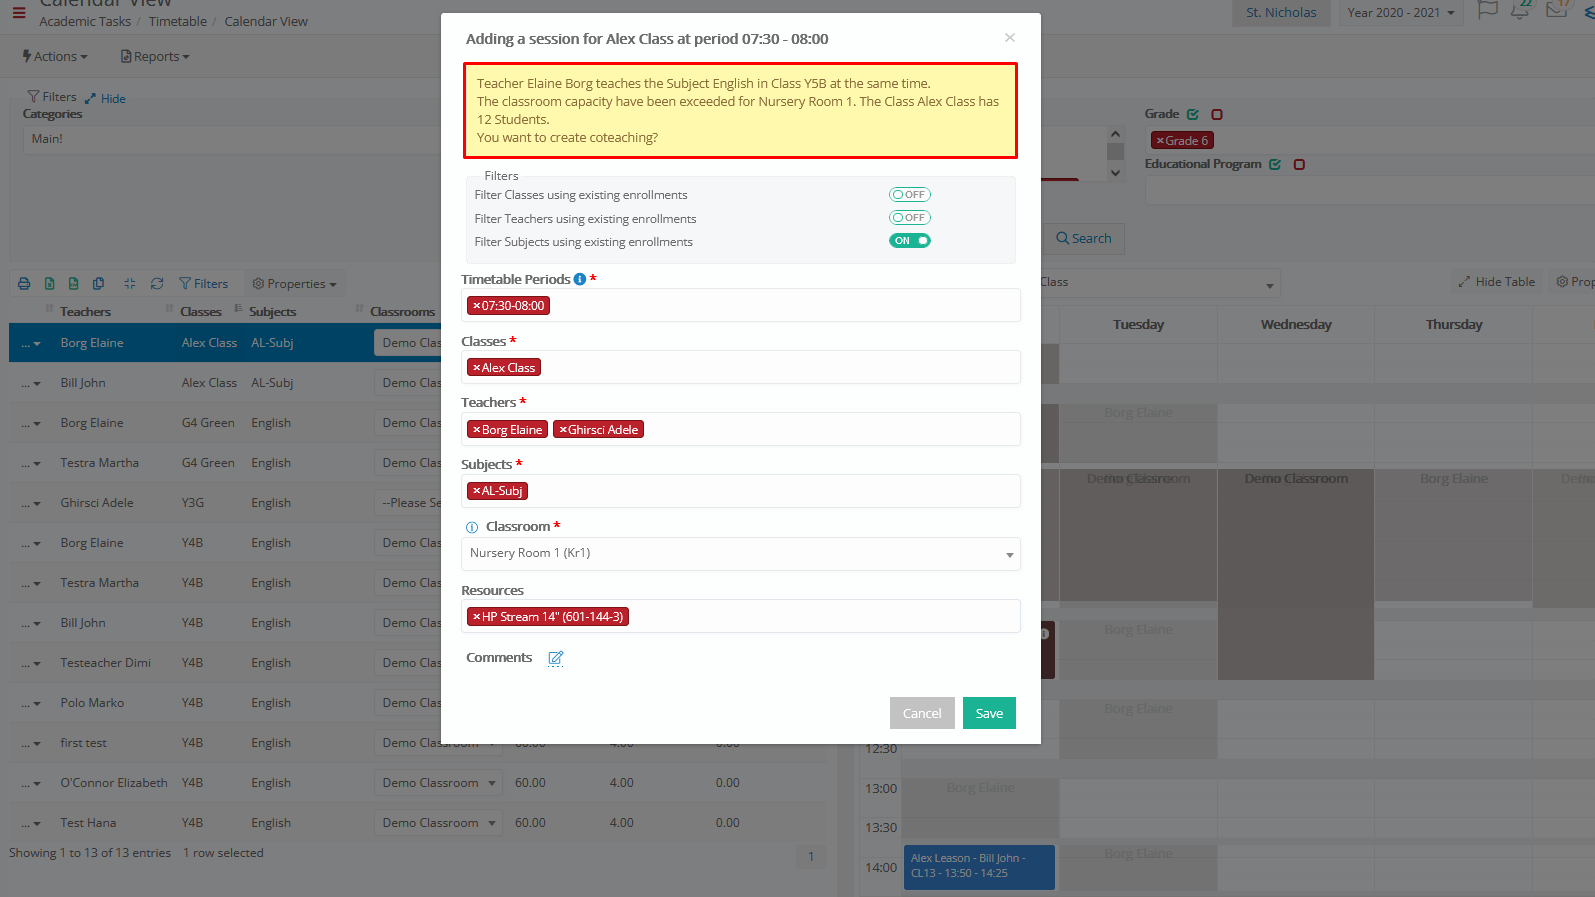
Figure 7