

Transportation
You can set up and configure the transportation service, and then link it to the students who use the service. Thus, you can manage both school’s transportation service and students’ transportation.
Configuration
In this section, you can configure school’s transportation system i.e. create an extensive list of buses, drivers and co-drivers, record buses’ fuels and have a clear picture of the transportation services costs, and create bus zones and routes, and find which are the optimum ones to follow (Figure 1).
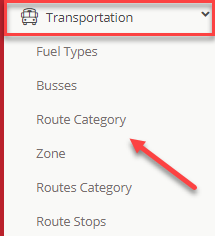
Figure 1
Fuel Types
You can define and manage the different fuel types and their cost per mile (Figure 2).
- Use the edit and delete buttons, to edit or delete the selected fuel type.
Note: Through the fuel cost you can calculate the whole transportation budget (function to be developed).

Figure 2
Add Fuel Type (Figure 3).
Click on ‘Create New’ to add a new fuel type.
- Add fuel description e.g. Diesel.
- Add fuel cost per mile e.g. 1.23.
- Click on ‘Save’ to add the new fuel type in the list.

Figure 3
Busses
You can create and manage a detailed list of the available buses (Figure 4).
Note: 1. If your institute uses outsource means of transport, create ‘dummy buses’ for each route.
2. Add the ‘External ID’ as a unique code for every bus if you want to import bus data by integration with an external system e.g. MS Excel.

Figure 4
- Use the edit and delete buttons, to edit or delete the selected bus entry. (Figure 5)

Figure 5
- Click on ‘Create New’ to add a bus. You can record its main, service, insurance or other data. (Figure 6)

Figure 6
- From Main Data you can register the name of the bus, its plate number and the Bus License. (Figure 7)

Figure 7
- At Service Data you can register the fuel consumption, the fuel type, when was it last checked, and when will the next service date be. (Figure 8)

Figure 8
- In the Insurance Data tab you can register information about the insurance company the bus is insured with, give the name of the insurance company, the type of insurance and the insurance’s expiring date. (Figure 9)

Figure 9
- In the Other Data tab you can add the number of seats the bus has, and an External ID as a unique code for every bus, if you wish to import bus data from an external source e.g. MS Excel. (Figure 10)

Figure 10
- Click on ‘Save’ to add the new bus in the List. (Figure 11)

Figure 11
- Now we can see the new bus that we have created in the list. (Figure 12)

Figure 12