

Watch the How-to Video
Timetables are the scheduling tool for planning and following an educational program, {classes}/{subjects}.
Here you can see how you can create a timetable, create timetable periods and categories, allocate educators to classes/subjects via the timetable, set up restrictions and controls and automatically generate a timetable.
The path you need to follow for Timetable Configuration is: Dashboard > Configuration > Academic Settings > Timetable (Figure 1)
Timetable Categories
In this section, you can create and manage various timetable categories e.g., Main, Exams, Activities etc. (Figure 3).
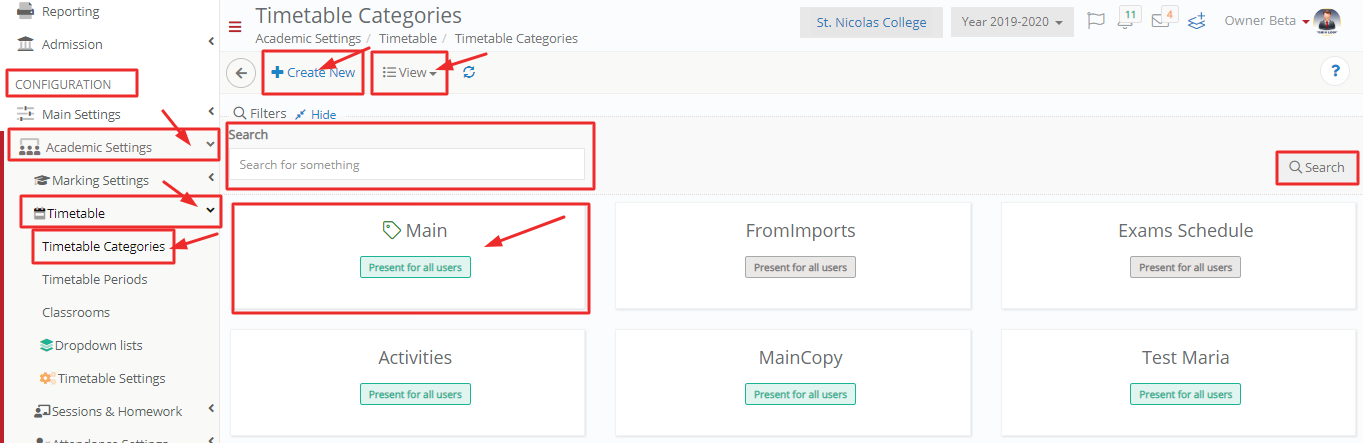
Figure 1
Note: One of the categories must be set as the default one (Figure 2).
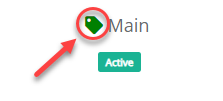
Figure 2
- Use the ‘View’ menu to select Card or Grid View.
- Use the ‘Refresh’ button to refresh your data after having made any changes.
- Click on the category card to edit or delete it (Figure 3).
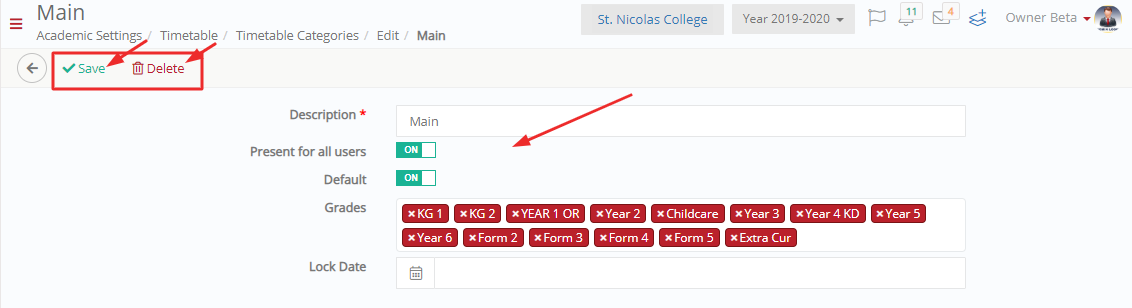
Figure 3
Create New
Click on the ‘Create New’ button to create a new Timetable Category (Figure 4). You create as many timetables as you need.
Timetables you create can be connected to subjects, classes, educational programs {Year} and (Stream).
The timetables you create can have many uses, either for planning everyday teaching, afternoon extracurricular activities or to program services.
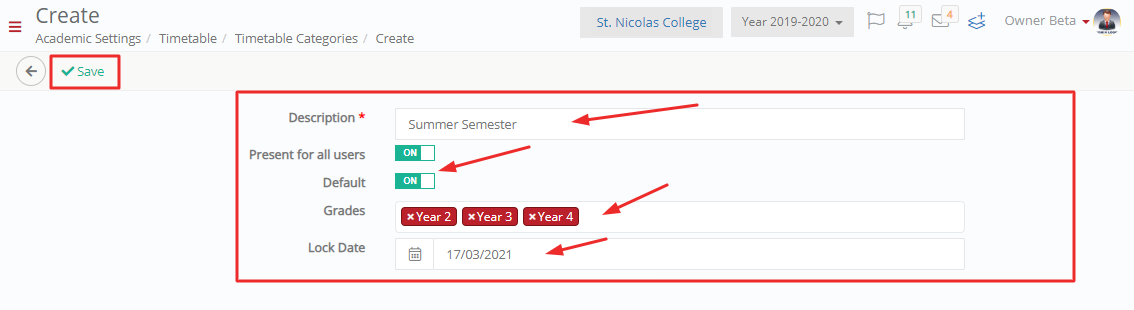
Figure 4
- Use the ‘Description’ text box to enter a category name, e.g., Activities.
- Select the ‘Active’ button to activate the category so that it is available.
- Activate the ‘Default’ button if you want to set the category as the default one.
- Click on ‘Save’
Timetable Periods
In this section, you can create and manage the timetable periods. A period could be a class session hour e.g., 1st, 2nd, 3rd Hour, etc., or a break e.g., 1st, 2nd, 3rd Break, etc. (Figure 7).
Note: the class session duration may differ from Institute to Institute, so one class session ‘hour’ might equal to 60, 45, or 30 minutes.
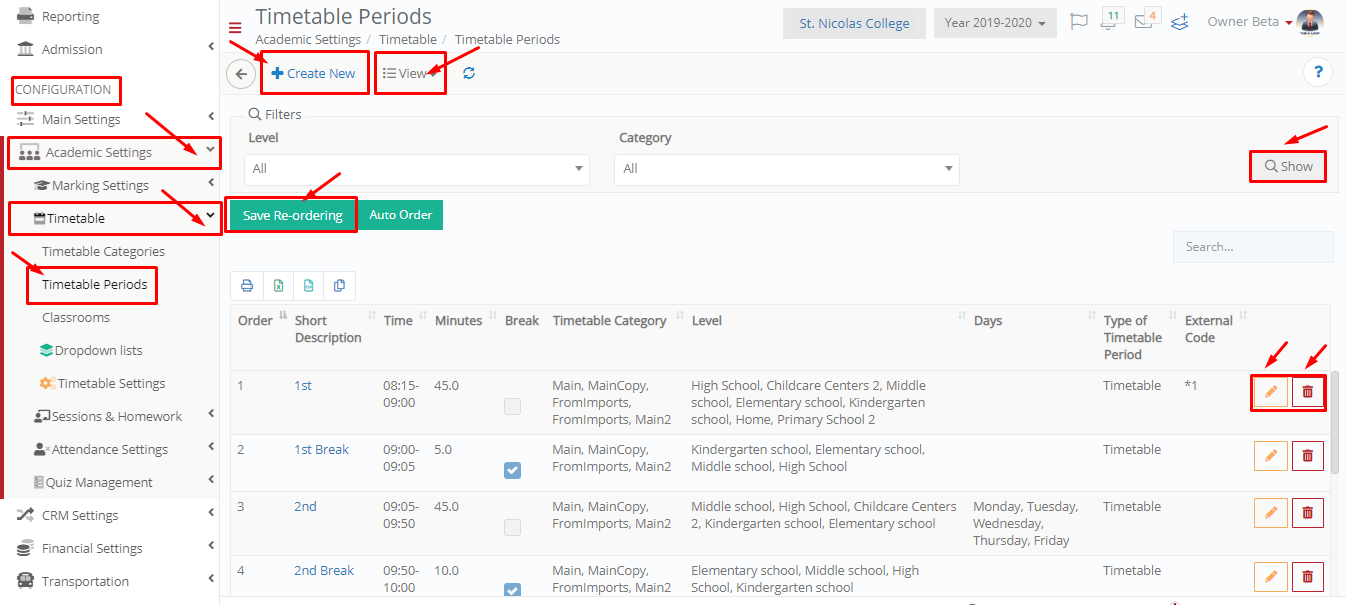
Figure 7
- Use the ‘Level’ and ‘Category’ filters to show the recorded timetable periods.
- Use the View drop-down menu to see results in Card or Grid View.
- Click on the edit button to edit the selected timetable period, or click on the delete button to delete the selected timetable period.
- Drag and drop timetable periods up or down the list to reorder them. Once you do, click on the ‘Save Re-ordering’ button.
- Use the Refresh button after having applied an edit, or deletion, to make sure that data is updated and synchronized.
- Click on the +Create New button to create a new timetable period.
Create New
- Click on the ‘Create New’ button to create a new timetable period (Figure 8).
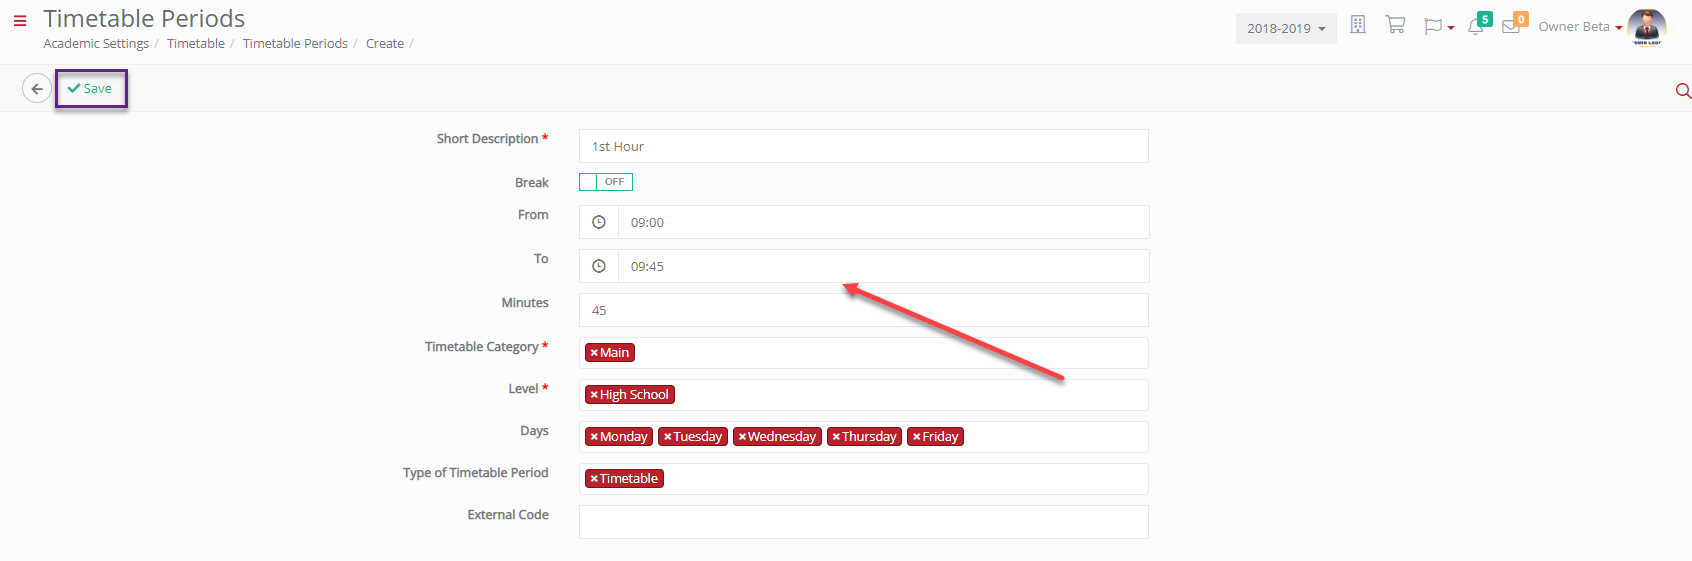
Figure 8
- Use the short description text box to enter the timetable period name, e.g., 1st Hour
- Activate the break button, if the period you are creating is a break
- Set the start and end time of the period, e.g., From 09:00 To 09:45
- Record the duration of the period in minutes, e.g., 45
- Select a timetable category from the available drop-down list, e.g., Main
- Select the Level(s) that the period will be available at, e.g., High School
- Select the days of the week that the period will be available
- Select the type of the timetable period e.g., Timetable or Services
- Use the external code if you want to import a timetable from a third-party application
- Click on ‘Save’
Allocate {Educators} to {Classes} and {Subjects}
In the enrollments part of this manual, you saw how we can allocate {educators} to {classes} and {subjects}.
We will now see how we can do this in a smaller scale through the timetable calendar view.
Follow the path: Dashboard > Management > Academic Tasks > Timetable > Calendar View (Figure 9).

Figure 9
On this page you can (Figures 10,11,12):
- Choose from the filters the Timetable Category, {school}, {year} and {stream} you wish to view the timetable for. Click on the ‘Search’ button.
- You will see the timetable on the right side and the list of {teachers}/{years}/{subjects/classrooms} (these entities are tied together and can be placed in the timetable in any free time slot).
- To allocate an {educator} to a {class}/{subject}, you first need to select the {teacher} you want to allocate and click on the free time slot on the timetable, e.g., time slot 8.15-9.15.
- Once you have clicked on the time slot on the timetable, you will see a popup window (Figure 10).

Figure 10
- If the top 2 filters are switched on, then the dropdown lists below will show only {teachers} and {subjects} that the {teacher} e.g., Elaine Borg is enrolled in.
- So you would just be creating a new session for a class and subject Ms Borg is already teaching.
- Unselect the filter {teachers} & {subjects} and now you will be able to create a session and allocate the {teacher} you want to a specific {class} and {subject} that is not currently enrolled in.
- Fill in the {class}, {teacher}, {subject}, classroom, resources, and a comment.
- Click on ‘Save’ button.
- You will see that the session has been created and that Ms. Borg will be connected to the new {class} and {subject} (you will see this in the teacher’s form/ classes-subjects tab).
Setup Constraints and Restrictions for Timetables
When creating a timetable, you must consider setting up some operating rules. This section will show you the options you have. The constraint will apply to all timetables.
Follow the path: Dashboard > Management > Academic Tasks > Timetable > Calendar View (Figure 11).
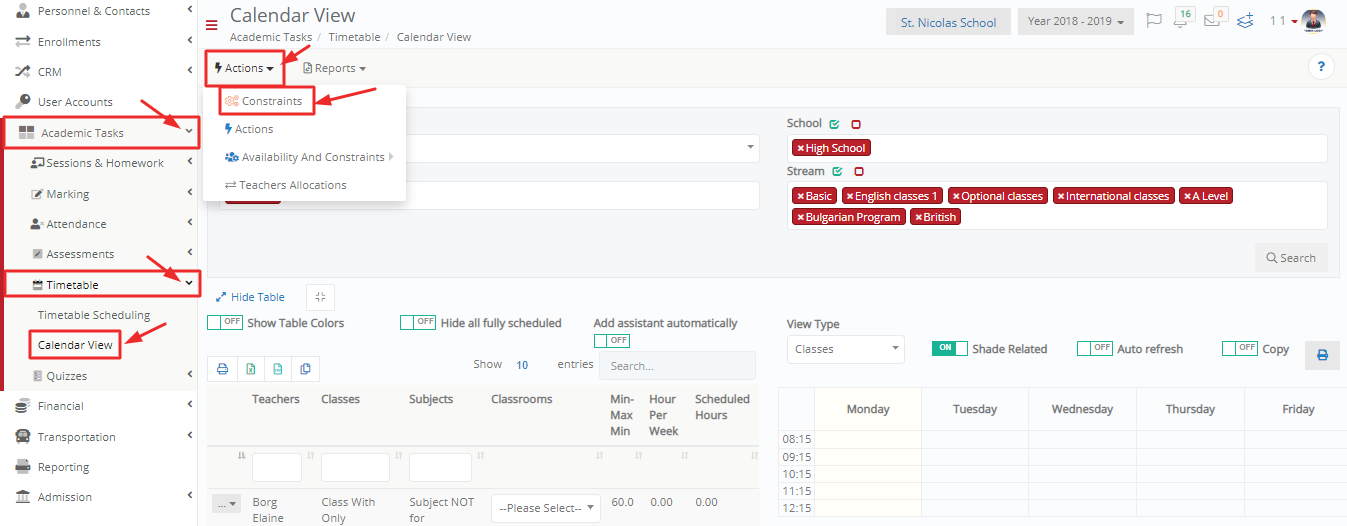
Figure 11
- From the Calendar view page, click on the ‘Actions’ dropdown button and then click on the ‘Constraints’ button.
- You will see a popup window appear (Figure 12).
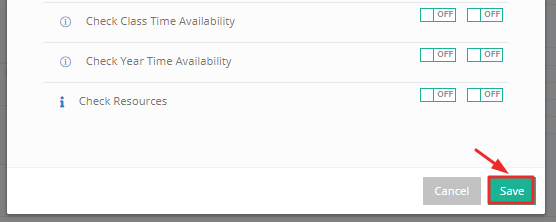
Figure 12
- ‘Check Teacher Hours’: Checks if the timetable entry exceeds teacher’s declared total working hours
- ‘Check Teacher Hours per Subject’: Checks if the timetable entry exceeds teacher’s declared teaching hours in the specific subject
- ‘Check Teacher’s Time Availability’: Checks if the teacher is available on the day and time of the timetable entry in respect to his/her availability schedule.
- ‘Check Students Enrollments’: Checks students’ availability, comparing the Group/Subjects they are enrolled to and the ones of the timetable entry.
- ‘Check Students Time Availability’: Checks if the students, enrolled to the selected group, are available on the day and time of the timetable entry in respect of e.g., their declared school activities
- ‘Check Subject Hours’: Checks if the timetable entry exceeds the declared teaching hours for the specific subject
- ‘Check Subject Constraints’: Checks for time, duration, year constraints that have been entered in to subjects during creation or through later addition, before allowing the creation of a session.
- ‘Check Class/Subject Enrollments’: Checks if the timetable entry exceeds the declared teaching hours for the specific subject per group
- ‘Check Classroom’: Checks classroom’s capacity in respect to the selected group’s number of students
- ‘Include all constraints of the associated main classes when you check class constraints’: System will check all constraints regarding main classes.
- ‘Check Classroom Time Availability’: Checks for Classroom time conflict, e.g., another session is planned at that time in this classroom.
- ‘Check Class Time Availability’: Checks for possible Class Time conflicts, e.g., If the Class has sessions already planned for this time period you can’t plan a new one.
- ‘Check Year Time Availability’: Checks for possible Year time conflicts before it allows the creation of the new session, e.g., if the Year 1 has other sessions planned it will warn about the conflict.
- ‘Check Resources’: the System checks if resources you have chosen for your session are available for use.
Click on ‘Save’ to Save changes