

When you have setup the webex connection/ integration from the Advanced Configurations page > Third Party Integrations tab > Webex (Figure 3), and selected the using a classter classroom connection type, you will need to create a classroom and then a session on Classter.
To start creating webex meetings via Classter Classroom you will need to follow the steps described below.
Create a Classroom from Admin Portal
Step 1: Go to Configuration > Academic Settings > Timetable > Classrooms (Figure 4).
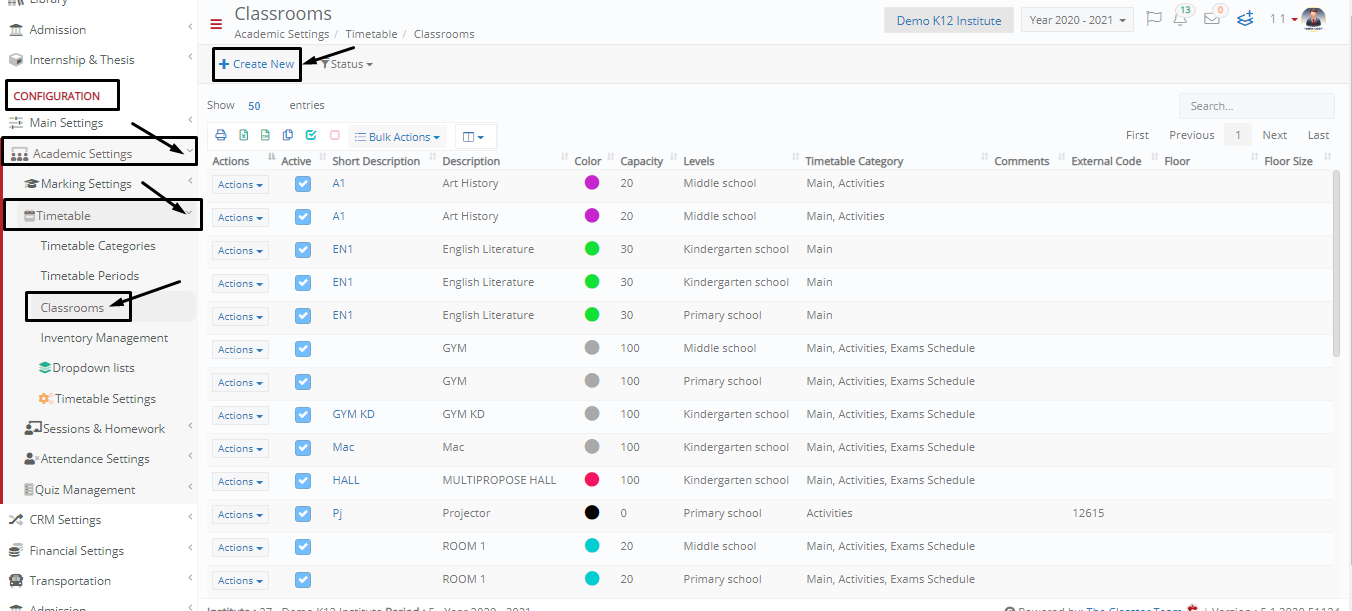 Figure 4
Click on the “Create New” button to create a Webex Classroom.
Step 2: Once you have clicked on the “Create New” button (Figure 4), you will be transferred to the Creation page (Figure 5).
 Figure 5
Once you reach the creation page, you can see that the fields are split into three main sections.
- Main Data section: Here you need to add a Short Description of the Classroom, the Main description of the classroom, which level this classroom will be used for e.g Middle school, the Room Type e.g class room and the Timetable category this classroom will appear in (if applicable to your institution). You can add a color to this classroom if you want and define the number of students that are allowed in the classroom.
- Other Data section: Here you only need to fill in that this is a Webex classroom in the Room location field. The rest of the fields are irrelevant in our case.
- Third Party Integrations section: here is where we essentially make this classroom a webex classroom. Select Webex from the “Provider” dropdown list and in the two following fields enter the Webex username and password of one of your available accounts.
- Finally Click on the “Save” button to save your new Webex Classroom!
Create a Webex Session from Admin Portal or Teacher Portal
Admin Portal
Step 3: Go to Management > Academic Tasks > Sessions & Homework > Session list (Figure 6)
 Figure 6
Click on the “Create New” button to create a new session.
Step 4: On the session creation page, we will create a session using the webex classroom we created (Figure 7).
 Figure 7
On the creation page, choose the Teacher, Group, Subject, Date, Session start and end time, Title and most importantly in our case the Classroom.
Make sure you have selected the Webex Classroom (s) in which you have configured Webex. Once you are done filling in the fields and adding any documents you require for the session, click on the “Save” button to create this session.
You can alternatively click on the “Save & Close” or “Save and Send Message” buttons.
Once you have clicked on the “Save” button, you should be able to see the password of the webex meeting appear e.g Figure 8.
 Figure 8
Step 5 (Teacher Portal): Go to the Teacher (who is teaching the session we created) or Students (who are participating in the session we created) Dashboard to view the Session you created (Figure 9).
 Figure 9
- Click on the session you see in the Calendar (Figure 9).
- You can also see the session appear in the session reminder entry of the teachers’ timeline (Figure 9).
If you click on the session from the calendar, you will see the following popup window appear (Figure 10).

Figure 10
Once you click on the join button you will be taken to the Webex environment for the online meeting (Figure 11).
 Figure 11