

Watch the How-to Video
Applicants may use a sign-up form without selecting any educational program.
Follow the steps you will see described in this section and you will be able to allocate applicants to educational programs by yourself.
Admission Settings
First, you should go to Admission-> Admission Settings and enable the extra Sign Up fields you require from your applicants. (Figure 1)

Figure 1
Save your changes and let’s see how the Admission Portal seems like.
From an Applicant view
Once you click on the online registration icon on, your institution’s website you will be transferred to the sign-up page (Figure 2).

Figure 2
On this page, you will see the following (Figure 2).
- Select Institution field: here you can choose the institution, college, the school you wish to apply to.
- If you wish you can change the portal language by clicking on the language you want.
- Click on ‘OK’ to proceed

Figure 3a
On this page you will see the following (Figure 3a):
- If you are a parent applying for your child click on the checkbox I’m a parent or legal guardian.

Figure 3b
On this page you will see the following (Figure 3b):
- If you forgot to select it and you are a parent applying for your child, click on the checkbox above the name field.
- Enter your name in the Name field e.g. Mark
- Enter your last name/family name in the Last Name field e.g. Green
- Enter your favored email address in the E-mail field. The system will be using this email for communication with you.
- Click on the I am not a robot box. Required for security purposes.
- Click on the Sign-Up button to sign up for the admissions process.
Note: if you are applying for your child keep in mind you need to enter the child’s Name, Last Name and ID. In addition, some Institutes might require more information
Once you have clicked on the sign-up button (Figure 3b), you will see the following page appear (Figure 4).

Figure 4
On this page you will see the following (Figure 4):
- Here you will get a message that your sign-up was successful, and your account has been created.
- You will be sent an email confirming the creation of your account in the email account you entered e.g Figure 4b.

Figure 4b
Admission Users
As an administrator, you can view all your applicants in Admission Users.
Select one (Figure 5)
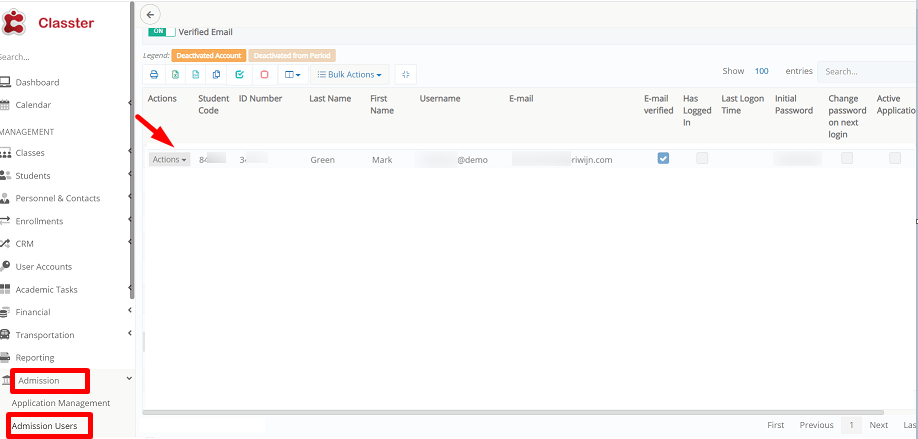
Figure 5
From actions you have several options (Figure 6)
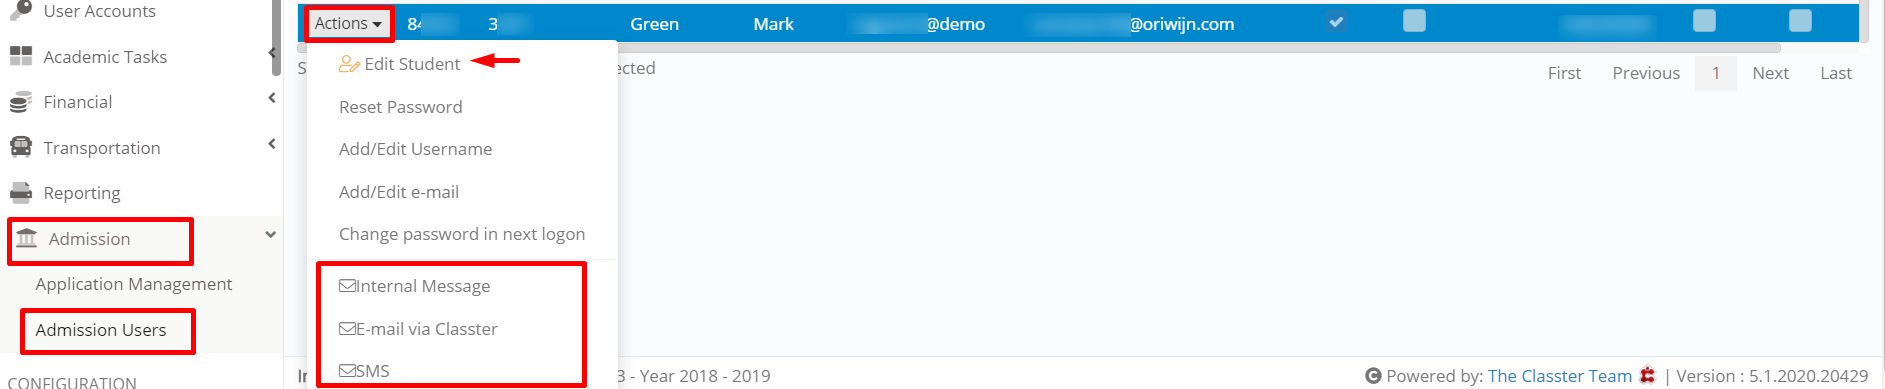
Figure 6
- You can contact the applicant via internal message, email or SMS
- You can edit the applicant and enroll him in educational programs (Figure 7)
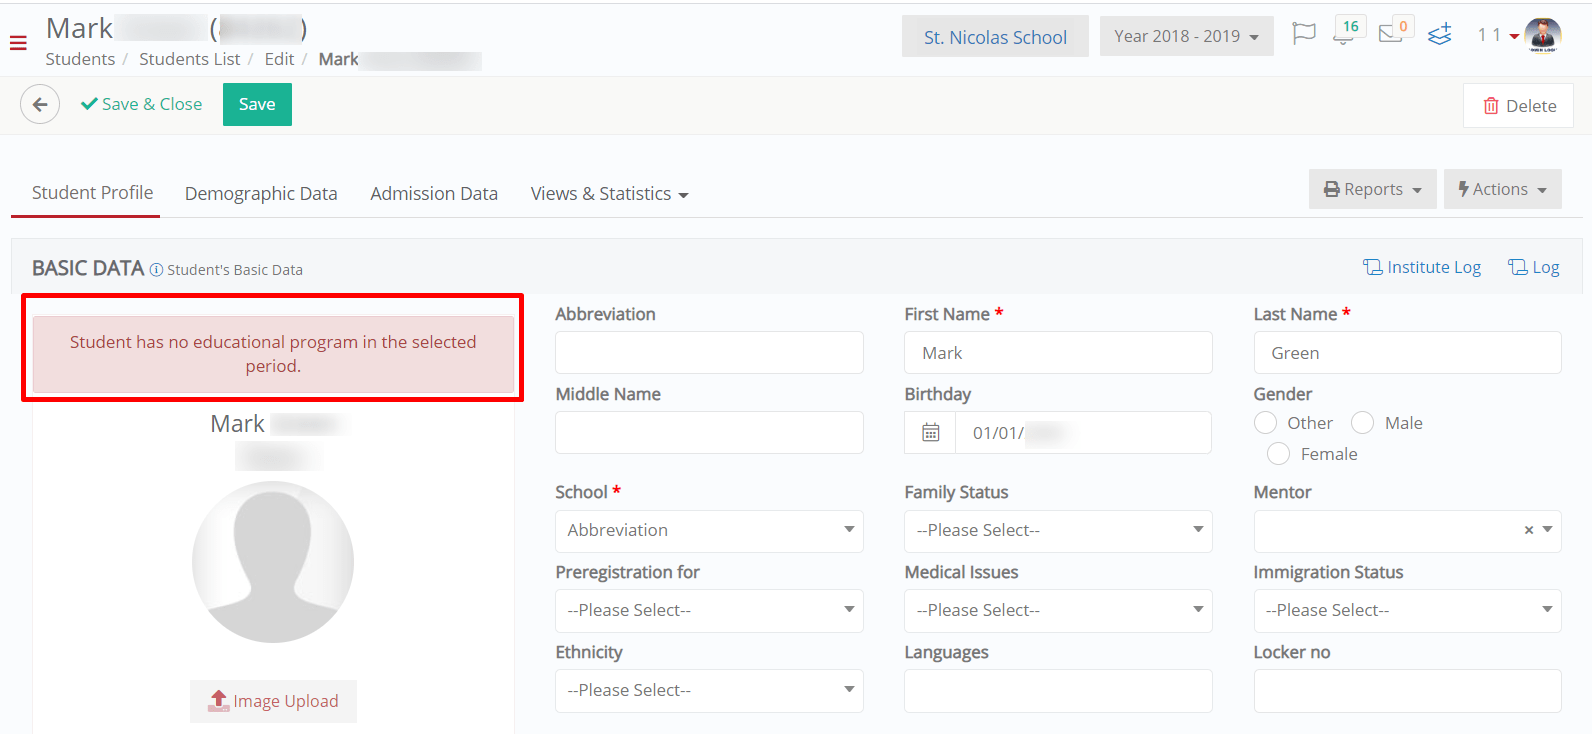
Figure 7
Select the Registration Status, Year & Stream (Figure 8)

Figure 8
From Bulk Actions, you can send an Initial Invitation (Figure 9)
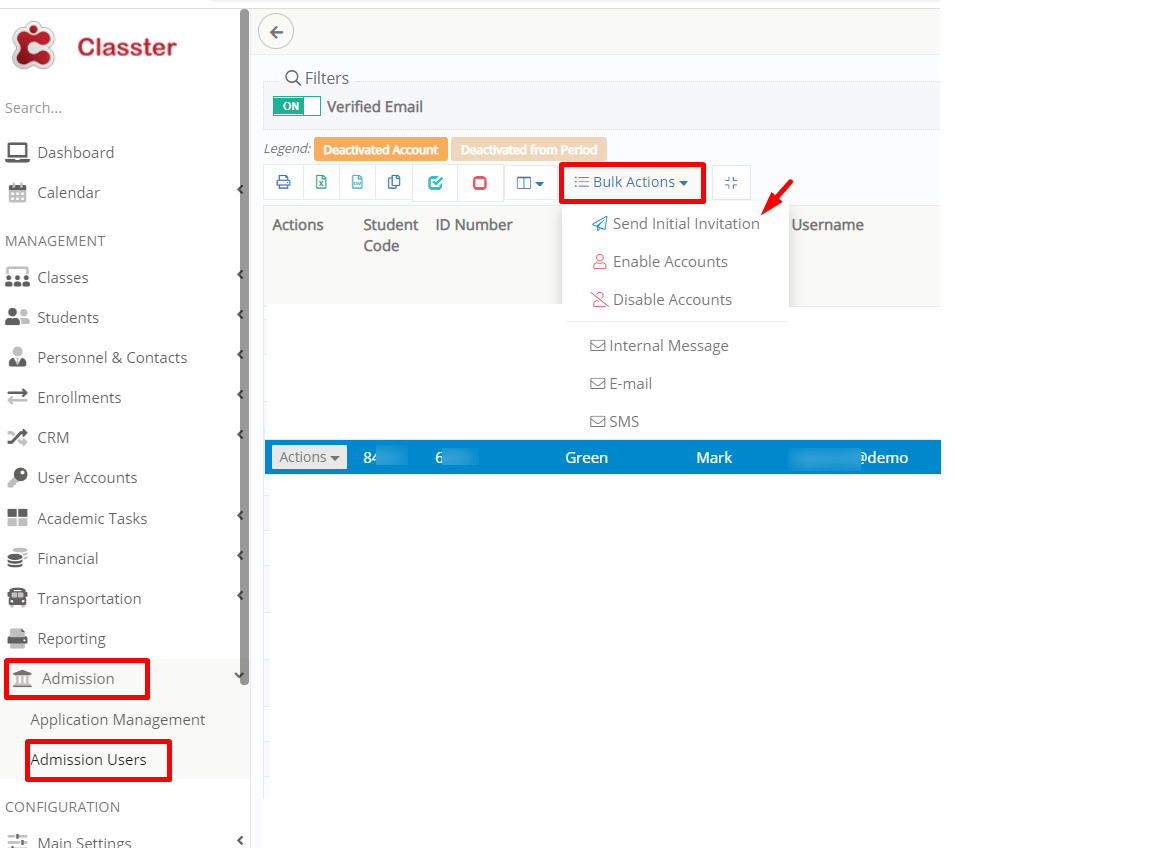
Figure 9