

Quick Navigation
Watch the How-to Video

Chat Tab
Select the chat tab on the left side of the screen. You will see the following page (Figure 40).
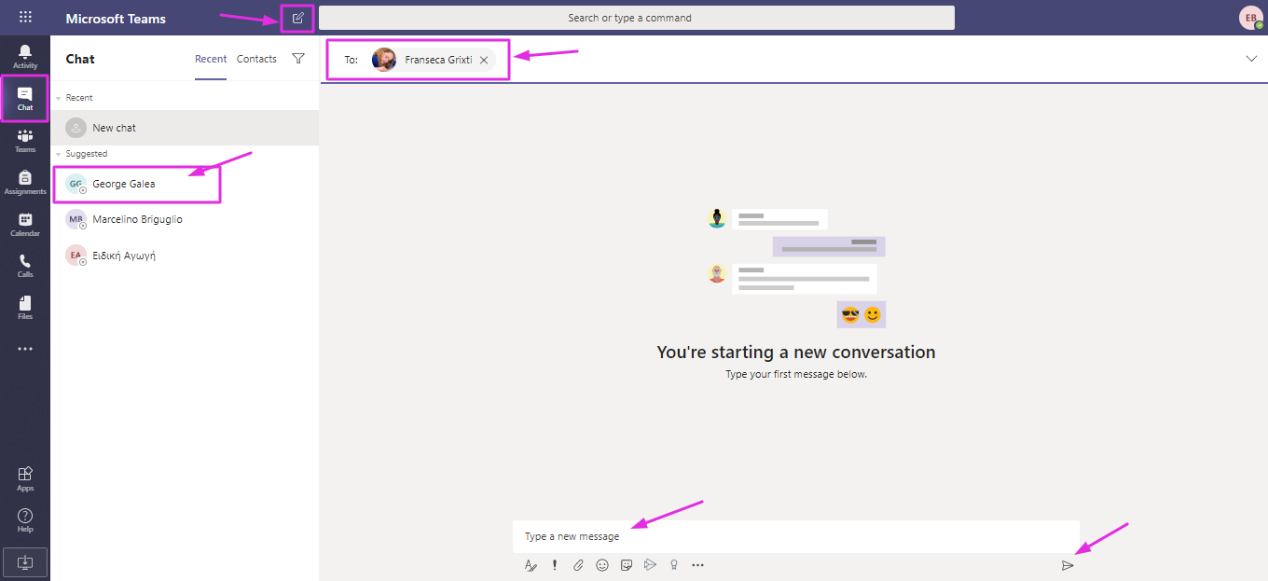
Figure 40
Chat (Figure 40):
- On the left side of the screen, you will see contacts/colleagues.
- You can chat with them individually by writing your message to them or attaching a file for them.
- From the top left side of the screen, you will see the next chat button. Here you can create a new chat and add multiple recipients and create group discussions.
- Here you can chat with all colleagues or students you are connected with, regardless of a specific class.
Assignments Tab
Once you click on the assignments tab from the left side of the screen, you will see the following page (Figure 41).
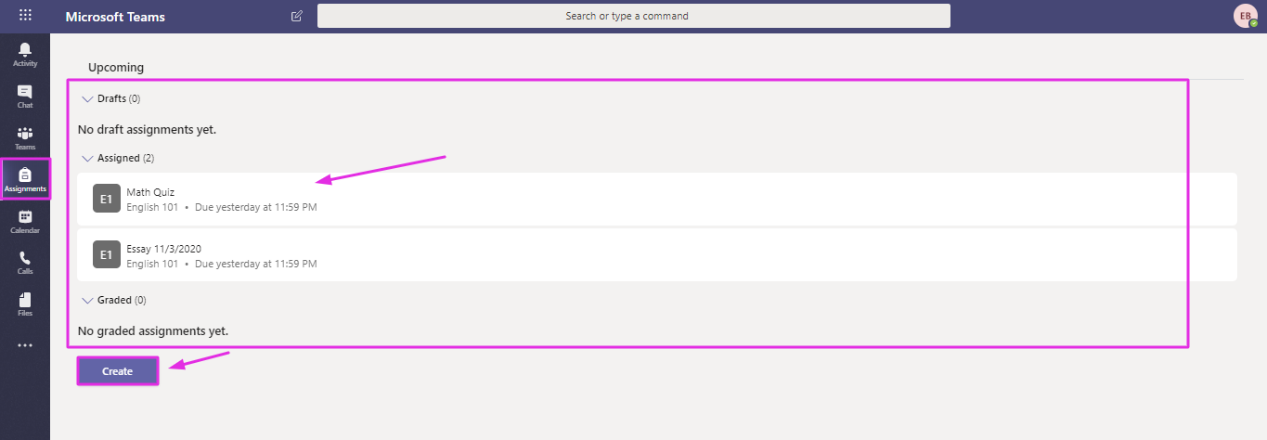
Figure 41
Assignments (Figure 41):
- Here you can view drafts, assignments, quizzes and grades.
- You can create new assignments or quizzes by clicking on the ‘Create’ button.
- Follow the steps described in the Creation of Classes section.
Calendar Tab
The calendar tab is very important for the planning of meetings as well as scheduling all classes/teams. Once you click on the Calendar tab you will see the following page (Figure 42).

Figure 42
Calendar (Figure 42):
- On this page, you can see a daily, weekly or monthly calendar.
- In the calendar, you can view all the scheduled meetings related to the user.
- You can join sessions/meetings in order to teach your classes.
- Click on the New Meeting button to create new meetings.
- You can click on the Meet Now button to start a meeting on the spot. You can add students or teachers from the video meeting screen directly.
Schedule Meetings
By clicking on the New Meeting button and then on the Schedule Meeting button you will be able to schedule a meeting with your class.
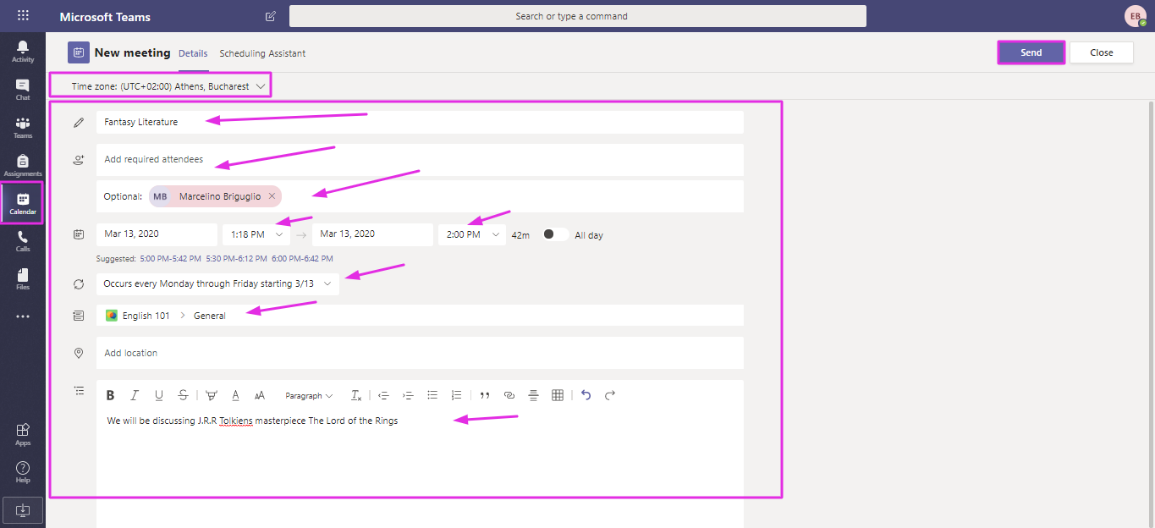
Figure 43
Calendar (Figure 43):
- Here you can schedule your meeting.
- Fill in the title or subject of this meeting e.g Fantasy Literature.
- Add participants and optional participants. You are a participant by default.
- Add a date and duration of the meeting according to your institution’s instructions.
- Select the class this meeting concerns or should be informed.
- Fill in the text box with information about the meeting.

Figure 43a
- Click on Join to join Meeting (Figure 43a).
- You will be taken to the meeting waiting room (Figure 43b).

Figure 43b
Click on Join to enter the meeting

Figure 43c
- Enable camera, sound and click on record meeting from the respective buttons.
- Click on the red button to hang up.
Schedule Meetings from the Calendar Directly
You are able to schedule meetings by directly choosing a day and timeslot from the calendar. See the following screen (Figure 44).
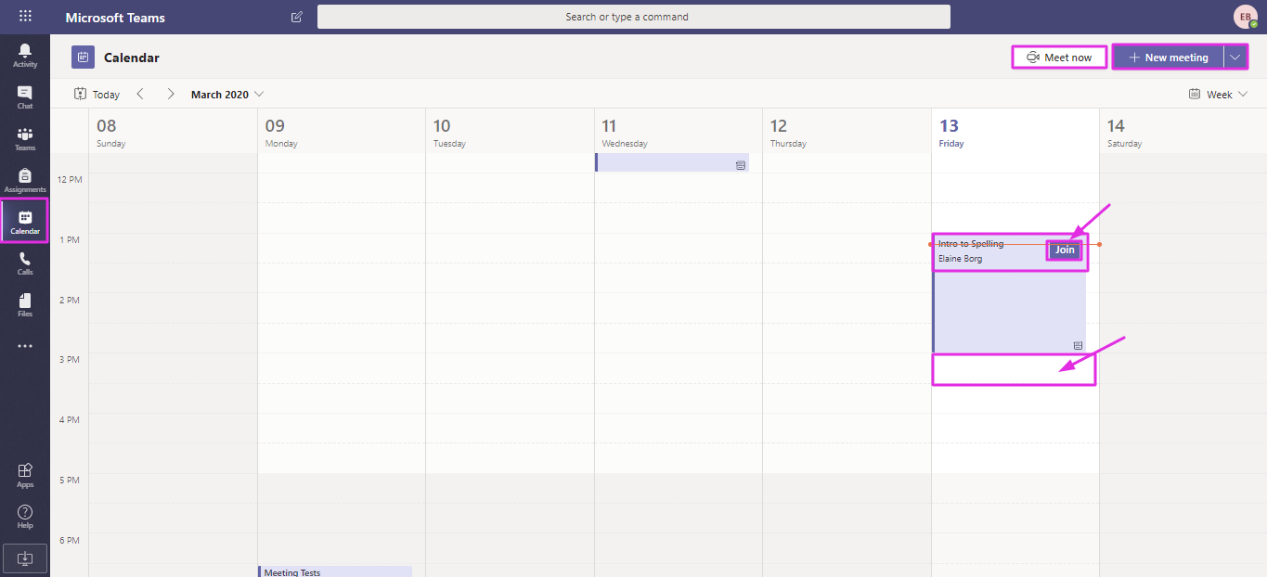
Figure 44
Calendar (Figure 44):
- Click on the empty time slot on the calendar.
- Once you do you will be transferred to the create new meeting page (Figure 45).

Figure 45
New Meeting (Figure 45):
- Here you can schedule your meeting.
- Fill in the title or subject of this meeting e.g Fantasy Literature.
- Add participants and optional participants. You are a participant by default.
- Add a date and duration of the meeting according to your institution’s instructions.
- Select the class this meeting concerns or should be informed.
- Fill in the text box with information about the meeting.

Figure 46
- Click on Join to join Meeting (Figure 46).
- You will be taken to the meeting waiting room (Figure 47).
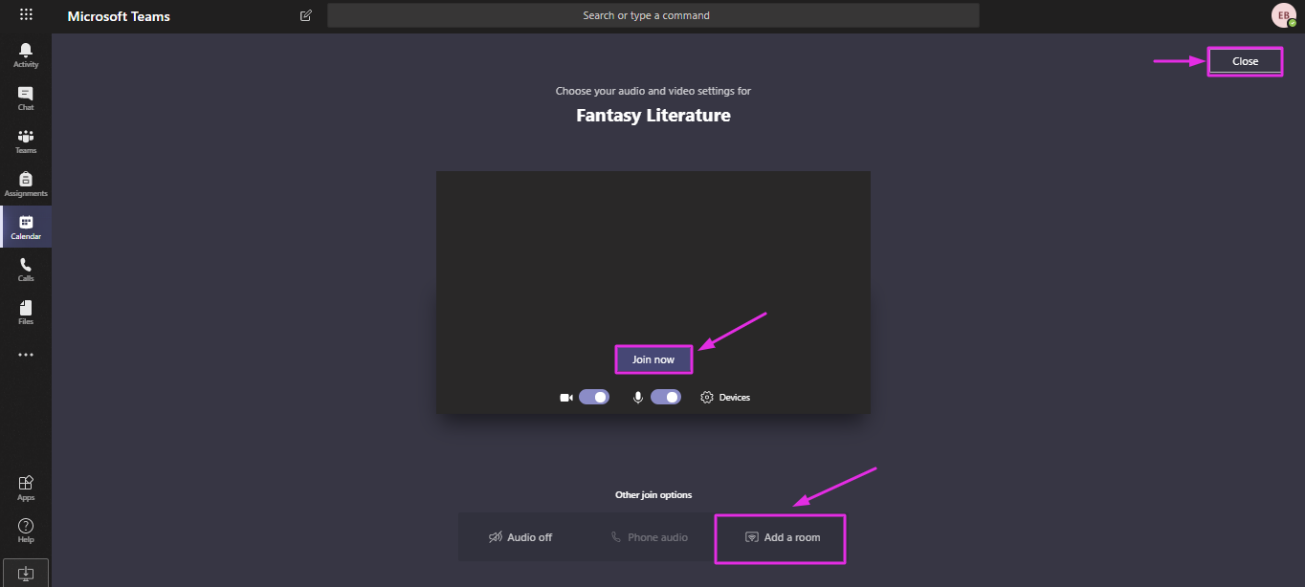
Figure 47
- Click on Join to enter the meeting.
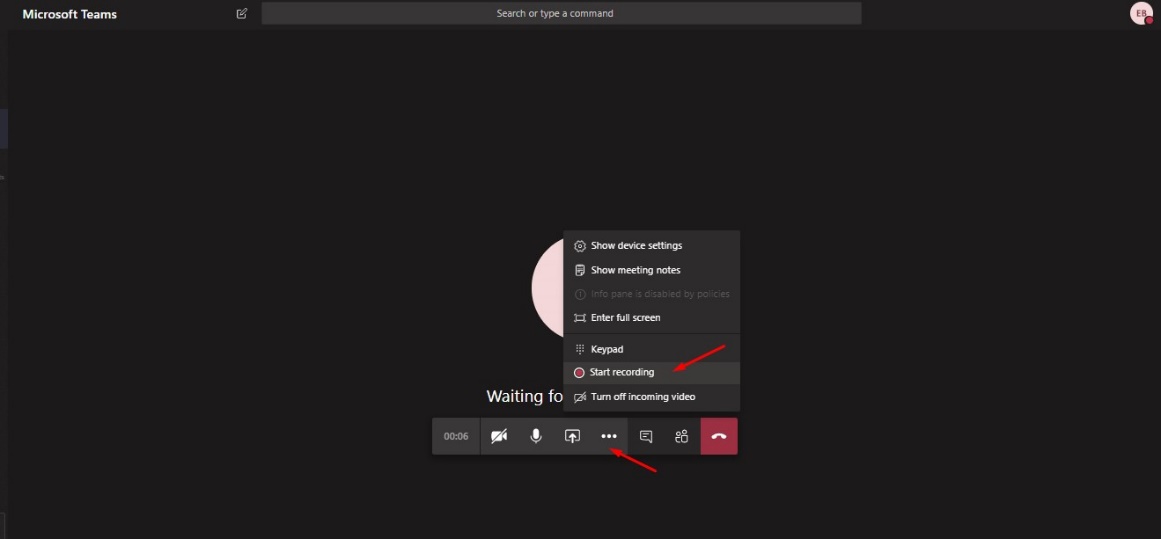
Figure 48
- Enable camera, sound and click on record meeting from the respective buttons.
- Click on the red button to hang up.