

For each individual application, Classter provides several Actions that can be completed from an employee.
When clicking on the Actions menu of a specific application, a list of available actions appears, as shown in Figure 1.
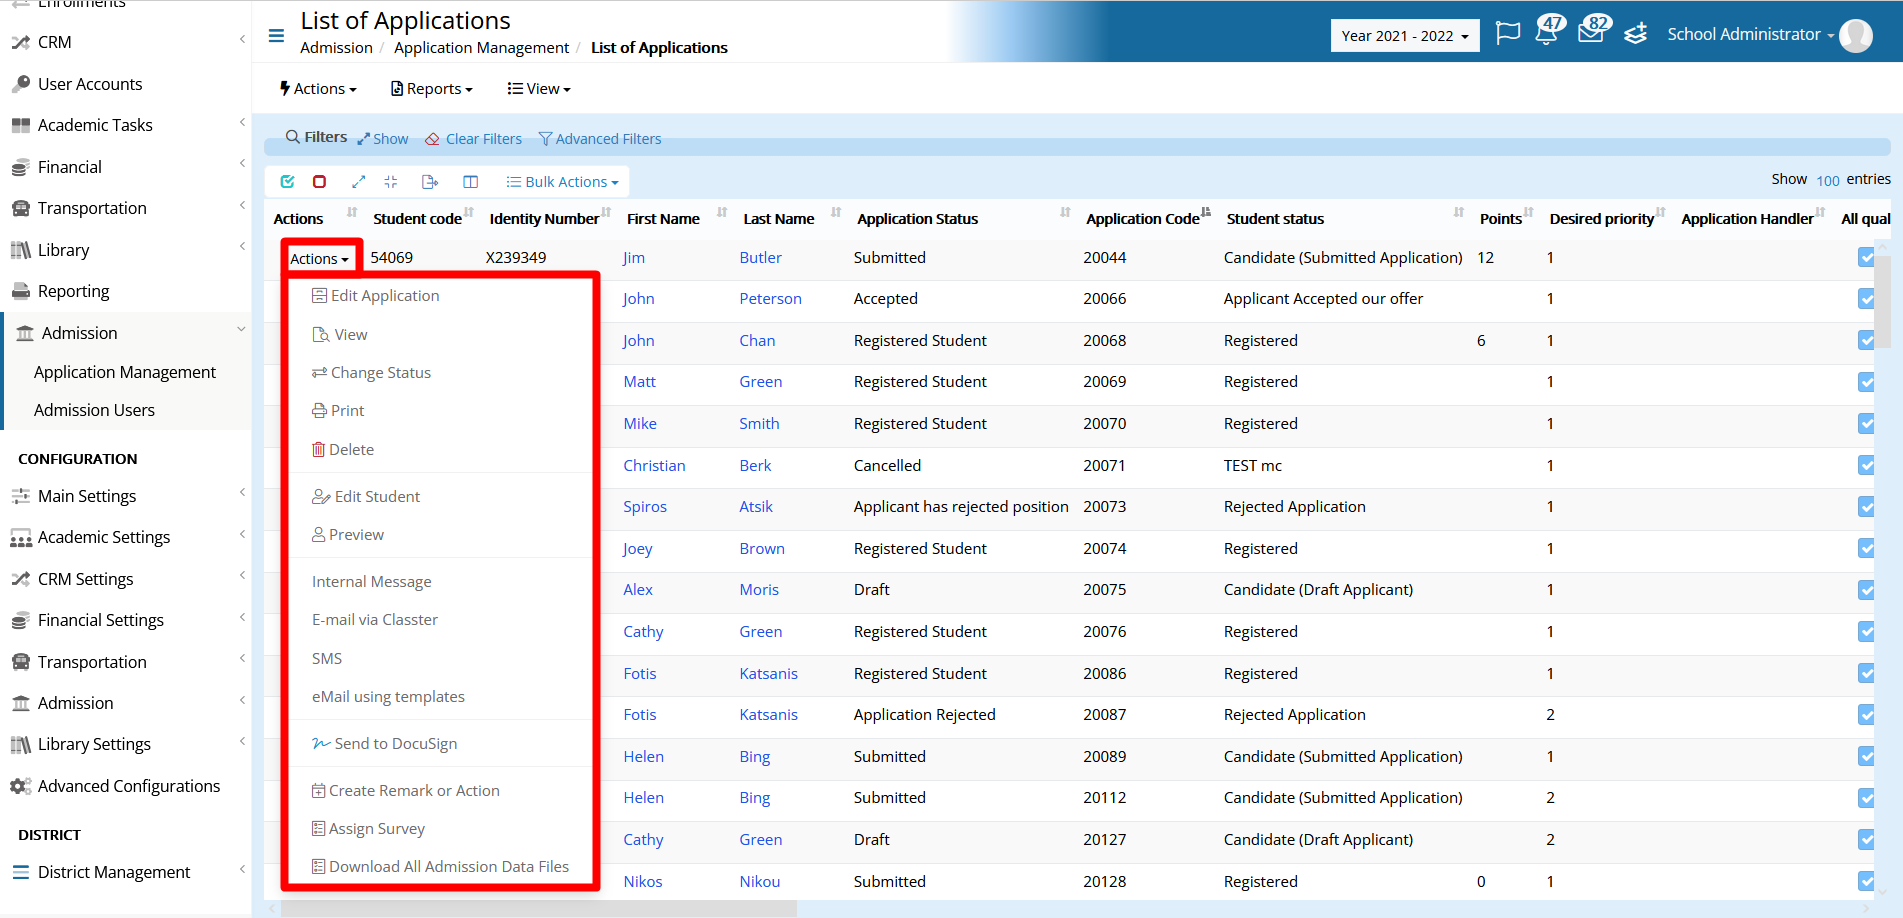
Figure 1
1. Edit Application: If selected, users will be directed to a new screen that will show all application information. Numerous fields can be edited in this screen, from manually changing the eligibility status or assigning a handler, to adding entry requirements and points to the application. (Figure 2)

Figure 2
2. View: The user gets to view the application in a pop-up window. The application’s ID, status, intake, and category are visible on the top, and below can be found all the admission data and consents connected to the program. (Figure 3)

Figure 3
3. Change Status: Change the Student’s Program status for the selected application (linked to an Application Status). This is one of the most used actions by employees, since status changes is the way of implementing the various stages, an application gets through from the moment it gets submitted, to when the student gets rejected by or registered to the institute. When clicked, a pop-up window appears where the employee gets to select the appropriate program status and save. (Figure 4 & 5)

Figure 4

Figure 5
The application status will change automatically as well, based on the configuration of connections between the student and application statuses.
4. Print: Clicking on this menu option, a pop-up window appears with the application report. The report can be a custom one based on the organization’s needs and can be downloaded, saved, printed, or exported in various formats. (Figure 6)

Figure 6
The report that is printed here is selected in the “Application Printout report for Applicants” setting.
5. Delete: The current application gets deleted.
6. Edit Student: When clicking on this option, the user gets redirected to the student’s form to edit the data of the applicant of the selected application. You can also edit a student by clicking on either the First or Last Name of the student in the list.
7. Preview: View the selected applicant’s read-only data in the Student Profile, enrolments, and medical tabs. (Figure 7)

Figure 7
8. Create Remark or Action: Create an internal action or add a remark related to the selected applicant. For example: enter an action for an Admission Interview, or add the remark following an interview. (Figure 8)

Figure 8
9. Internal Message: Send a message to the selected applicant through Classter. Applicants will be able to view this message only through the Classter portal.
10. E-mail via Classter: Send an email message to the selected applicant using the Classter interface. Applicants will be able to view this message in their mail inbox.
11. SMS: Send an SMS to the selected applicant using the Classter Interface. Applicants will receive an SMS to the registered mobile phone number.
12. Email using templates: Send a message to the applicant using a preconfigured template.
13. Send to DocuSign: To complete this action, the DocuSign integration is required. When clicked, a pop-up window appears asking the user to select which file requires a signature and by whom. (Figure 9)

Figure 9
The recipient can be the Student, the Parent, or the Person set as the Payer, and the document that requires signing can be either the Private Agreement or any file that is stored in the Candidate’s Profile.
When the employee clicks on send, the selected file is sent to DocuSign and the recipient is sent an invitation from DocuSign to sign the document.
14. Assign Survey: Assign a preconfigured survey to be answered by the selected user(s). The survey can either be assigned to the applicant, or their parents. (Figure 10)

Figure 10
15. Download All Admission Data Files: All the files in the Admission Data of the Student/Applicant are compressed in a zip file and downloaded.
Find more or post your questions on our Facebook Community Page. Also, watch our how-to videos on our YouTube channel.