

In this section, we will examine the Quiz Management module from the Teacher portal.
Like the Admin portal above, the Quiz Section is divided into three subsections. Namely:
- My Distributions
- Questions Bank
- Quizzes
The final two are similar to the Admin’s ones, so we will not discuss them any further. A major difference, one must have in mind, is that a Teacher can only create Assignment/Test type of Quizzes and not Surveys.
Another use of a Quiz for the Teacher is that he can implement a Quiz into an Assignment and then mark it, like an Examination.
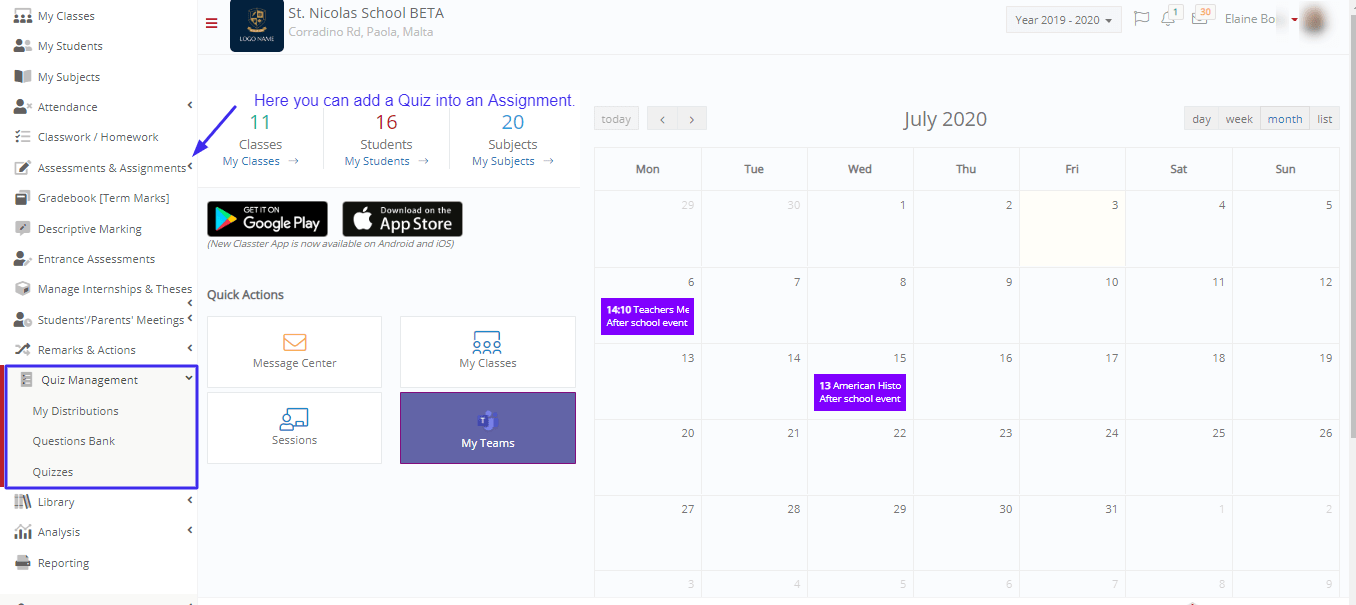
Figure 20
We will look into each and every menu button in the sections below.
My Distributions
Here a Teacher can see and submit any Quiz assigned to him/her. Since this is a Teacher portal, all the quizzes here are of type “Assinment/Test”.
The columns in the table appearing are as follows:
- Description: Has the Quiz and Distribution name, separated by “,”.
- Remaining Submission: The number of submissions the users can submit the Quiz.
- Submitted: A checkbox indicating if the Quiz has been submitted.
- Time Limit: The time limit of the Quiz.
- Subject: The subject, that the quiz is referred to.
- Group: Its corresponding group.
- Book: A book related to the Quiz.
- Assessment: Here we can see the Description of the Assessment, associated with the Quiz (if any).
- Start Date: The start date of the Quiz.
- End Date: The Quiz is available to this date.
- View: Here the Teacher can Submit the Quiz. We will explain the submission in the subsection that follows.
Also, in the top left corner, there is a filter called “Show Inactive Quizzes”. By clicking this filter, all the inactive Quizzes appear in the table below.
Do not forget that there is a search bar in the right corner, for easier navigation in the Quiz table.

Figure 21
View
By clicking the View button, the Submission page appears (Figure 22).
To submit the Quiz, just answer the questions (either by clicking, if multiple-choice or by typing the answer) and then click “Submit Quiz” at the bottom or top of the page.
There is also the possibility, to submit the Quiz anonymously. To do so, just check the corresponding checkbox.
 Figure 22
Assessments & Assignments – Scheduling Quiz
By going to the Assessments & Assignments menu, a Teacher can Schedule a Quiz.
To do so, from the menu we click on Scheduling and then Create New Quiz.
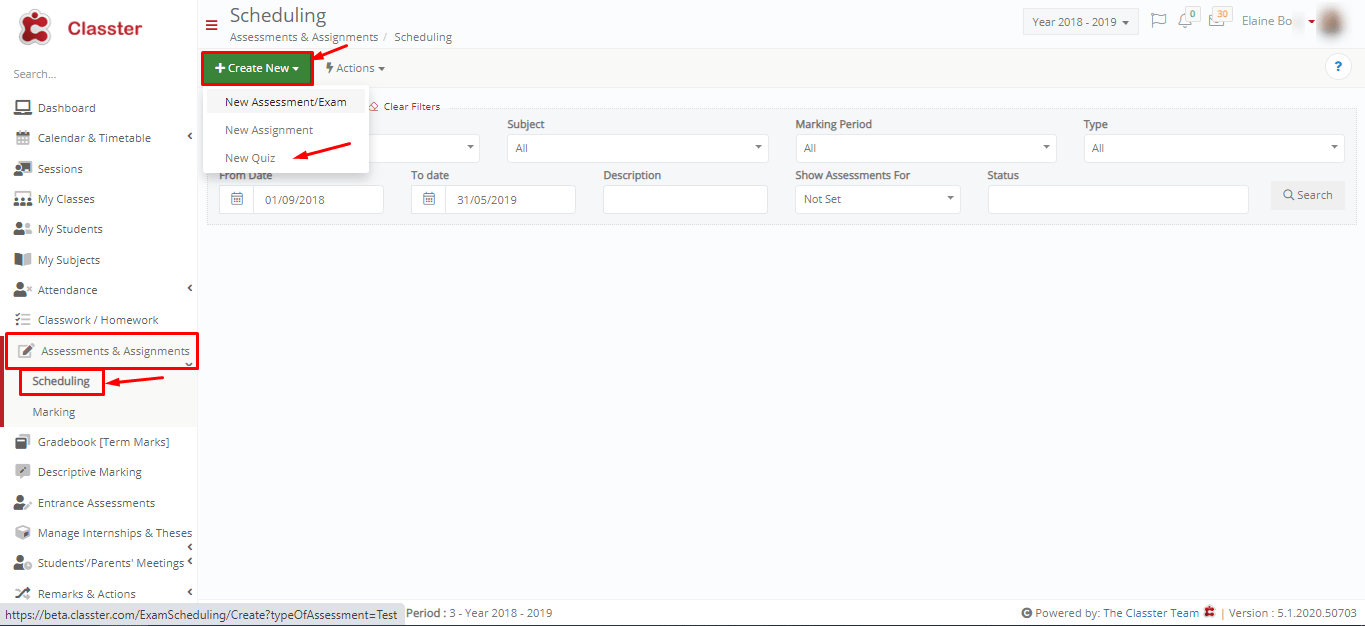
Figure 23
The “Create Quiz” page is like Figure 25. The input fields in this page, are described below:
- Assessment Date: This is the Date the Assessment will take place.
- End Date: This is the expiration date.
- End Time: Till this time and date explained above, the Assessment will be available.
- Class: The class that the Assessment is intended for.
- Subject: The Subject, that the Assessment refers to.
Right below this field, there is a button called “View Students Workload”. With that, we can see if the students (filtered by Group and Subject) have any other Assessment.
- Hours: The exact time of the Assessment e.g 9.00-9.45.
- Type: This is the type of Assessment. The Default type is Quiz.
- Marking Period: Here we can select, in which marking period our Assessment will be graded by.
- Description: A description of the Assessment. This is what will appear to Students. By clicking the button right next to this field, an automated Description is generated.
- Weight: The Weight factor is a multiplier, by which the Assessment will be multiplied regarding the students’ average grade.
- Assignment Comments / Instructions: Here we add further information or instructions about the Assessment.
- Visible in Calendar: If this switch is turned on, then the Assessment with the quiz will appear on relevant users Calendars.
- Calendar Category: The calendar category this assessment belongs too e.g Exams. Depending on the category the entry on the calendar will appear in a different color.
- Teacher Internal Notes: In this text field you can add comments and notes that are intended only for Teachers or Employees.
- Quiz: From this drop-down list, we select our quiz. If we select the option “Auto Quiz Creation – Answers Only”, a button called “Insert Quiz Questions/Answers Structure” appears in which we create a QA Structure. This feature is used for quick marking of a Quiz, by a computer or machine in general. Let’s explain it a bit further:
 Figure 24
In figure 24 we see the pop-up window, that appears after clicking the button.
First, we select the number of Questions, the number of answers each question will have and the points every correct answer is worth. Both the number of answers and their points can be edited later, to adjust the Quiz properly. We then click the “Create Structure” and the table below is being made.
Here we can type the title of the Question, the type, adjust the number of answers, choose in which number the correct answer will be and edit its points.
By clicking Submit the QA Structure is created.
- Publish Assignment: If this checkbox is “On”, the Assignment will be published to students. Otherwise, only teachers and employees can access it.
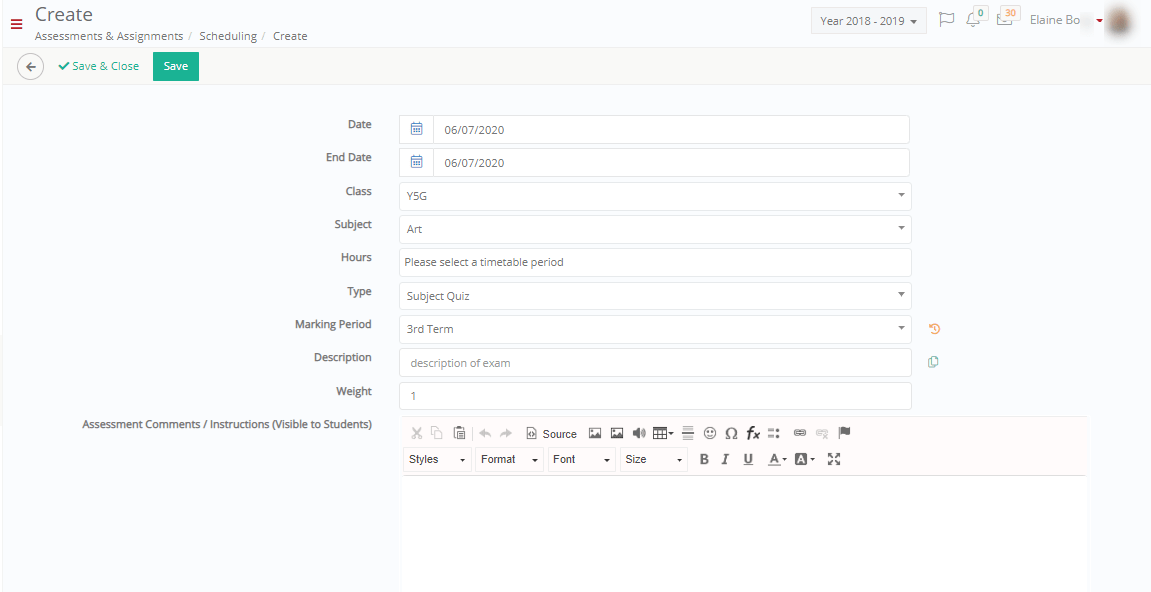

Figure 25
After filling all the fields explained above, we click the Save button to create our Assessment.
Assessments & Assignments – Marking Quiz
In this section, we can mark the assessment with the Quiz. This takes place under the Assessments & Assignment menu, in the Marking page. For question by question marking of a quiz you will need to go to the quiz answers page from the Quizzes page in the Quiz Management menu (described in the Admin section of the Manual).
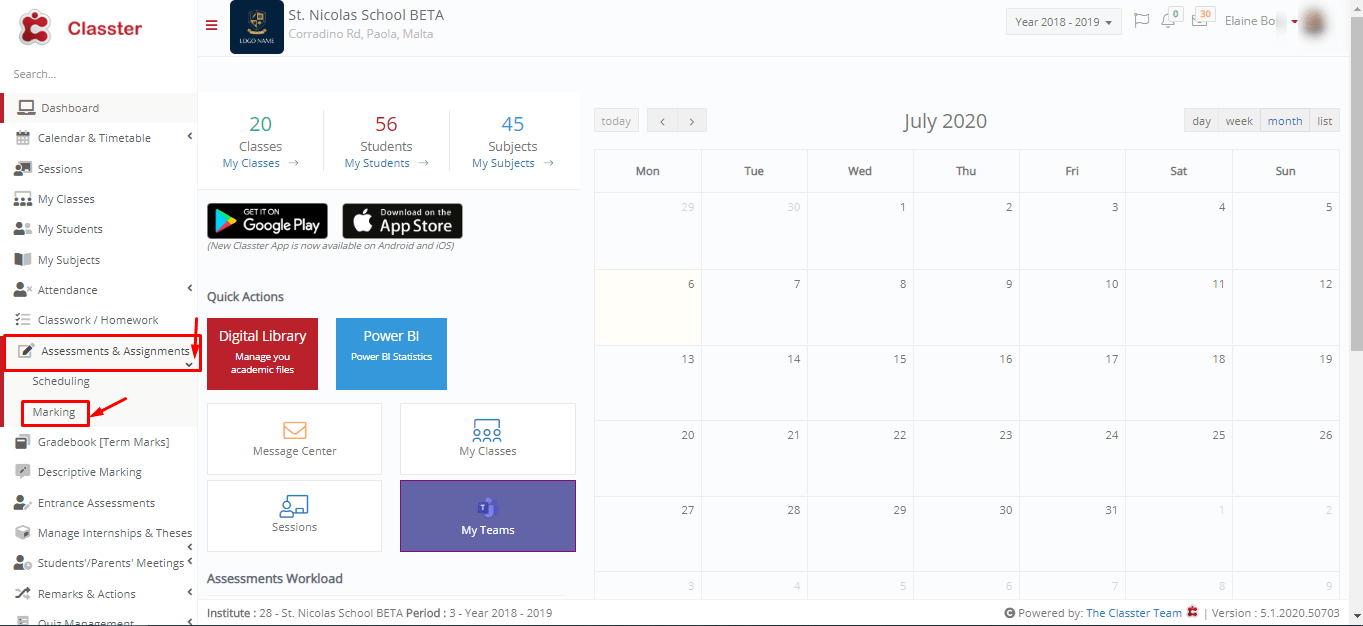
Figure 26
In this page (Figure 27) we select our Class, Marking Period, Subject, Type and Assessment, and a table appears with all the Students Names and their presence status.
Here next to each student we can enter the mark for this assessment/quiz.
You can click on the Publish marks button so when you save the marks will be published for students.
We click the Save button on the top left corner of the screen to save the Marking.
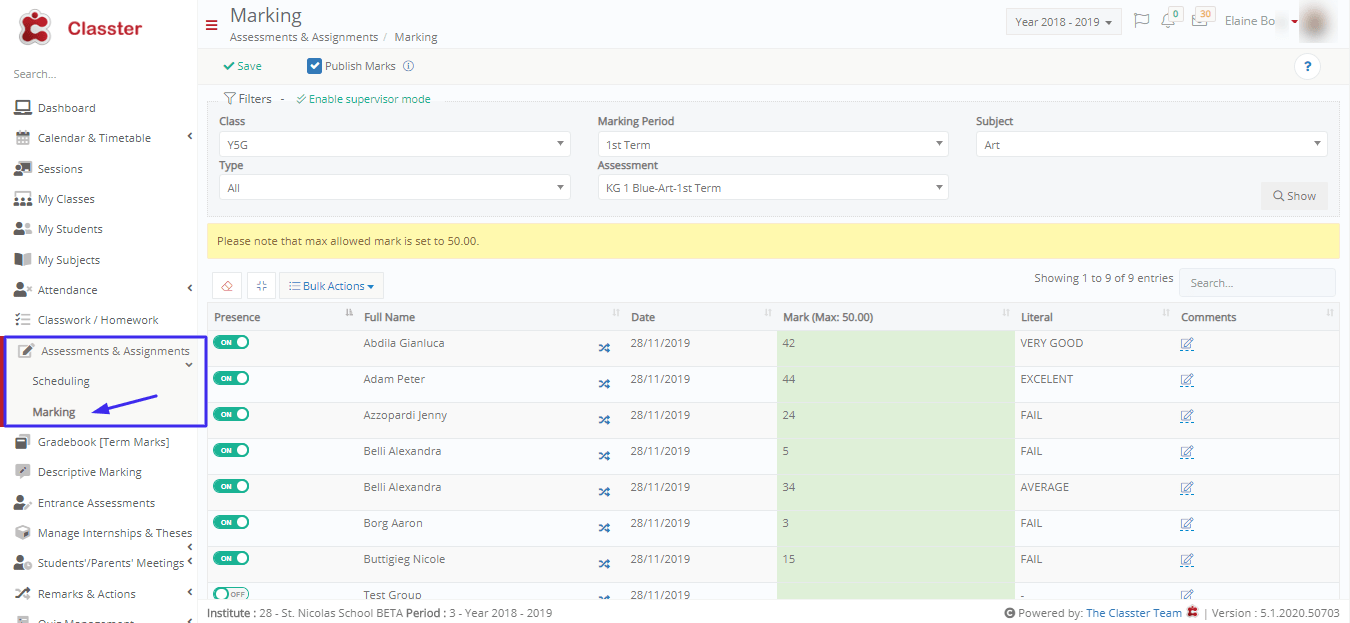
Figure 27