

Using the daily sessions, you can record various data and perform specific actions related to a subject delivery in a specific timetable period. Create a new session, assign a group and a subject, and add information like which chapters you are teaching, the bibliography used, files, digital material, etc. You can also take numerous actions such as daily evaluation, tasks assignment, questionnaires, and absences record. That way, you can have an overall picture of each of your sessions.
To go to Sessions, follow the path from the menu: Dashboard>Sessions
New Session
- Select ‘Sessions’ (main menu)
- Click on ‘+Create New’ (Figure 29).
 Figure 29
- At the ‘Session’s Data’ page (Figure 30), set the session’s details:
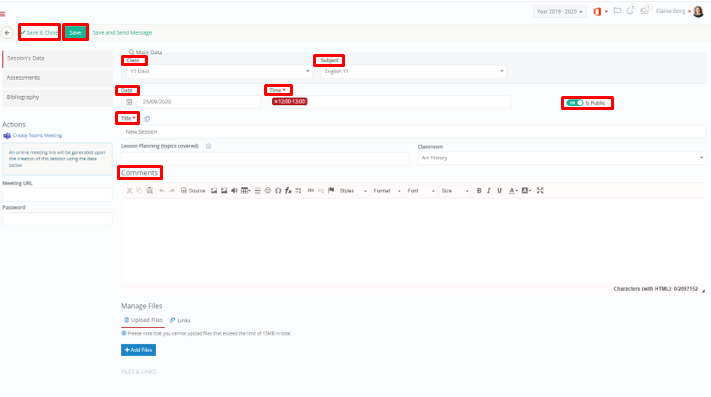 Figure 30
- Select the Group/Class, for the subject of which, you want to add a session.
- Select the Subject for which you want to add a session.
- Enter the date of the session.
 Select the start and end time of the session by selecting a specific time slot e.g 12.00-13.00.
- Enter a customized title to your session or click on the ‘Create session title’ button to have the system generate a title i.e. English Y4 – Y4G: 20/05/2019 11:00-11:45.
- Activate the setting ‘Is Public’ to make the session visible to students/parents.
 Insert the content of the session at the Comment text box.
Note: If you have created lesson plans, you can click on the ‘Copy comments from the lesson plan’ button to insert the content of the lesson plan.- If you have a Teams integration enabled/setup you can see the ‘Create Teams Meeting’ button. If you click on it, you will be transferred to the team’s browser page and from there you invite students to a teams meeting connected to this session. Once you have sent the meeting to the recipients through teams you can copy the meeting link into the meeting url field you see in the session under the create teams meeting button.
- Add Links, upload Files (from local disk) or use the Digital Library feature (create folder with files available through OneDrive).
In the Assessments page (Figure 30a):
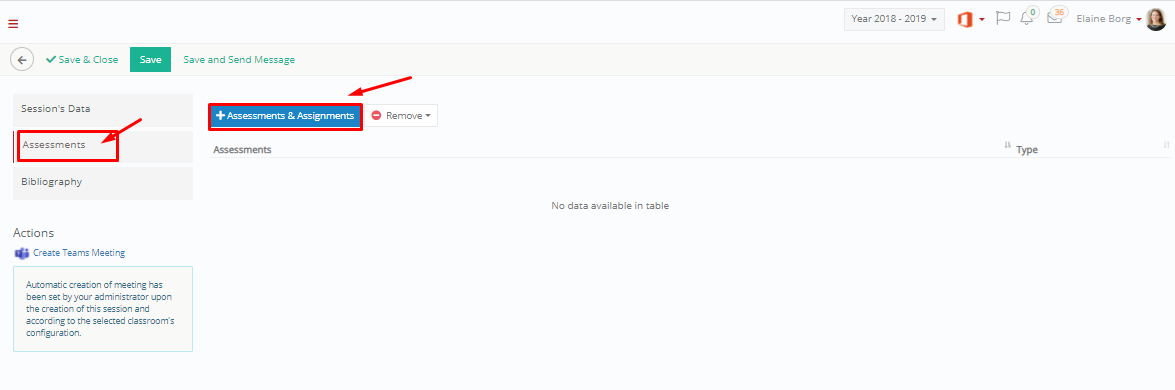 Figure 30a
- Add assessments & assignments you have already created for the selected group and subject (you can see how to create assessments & assignments). You can click on ‘+Assessments & Assignments’ button to add them to this session.
In the Bibliography page (Figure 30b):
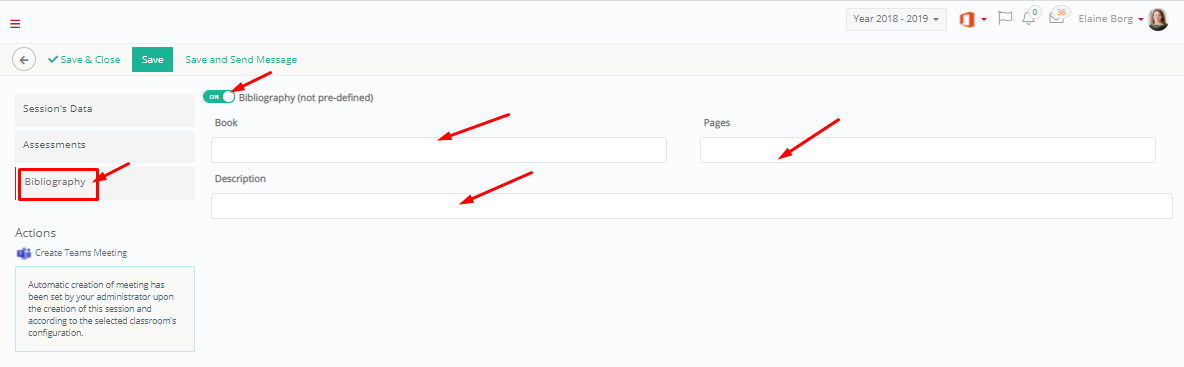 Figure 30b
- Add Bibliography (see the pre-defined [by the Admin] bibliography or activate, to add custom bibliography).
- Click on Save, to save the session.
View/ Edit Session
- In order to view a session, select the class and the subject for which you have added a session.
- Click on Show (Timeline Vew) (Figure 31).
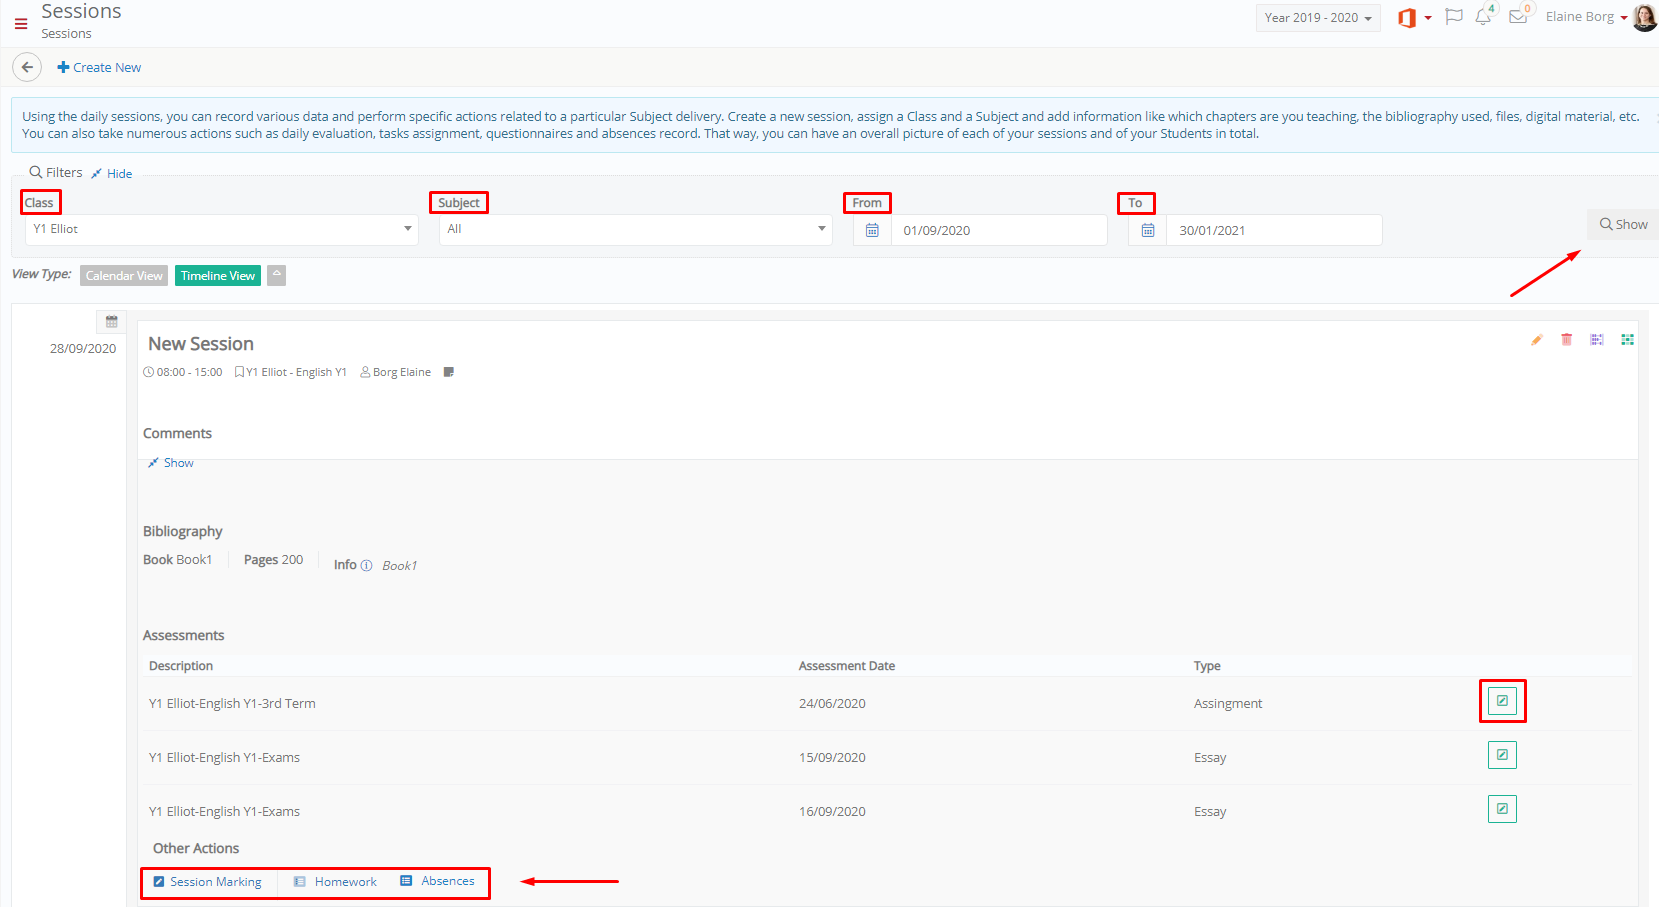 Figure 31
- At the session page, you can select the date of the session by clicking on the specific date i.e. 01/09/2020.
 You can edit the session, delete the session, manage classroom, and view the classroom layout by clicking on the respective buttons:

- Click on the Assessment Marks button to mark the assessment.
- Click on the Session Marking button to mark the session.
- Click on the Homework button to add/edit/delete the participants’ session homework.
- Click on the Absences button to manage absences.